A Tacoma underbody inspection is not just a quick look for rust. It is a safety check of the frame, suspension, steering, brake and fuel lines, driveline seals, skid plates, tires, wiring, and recovery points. Do it on clean, dry parts with the truck safely supported, then document anything cracked, leaking, loose, bent, or deeply corroded before your next road trip or trail run.
Quick Answer
Inspect the Tacoma’s frame first, especially welded seams, front frame horns, rear leaf-spring areas, and crossmembers. Then check suspension play, brake and fuel line corrosion, driveline leaks, skid plates, recovery points, wheel/tire condition, and underbody wiring. Any frame perforation, crack, fuel leak, brake leak, or loose steering part needs immediate professional attention.
Key Takeaways
- Wash the underbody first so you can see cracks, rust scale, wet leaks, and damaged fasteners clearly.
- Never crawl under a Tacoma supported only by a jack; Toyota’s owner guidance says to use a jack stand if you need to get under the vehicle.
- Surface rust can usually be cleaned and protected, but perforation, cracked welds, bent frame horns, or separated mounts need professional inspection.
- Check your exact model year, trim, wheel type, and service manual before using any torque specification.
- Use Toyota’s VIN recall lookup for open safety recalls or service campaigns before buying or repairing a used Tacoma.
At a Glance
| Time Required | 45–90 minutes for a basic driveway inspection; longer if cleaning or documenting heavy rust |
| Difficulty | Moderate DIY inspection; repairs may require a qualified technician or frame shop |
| Tools Needed | Flashlight, inspection mirror, gloves, eye protection, wheel chocks, jack stands, torque wrench, pry bar, tread depth gauge, camera/phone, degreaser |
| Cost | Usually $0–$40 for inspection supplies; repair costs vary widely by corrosion, leaks, and suspension wear |
Warning: Do not work under a truck supported only by a hydraulic jack. Use wheel chocks, level ground, and properly rated jack stands. Toyota’s 2025 Tacoma flat-tire guidance specifically says to use a jack stand if it is necessary to get under the vehicle.
Tacoma Underbody Inspection: Quick Checklist

Use this quick checklist before a trail run, after off-road use, before buying a used Tacoma, or whenever you see rust, leaks, uneven tire wear, clunks, or steering looseness.
| Area | What to Check | What Needs Action |
|---|---|---|
| Frame | Rails, welds, front frame horns, crossmembers, rear spring areas | Cracks, perforation, kinks, bent sections, heavy flaking rust |
| Suspension | Control-arm bushings, ball joints, leaf springs, shackles, U-bolts, shock mounts | Play, torn rubber, loose hardware, cracked leaves, leaking shocks |
| Steering | Tie-rod ends, rack boots, steering linkage, alignment clues | Loose joints, torn boots, clunks, wandering, uneven tire wear |
| Leaks | Engine, transmission, transfer case, differential, brake and fuel lines | Wet fittings, drips, oil trails, fuel odor, brake-fluid seepage |
| Protection | Skid plates, splash shields, recovery points, underbody guards | Missing bolts, bent plates, cracked welds, unrated recovery hardware |
| Wheels and tires | Lug nuts, tread depth, sidewalls, rubbing, clearance | Loose lugs, bulges, cuts, feathering, inner-edge wear, tire contact |
| Electrical | Harness routing, auxiliary lights, battery and ground connections | Chafing, corrosion, exposed wire, loose mounts, water intrusion |
Prep & Safety: Cleaning, Tools, and Setup
Start by thoroughly washing the Tacoma’s underbody. Mud, oil, salt, and trail grime can hide cracks, wet leaks, rust scale, and loose fasteners. Use a mild degreaser on oily areas, pressure-rinse wheel wells and skid plates, then let the truck dry so fresh leaks are easier to spot.
Gather the basics before you crawl under the truck: a bright flashlight, inspection mirror, gloves, eye protection, wheel chocks, a camera or phone, a tread depth gauge, a torque wrench, and basic hand tools. If you need to lift the truck, use the lift points and safety instructions for your model year.
Note: Portable automotive lifting equipment is safety-critical. The ASME PASE standard covers equipment such as automotive jacks, stands, ramps, and mobile lifts. Use rated equipment, inspect it for damage, and never exceed its capacity.
Set up on level, solid ground. Chock the wheels that remain on the ground, set the parking brake, and shake-test the truck gently before getting underneath. Keep your phone within reach and avoid working alone when the truck is lifted.
[Products Worth Considering]

【Car Jack Capacity】Maximum lifting weight 2 Ton (4409 lbs),This Jack for Car Lifting Range from 4.33" (11cm) to 15.75"(40cm). The scissor lift jack provides a wider range to reach under low chassis sedans or elevate high-body SUVs effortlessly.

Pair of 3 Ton (2.7 metric Ton) jack stands with 6,000-pound capacity

Powerful Electric Car Jack: Lifting capacity: 5.0 tons/11023 lbs. Lifting Range: 6.1''-17.7" / 155-450 mm. This electric car jack kit is a lifesaver during roadside emergencies and can be used for at-home garage repairs. It matches all autos, sedans, SUVs, trucks, or vehicles that suit its capacity.
Frame Hotspots to Inspect on a Tacoma
Start at the front and work rearward in a consistent pattern. Look for cracks, perforation, swollen rust, failed welds, bent brackets, torn metal around bolt holes, and obvious repair patches. Use a flashlight at a low angle to make cracks and ripples easier to see.
Front Frame Horns
Inspect the front frame horns closely. These forward frame extensions can bend or kink after impacts, hard recoveries, bumper hits, or collision damage. Look for uneven gaps, fresh paint, wrinkled metal, misaligned bumper brackets, cracked welds, and rust hiding at seams.
Minor cosmetic corrosion is one thing. A kinked frame horn, split weld, or visibly distorted mounting point is different. If the truck pulls, the bumper sits crooked, or suspension alignment cannot be set correctly, get a professional frame measurement before guessing.
Rear Spring Mounts and Leaf-Spring Areas
Move rearward to the leaf-spring hangers, shackles, mounts, U-bolts, and surrounding frame. These areas collect water, salt, and debris, especially on older trucks and trucks used in snow-belt regions. Probe heavy rust carefully; loose surface scale can hide thinning metal.
Pay attention to the leaf springs themselves. Toyota and NHTSA recall documents for certain 2005–2011 Tacoma PreRunner and 4×4 models describe a rear leaf-spring issue where a fractured leaf could move out of position and potentially contact the fuel tank. If you own one of those model years, check your VIN through Toyota’s official recall lookup and review NHTSA Recall 14V-604 documentation.
Warning: Do not ignore a cracked leaf spring, separated spring mount, or fuel smell near the rear suspension. Those are safety problems, not “watch it later” problems.
Transmission Crossmember
The transmission crossmember supports drivetrain alignment and absorbs vibration through its mounts. Inspect the crossmember, mounting bolts, plate edges, welds, and frame attachment points for rust-through, impact dents, loose hardware, and elongated bolt holes.
Look above and around the crossmember for transmission, transfer-case, or engine oil leaks. Fluid trails collect dirt and speed corrosion, so trace wetness to the highest fresh point. A dirty crossmember with dry, old residue is less urgent than a wet crossmember with active dripping.
Surface Rust vs. Structural Rust
Surface rust is usually orange or brown staining that has not deeply pitted the metal. It can often be cleaned, neutralized, coated, and monitored. Structural rust is different: it flakes in layers, creates holes, swells seams, weakens brackets, or lets a pick or screwdriver push through the metal.
| Finding | Likely Severity | Next Step |
|---|---|---|
| Light orange film | Low | Clean, coat, and monitor |
| Flaking scale | Moderate | Remove loose scale and inspect metal thickness |
| Deep pitting | High | Have the area evaluated before towing or off-roading |
| Perforation, cracks, or separated mounts | Critical | Stop relying on the truck until repaired by a qualified shop |
Suspension & Steering: Control Arms, Joints, and Shocks

Focus on control-arm bushings, ball joints, tie-rod ends, rack boots, sway-bar links, shock mounts, leaf springs, shackles, and U-bolts. Worn suspension parts do not just make noise; they can change alignment, reduce braking stability, damage tires, and make the truck unpredictable on rough roads.
Inspect upper and lower control-arm bushings for cracks, separation, crushed rubber, and metal-to-metal contact. Check ball joints and tie-rod ends for torn boots, grease loss, looseness, clicking, or clunking. Look at shocks for oil leakage, dented bodies, loose bushings, and broken mounts.
| Component | Symptom | Action |
|---|---|---|
| Control arm bushings | Cracks, separation, clunking, poor alignment hold | Replace worn bushings or arms |
| Ball joints | Play, torn boots, popping, steering looseness | Inspect immediately; replace if worn |
| Tie rod ends | Loose steering, uneven tire wear, wandering | Replace and align |
| Shock mounts | Rust, looseness, cracked bushings, oil leakage | Secure hardware or replace shocks/mounts |
| Leaf springs and shackles | Cracked leaf, shifted pack, sagging, squeaking | Repair before towing, hauling, or off-roading |
Pro Tip: After any lift kit, bigger tire install, front-end repair, or hard trail day, inspect the suspension again. New angles and added load can reveal weak bushings, marginal tie rods, and clearance problems that were not obvious before.
[Products Worth Considering]
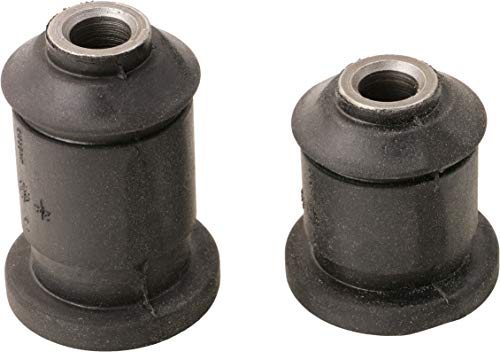
Built to Last: The MOOG Suspension Control Arm Bushing Kit is designed for reliable auto repair replacement and uses high-quality elastomer for long-lasting durability

COMPATIBILITY – Fits 1984-2001 Jeep Cherokee; 1986-1992 Jeep Comanche; 1993-1998 Jeep Grand Cherokee; 1996-1996 Jeep Grand Cherokee; 1993-1993 Jeep Grand Wagoneer; 1984-1990 Jeep Wagoneer; 1997-2006 Jeep Wrangler

COMPATIBILITY – Fits 1995-1997 Nissan Pickup; 1996-1996 Nissan Pickup; 1978-1979 Nissan 620; 1980-1982 Nissan 720; 1983-1986 Nissan 720; 1984-1985 Nissan 720; 1986-1994 Nissan D21; 1987-1993 Nissan D21; 1987-1995 Nissan Pathfinder
Brake, Fuel, Driveline, and Differential Leak Checks
Start leak checks with the truck parked on clean pavement or cardboard overnight. Then inspect from front to rear. Fresh fluid, wet fittings, strong fuel odor, or drips on the ground matter more than old dry staining.
Check brake lines for corrosion, kinks, crushed sections, and wetness at fittings, brackets, flex hoses, calipers, and the master-cylinder area. Brake fluid can be clear to amber and feels slick. Any brake-fluid leak is urgent because it can reduce stopping power.
Inspect fuel lines, clamps, tank straps, and connectors for rust, abrasion, soft spots, dampness, or odor. If you smell fuel, stop and find the source before driving or parking near ignition sources.
For driveline leaks, examine the engine oil pan, transmission, transfer case, front and rear differentials, axle seals, pinion seals, fill plugs, drain plugs, and vent hoses. Oil trails often spread backward as you drive, so trace the stain upward and forward to locate the source.
| Fluid | Common Clue | Possible Source |
|---|---|---|
| Engine oil | Brown/black slick film | Oil pan, filter, valve cover, rear main area |
| Gear oil | Thick oil with strong sulfur smell | Differential cover, pinion seal, axle seal |
| Transmission fluid | Red, brown, or amber fluid depending on age/type | Transmission pan, cooler lines, output seal |
| Brake fluid | Clear/amber slick wetness near brake parts | Brake lines, hoses, calipers, fittings |
| Fuel | Strong gasoline smell | Fuel lines, tank, clamps, filler neck |
[Products Worth Considering]

Material: Brake line is made of copper-plated alloy steel, and its surface has been specially treated. Compared with standard steel lines, it has better corrosion resistance, stability and durability

【Premium Copper Coated Brake Line】Our 3/16 Brake Line Kit features high-quality copper-coated steel tubing that’s both flexible and corrosion-resistant. Ideal for vehicles facing harsh weather conditions, this kit ensures reliable performance and durability.
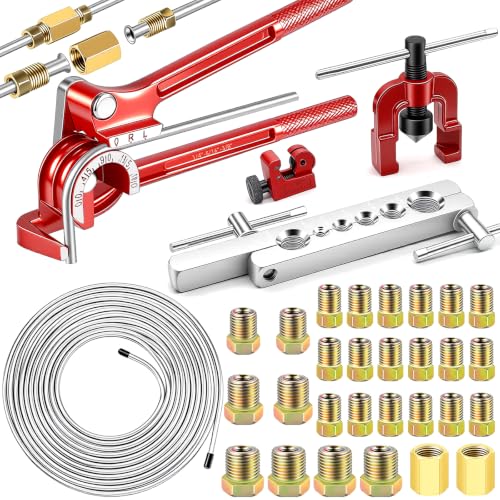
3/16 Inch 25 FT Brake Line Kit: Transform your brake line installation experience with our comprehensive kit! Featuring everything you need, including brake tube bender, 3/16 inch brake lines, a precision single flare tool, brake pipe cutter, and two-sets unions
Skid Plates, Recovery Points, and Underbody Protection
Check skid plates, splash shields, brackets, and recovery points after any off-road trip. A skid plate that is bent into the oil pan, transfer case, exhaust, steering rack, or wiring can cause damage even if it “did its job” on the trail.
Skid Plate Condition
Inspect skid plates for bends, cracks, impact gouges, rust, missing hardware, and crushed spacers. Steel plates resist sharp hits but can rust; aluminum plates are lighter but may dent more easily. Either way, the plate should protect the component without touching it.
Verify clearance around the oil pan, front differential, transmission, transfer case, catalytic converter area, and exhaust. If the plate is jammed against a component, loosen and realign it or replace damaged brackets before the next drive.
Recovery Point Integrity
Recovery points must be real recovery points, not decorative tie-down loops or mystery brackets. Inspect welds, mounting bolts, brackets, and surrounding frame metal for cracks, rust, stretch marks, and deformation. Make sure the points are rated for the type of recovery you actually do.
| Component | Condition Check | Action |
|---|---|---|
| Recovery Points | No cracks, no bending, properly rated | Torque bolts and replace if deformed |
| Skid Plates | No severe bends, cracks, or missing hardware | Repair, realign, or upgrade |
| Underbody Shields | No rust-through, rubbing, or loose edges | Secure or replace |
Fasteners and Clearance
Inspect every skid-plate, crossmember, recovery-point, and underbody shield fastener. Replace missing, stretched, cross-threaded, or severely corroded hardware. Use the correct grade and torque specification from the manufacturer or service information.
With lifted trucks or larger tires, check clearance at full steering lock and through suspension travel. Look for shiny rub marks on control arms, sway bars, fender liners, body mounts, brake hoses, and wiring. A small rub on pavement can become a shredded tire or damaged hose off-road.
Wheels & Tires: Lug Torque, Clearance, and Alignment Signs

Any time a wheel comes off, hand-start the lug nuts, tighten in a crisscross pattern, and use a calibrated torque wrench. Do not rely on an impact gun as the final torque tool. The correct lug-nut torque can vary by model year, wheel type, and service information, so verify the value for your exact Tacoma before tightening.
Measure tread depth and inspect sidewalls for cuts, bulges, weather cracking, embedded objects, and exposed cords. NHTSA explains that tire treadwear indicators are molded at the 2/32-inch tread depth level, where tires rapidly lose traction characteristics. For wet roads, towing, snow, or off-road use, do not wait until the absolute minimum.
Scan for alignment clues: feathered tread, shoulder wear, inner-edge wear, cupping, or one tire wearing much faster than the others. These signs often point to worn suspension parts, incorrect alignment, unbalanced tires, bent components, or inflation problems.
Uneven tire wear is often the underbody’s first visible warning sign. If the tires are talking, listen before the ball joint, tie rod, or alignment bill gets louder.
Electrical & Battery: Underbody Wiring and Auxiliary Lights
Underbody wiring lives a rough life. It gets blasted by water, mud, salt, gravel, heat, and vibration. Inspect harnesses, grounds, auxiliary light wiring, trailer wiring, winch wiring, compressor wiring, and battery connections for chafing, corrosion, loose routing, and damaged insulation.
Repair exposed wire immediately. Use proper automotive wire, sealed connectors, split loom, grommets, heat protection, and secure mounting points. Keep harnesses away from sharp frame edges, hot exhaust parts, driveshafts, steering components, suspension travel, and skid-plate pinch points.
Check auxiliary lights for cracked lenses, loose brackets, water inside the housing, corroded connectors, and poor grounds. Test switches, relays, and fuses under load. A light that works in the driveway but flickers on washboard roads usually has a loose connection, weak ground, or broken wire strand.
Test Drive and Post-Inspection Documentation
After the visual inspection, take a short test drive if the truck is safe to operate. Listen for clunks, groans, grinding, rattles, clicking during turns, brake pulsation, driveline vibration, steering pull, or new rubbing noises. Test at low speed first before highway driving.
Document your findings with photos and notes. Record the date, mileage, location of the issue, and whether it is dry, wet, loose, cracked, or corroded. Good documentation helps you decide what is urgent, what can be monitored, and what to show a mechanic or frame specialist.
Common Findings and When to Get Professional Frame Repair
Common Tacoma underbody findings include surface rust, seized or corroded fasteners, worn control-arm bushings, leaking shocks, loose skid-plate hardware, differential seepage, torn steering boots, and uneven tire wear. These are fixable when caught early.
Professional help is needed when you find frame perforation, cracked welds, bent frame horns, separated spring mounts, fuel leaks, brake-fluid leaks, steering play, serious suspension looseness, or collision damage. Frame straightening, welding, and structural section repair require accurate measurements, proper equipment, and a technician who understands load paths.
If you are buying a used Tacoma, do not let clean paint and shiny tires distract you. Crawl underneath, check the VIN for recalls, look for fresh undercoating hiding rust, and consider a pre-purchase inspection by a shop familiar with trucks and corrosion.
Frequently Asked Questions
What are the Toyota inspection standards?
There is no single universal “Toyota inspection standard” for every Tacoma underbody situation. Use the owner’s manual, Toyota maintenance guide, factory repair information, recall/campaign lookup, and model-year-specific torque and inspection procedures. For serious rust, collision damage, or safety systems, have a Toyota dealer or qualified repair shop inspect it.
What are the 7 steps of a Tacoma underbody inspection?
A practical 7-step process is: wash the underbody, support the truck safely, inspect the frame, check suspension and steering, inspect brake/fuel/driveline leaks, verify skid plates and recovery points, then test drive and document repairs.
What is a Toyota 21-point inspection?
A 21-point inspection is a basic multi-system check commonly used by service departments to review items such as tires, brakes, fluids, lights, steering, suspension, and visible undercarriage condition. The exact checklist can vary by dealer, promotion, and vehicle.
What is a Toyota 160-point inspection?
A 160-point inspection is a more detailed vehicle evaluation often associated with certified pre-owned or dealership reconditioning programs. It may include engine, transmission, brakes, steering, suspension, tires, interior, exterior, electrical systems, and underbody condition, but the exact checklist depends on the program.
How often should I inspect a Tacoma underbody?
Inspect it at least during routine maintenance and before major trips. Also inspect after off-road driving, winter salt exposure, water crossings, impacts, towing/hauling, suspension work, or any new clunk, leak, vibration, steering pull, or uneven tire wear.
How do I know if Tacoma frame rust is too bad?
Light surface rust is usually manageable. Rust is too serious for casual DIY judgment when it flakes heavily, pits deeply, creates holes, swells seams, weakens mounts, cracks welds, or lets a pick push through the frame. Get a professional inspection before towing, hauling, or off-roading.
Can I drive with a cracked leaf spring or spring mount?
Do not treat a cracked leaf spring, separated spring mount, or shifted spring pack as safe normal wear. These parts locate and support the rear axle. A failure can affect control, braking stability, tire position, and nearby fuel or brake components.
Should I check Tacoma recalls before inspecting the underbody?
Yes. Use Toyota’s official recall lookup with the VIN before buying, repairing, or heavily modifying a Tacoma. Recall and campaign eligibility depends on the exact vehicle, model year, market, and completion history.
Conclusion
A good Tacoma underbody inspection is slow, bright, and suspicious in the best possible way. Clean the truck, support it safely, follow a front-to-rear pattern, and take photos of anything ugly. Tighten what is loose, repair what is leaking, replace what is worn, and get professional help for frame damage, fuel leaks, brake leaks, or steering/suspension play. Rust does not get better because you ignored it, and neither does a clunk with a secret.
Sources
- Toyota 2025 Tacoma Owner’s Manual: If You Have a Flat Tire — supports jack-stand safety guidance when working under the vehicle.
- Toyota Safety Recalls & Service Campaigns Lookup — supports VIN-based recall and campaign checks.
- NHTSA Recall 14V-604 Toyota Tacoma Rear Leaf Spring Remedy Notice — supports the 2005–2011 Tacoma rear leaf-spring recall discussion.
- ASME PASE Safety Standard for Portable Automotive Service Equipment — supports jack, stand, ramp, and lift equipment safety context.
- NHTSA TireWise: Tire Safety Ratings and Awareness — supports tire type, tire label, and tire safety guidance.
- NHTSA Interpretation on Treadwear Indicators — supports the 2/32-inch treadwear indicator safety reference.