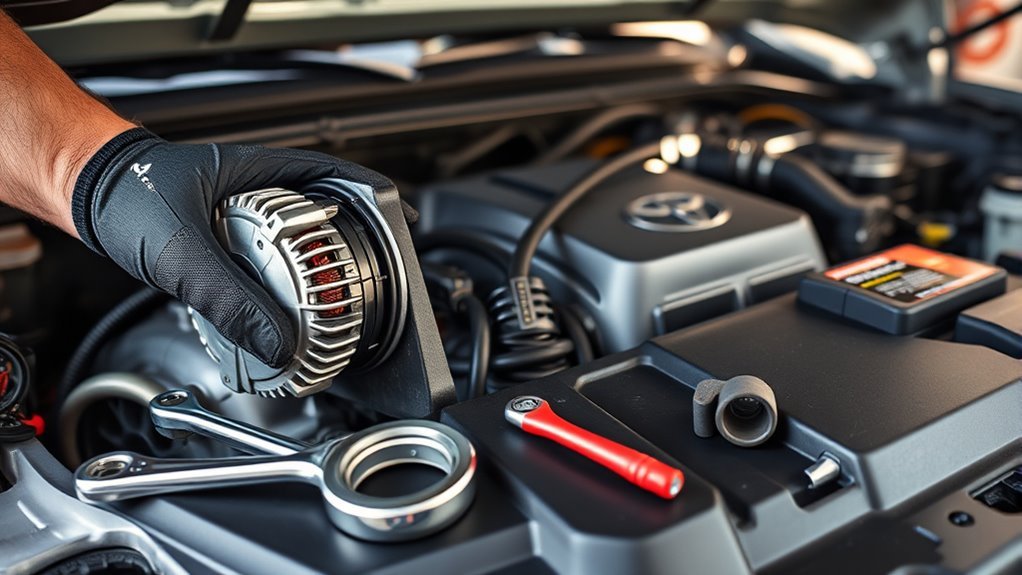
A failing alternator can make a Toyota Tacoma act like it has a bad battery: slow starts, dim lights, warning messages, dead-battery jump starts, or odd electrical resets. Before replacing parts, test the charging system, confirm the alternator is the real fault, then work safely with the battery disconnected and the belt tension released.
Quick Answer
To replace a Toyota Tacoma alternator, confirm low or unstable charging voltage first, disconnect the negative battery cable, remove the battery and skid pan if needed, release the serpentine belt tensioner, unplug the alternator wiring, remove the mounting bolts, install the correct replacement alternator, route the belt correctly, reconnect the battery, and retest charging voltage.
Key Takeaways
- Do not replace the alternator until you test battery voltage, charging voltage, belt condition, and major wiring connections.
- A fully charged 12-volt lead-acid battery is usually around 12.6 volts at rest, but modern charging systems can vary under load and temperature.
- Disconnect the negative battery terminal before touching the alternator output cable.
- Use the belt routing diagram under the hood or the factory service information for your exact model year and engine.
- Torque specs vary by generation and engine, so verify the final specs for your VIN before tightening critical fasteners.
At a Glance
| Time Required | About 1.5–3 hours for most DIYers |
| Difficulty | Moderate; tight access and belt routing require patience |
| Tools Needed | Digital multimeter, 10mm, 12mm and 14mm sockets, ratchet, torque wrench, 5mm or snug-fitting 7/32-inch Allen key, gloves, eye protection, work light |
| Cost | Usually the cost of the alternator plus any belt, battery, or terminal parts needed; confirm pricing by VIN before buying |
Confirm Alternator Failure: Quick Checks and Expected Readings
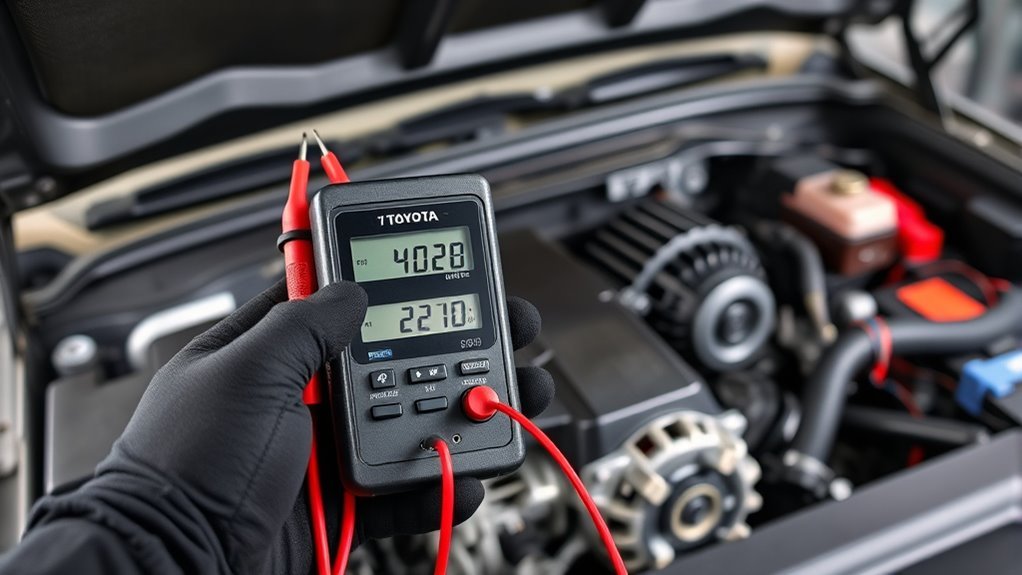
Before you pull the alternator, confirm it is the problem. A weak battery, loose battery terminal, corroded ground, slipping belt, blown fuse, or damaged charging cable can mimic a failed alternator.
Use a digital multimeter at the battery posts. With the engine off and the truck sitting for a while, a healthy, fully charged 12-volt lead-acid battery is usually near 12.6 volts. Then start the engine and check voltage again. Many conventional charging systems show roughly 13.5–14.7 volts while charging, but modern computer-controlled charging systems can vary by load, temperature, and battery condition. Underhood Service notes that one voltage test alone is not enough because PCM-controlled alternators may change output depending on operating conditions.
| Test | Typical Reading | What It Suggests |
|---|---|---|
| Battery at rest | Around 12.6 V when fully charged | Battery has a normal surface voltage |
| Engine running | Often about 13.5–14.7 V | Charging system is likely working, depending on vehicle strategy |
| Running with lights, blower, and rear defogger on | Should stay stable, not collapse toward battery-only voltage | Low or unstable voltage can point to alternator, belt, wiring, or battery trouble |
| Alternator output stud vs. battery positive | Very small voltage difference | A large drop points to cable, fuse, or connection resistance |
Warning: Do not test an alternator by disconnecting a battery cable while the engine is running. That old shortcut can create voltage spikes and damage modern vehicle electronics.
Also listen for grinding, whining, or squealing. Check the serpentine belt for cracks, glazing, missing ribs, or oil contamination. Inspect the alternator plug, output cable, battery terminals, ground straps, and main fuse links. If voltage is low or erratic and the wiring, belt, and battery check out, replacement is more likely to solve the problem.
Prep: Tools, Parts, Time, and Safety for a Tacoma Alternator Swap
Gather the required tools before starting: a 10mm socket for battery and wiring hardware, a 12mm socket for skid pan or bracket hardware on many trucks, a 14mm socket for tensioner and alternator bolts, a ratchet, extensions, a torque wrench, a multimeter, gloves, eye protection, and a work light. Some Tacoma tensioners can be locked with a 5mm Allen key; a 7/32-inch Allen key may work on some setups if it fits securely, but do not force it.
Buy the alternator by VIN, not by guesswork. Toyota Tacoma alternator amperage and part numbers vary by year, engine, trim, and options. For example, the Genuine Toyota 27060-0P350 alternator assembly is listed for certain Tacoma applications, but that does not mean it fits every Tacoma. Verify fitment before opening the box.
Note: This guide covers the common workflow used on many Tacoma alternator replacements. Exact bolt count, bolt location, alternator amperage, belt routing, and torque specs can differ by model year and engine. For final specs, use your under-hood diagram and Toyota factory service information for your VIN.
Set aside 1.5–3 hours. A first-time DIY job usually takes longer because access is tight, and some Tacoma generations have a hidden rear alternator bolt or support bracket. Work on level ground, set the parking brake, let the engine cool, and keep fasteners sorted in a tray.
[Products Worth Considering]

[Replacement Part Numbers] 11139, 11139N, 0124325123, 1042103470, 1042103471, 1042104200, 1042104201, 1042104202, 1042104870, 1042104871

Fitments: AOTPAT Stable Output Alternator For:-Toyota 2003-2009 4Runner limited 4.0L V6, 2003-2009 4Runner sport 4.0L V6, 2003-2009 4Runner sr5 4.0L V6, 2005-2015 Tacoma base 4.0L V6, 2005-2015 Tacoma pre runner 4.0L V6, 2015 Tacoma trd pro 4.0L V6, 2005-2013 Tacoma x-runner 4.0L V6

【Compatibility】Fits for Toyota 2.4L 2.7L Tacoma 1997 1998 1999,Fit for Toyota 4Runner 2.7L 1996-1999, Fit for T-100 Pickup 2.7L 1997 1998
Battery Removal: Safe Disconnect and Removal Steps
Shut the Tacoma off, remove the key or keep the smart key away from the truck, and make sure all accessories are off. Put on gloves and eye protection. Toyota warns that vehicle batteries contain corrosive sulfuric acid and can produce flammable hydrogen gas, so avoid sparks, flames, smoking, and accidental tool contact across the terminals.
Use a 10mm socket or wrench to loosen the negative battery terminal first. Move the cable away from the post so it cannot spring back. Then remove the positive terminal if the battery needs to come out for access. Remove the battery hold-down, lift the battery straight up, and set it on a stable, ventilated surface.
| Action | Reason |
|---|---|
| Disconnect negative first | Reduces short-circuit risk while tools are near the positive side |
| Remove the hold-down | Frees the battery without forcing the case or tray |
| Lift straight up | Avoids cracking the case or damaging nearby wiring |
| Keep the battery upright | Helps prevent acid leaks on serviceable lead-acid batteries |
Pro Tip: Take a quick photo of the battery cables, belt routing sticker, and alternator wiring before disassembly. Photos save time when everything looks similar during reassembly.
Remove Skid Pan and Expose the Alternator
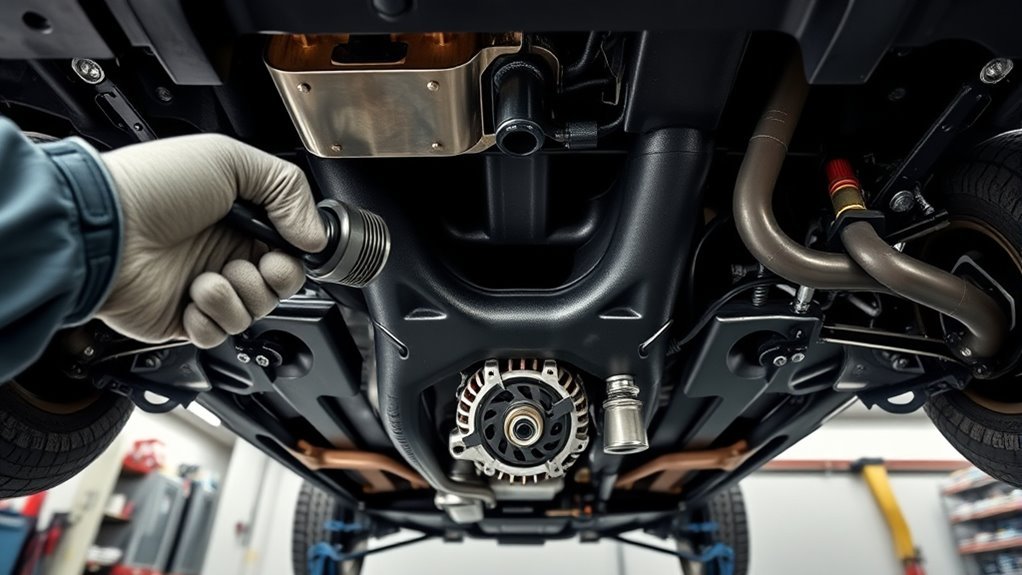
On many Tacoma models, the skid pan or splash shield blocks lower access. Locate the skid pan under the engine. It is often secured with 12mm bolts, but hardware can vary if the truck has aftermarket skid plates or off-road armor.
Skid Pan Bolt Removal
Position yourself safely under the front of the truck with a 12mm socket ready. Seat the socket fully on each bolt and turn counterclockwise with steady pressure. If a bolt resists, apply penetrating lubricant and give it time to work instead of rounding the head.
- Remove bolts one at a time and place them in a labeled tray.
- Support the skid pan as the last bolt comes out so it does not fall.
- Watch for sharp edges, trapped dirt, and aftermarket wiring.
- Inspect the hardware for rust and replace damaged bolts before reinstalling.
Exposing Alternator Area
With the skid pan removed, clean out loose debris and identify the alternator, belt, tensioner, output cable, electrical connector, and nearby brackets. Good lighting matters here because the rear of the alternator is usually the hardest area to see.
Before moving forward, trace the serpentine belt path. If the under-hood routing sticker is missing or unreadable, look up the factory belt diagram for your exact Tacoma year and engine before removing the belt.
Release the Serpentine Belt and Lock the Tensioner

Locate the belt tensioner pulley. Fit a 14mm socket on the tensioner and rotate it in the correct direction for your engine to relieve belt tension. On many Tacoma V6 setups, you rotate the tensioner counterclockwise to create slack. Once the belt is loose, slip it off the alternator pulley.
Tensioner Rotation Technique
Use slow, controlled pressure. The tensioner is spring-loaded, and sudden release can pinch fingers or damage the belt. If your tensioner has a lock hole, insert a 5mm Allen key or a snug-fitting 7/32-inch Allen key to hold the arm open. The key should seat cleanly; if it does not, use the correct size rather than forcing it.
- Rotate the tensioner only far enough to remove belt tension.
- Keep fingers away from the belt and pulley pinch points.
- Do not let the tensioner snap back against its stop.
- Inspect the belt while it is off. Replace it if it is cracked, glazed, oil-soaked, frayed, or missing ribs.
Locking With Allen Key
While holding pressure on the tensioner, slide the Allen key into the lock hole. Confirm it is fully engaged before letting go of the ratchet. This keeps the belt slack and gives you more freedom to remove the alternator.
Warning: Never place your hand between the belt and pulley while the tensioner is loaded. If the tool slips, the belt can pinch hard enough to injure you.
Disconnect Wiring and Detach the Old Alternator
With the battery disconnected and the belt off the alternator pulley, move to the wiring. Most Tacoma alternators have a small electrical connector and a larger output cable protected by a rubber or plastic cover. Press the connector release tab and unplug the harness. Lift the terminal cover, then use a 10mm socket or nut driver to remove the output terminal nut.
- Remove wiring in order: small connector first, output cable second, then any harness brackets attached to the alternator.
- Keep the output terminal nut safe; do not let it fall into the engine bay.
- Remove the visible alternator mounting bolts, commonly 14mm on many Tacoma setups.
- Check for a rear support bolt or hidden bracket before forcing the alternator out.
- Wiggle the old alternator free carefully, avoiding coolant hoses, wiring, and the radiator fan area.
If the alternator will not move after the visible bolts are out, stop and look again. Some 2016–2023 3.5L V6 Tacoma alternator replacements involve a hard-to-see rear bolt or bracket. Forcing the alternator can crack a bracket or damage the mounting ear.
Most “bad alternator” comebacks are caused by skipped diagnosis: a weak battery, poor ground, loose output cable, slipping belt, or wrong part can all create the same symptoms.
Install the Remanufactured or New Alternator
Compare the replacement alternator to the original before installing it. The mounting ears, pulley, electrical connector, output stud, case shape, and amperage rating should match. If the replacement alternator does not include the correct pulley, do not install it until the pulley issue is resolved.
Position the new or remanufactured alternator in the mount. Start all mounting bolts by hand before tightening anything. This helps prevent cross-threading and keeps the alternator aligned. If your Tacoma uses a rear support bolt, start that bolt before fully tightening the front bolts.
| Step | Action |
|---|---|
| 1 | Set the alternator into the bracket and start bolts by hand |
| 2 | Install any rear support bolt or bracket before final tightening |
| 3 | Reconnect the output cable and small electrical connector |
| 4 | Route the serpentine belt exactly as shown on the belt diagram |
| 5 | Torque fasteners, reinstall the skid pan and battery, then test charging voltage |
Reconnect the black output cable and tighten its nut securely, then reinstall the protective cover. Plug in the smaller connector until it clicks. Reattach any harness brackets so the wiring cannot rub the belt or pulley.
[Products Worth Considering]

Premium Alternators: Alternators are tested by high thermal environment and high power demand to ensure product quality and durability.

COMPLETE VEHICLE COVERAGE – Direct-fit replacement for Toyota Tacoma 2007-2016 2.7L engines. Covers all trims: Base, Pre Runner, SR, and SR5. Compatible with Crew Cab, Extended Cab, and Standard Cab configurations. Note for 2016 models: Fits vehicles built before August 2015 – verify your production date

【Automotive Replacement Alternators Part Number】1042103471, 1042104200, 11129, 11129A, 11139, 11139A, 11139N, 12453, 12670, 12691, 139542, 13984, 13984A, 13984N, 15441, 15544, 1N9542, 2100572, 2100611, 211139, 2139279, 2139542, 2139641, 213984, 2205253, 270600P010.【Specifications】① Amperage: 130A; ② Voltage: 12V; ③ Rotation: CW(Clockwise); ④ Number of Grooves: 7-Groove Pulley; ⑤ Fan Type: Internal; ⑥Regulator Type: Internal. Farrme 11129 alternator 130A ensures exact fit, form, and function, adhering to OEM standards for reliability and performance, and is a direct replacement for your original part.
Torque Specs, Belt Routing, and Reassembly Checklist
Torque specs are where you should slow down. The original “tight enough” approach can lead to stripped threads, loose brackets, belt misalignment, or a broken mounting ear. Published torque references for a 2016–2023 Tacoma 3.5L V6 list alternator mounting bolts around 37 lb-ft and an alternator pivot bolt around 18 lb-ft, while other years and engines can differ. Verify your final values with Toyota Technical Information System or factory service information for your VIN.
Torque Specifications
Use a calibrated torque wrench where access allows. Tighten fasteners evenly and make sure the alternator sits square in the bracket. Do not overtighten battery terminal hardware; battery posts and clamps can be damaged by excessive force.
- Confirm every alternator mounting bolt is installed before final torque.
- Make sure the output cable nut is tight and the protective boot is back in place.
- Reattach every harness bracket and clip that was removed.
- Remove the Allen key from the tensioner after the belt is routed.
- Reconnect the battery positive terminal first, then the negative terminal.
Belt Routing Diagram
Route the serpentine belt around the crankshaft pulley, alternator, tensioner, idlers, A/C compressor, and other driven accessories exactly as shown on the factory belt diagram for your engine. Every belt rib must sit fully in every grooved pulley. A belt that is one rib off can squeal, shred, walk off the pulley, or overload bearings.
Pro Tip: After releasing the tensioner, rotate the belt by hand where accessible and visually check every pulley from above and below. Misalignment is easier to fix before the battery and skid pan go back in.
Reinstall the skid pan with its original hardware. Reinstall the battery and hold-down clamp. Reconnect the positive terminal first and the negative terminal last. Make sure the terminals are clean, tight, and unable to rotate by hand.
Test Charging System Voltages After Installation
Before calling the job finished, test the charging system again. Start the truck and let it idle. Watch the belt for wobble, squeal, or wandering. Listen for grinding, scraping, or chirping. Then measure voltage at the battery posts.
- Engine off: a fully charged battery is usually near 12.6 volts after surface charge settles.
- Engine running: many systems show about 13.5–14.7 volts, but the exact value can vary on modern computer-controlled charging systems.
- Under load: switch on headlights, blower, and rear defogger. Voltage should remain controlled and stable, not drop steadily toward battery-only voltage.
- Voltage drop: compare alternator output stud voltage to battery positive voltage. A large difference points to cable, fuse, or connection resistance.
If the battery was deeply discharged before the repair, charge it with a battery charger rather than relying only on the new alternator. Alternators are designed to maintain and replenish a battery, not to rescue a severely discharged or failing one for long periods.
Common Post-Replace Problems and Quick Troubleshooting Steps
If the battery warning light or charging message stays on after replacement, shut the truck off and recheck the basics. Toyota’s owner information for newer Tacomas says a warning message indicating a malfunction may require stopping in a safe place and contacting a Toyota dealer, so do not ignore a charging-system warning on the road.
| Problem | Likely Cause | Quick Check |
|---|---|---|
| Battery light stays on | Loose plug, output cable issue, blown fuse, wrong alternator, weak battery | Recheck connector, output terminal, battery condition, and codes |
| Belt squeals | Misrouted belt, weak tensioner, worn belt, pulley misalignment | Verify routing and rib seating on every pulley |
| Voltage still low | Bad ground, cable voltage drop, discharged battery, defective replacement unit | Voltage-drop test positive and ground sides |
| Grinding or whining | Defective alternator bearing, pulley issue, belt tracking problem | Stop the engine and inspect before driving |
| Truck still needs jump starts | Battery damaged by deep discharge or parasitic draw | Charge and load-test the battery; check key-off draw if needed |
Act methodically. Clean corroded grounds, tighten loose terminals, correct belt routing, and test the battery separately. If abnormal noise or incorrect voltage remains after all checks, the replacement alternator may be wrong or defective.
[Products Worth Considering]

[Compatibility]: New alternator for 1999 2000 2001 2002 Toyota 4Runner V6 3.4L, 00 01 2003 2004 Toyota Tacoma, 00-02 Toyota Tundra. Before purchasing this order, please check the description to confirm your vehicle model compatibility

[Replacement Part Numbers] 101211-9590, 13794, 13794N, 213794, 2-13794, 2706062160, 27060-62160, 270606216084, 27060-62160-84, 3341341, 334-1341, 3342051, 334-2051, 3342079, 334-2079, 40052073, 400-52073, AND0180, 1012119590
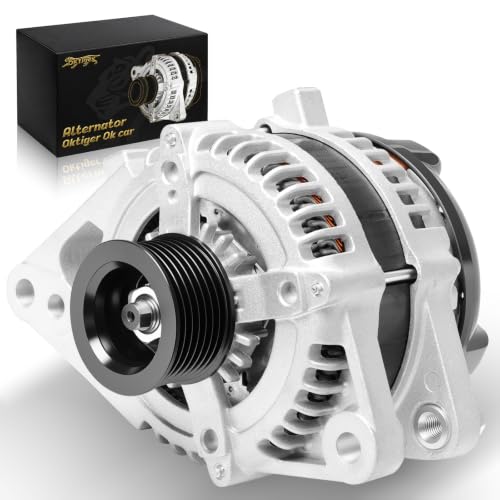
Fitment: Compatible with TOYOTA Tacoma base 2005-2015 4.0l v6 gas, Tacoma pre runner 2005-2015 4.0l v6 gas, Tacoma trd pro 2015 4.0l v6 gas, Tacoma x-runner 2005-2013 4.0l v6 gas, 4Runner limited 2003-2009 4.0l v6 gas, 4Runner sport 2003-2009 4.0l v6 gas, 4Runner sr5 2003-2009 4.0l v6 gas
Frequently Asked Questions
How long does it take to change an alternator in a Toyota Tacoma?
Most DIYers should plan on 1.5–3 hours. The job can go faster if you have done it before, but it can take longer if bolts are rusty, the skid pan is aftermarket, the belt routing is unclear, or your Tacoma has a hidden rear alternator bolt.
How do I know if my Toyota Tacoma alternator is bad?
Common signs include a battery warning light, repeated dead battery, dim or flickering lights, electrical resets, whining or grinding from the alternator area, and low or unstable charging voltage. Test the battery, belt, wiring, grounds, and alternator output before replacing parts.
Can I drive my Tacoma with a bad alternator?
Only as far as needed to reach a safe place. Once the alternator stops charging, the truck runs on battery reserve. When that reserve drops, the engine and electronics can shut down. If a charging-system warning appears, reduce electrical loads and stop safely.
Should I replace the serpentine belt when replacing the alternator?
Replace it if it is cracked, glazed, frayed, oil-soaked, stretched, noisy, or missing ribs. If the belt is in excellent condition and not near its service interval, it can usually be reused after careful inspection.
Do I need an OEM alternator for a Toyota Tacoma?
You do not always need OEM, but the replacement must match the correct amperage, pulley, connector, mounting points, and fitment for your VIN. OEM and high-quality remanufactured units are usually safer choices than unknown low-cost units.
Conclusion
Replacing a Toyota Tacoma alternator is a manageable DIY job when you diagnose first and work in order. Test the battery and charging voltage, disconnect the battery, release the belt safely, label or photograph the wiring, remove every mounting bolt without forcing the case, and verify the replacement alternator by VIN. After installation, belt alignment and voltage testing are the final proof. If readings still stray from spec, recheck connections, grounds, belt tension, battery condition, and voltage drop before blaming the new part.
Sources
- Toyota Owners Manuals and Warranties — official owner manual and service-information access point for Toyota Tacoma owners.
- Toyota Tacoma Owner’s Manual: Engine Compartment — battery safety warnings and under-hood maintenance precautions.
- Toyota Tacoma Owner’s Manual: Warning Messages — guidance for malfunction warnings and safe response.
- Toyota Technical Information System — official source for model-specific repair procedures and torque specifications.
- Toyota Genuine Alternator Assembly 27060-0P350 — example of VIN-specific alternator fitment and Toyota parts verification.
- Underhood Service: Alternator Testing — professional discussion of charging-system diagnosis, voltage variation, and avoiding misdiagnosis.