
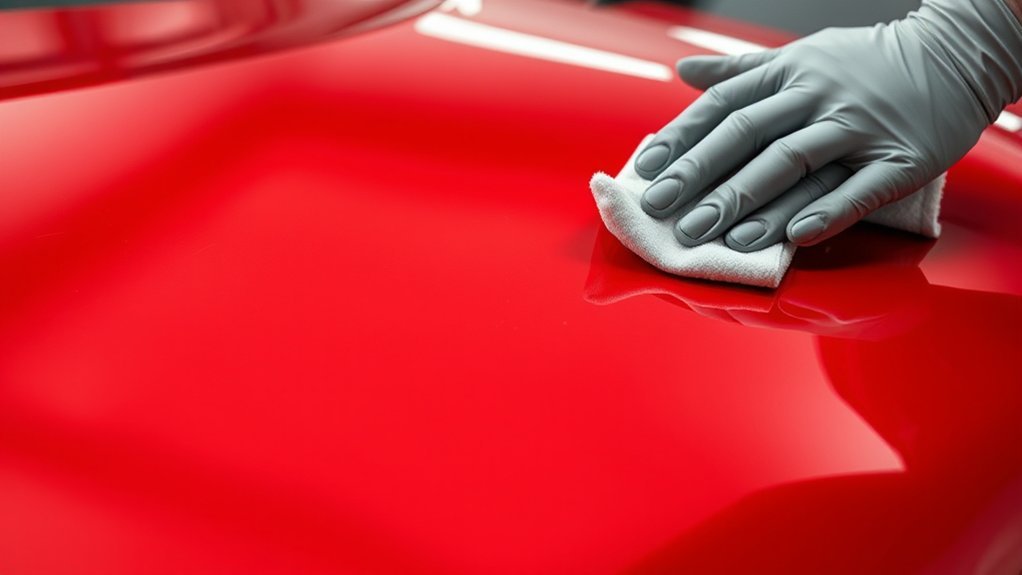
Paint correction can restore clarity and gloss to your Toyota Supra by reducing visible swirl marks, haze, oxidation, light scratches, and some water-spot etching. Because polishing removes a small amount of the painted surface, your goal should be a safe improvement rather than perfect defect removal. Careful inspection, decontamination, testing, and protection are essential.
Quick Answer
To correct gloss paint on a Toyota Supra, wash and decontaminate the surface, inspect the paint, mask vulnerable areas, and test a mild pad-and-polish combination. Work in small sections, control heat, inspect each result, and apply wax, sealant, ceramic coating, or paint protection film after polishing.
Key Takeaways
- Use conventional paint correction only on a suitable polishable gloss finish.
- Begin with the least aggressive pad and polish that produces an acceptable improvement.
- Choose pads by their material and stated cut level, not color alone.
- Deep scratches, peeling clear coat, uncertain repairs, and unusual paint readings need professional assessment.
- Correction improves appearance, while wax, sealant, ceramic coating, or PPF supplies protection.
At a Glance
| Time Required | About 6 to 12 hours for a careful one-step correction; multi-step work may take one or more full days |
| Difficulty | Intermediate; beginners should practice on a low-risk test area before correcting the full vehicle |
| Tools Needed | Dual-action polisher, suitable pads and abrasives, inspection light, microfiber towels, masking tape, wash and decontamination products, gloves, and eye protection |
| Cost | Approximately $150 to $500 or more for reusable DIY equipment and supplies, depending on what you already own |
Why Paint Correction Can Improve Your Supra
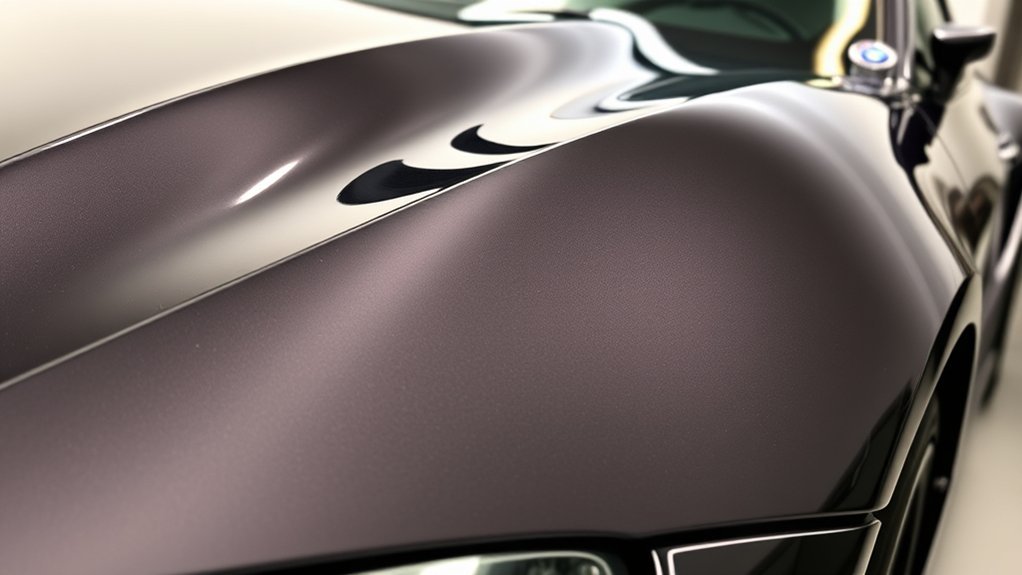
Paint correction uses abrasive polish to level a tiny amount of the painted surface around shallow defects. This reduces the way light catches swirl marks, wash scratches, oxidation, haze, and some etched water spots. The result can be clearer reflections and a deeper-looking gloss.
Correction is not required for every Supra. If the paint already looks clear and has only minor marks, a mild finishing polish or no polishing may be the safest choice. Each abrasive session removes some material, so you should correct the paint only when the visible improvement justifies that removal.
Correction can also improve the appearance of paint before paint protection film is installed. PPF does not require every cosmetic defect to be removed for adhesion, but marks left in the paint may remain visible through clear film. The installer should receive clean, compatible paint without fresh wax, sealant, or coating that interferes with the installation process.
Paint correction itself does not provide long-term protection from sunlight, chemicals, bird droppings, or contamination. Those benefits come from a separate wax, sealant, ceramic coating, or protective film applied after the polishing work is complete.
What Paint Correction Can and Cannot Fix
Machine polishing can often improve shallow defects that remain within a safe portion of the clear coat. It cannot safely repair peeling clear coat, paint cracks, exposed primer, bare material, stone chips, or scratches that extend through the color layer.
A fingernail test can help you notice a deep edge, but it cannot measure the exact depth of a scratch. If your nail catches strongly, the defect remains visible when wet, or you can see another paint layer, stop chasing complete removal. Refinishing or touch-up repair may be the safer solution.
Warning: Do not use normal abrasive correction on matte, satin, frozen, peeling, cracked, or failing finishes. Polishing a low-gloss finish can create permanent shiny patches. Unknown smart repairs or repainted panels also require extra testing and caution.
Inspect the Paint Before You Begin
Washable dirt can hide defects, but you should still complete an initial inspection before applying strong chemicals or abrasives. Look for differences in gloss, texture, color, and orange peel between panels. Overspray, tape lines, sanding marks, or unusual texture may indicate a previous repair.
Use a bright inspection light from several angles. A focused light helps reveal swirl marks, while a broad diffused light can expose haze, residue, and uneven finishing. Also inspect narrow areas around badges, mirrors, vents, panel edges, and raised body lines.
Confirm the Surface Type
Identify whether each area is factory gloss paint, repainted gloss paint, matte or satin paint, clear PPF, colored vinyl, textured plastic, or unpainted trim. Do not assume that every glossy-looking panel can receive the same chemical or polishing process.
If your Supra has PPF, inspect the film for lifted edges, cracks, stains, or previous polishing damage. Treat the film according to its manufacturer’s instructions rather than using the same aggressive combination selected for clear-coated paint.
Use a Paint-Thickness Gauge Carefully
A compatible paint-thickness gauge can help you compare readings across metal panels and identify unusual variations. Take several readings across each panel, including the center and areas near edges. Compare patterns instead of relying on one number.
A gauge cannot tell you exactly how much clear coat remains unless you have specialized equipment and reference data. Some gauges also cannot read plastic, composite, or certain nonferrous surfaces. Treat unusually low, high, or inconsistent readings as a reason to slow down or seek professional advice.
The safest paint correction is the least aggressive process that produces an improvement you are satisfied with.
Must-Have Tools for Paint Correction
The correct supplies make the work safer and more consistent. A dual-action polisher is generally easier for a beginner to control than a direct-drive rotary polisher, but either machine can damage paint when used carelessly.
- Dual-action polisher: Choose a machine with a backing plate and pad size that suit the Supra’s large panels and tighter areas.
- Polishing pads: Keep cutting, polishing, and finishing pads available. Select them by their stated cut and material rather than color.
- Compound and polish: Keep a mild polish available before reaching for an aggressive compound.
- Inspection lights: Use focused and diffused lighting to check defects, haze, and residue.
- Paint-thickness gauge: Use it as a comparison tool on compatible surfaces, not as a guarantee that polishing is safe.
- Masking tape: Protect textured trim, rubber seals, badges, panel edges, vents, and raised body lines.
- Microfiber towels: Use clean, soft towels and separate them by task.
- Decontamination supplies: Use automotive shampoo, a compatible iron remover, tar remover when needed, and clay or synthetic decontamination media.
- Pad-cleaning supplies: Use a suitable pad brush, compressed air with proper safety precautions, or the cleaning method recommended by the pad manufacturer.
- Personal protection: Wear chemical-resistant gloves and eye protection. Follow each product label and safety data sheet.
[Products Worth Considering]

Restore cloudy, oxidized headlights with a simple three-step kit that removes haze, smooths deeper damage, and leaves behind a durable ceramic coating. Designed for easy use without power tools, it helps improve clarity and adds UV protection for long-lasting results. This professional-grade formula chemically bonds to the headlight surface for a like-new finish and lasting protection.

Restore cloudy, yellowed vehicle lenses with this easy-to-use headlight restoration kit from 3M. It includes sanding discs, a disc pad holder, masking tape, and a clear coat protectant to help improve clarity on headlights, taillights, and other plastic lenses. Designed to remove haze and buildup without damaging the lens surface, it offers a practical way to refresh appearance and avoid costly replacement.

Meguiar's Ultimate Compound is a pro-grade automotive polish designed to remove scratches, swirls, oxidation, and water spots while restoring color and clarity. Its micro-abrasive technology cuts quickly without hazing, making it a clear-coat-safe solution for achieving a smooth, showroom-quality finish. It can be applied by hand or with a polisher for fast, effective paint correction.
Choosing a Compound and Polish
Menzerna Heavy Cut Compound 400 is an aggressive automotive polish intended for significant defects. Menzerna rates it as a heavy-cut product and states that it can remove scratches while producing gloss. The manufacturer also notes that a second finishing stage may be needed depending on the surface.
Do not make a heavy-cut compound your automatic first choice. Begin with a mild polish and a polishing pad. Increase to a stronger polish, cutting pad, or compound only when the test result does not meet your realistic goal.
Note: Pad colors are not standardized. A white or black pad from one company may have a different cut from the same color sold by another company. Read the pad description and system chart.
How to Decontaminate Your Supra Before Correcting Paint
Polishing contaminated paint can drag particles across the surface, clog your pads, and create new defects. Complete both chemical and mechanical decontamination before you start the test spot.
| Step | Action | Important Precaution |
|---|---|---|
| 1. Pre-rinse | Rinse away loose grit with free-flowing water or a pressure washer used at a safe distance. | Do not force water into damaged paint, loose film, seals, or vents. |
| 2. Pre-wash | Apply a paint-compatible automotive pre-wash according to its label. | Work on cool paint and do not let the chemical dry. |
| 3. Contact wash | Wash from the roof downward with automotive shampoo and a clean microfiber mitt or pad. | Rinse the wash media often and keep wheel tools separate. |
| 4. Iron removal | Apply a compatible iron remover and rinse within its stated dwell time. | Color change may indicate a reaction, but never wait for the product to dry. |
| 5. Tar treatment | Spot-treat visible tar with a suitable remover if needed. | Check compatibility with repaired paint, film, plastic, and rubber. |
| 6. Mechanical decontamination | Use a clay bar, clay mitt, or NanoSkin AutoScrub Sponge with generous compatible lubricant. | Use light pressure because clay and synthetic media can create marring. |
| 7. Final rinse and dry | Rinse thoroughly and dry with clean microfiber towels or filtered air. | Remove trapped water from mirrors, badges, trim, and panel gaps. |
Do not apply one universal pH or dwell-time rule to every chemical. For example, Gtechniq W6 Iron Removing Wheel and Paint Cleaner currently specifies a 3-to-5-minute dwell time, ventilation, gloves, and rinsing before the product dries. Other iron removers may have different directions.
Pro Tip: After decontamination and drying, place your clean hand inside a thin plastic bag and lightly glide it over the paint. The bag can make remaining bonded contamination easier to feel without pressing hard.
Prepare and Mask the Working Area
Move the Supra indoors or into deep shade. The paint should be clean, dry, and cool. Arrange your power cable so it does not rub against the body, and use enough lighting to inspect the area from several angles.
Mask textured plastic, rubber seals, badges, sharp panel edges, raised lines, and narrow areas that are difficult to polish safely. Also protect adjacent matte, wrapped, or PPF-covered surfaces if your polishing combination is not approved for them.
Use extra caution around the edges of the hood, doors, hatch, bumpers, vents, and sculpted body lines. Paint can be thinner at edges, and a pad can build heat quickly when only part of its face contacts the surface.
Effective Compounding and Polishing Techniques
[Products Worth Considering]

Meguiar's Keep Clear Headlight Coating helps maintain crystal-clear headlights on both new and restored lenses for improved nighttime visibility and a cleaner look. Its durable UV-protective formula helps resist hazing, yellowing, and discoloration while delivering lasting clarity for up to a year. The easy aerosol spray application makes it simple to protect and refresh your headlights with minimal effort.

Meguiar's Ultimate Ceramic Coating Kit delivers durable paint protection with enhanced gloss, slickness, and impressive water beading for easier washing and drying. Its spray-on, wipe-off application makes it simple to use, while helping conceal light defects and adding protection to glossy paint, trim, decals, paint protection film, and wheels.
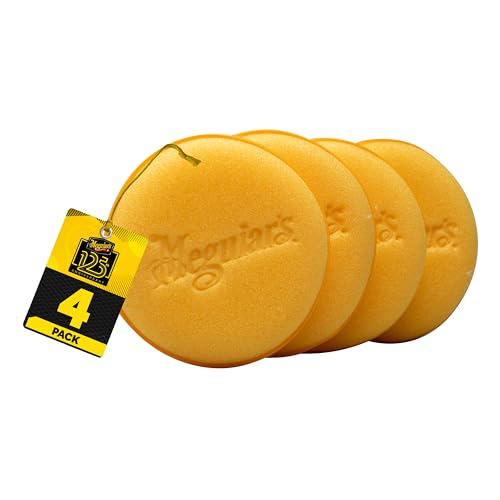
WIDE APPLICATION: Upgrade your car detailing kit with Meguiar's 4" Foam Applicator Pads, versatile tools designed to effortlessly apply various auto care products, including car polish, car wax, dressings, interior products, and more.
Perform a Test Spot First
Choose a representative section measuring about 18 by 18 inches. Start with a mild polish and a light or medium polishing pad. Prime the pad according to its manufacturer’s instructions, add a small amount of polish, and spread it across the section before increasing the machine speed.
Use slow, controlled, overlapping passes. Keep the pad as flat as the panel shape allows and do not force the machine to stop rotating. Wipe away the residue and inspect the area under focused and diffused lighting.
If the result meets your goal, use the same combination on similar panels. If the defects remain too visible, increase the cut one step at a time. You might change the pad, polish, or both, but changing one variable at a time makes the result easier to evaluate.
Pro Tip: Place masking tape through the test area so you can compare corrected and untouched paint side by side. This helps you decide whether a stronger process is worth the extra paint removal.
Choose Between One-Step and Multi-Step Correction
A one-step correction uses one pad-and-polish combination to improve gloss while reducing moderate defects. It is often a sensible choice for a regularly driven Supra because it balances appearance with paint preservation.
A multi-step correction begins with a stronger cutting stage and follows with a finer polishing stage. It may reduce more severe defects and refine haze left by compounding, but it takes longer and removes more material.
Menzerna states that HC400 can cut and generate gloss in one stage. However, the manufacturer also recommends inspecting the surface and completing another HC400 pass or using a finishing polish when the result requires additional refinement.
Work in Small Sections
Keep each working section small enough that the polish remains workable. Make overlapping passes in a crosshatch pattern, first side to side and then up and down. Maintain steady arm movement and use only the pressure needed for the selected system.
Follow the machine, pad, and polish manufacturer’s speed instructions. Do not copy a speed setting from an unrelated machine because throw length, motor behavior, pad size, and product requirements differ.
Do not hold the pad in one place. Stop periodically and check the panel and pad for excess heat. Reduce pressure, speed, and polishing time near edges, curves, vents, and raised lines.
Clean and Rotate Your Pads
Polish residue and removed paint collect in the pad during use. A saturated pad cuts less consistently and can produce more heat, dust, and haze.
Clean the pad after each section or as directed by its manufacturer. Rotate through several pads when correcting the full vehicle. Replace pads that are torn, overheated, separated from their backing, or too saturated to clean effectively.
Refine the Finish When Needed
Inspect each compounded area after removing residue. If you see haze, micro-marring, or reduced clarity, use a finer polish and a suitable polishing or finishing pad.
Do not continue compounding an isolated deep scratch after the surrounding surface has improved. Leaving part of a scratch visible is safer than removing excessive clear coat from the entire area.
Remove Polishing Oils and Inspect
Some polishes can temporarily hide defects with lubricating oils. Use a coating-compatible inspection or panel-preparation product when you need to see the true finish or prepare for a chemically bonding coating.
Gtechniq PWv2 Panel Wipe is designed to remove polishing residue and promote coating bonding. Its current instructions say to spray it onto a microfiber cloth, test a small area, and avoid PPF, vinyl, plastic, rubber, smart repairs, and resprayed surfaces.
Warning: Do not use a strong panel wipe or solvent on an unknown repair without testing. A product that is safe on original factory paint may stain, soften, or tarnish a smart repair, respray, film, plastic, or rubber component.
Applying Protection After Paint Correction
Corrected paint should receive suitable protection after the final inspection. Your main choices are wax, synthetic sealant, ceramic coating, and paint protection film. Each option has different preparation, cost, installation, and maintenance requirements.
[Products Worth Considering]
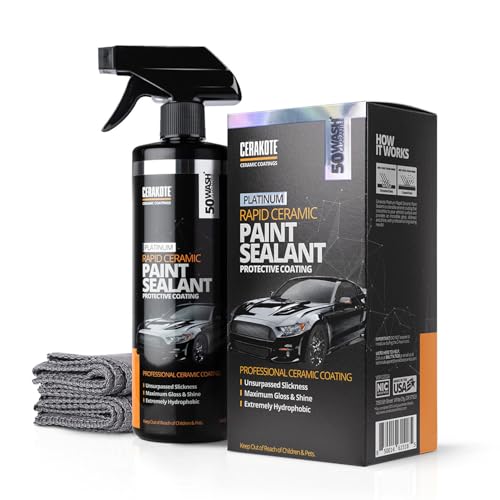
CERAMIC COATING FOR CARS: Delivers an extremely glossy, mirror-like finish on clean paint. Use as a standalone paint sealant or as a quick ceramic topper that deepens color and adds slickness. Not a one-step miracle coating and not a paint corrector

10+ Years of Extreme Protection: Advanced ceramic coating for cars with 20H hardness – the toughest shield against UV rays, acid rain, and oxidation, keeping your paint flawless for over a decade.

🏆 WATER-BASED HYBRID NANO CERAMIC SPRAY COATING FOR NEW AND RECENTLY DETAILED VEHICLES VX-Coat is engineered for vehicles already in excellent condition. A modern ceramic spray wax alternative that preserves the original finish rather than correcting damaged surfaces. Ideal for new car owners and drivers focused on long term exterior maintenance and premium automotive detailing results.
Wax and Synthetic Sealant
A wax such as Collinite 845 can provide gloss, water repellency, and a sacrificial layer. Synthetic sealants offer similar convenience and may have different chemical or durability characteristics. Actual service life varies with preparation, climate, storage, mileage, washing, and application quality, so avoid treating a fixed number of months as guaranteed.
Ceramic Coating
Gtechniq Crystal Serum Light is currently advertised by its manufacturer as providing up to five years of durability when properly applied and maintained. Current instructions require thoroughly washed and decontaminated paint, polishing when needed, residue removal, indoor application between 5°C and 25°C, and at least 12 hours indoors after application.
The EXOv4 reference in the original article is outdated. The current Gtechniq EXOv5 is listed as a one-layer hydrophobic coating with manufacturer-rated durability of 18 to 24 months. It can be used alone or over Crystal Serum Light.
Current EXOv5 instructions say the vehicle must remain dry for at least 12 hours after application and should not be washed for at least one week. Always follow the latest label because application and curing instructions can change.
Note: A ceramic coating can improve chemical resistance, gloss, water behavior, and cleaning. It does not make your Supra scratch-proof, stone-chip-proof, or maintenance-free.
Paint Protection Film
PPF provides a thicker physical barrier than wax, sealant, or ceramic coating and can help protect high-impact areas from many chips and abrasions. Common coverage areas include the front bumper, hood, front fenders, mirror caps, rocker panels, and rear wheel-impact areas.
Have the installer confirm how the surface should be prepared. Fresh waxes, sealants, and coatings may need to be removed before installation. Existing paint defects may remain visible through clear film, so correction should be completed before PPF when the paint condition and thickness allow it.
What Common Mistakes Should You Avoid During Paint Correction?
Most DIY problems result from poor preparation, excessive aggression, contaminated pads, or continuing after the paint gives you a reason to stop.
| Mistake | Possible Result | Safer Approach |
|---|---|---|
| Skipping decontamination | Clogged pads, new scratches, and uneven correction | Wash, chemically decontaminate, and clay before polishing. |
| Starting with heavy compound | Unnecessary material removal and compounding haze | Begin with a mild test spot and increase cut only when needed. |
| Selecting pads by color | Incorrect cutting or finishing ability | Use the pad maker’s material and cut description. |
| Using excessive pressure | Heat, pad stalling, haze, and possible paint damage | Use controlled pressure and keep the machine moving. |
| Ignoring edges and body lines | Uneven correction or paint burn-through | Mask vulnerable areas and reduce aggression near them. |
| Using a saturated pad | Poor cut, more heat, dust, and inconsistent finishing | Clean pads often and rotate through several pads. |
| Polishing matte or failing paint | Permanent gloss changes or coating failure | Use finish-specific care or obtain professional assessment. |
| Chasing every deep scratch | Excessive clear-coat removal | Accept safe improvement or arrange a proper repair. |
| Coating over polish residue | Poor bonding, smearing, or misleading inspection | Use a compatible surface-preparation product as directed. |
Troubleshooting Common Paint-Correction Problems
The Polish Is Dusting
Dust can result from excessive product, a dirty pad, long working cycles, heat, dry conditions, or an incompatible pad-and-polish combination. Clean or replace the pad, use the correct amount of product, shorten the cycle, and follow the polish instructions.
The Dual-Action Pad Stops Rotating
The pad may stall when you use too much pressure, tilt the machine, work on a sharp curve, or use a pad that is too large for the area. Reduce pressure, keep the pad flatter, and use a smaller backing plate and pad for tight sections when suitable.
The Paint Looks Hazy After Compounding
Haze may come from an aggressive pad, compound residue, overheating, a clogged pad, or a combination that does not finish well on that paint. Clean the surface, inspect it under good lighting, and complete a test spot with a finer polish and finishing pad.
Defects Return After Panel Wipe
Polishing oils may have temporarily filled or hidden the marks. Reassess the test spot under clean lighting. Decide whether another safe polishing step is justified or whether the remaining defects should be accepted.
The Panel Becomes Unusually Hot
Stop polishing and allow the area to cool. Check your pressure, machine speed, pad condition, section size, and time spent in one area. Do not continue until you understand the cause.
When to Hire a Professional Detailer
Professional correction is the safer choice when:
- The paint has deep scratches, sanding marks, peeling clear coat, or exposed layers.
- You find matte, satin, wrapped, or unknown refinished surfaces.
- Paint readings are unusually low or inconsistent.
- The vehicle has extensive previous bodywork or smart repairs.
- You want wet sanding or a high-level multi-step correction.
- You do not have an indoor workspace with suitable lighting and ventilation.
- You are uncertain which chemicals are compatible with the surface.
Ask the detailer how the paint will be measured, what defect-removal target is realistic, how edges will be protected, and which protection will be applied afterward.
Tips for Long-Lasting Protection After Paint Correction
The appearance produced by paint correction lasts only as long as your washing, drying, and storage habits allow. Protection can reduce contamination and make cleaning easier, but poor contact washing can still create new swirl marks.
Regular Maintenance Routine
Wash the Supra when contamination begins to build rather than following a rigid two-week rule. A garage-kept weekend car may need less frequent washing than a daily-driven car exposed to rain, dust, insects, road salt, or bird droppings.
Use a clean microfiber wash mitt or pad with a suitable automotive shampoo. Wash from the roof downward and keep separate tools for the wheels. Rinse the wash media frequently so removed grit does not stay against the paint.
Dry with a clean microfiber drying towel, filtered air, or both. A compatible drying aid, including products such as Obsessed Garage Drying Aid, may add lubrication during towel drying. Confirm that it is suitable for the wax, sealant, coating, or film on your vehicle.
Avoid automatic washes that use shared brushes or cloth strips. These materials may hold grit from other vehicles and introduce fresh swirl marks. Touchless washing reduces direct contact but may use stronger chemicals, so it should not replace careful hand washing for routine maintenance.
Choose Quality Products
Quality products help, but correct use and compatibility matter just as much. Menzerna HC400 is a heavy-cut abrasive rather than a routine maintenance polish. Clay bars from Mothers, 3M, and other established manufacturers belong in the pre-polishing decontamination process, not after correction.
Use a pH-neutral shampoo when it suits your protection system, and follow the coating or film manufacturer’s maintenance instructions. Do not apply wax or sealant on a fixed schedule without checking whether the existing protection still performs and whether the new product is compatible.
How Often to Repeat Paint Correction
Do not repeat paint correction automatically every one or two years. Inspect the paint after a proper wash and decontamination. If the finish remains clear but the protection has weakened, renew the wax, sealant, or coating without polishing the full vehicle.
Correct the paint again only when visible defects justify additional abrasion and the paint condition supports it. Better washing and drying techniques can reduce how often polishing is needed.
Frequently Asked Questions
How often should I perform paint correction on my Supra?
Correct the paint only when visible defects justify removing more material. There is no universal one-year or two-year interval. If the finish remains clear and healthy, renew the protective product and improve your wash method instead of polishing again.
Can I do paint correction myself, or should I hire a professional?
You can complete a mild one-step correction with a dual-action polisher if you understand surface inspection, decontamination, test spots, pad selection, heat control, and edge safety. Hire a professional for deep defects, uncertain repairs, low readings, matte finishes, failing clear coat, wet sanding, or extensive multi-step work.
What are the signs that my Supra needs paint correction?
Possible signs include visible swirl marks under direct light, reduced clarity, light wash scratches, oxidation, haze, and shallow water-spot etching that remains after decontamination. Peeling clear coat, exposed primer, paint chips, and deep scratches need repair rather than ordinary polishing.
Is paint correction safe for all car colors and finishes?
The color is less important than the finish type and condition. Conventional correction may be suitable for healthy gloss paint, including metallic gloss paint. Do not normally polish matte, satin, frozen, failing, wrapped, or unknown refinished surfaces without finish-specific professional guidance.
How long does Toyota Supra paint correction take?
A careful one-step correction commonly takes about 6 to 12 hours after washing and decontamination. Multi-step correction, extensive masking, difficult defects, wet sanding, or coating application can extend the project beyond one full day.
Will paint correction remove every scratch?
No. Correction can reduce defects that remain within a safely polishable portion of the surface. Deep scratches may extend too far into the clear coat, color coat, primer, or underlying material. Safe improvement is more important than complete removal.
Can I polish paint protection film on my Supra?
Some films permit light polishing with approved products, while others have different care limits. Identify the film manufacturer and follow its instructions. Aggressive paint compounds, high heat, and edge contact can permanently damage film.
Should I apply ceramic coating or PPF after correction?
Either option may be suitable. Ceramic coating can improve chemical resistance, gloss, water behavior, and ease of cleaning. PPF creates a thicker physical barrier against many chips and abrasions. You can also use PPF on high-impact areas and apply a compatible coating to the remaining paint or film.
Conclusion
Safe Toyota Supra paint correction depends on inspection, restraint, and controlled technique. Decontaminate the paint, confirm that the finish is suitable for polishing, complete a test spot, and use the least aggressive combination that meets your goal. Protect the corrected surface afterward and use careful washing and drying methods to reduce new defects. A small remaining scratch is better than unnecessary clear-coat removal or permanent paint damage.
Sources
- Toyota Manuals and Warranties — model-year-specific owner, maintenance, and vehicle-care information
- Menzerna Heavy Cut Compound 400 — product category, cut and gloss ratings, recommended process, and possible finishing stage
- Gtechniq Crystal Serum Light — preparation, temperature, curing, application, and conditional durability guidance
- Gtechniq EXOv5 Ultra Durable Hydrophobic Coating — current product version, durability, layering, curing, and washing guidance
- Gtechniq W6 Iron Removing Wheel and Paint Cleaner — iron-removal dwell time, ventilation, gloves, color reaction, and rinsing instructions
- Gtechniq PWv2 Panel Wipe — polish-residue removal, coating preparation, compatibility limits, and respray warnings


[…] modern MkV Toyota GR Supra 3.0 uses a turbocharged inline-six, so the engine sets a smooth base tone before any exhaust parts […]