
What’s in This Article
- What the Idle-Overheating Pattern Usually Means
- How to Stop a Camry From Overheating at Idle
- Quick Checklist: Camry Overheating at Idle or Stoplights
- Symptoms That Point to Idle-Only Overheating
- Tools and Safety Gear You May Need
- Check Coolant Level, Radiator Cap, and Air Pockets First
- Test Radiator Fans, Relays, and Wiring With an A/C Quick Test
- Test Camry Cooling Fan Switches, ECT Sensors, and Control Modules
- Diagnose Coolant Flow Through the Thermostat, Water Pump, and Radiator
- Test for Head Gasket or Combustion-Gas Leaks
- Step-by-Step Bleeding and Coolant Top-Off Procedure
- Repair Priorities, Estimated Costs, and When to Get Professional Help
Last updated: July 31, 2026 | Technically Reviewed by
If your Camry overheats at idle but cools down after you start moving, check the radiator-fan and airflow system first. Road speed forces ambient air through the radiator core, temporarily masking a failed cooling fan motor, bad fan relay, blown fuse, damaged shroud, or debris-clogged condenser. Low coolant volume, an unpurged air pocket, a weak radiator cap, a stuck thermostat, failing water pump impellers, internal radiator restriction, or a blown head gasket can produce identical symptoms. Stop driving immediately if the temperature gauge enters the red zone, steam escapes, or coolant boils over.
Quick Answer
A Toyota Camry that overheats only while stationary or idling almost always suffers from insufficient airflow across the radiator core or low coolant volume. Inspect electric radiator fans, fan relays (Fan No. 1, No. 2, No. 3), and clean debris between the A/C condenser and radiator. Next, verify cold coolant levels, test radiator cap pressure holding, purge trapped air pockets, and verify that the thermostat opens between 80°C and 84°C (176°F–183°F).
Key Takeaways
- If coolant temperature drops once the car reaches 35+ mph, diagnose the electric cooling fans and low-speed radiator airflow first.
- Turning on the A/C verifies fan motor power, but does not prove the ECM or temperature sensors can command high-speed cooling when the engine gets hot.
- Trapped air pockets behind the thermostat or in the heater core mimic a failed water pump or thermostat.
- Use live OBD-II scan data (ECT) and an infrared thermometer to verify actual engine temperature before replacing components.
- Shut the engine down immediately if the temperature gauge reaches the hot mark to prevent cylinder head warpage.
What the Idle-Overheating Pattern Usually Means
The symptom pattern identifies which subsystem requires testing. Do not replace parts on speculation; match your Camry’s exact operating symptoms to the test path below.
| Symptom Pattern | Focus First | Next Check |
|---|---|---|
| Temperature climbs while stopped; drops quickly once moving above 30 mph | Electric radiator fan operation or blocked heat-exchanger airflow | Check fan spin, test Fan No. 1/2/3 relays, inspect 30A/40A/50A fuses, and check debris between condenser and radiator |
| Temperature climbs rapidly at idle with A/C turned ON | High-speed fan relay failure, condenser heat soak, or marginal coolant volume | Verify both fans switch to high speed; inspect condenser fins for packed road dirt and bent fins |
| Cabin heater blows cold air while temperature gauge climbs at idle | Low coolant level, trapped air pocket, or water pump impeller slip | Check cold reservoir and radiator fill neck; pressure-test cooling system for leaks; bleed air with heater on MAX HEAT |
| Dashboard gauge rises into hot zone, but scan-tool live ECT reads normal (~190°F–205°F) | Dashboard gauge sender, instrument cluster circuit, or wiring harness fault | Cross-check live ECM data with an infrared thermometer pointed directly at the water outlet housing |
| Coolant overflows reservoir tank, bubbles continuously, or builds pressure immediately after cold start | Combustion gas leaking into cooling jacket (head gasket or cracked head) | Perform a chemical block test (combustion gas leak detector), cooling system pressure test, and cylinder leak-down test |
How to Stop a Camry From Overheating at Idle
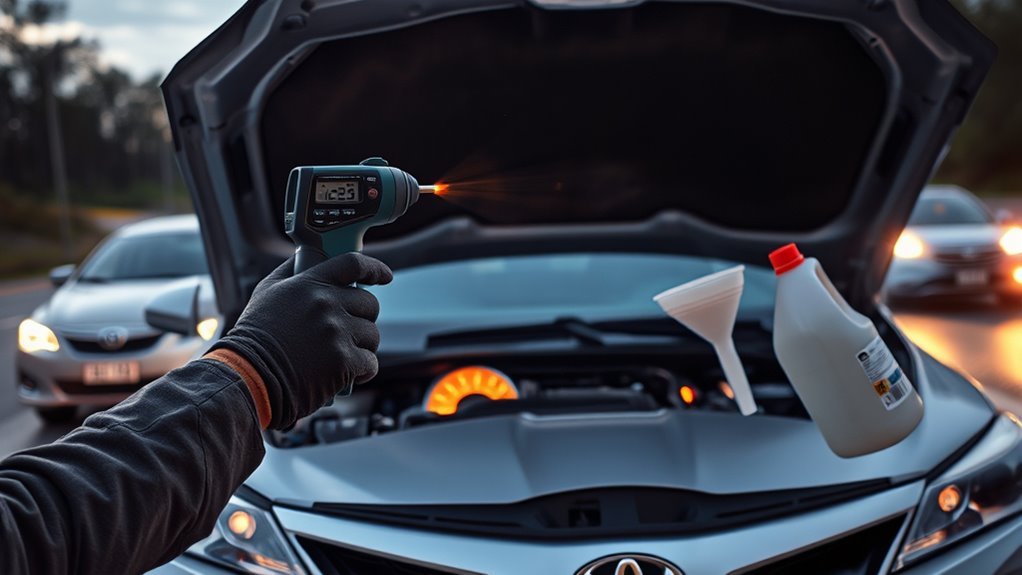
When your Camry starts to overheat at a red light or in traffic, take immediate action to protect the cylinder head from thermal warpage:
- Turn the A/C OFF immediately: This removes significant heat load from the condenser located directly in front of the radiator.
- Turn the cabin heater to MAX HEAT and fan to HIGH: The heater core acts as a secondary auxiliary radiator, pulling thermal energy directly from the cylinder head.
- Safely pull over and shut down: If cabin heat does not drop the gauge within 60 seconds, pull over safely, place the transmission in Park, set the emergency brake, and shut the engine off.
Scalding Hazard Warning: Never open a radiator cap or pressurized coolant expansion tank while the engine is hot. Pressurized boiling coolant (exceeding 100°C / 212°F) and steam can erupt violently, causing third-degree burns. Allow the powertrain to cool for a minimum of 45 to 60 minutes.
After the engine has fully cooled to ambient temperature, inspect the coolant reservoir, radiator neck, cap sealing gaskets, upper/lower radiator hoses, heater core hoses, and the water pump area for pink or red crusty residue. If your Camry is losing fluid without obvious puddles, use the site’s Camry coolant-leak guide to track down hidden external hose and housing leaks.
Note for Camry Hybrid owners: 2007+ Camry Hybrid models feature two completely independent cooling loops—one for the internal combustion engine and one for the hybrid inverter/transaxle. Verify which reservoir is low; an overheating inverter triggers a hybrid warning message rather than a mechanical temperature gauge spike.
Quick Checklist: Camry Overheating at Idle or Stoplights
Follow this diagnostic sequence to identify the root failure with minimal teardown:
- Cold Fluid Inspection: Check coolant level at both the transparent overflow reservoir (between LOW and FULL) and directly under the radiator cap (fluid must reach the base of the filler neck).
- Cap Seal Check: Inspect the rubber seal and spring on the radiator pressure cap for tears, stiffness, or mineral buildup.
- Condenser Airflow Inspection: Shine a flashlight through the front bumper grille; look for road grime, leaves, plastic bags, or bent fins trapped between the A/C condenser and the radiator core.
- A/C Fan Override Test: Start the cold engine, engage the parking brake, set climate control to MAX A/C, and visually confirm both electric cooling fans spin up.
- Live ECT Scan Data: Connect an OBD-II scanner. Monitor live Engine Coolant Temperature as the vehicle idles. Fans should command on low speed at ~96°C–98°C (205°F–208°F) and high speed at ~104°C (219°F).
- Relay and Fuse Verification: If fans do not spin when commanded, test the RDI FAN fuse, CDS FAN fuse, and Fan Relays (No. 1, No. 2, No. 3) in the underhood fuse block.
- Thermostat Opening Check: Use an infrared thermometer on the upper and lower radiator hoses once ECT reaches 84°C (183°F). The lower hose should rapidly warm up as the thermostat opens.
- Cooling System Pressure Test: Pressurize the cooling system to manufacturer specification (e.g., 118 kPa / 17.1 psi on 1AZ-FE/1MZ-FE) to reveal pinhole leaks or weak hose clamps.
- Chemical Combustion Gas Test: Place a block tester over the radiator neck to rule out head gasket leakage if coolant boils out or pressure spikes immediately upon cold startup.
Symptoms That Point to Idle-Only Overheating
When an engine overheats exclusively while idling or moving at speeds below 20 mph, the thermal dynamics point directly toward an airflow deficit or low-RPM circulation stall. At highway speeds (45–70 mph), dynamic ram air pushes through the front fascia at over 2,000 CFM, naturally cooling the radiator even if the electric fans are completely dead.
Primary symptom indicators include:
- Temperature drops at speed: The temperature gauge needle drops back to the center position within 60 to 90 seconds of accelerating onto an open road.
- Degraded A/C performance at stops: The air conditioner blows warm or humid air while waiting at a red light, then blows ice cold once the vehicle moves.
- Silent engine bay at high temp: The electric cooling fans remain stationary even when the dashboard gauge climbs above the 3/4 mark.
- Cold cabin heater on acceleration: Heat disappears while idling at a light, but suddenly warms up when the engine RPM is raised to 2,000 RPM.
- Coolant reservoir ejection: Coolant violently surges into the overflow tank and overflows onto the ground after sitting at an extended idle.
If your Camry overheats primarily at sustained highway cruising speeds rather than during stationary idling, refer to the dedicated Camry highway-overheating guide. Highway overheating indicates radiator core internal restriction, collapsed lower radiator hoses, or worn water pump impellers failing under high thermal load.
Tools and Safety Gear You May Need
To safely troubleshoot an overheating condition, assemble these professional diagnostic tools:
- Safety Glasses & Nitrile/Heat-Resistant Gloves: Protection against high-temperature fluid spray and sharp radiator fins.
- OBD-II Scan Tool: Capable of reading live engine sensor data stream (specifically ECT in real-time degrees).
- Non-Contact Infrared Thermometer: For pinpointing thermal gradients across radiator inlet/outlet tanks and thermostat housings.
- Digital Multimeter (DMM): For checking DC voltage, ground integrity, relay coil resistance, and sensor continuity.
- Cooling System Pressure Tester & Toyota Adapters: To verify system integrity at 14–18 psi without running the engine.
- Chemical Combustion Gas Leak Detector (Block Tester): Bromothymol blue test fluid to detect exhaust hydrocarbons in coolant vapor.
- Spill-Free Coolant Funnel Kit: Essential for elevated burping and air-pocket elimination.
- Toyota Super Long Life Coolant (SLLC): Premixed 50/50 pink phosphated organic acid technology (POAT) coolant.
Mechanical Hazard Warning: Modern electric cooling fans are controlled electronically and can turn on unexpectedly at maximum RPM even with the ignition key turned off if the ECM detects a high soak temperature. Keep hands, clothing, tools, and multimeter test leads completely clear of fan blades at all times.
[Products Worth Considering]

📢⚠️【Please Read Carefully before Purchasing】- ▶ This is just a 22Pin to 16Pin converter cable ONLY, not a diagnostic scanner. ▶Please comfirm that your cars support the OBD2 protocol, and your scanner being compatible with your cars with the functions you need – none of which is related to our cable. ▶ This 22pin OBD port does not provide a power supply. Any question, pls conta.ct us via 📩Autelchoice @ outlook . com📩.

【Universal Connector】This OBD2 to OBD1 adapter is compatible with all 1990 and newer Toyota/Lexus vehicles equipped with a 17 pin Data Link Connector port.

Compatibility: This OBD2 adapter cable is designed specifically for Toyota vehicles with a 17 pin OBD1 connector, allowing seamless connection to OBD2 diagnostic scanners and code readers.
Check Coolant Level, Radiator Cap, and Air Pockets First
Low coolant volume is the most common cause of idle overheating. When coolant drops below the level of the cylinder head temperature sensor or water pump inlet, the pump cannot generate sufficient fluid velocity at low idle RPM (650–750 RPM) to circulate fluid through the radiator.
Always inspect fluid levels when the engine is completely cold. According to Toyota service manual documentation, cold coolant in the recovery reservoir must sit precisely between the “LOW” and “FULL” graduation marks. If the reservoir is completely dry, remove the radiator cap (cold only); fluid must reach the top of the internal filler neck.
Inspect the radiator pressure cap. The cap serves two crucial functions: it raises the boiling point of the 50/50 coolant mixture from 100°C (212°F) to approximately 125°C (257°F) by maintaining 13–16 psi (0.9–1.1 bar) of pressure, and its vacuum return valve allows expanding coolant to return from the overflow bottle during cool-down. If the cap rubber seal is hardened, cracked, or the center spring has lost tension, the cooling system will boil at normal idle operating temperatures.
Trapped air pockets can form after a component replacement or via a slow external pinhole leak. Air pockets settle around the thermostat pellet or inside the heater core. Because air expands rapidly when heated and cannot transfer heat, it prevents the thermostat from sensing actual coolant temperature, keeping it closed while the engine overheats. Review the Toyota Camry coolant check and refill guide for complete cold-fill safety steps.
Test Radiator Fans, Relays, and Wiring With an A/C Quick Test
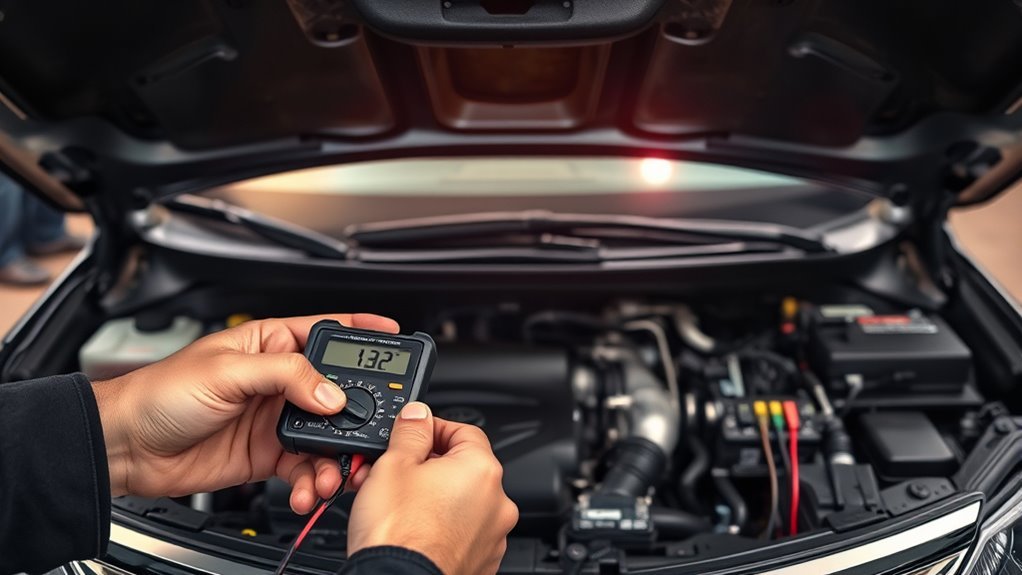
Electric cooling fans pull air through the radiator when the car is stationary. Most Camry models utilize a dual-fan assembly: the radiator fan (driver side) and condenser fan (passenger side). Depending on the generation, these fans operate in a series-parallel relay configuration for Low and High speeds, or are managed via a Pulse-Width Modulated (PWM) solid-state fan controller.
A/C Override Screening Test
- Start the engine and place the transmission in Park with the emergency brake engaged.
- Switch the air conditioning to MAX A/C with the blower fan on High.
- Observe both fan blades from a safe distance. Both fans should begin spinning immediately or within 10 to 15 seconds as refrigerant head pressure rises.
Diagnostic interpretation: If both fans spin with A/C engaged, the fan motors, main power supply, and primary ground circuits are operational. However, this does not prove the system will trigger on engine heat alone. If the fans run with A/C but never engage when the A/C is off and the engine is overheating, the fault lies in the temperature sensing circuit, ECM trigger logic, or high-temperature fan relay control.
Fan Circuit Electrical Troubleshooting
If one or both fans fail to spin during the A/C test, perform these step-by-step electrical checks:
- Check Fuses: Inspect the main 30A/40A/50A cooling fan fuses (labeled
RDI FAN,CDS FAN, orFAN NO. 1) in the main engine compartment junction block. Use a multimeter set to DC volts or continuity across the fuse test pins. - Test Fan Relays: Toyota fan circuits commonly use three separate 4-pin/5-pin relays (FAN NO. 1, FAN NO. 2, FAN NO. 3) to switch the fan motors between series (Low Speed, 6V each) and parallel (High Speed, 12V each). Remove the relay, verify 60–80 ohms resistance across coil terminals 85 and 86, and verify 12V battery power at terminal 30.
- Direct 12V Motor Test: Disconnect the two-pin electrical connector at the fan motor. Using fused jumper wires, apply 12V battery power and ground directly to the motor pins. If the motor fails to spin or draws excessive amperage (tripping a 20A fuse), the electric motor brushes have failed.
- Inspect Ground Connections: Verify zero ohms resistance between the negative wire on the fan harness and the bare metal chassis ground. Corroded ground lugs on the radiator core support frequently cause intermittent fan operation.
For detailed circuit diagrams and relay testing steps, visit our Camry cooling-fan diagnosis guide.
Test Camry Cooling Fan Switches, ECT Sensors, and Control Modules
Cooling fan control logic differs significantly across Camry generations. Troubleshooting requires matching the diagnostic procedure to your vehicle’s specific engine and control architecture.
Pre-2002 Camrys (4th Gen 5S-FE and 1MZ-FE Thermoswitches)
Fourth-generation Camrys (1997–2001) utilize dedicated mechanical engine-coolant temperature switches threaded directly into the lower radiator tank or water outlet housing to control fan relay grounding. These switches operate independently from the ECM’s temperature sensor.
| Camry Component / Engine | Bench-Test Specification (OEM Service Manual) | Failed Diagnostic Result |
|---|---|---|
| 5S-FE 2.2L Fan ECT Switch (Radiator Bottom Tank) | Continuity (0 ohms) below 83°C (181°F); No continuity (Open circuit) above 93°C (199°F) | Switch remains closed above 93°C; fans never receive the ground-break signal to turn on |
| 1MZ-FE 3.0L No. 1 ECT Switch (Water Outlet) | Continuity below 88°C (190°F); No continuity above 98°C (208°F) | Switch fails to open; low-speed fan circuit does not activate |
| 1MZ-FE 3.0L No. 2 ECT Switch (Radiator Tank) | No continuity below 83°C (181°F); Continuity above 94°C (201°F) | Switch fails to close at temperature; high-speed fan relay circuit fails to trigger |
Testing Note: On the 5S-FE system, disconnecting the single-wire connector from the bottom radiator switch should immediately trigger the cooling fans on HIGH with the ignition key turned ON (fail-safe mode). If the fans run with the switch unplugged but never run when plugged in, the thermoswitch is defective.
2002–Present Camrys (5th–8th Gen ECM and PWM Fan Control)
Modern Camrys (2.4L 2AZ-FE, 2.5L 2AR-FE / A25A-FKS, and 3.5L 2GR-FE) eliminate radiator thermoswitches. The Engine Control Module (ECM) monitors a 2-wire thermistor-type Engine Coolant Temperature (ECT) sensor located on the cylinder head water neck. The ECM processes engine temperature, vehicle speed, and A/C refrigerant pressure, commanding the fans via relay stages or a variable-speed PWM fan control module mounted to the fan shroud.
- Live ECT Scan Test: Read live ECT data using an OBD-II scanner. If the live data reads -40°C or an erratic +140°C, the ECT sensor or its wiring harness is open or shorted.
- OEM Fan Command Thresholds: On standard 2.4L/2.5L models, Stage 1 (Low Speed) commands ON at approximately 96°C to 98°C (205°F–208°F). Stage 2 (High Speed) commands ON at approximately 104°C to 106°C (219°F–223°F).
- PWM Duty Cycle Verification: On models equipped with a fan control module, back-probe the control wire with a digital multimeter (duty cycle mode) or oscilloscope. The ECM outputs a 0–100% square-wave signal based on cooling demand. If the control signal increases but the fan does not spin, replace the fan control module.
Diagnose Coolant Flow Through the Thermostat, Water Pump, and Radiator
If the electric fans operate at full speed and airflow is clear, idle overheating indicates a mechanical restriction in coolant flow. At idle, the water pump spins at low speed; any restriction in the thermostat, water pump impellers, or radiator core will immediately stall circulation.
Thermostat Operation and Thermal Verification
Toyota thermostats utilize a wax-pellet actuator with an integrated jiggle valve. The factory thermostat begins opening between 80°C and 84°C (176°F–183°F) and reaches full lift (8.5 mm or more) at 95°C (203°F). If the thermostat sticks shut or opens partially, hot coolant remains trapped inside the cylinder block.
Use a non-contact infrared thermometer to measure thermal flow across the cooling system:
- Aim the infrared laser at the upper radiator inlet hose. As the engine reaches operating temperature (~190°F / 88°C), the upper hose should become hot.
- Aim the laser at the lower radiator outlet hose (connected to the thermostat housing on most Toyota engines). As the thermostat opens, the lower hose temperature should rise steadily, settling roughly 15°F to 25°F (8°C–14°C) cooler than the upper hose.
- If the upper hose is scalding hot (>210°F / 99°C) while the lower hose remains cold (<120°F / 49°C) and the radiator core is cold at the bottom, the thermostat is stuck closed or an air pocket is blocking the wax pellet.
Water Pump Inspection
Inspect the water pump casing and serpentine drive belt. Look for pink crusted crystallization around the water pump weep hole (indicating mechanical shaft seal failure). With the engine off, grab the water pump pulley and check for radial play or bearing roughness. Slipping drive belts or plastic impeller blades that have eroded/detached from the drive shaft will cause zero coolant flow at idle speeds while operating marginally at higher cruising RPM. Review the site’s Camry water-pump diagnosis guide for step-by-step impeller testing.
Radiator Core External and Internal Restriction
Shine a light between the A/C condenser and radiator. Road debris, compressed leaves, and insect buildup often coat the front face of the radiator, cutting idle airflow by over 50%. Internally, mineral scale or silicate dropout can clog the narrow aluminum radiator core tubes. Scan the radiator core face vertically from top to bottom with an infrared thermometer; cold horizontal bands indicate clogged tubes that cannot transfer heat.
To confirm cooling system pressure capability, Toyota service manual RM915E specifies connecting a pressure tester and applying 118 kPa (17.1 psi) to the system. The pressure must hold steady without dropping for a minimum of 3 minutes.
Test for Head Gasket or Combustion-Gas Leaks
If coolant levels drop continuously with no external leaks, the cooling system pressurizes instantly within 30 seconds of a cold start, or temperature spikes uncontrollably at idle, test for a blown cylinder head gasket or cracked cylinder head.
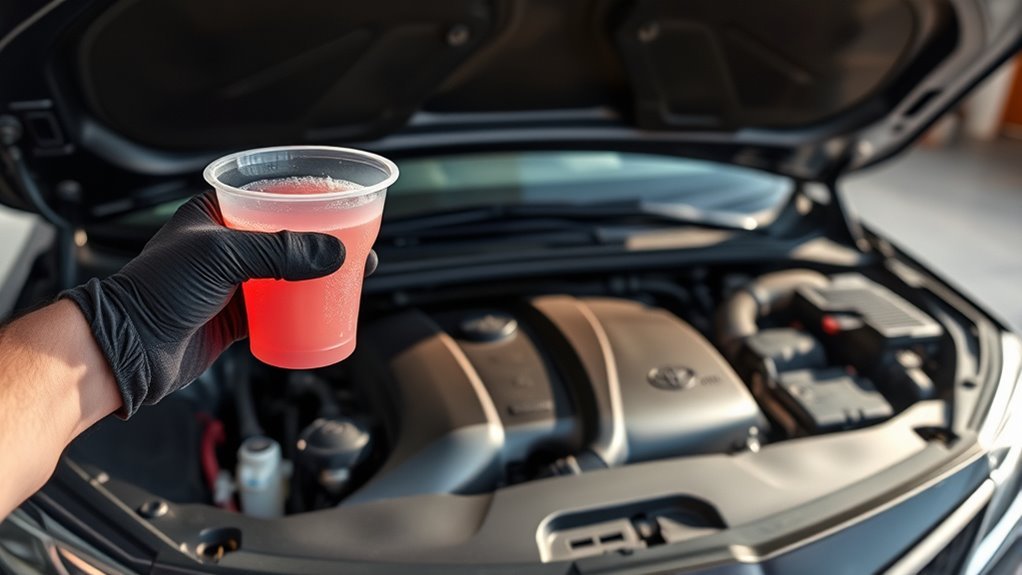
Chemical Block Test (Combustion Gas Detector)
A chemical block test is the most definitive, non-invasive method for detecting combustion gas leakage into the cooling jacket:
- Lower the cold coolant level in the radiator filler neck by 2–3 inches using a siphon bulb (preventing liquid coolant from entering the test tube).
- Fill the dual-chamber combustion leak detector with blue bromothymol test fluid up to the fill line.
- Place the rubber cone securely into the radiator neck and start the engine.
- Squeeze the aspirator bulb repeatedly to draw air and vapors from the radiator headspace through the test fluid.
Interpreting the Test Result:
- Fluid Remains BLUE: No combustion gases detected. The cooling system is sealed from the combustion chambers.
- Fluid Turns YELLOW / GREEN: Combustion gases (carbon dioxide / hydrocarbons) are leaking through the head gasket, a warped cylinder head, or a cracked block. The chemical reaction between acidic exhaust gases and bromothymol blue causes an immediate color change.
Cylinder Compression and Leak-Down Testing
When internal leakage is suspected, confirm the exact failing cylinder using a mechanical compression test and pneumatic leak-down test. For the 1999 Camry 2.2L 5S-FE, Toyota 5S-FE engine service specifications establish a standard compression of 178 psi or higher, a minimum limit of 142 psi, and a maximum allowable variance between cylinders of 14 psi.
- Leak-down bubbles in radiator: Applying 90 psi of shop air to a cylinder at Top Dead Center (TDC) compression stroke that produces bubbling or rising fluid in the radiator neck confirms a failed head gasket fire-ring or cracked combustion chamber.
- Exhaust Smoke Verification: Persistent sweet-smelling white exhaust smoke after full engine warm-up indicates coolant burning in the combustion chamber. Review our Camry white-smoke and head-gasket guide to distinguish normal condensation from internal coolant consumption.
Step-by-Step Bleeding and Coolant Top-Off Procedure
Eliminating trapped air pockets is critical after any coolant service or cooling system repair. Follow this professional vacuum/burping sequence:
- Preparation: Park the vehicle on level ground or elevate the front wheels slightly on ramps (placing the radiator neck at the highest point of the cooling system). Set the parking brake and ensure the engine is stone cold.
- Install Spill-Free Funnel: Remove the radiator cap and attach a spill-free funnel kit with the appropriate rubber adapter tightly into the radiator neck.
- Initial Fill: Slowly pour premixed 50/50 Toyota Super Long Life Coolant (pink) into the funnel until the fluid level fills the radiator and rises 1/3 into the funnel bowl.
- HVAC Climate Setting: Turn the ignition switch to ON. Set the climate control temperature dial to MAX HEAT, set the airflow mode to Front Vents, and set the blower fan speed to LOW. This commands the heater control valve/blend door to open, allowing coolant to circulate through the heater core.
- Engine Warm-Up Idle: Start the engine. Let it idle smoothly at 700–900 RPM. Squeeze the upper radiator hose repeatedly to dislodge air bubbles trapped in the cylinder head passages.
- Thermostat Cycle: Allow the engine to reach operating temperature (~190°F / 88°C). Observe large air pockets bubbling up into the funnel bowl. When the thermostat opens, the coolant level in the funnel will drop noticeably—add fluid immediately to maintain the level in the funnel bowl.
- Hold Fast Idle: Raise the engine speed to 2,000–2,500 RPM for 15 seconds, then return to idle. Repeat 3 to 5 times. Confirm that the cabin heater blows hot air.
- Cool-Down and Cap Installation: Once air bubbles cease completely and the radiator cooling fans have cycled on and off at least once, insert the funnel stopper, remove the funnel, and install a tested radiator cap securely.
- Top-Off Reservoir: Fill the coolant overflow reservoir bottle to the “FULL” line with fresh coolant.
- Drive Cycle Verification: Complete a 15-minute test drive, allow the powertrain to cool completely for 2 hours, and verify that the cold reservoir fluid level remains at the “FULL” mark.
Repair Priorities, Estimated Costs, and When to Get Professional Help
Prioritize cooling system repairs based on diagnostic confirmation to avoid unnecessary expenditures:
- Priority 1 (Airflow & Fluid Volume): Clean radiator/condenser fins, replace leaking radiator caps ($15–$30 DIY), purge air pockets ($20 DIY coolant), and replace blown fan fuses or failed relays ($20–$60 DIY).
- Priority 2 (Electrical Fan Components): Replace failed radiator cooling fan motor assemblies ($150–$350 DIY; $300–$550 shop) or defective ECT sensors/fan switches ($30–$80 DIY; $120–$220 shop).
- Priority 3 (Mechanical Flow Components): Replace sticking thermostats ($40 DIY; $395–$505 shop) or leaking water pumps with new drive belts ($120–$250 DIY; $638–$819 shop).
- Priority 4 (Heat Exchanger Replacement): Replace cracked or internally clogged aluminum radiators ($120–$220 DIY; $450–$750 shop).
- Priority 5 (Internal Engine Sealing): Cylinder head gasket replacement, head resurfacing, and valve inspection ($1,561–$2,247 shop estimate).
According to RepairPal automotive repair estimates updated June 18, 2026, standard professional repair ranges for the Toyota Camry in the U.S. include:
- Toyota Camry Thermostat Replacement: $395 to $505 (Parts: ~$85–$120; Labor: ~$310–$385).
- Toyota Camry Water Pump Replacement: $638 to $819 (Varies by engine: 4-cylinder vs. 3.5L V6 transverse layout).
- 1999 Toyota Camry Head Gasket Replacement: $1,561 to $2,247 (Includes cylinder head flatness inspection and new head bolts).
When to Call a Professional: If the temperature gauge spikes into the red danger zone, steam erupts from the engine compartment, a chemical block test confirms combustion hydrocarbons in the radiator, or you lack the multimeter tools required to diagnose ECM fan control wiring, turn the vehicle off immediately and arrange flatbed towing to a certified repair facility.
[Products Worth Considering]
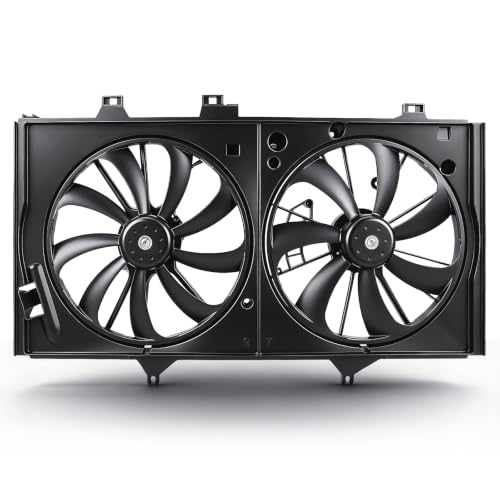
Replace Part Number: 620-592, 622760, TO3115169, 163610V090, 163610V100, 163610V420, 163610V430, 163630H010, 163630V130, 167110V100, 1671136120, FA50326C.

[Vehicle Fitment]: Compatible with Lexus ES350 2007-2012 V6 3.5L; Compatible with Toyota Avalon 2005-2012 V6 3.5L, Camry 2007-2011 V6 3.5L, Venza 2009-2015 V6 3.5L
Frequently Asked Questions
Why does my Camry overheat at idle but cool down when driving?
At highway speeds, incoming ram airflow forces cool air through the radiator core, cooling the engine even if the electric fans are dead. When the car stops at idle, airflow stops completely. If the radiator cooling fans, fan relays, temperature switches, or fan fuses are defective, heat builds up rapidly in the stationary radiator, causing the temperature gauge to climb.
What causes a Camry to overheat only when idling?
The primary causes are inoperative or weak electric radiator cooling fans, a blown fan fuse or relay, road debris clogging the space between the condenser and radiator, low coolant volume, trapped air pockets in the cylinder head, a weak radiator pressure cap, a thermostat stuck partially closed, or a water pump impeller slipping at low idle RPM.
Does the A/C fan test prove the cooling fans are good?
No. Turning on the A/C only confirms that the fan motors spin when commanded by the A/C pressure switch. It does not prove the ECM, engine coolant temperature (ECT) sensor, or high-temperature relays are functioning properly to command high-speed cooling when engine coolant exceeds 96°C–104°C (205°F–219°F).
How can you tell if it’s a bad thermostat or water pump?
A stuck-closed thermostat causes a cold lower radiator hose while the upper hose is scalding hot, with no heat transfer across the radiator core. A failed water pump typically exhibits pink dried coolant residue around its lower weep hole, audible pulley bearing growl, radial shaft play, or zero cabin heat at idle that only warms up when the engine is revved to 2,500 RPM.
Can trapped air make a Camry overheat at idle?
Yes. Air pockets collect around the thermostat housing and inside the heater core. Because air does not transfer heat effectively, a trapped air pocket insulates the thermostat’s wax actuator, preventing it from opening when the engine is hot and causing severe idle overheating and fluctuating dashboard gauge readings.
Why does my Toyota Camry keep overheating after I add coolant?
Adding coolant only replaces lost volume; it does not fix the underlying defect. If your Camry continues to overheat, the system likely has an active external pressure leak, an unpurged air pocket, a malfunctioning radiator pressure cap, inoperative radiator fans, or an internal cylinder head gasket leak pumping exhaust gases into the cooling passages.
Can you drive a Camry that overheats at idle?
No. Operating an aluminum Toyota engine (such as the 2.4L 2AZ-FE, 2.5L 2AR-FE, or 3.5L 2GR-FE) in the red overheating zone can warp the aluminum cylinder head, strip head bolt threads out of the engine block, and blow the head gasket within minutes. Pull over safely, shut the engine down, and allow it to cool completely.
Automotive Safety Disclaimer: This troubleshooting guide is provided for educational and diagnostic purposes only. Automotive cooling systems operate under high hydraulic pressure and elevated temperatures. Always consult a certified ASE technician and wear appropriate personal protective equipment before performing electrical, mechanical, or thermal tests around moving belts, fan blades, and pressurized fluids.
Conclusion
A Toyota Camry that overheats at idle but recovers at road speed is signaling an immediate airflow or low-RPM coolant circulation breakdown. Systematically verify radiator fan motor and relay operation, inspect the radiator-condenser stack for dirt blockage, verify cold coolant levels, and test radiator cap pressure holding.
If electrical fans and airflow checks pass, verify thermostat opening temperatures with an infrared thermometer and perform a spill-free funnel air purge with the cabin heater set to MAX HEAT. If coolant pushes out under cold startup or levels drop continuously, execute a chemical combustion gas test immediately to catch head gasket failure before catastrophic cylinder head damage occurs.
References
- 1999 Camry Owner’s Manual – Toyota Motor Corporation, accessed July 2026
- Camry Repair Manual RM915E: Cooling System 1AZ-FE – Toyota Technical Information Services, accessed July 2026
- Camry Repair Manual RM915E: Cooling System 1MZ-FE – Toyota Technical Information Services, accessed July 2026
- How Often to Change Engine Coolant – Toyota Official Maintenance Guide, accessed July 2026
- Car Overheating: Causes and Solutions – AAA Automotive Services, accessed July 2026
- Toyota Camry Thermostat Replacement Cost – RepairPal Certified Pricing Index, updated June 18, 2026
- Toyota Camry Water Pump Replacement Cost – RepairPal Certified Pricing Index, updated June 18, 2026
- 1999 Toyota Camry Head Gasket Replacement Cost – RepairPal Certified Pricing Index, accessed July 2026
- 1999 Camry Service Manual: 5S-FE Compression Inspection – Toyota Service Information Reproduction, accessed July 2026
- 1999 Camry Service Manual: ECT Switch Inspection – Toyota Service Information Reproduction, accessed July 2026


[…] Engine-temperature warning: If the temperature gauge rises, a high-temperature warning appears, or the cooling fans do not operate, turn the AC off and prioritize the engine-cooling problem. A fan fault can reduce AC cooling at idle and may also contribute to engine overheating. See the related Camry overheating-at-idle guide. […]