
Last updated: July 31, 2026 · Author: Daxon Steele · Reviewed for accuracy: Editorial Team
Update note: Added DRL-only diagnosis, a two-minute symptom check, a headlight-relay test step, safer LED-retrofit guidance, and links to dedicated Camry charging, alternator, bulb-size, and OBD2 resources.
Toyota Camry headlights flickering usually follow one of two fault paths. If both lamps pulse together, start with the shared 12-volt supply, charging system, battery terminals, grounds, relays, and lighting controls. If only one lamp flickers, inspect that side’s bulb, socket, connector, HID ballast, LED driver, and local wiring.
Before buying parts, note whether the dashboard or interior lights also flicker, whether the problem appears only in daytime running light mode, and whether the car is hybrid or non-hybrid. Exact fuses, relays, lamp parts, control modules, and test specifications vary by model year, trim, market, and installed headlamp assembly.
Quick Answer
If both Toyota Camry headlights flicker together, test the 12-volt battery, terminals, grounds, headlight relay, and the correct charging system before replacing bulbs. If the dash and interior lights flicker too, a shared supply or ground fault becomes more likely. If only one headlight flickers, focus on that bulb, socket, ballast, LED driver, connector, or local ground. If only the daytime running lights flicker after an LED conversion, restore the correct factory-type bulb or verify a vehicle-specific, road-legal retrofit rather than adding a generic resistor.
Key Takeaways
- Both headlights flickering together usually points to a shared power, ground, charging, relay, switch, or control problem.
- One flickering headlight usually points to a local bulb, socket, ballast, LED driver, connector, or wiring fault.
- A worn or intermittent headlight relay is a common, easily overlooked cause that can mimic a battery or alternator problem.
- DRL-only flicker after an LED conversion often points to reduced-intensity or pulsed DRL operation that the retrofit driver cannot handle correctly.
- Camry Hybrid models do not use the same conventional alternator test path as non-hybrid Camrys.
- A rested 12-volt battery reading helps, but load and voltage-drop tests provide stronger evidence.
- Do not add a generic LED load resistor or decoder unless the lighting manufacturer specifically requires it.
- Stop night driving if either low beam cuts out, brightness changes sharply, wiring overheats, or a fuse repeatedly blows.
What’s in This Article
- Quick Fixes for Flickering Headlights in Your Toyota Camry
- Match the Flicker Pattern to the Likely Cause
- Identify Your Camry Powertrain and Headlight System
- Before You Start: Safety and Tools
- Diagnosing the 12-Volt Battery and Charging System
- Identifying Bulb, Ballast, and LED Driver Problems
- Troubleshooting Loose Connections and Bad Wiring
- Is Your Headlamp Switch Causing the Flicker?
- Fixing LED Flickering Issues in Your Camry
- When to Get Professional Help
- Frequently Asked Questions
- Conclusion
- References
Evidence note: This guide synthesizes Toyota manufacturer information and standard automotive electrical diagnosis. It does not claim that a specific Camry was physically tested for this article.
Quick Fixes for Flickering Headlights in Your Toyota Camry
If your Toyota Camry has flickering headlights, use the symptom pattern before buying parts. The following order reduces guesswork:
- Identify the vehicle: Confirm the model year, hybrid or non-hybrid powertrain, and headlight type.
- Check one side versus both: One side usually means a local lamp fault. Both sides usually mean a shared electrical or control fault.
- Watch when it happens: Note whether the flicker follows bumps, engine speed, startup, steering input, or heavy electrical loads.
- Inspect the easy items: Look for loose battery terminals, corrosion, moisture, damaged connectors, melted plastic, or an incorrectly seated bulb.
- Test the 12-volt battery: Measure it after the car has rested, then use a proper battery load or conductance test if the result is low or inconsistent.
- Choose the correct charging test: Check the alternator on a non-hybrid Camry or the inverter and DC-DC converter on a Camry Hybrid.
Two-Minute Observation Check
- Park safely with the parking brake set and face a wall or garage door so small brightness changes are easier to see.
- Compare the low beams, high beams, daytime running lights, parking lamps, dashboard lights, and interior lights. Record which functions flicker and whether one side or both sides are affected.
- On a non-hybrid Camry, compare the symptom with the engine off and running. On a Camry Hybrid, compare the system off and in READY mode. Turn on the blower and rear defroster one at a time, but do not touch wiring while the vehicle is operating.
- Record recent bulb or LED work, rain or car-wash exposure, warning lights, burning smells, blown fuses, and whether bumps or steering-column movement trigger the fault.
Many car batteries last about three to five years, but climate, short trips, electrical drain, and maintenance can shorten that period. Battery age is a reason to test the battery, not proof that it has failed.
Do not keep replacing bulbs if both headlights pulse together. Shared flicker is more likely to involve the 12-volt supply, charging system, ground path, relay, switch input, body control module, or related wiring.
Match the Flicker Pattern to the Likely Cause
Your flicker pattern can narrow the fault before you remove any parts. Match the symptom to the most likely area, then confirm it with testing.
| Symptom | Likely Area | First Check |
|---|---|---|
| Both headlights flicker together | 12-volt battery, charging system, shared ground, relay, switch input, or control module | Test the battery and choose the correct hybrid or non-hybrid charging procedure |
| Both headlights plus dashboard or interior lights flicker | Shared 12-volt supply, battery connection, main ground, charging system, or power-distribution fault | Inspect the battery terminals and main grounds, then test system voltage under load |
| Only one headlight flickers | Bulb, socket, HID ballast, LED driver, connector, or local wiring | Inspect and test the affected side |
| Flicker happens on bumps | Loose plug, damaged terminal, broken wire, or poor ground | Inspect connectors and harness routing with the system off |
| Flicker increases at idle or when the blower, defroster, or other loads turn on | Weak 12-volt battery, charging fault, loose terminal, or excessive voltage drop | Load-test the battery and measure the circuit under load |
| Flicker changes with engine speed on a non-hybrid Camry | Alternator, regulator, rectifier diode, belt, or connection | Inspect the belt and request charging-output and ripple tests |
| Only the low beam or high beam flickers | Function-specific bulb, relay, driver, connector, or control circuit | Compare the working and affected beam circuits |
| Flicker starts after an LED upgrade | Incorrect bulb, incompatible driver, poor fit, reversed connector, or unsuitable interface | Return to the correct factory-type lamp or verify the complete retrofit system |
| DRLs flicker but full high beams remain steady after an LED upgrade | Reduced-intensity or pulsed DRL operation that the retrofit driver cannot process correctly | Restore the specified factory-type bulb or use only a verified, compliant complete lighting solution |
| Flicker starts after rain, washing, or visible condensation | Moisture in the housing, connector, ballast, driver, or harness | Switch the lights off and inspect for water entry, corrosion, damaged seals, and pooled moisture |
| Flicker appears only in phone video | Camera frame-rate or rolling-shutter interaction with LED modulation | Confirm whether the flicker is visible to your eyes before diagnosing a vehicle fault |
Identify Your Camry Powertrain and Headlight System
Your Camry’s powertrain and lamp technology determine which parts you should test. Do not order a bulb, alternator, ballast, or LED module until you confirm the exact vehicle configuration.
Toyota’s U.S. model releases describe the 2025 Camry and 2026 Camry as hybrid-only lineups with LED headlights and daytime running lights on all grades. Older Camrys and vehicles sold in other markets may use non-hybrid powertrains, halogen bulbs, HID lamps, or different LED assemblies.
| System | What It Changes | Main Flicker Checks |
|---|---|---|
| Non-hybrid Camry | Uses a conventional engine-driven charging system | Alternator, regulator, belt, battery, terminals, grounds, and ripple |
| Camry Hybrid | Supports the 12-volt system through the hybrid inverter and converter | 12-volt battery, READY-mode voltage, inverter or converter operation, grounds, and diagnostic codes |
| Halogen headlight | Usually has a replaceable filament bulb | Bulb filament, socket tension, connector heat, ground, and correct seating |
| HID headlight | Uses a capsule with a ballast and possibly a separate igniter | Capsule age, ballast, igniter, connector, moisture, and power supply |
| Factory LED headlight | May use an integrated or separate LED driver and non-serviceable light source | Driver or module, assembly, wiring, grounds, control input, and stored codes |
| Aftermarket LED retrofit | Changes the original electrical load, heat management, and beam source position | Bulb compatibility, driver quality, connector polarity, cooling clearance, and housing fit |
Check your owner’s manual, Toyota parts information, or the markings on the original lamp. A VIN-based parts lookup can help separate trim, production, and market differences. For common replaceable-bulb families and factory LED cautions, use the site’s Toyota Camry headlight bulb size guide, then verify the result against the installed assembly.
Before You Start: Safety and Tools
Park on level ground, set the parking brake, switch the lights off, and keep the key or smart key away from the car before touching a connector. Let halogen and HID lamps cool before service.
You can inspect many low-voltage components with simple tools:
- Use a digital multimeter rated for automotive work.
- Use an approved battery tester for a load or conductance test.
- Wear gloves and safety glasses when handling bulbs or battery connections.
- Use insulated hand tools where appropriate.
- Use electrical contact cleaner only after the circuit is safely powered down.
- Use the correct wiring diagram or Toyota service information for your model year.
Do not probe an HID output circuit, force meter leads into sealed connectors, or substitute a higher-amperage fuse. If a connector pin must be back-probed, use the Toyota wiring diagram and an approved terminal-testing method so the seal and terminal tension are not damaged.
Warning: Stop testing if you smell burning plastic, see smoke, find melted wiring, or notice a hot connector. On a Camry Hybrid, do not touch orange high-voltage cables or open the inverter, converter, or traction-battery components. Never disconnect a battery cable while the engine or hybrid system is operating as a charging-system test.
Diagnosing the 12-Volt Battery and Charging System
Every Camry uses a 12-volt electrical system for lighting and control modules, but the method used to support that system depends on the powertrain. Start with the 12-volt battery and cable connections, then follow the correct non-hybrid or hybrid test path.
Battery Condition Assessment
A careful battery condition assessment helps you avoid replacing good lighting parts. AAA reports that car batteries commonly last three to five years, depending on climate, use, and maintenance. Test an older battery even if the car still starts.
Inspect the battery case, terminals, clamps, and ground connections. Look for corrosion, loose hardware, swelling, cracks, damaged cables, or a terminal that can rotate by hand.
After the car has sat for several hours without charging or heavy electrical use, measure the battery at its posts. Midtronics identifies about 12.6 to 12.8 volts as a healthy rested range for a charged 12-volt lead-acid battery. A reading below 12.4 volts suggests partial discharge, but it does not prove the battery has failed.
If the reading is low, recharge the battery with an appropriate charger and test it again. Use a proper load or conductance test because voltage alone cannot measure cranking capacity, internal resistance, or performance under load.
Charging-System Testing by Powertrain
For a non-hybrid Camry: Inspect the alternator drive belt for cracks, glazing, contamination, looseness, or tensioner problems. Measure charging voltage at the battery with the engine running and electrical loads switched on. The value should generally rise above the rested battery voltage, but the correct range varies by model, temperature, battery condition, and load.
A single voltage reading cannot rule out an intermittent alternator problem. Ask a qualified shop to test alternator output under load and check AC ripple or the charging waveform. Excessive ripple can point to a rectifier-diode or internal alternator fault even when average voltage appears reasonable. For the full conventional charging procedure, see the Toyota Camry alternator testing guide.
For a Camry Hybrid: Do not look for a conventional belt-driven alternator. Toyota’s Camry Hybrid technical information describes a power-control unit with a DC-DC converter. That system supports the vehicle’s low-voltage electrical loads when the hybrid system is in READY mode.
Measure the 12-volt system only with the correct model-year hybrid procedure. If voltage remains low or unstable in READY mode, a technician may need to check the 12-volt battery, inverter or converter operation, grounds, fuses, wiring, and hybrid-control trouble codes. If a charging warning or hybrid-system message is present, use the site’s Camry charging-system warning guide and the exact Toyota owner’s manual before continuing.
Compare Engine-Off, Running, and READY-Mode Results
| When the Flicker Appears | What It Suggests | Best Next Test |
|---|---|---|
| With the engine or hybrid system off | Battery, local lamp circuit, relay, switch input, control module, or wiring can still be involved | Check one side versus both, battery condition, connectors, fuses, relays, and grounds |
| Only while a non-hybrid engine is running | Alternator output, regulator, rectifier ripple, belt, or a connection affected by engine vibration | Test charging output and waveform under the same load and engine-speed conditions |
| Only while a Camry Hybrid is in READY mode | 12-volt support, converter operation, grounds, wiring, control commands, or a load-related fault | Use hybrid-capable scan data and the model-year Toyota diagnostic procedure |
| In every operating state, but only on one side | A local bulb, ballast, driver, socket, connector, ground, or harness fault | Test the affected lamp circuit and compare it with the working side |
Why Load Testing and Voltage-Drop Testing Matter
A damaged connection can show normal voltage when the headlights are off and fail when the lamps draw current. A voltage-drop test measures energy lost across cables, terminals, connectors, fuses, and grounds while the circuit operates.
A technician can compare the positive and ground sides of the affected circuit with the headlights on. Excessive drop on the positive side points toward resistance in a cable, fuse, relay, connector, or power feed. Excessive ground-side drop points toward a weak ground connection or damaged ground wire.
If the flicker occurs only while driving, ask the technician to reproduce the fault under electrical load and monitor voltage, scan data, and the headlight command. An intermittent problem may not appear during a brief parked test.
Identifying Bulb, Ballast, and LED Driver Problems
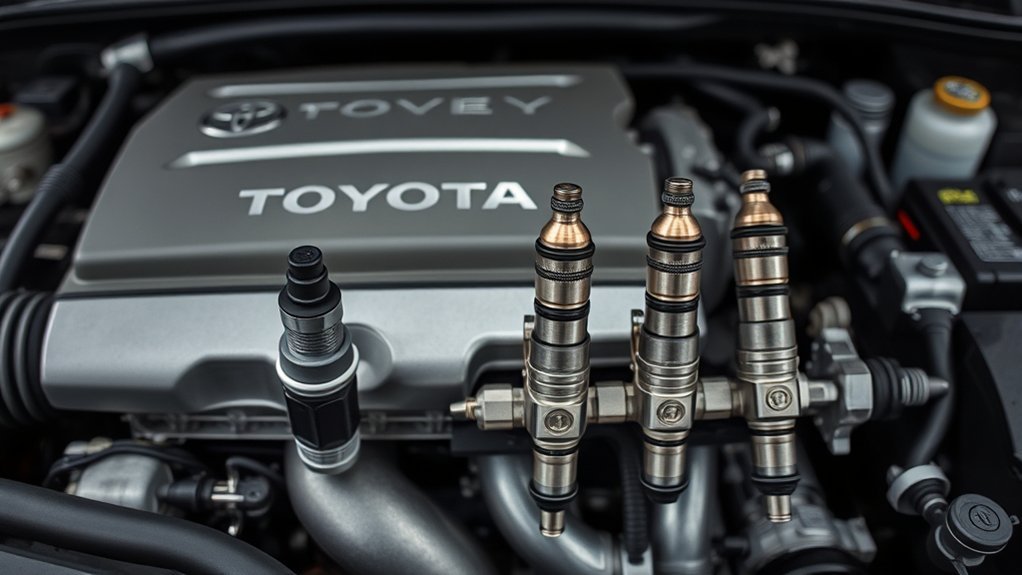
When only one Toyota Camry headlight flickers, start with the affected lamp and its local circuit. The likely component depends on whether the vehicle uses a halogen bulb, HID capsule and ballast, factory LED assembly, or aftermarket LED retrofit.
[Products Worth Considering]

High-Quality Canbus Decoder: Xprite 9005/H10 LED canbus decoder adopts resistor and capacitor error-free design, providing stable output performance. The heavy-duty case enhances heat dissipation and safety protection, ensuring a longer lifespan.

[Original 1:1 size perfectly Fit For Toyota Camry]:This halogen bulb combination is suitable for all Camry models from 2007-2018. It includes :2*9005/HB3 high beams and 2*H8/H9/H11 low beams, totaling 4 bulbs, ensuring perfect coordination and easy installation.Before purchasing, please check the Camry model.
Signs of a Lamp-Side Fault
| Sign | What It May Indicate |
|---|---|
| One side is dimmer | Aging halogen bulb, HID capsule, damaged reflector, weak driver, or voltage loss |
| Color changes before flicker | Aging HID capsule, heat damage, or LED driver problem |
| Lamp cuts out on bumps | Loose bulb, socket, terminal, connector, ground, or broken wire |
| Connector or socket looks brown or melted | High resistance, overheating, incorrect bulb wattage, or poor terminal contact |
| Moisture appears inside the housing | Seal or vent problem that may damage the lamp, ballast, driver, or wiring |
Replacement Process Overview
Check your owner’s manual or a VIN-based parts guide for the correct headlight system and part. Do not assume that two Camrys from the same generation use the same lamp.
For a replaceable halogen bulb, let the lamp cool, handle the new bulb by its base, and avoid touching the glass. Skin oil can create a hot spot and shorten bulb life. Seat the bulb fully and lock the connector before testing it.
Replacing aging halogen bulbs in pairs can help balance color and output when both have similar use, but a pair replacement will not fix a damaged socket, ground, connector, or charging problem.
After installation, test the low beams, high beams, daytime running lamps, and automatic-light function. Confirm that the beam pattern remains correctly aimed before driving at night.
HID Ballast and LED Driver Faults
An HID lamp may flicker because of an aging capsule, failing ballast, igniter fault, poor ground, moisture, or unstable power. Do not touch an operating HID circuit because its starting voltage can be dangerous.
A factory LED system may use a separate driver or a driver integrated into the headlight assembly. If the light source is not serviceable, replacing a basic bulb will not solve the problem. A technician may need to test module power, ground, command signals, stored trouble codes, and the assembly itself.
Maintenance Tips for Longevity
Inspect your Toyota Camry’s headlights during routine service. Look for cracks, haze, condensation, loose connectors, discoloration, heat damage, and uneven output.
Clean cloudy outer lenses because oxidation can make a working lamp look weak. Persistent moisture inside the housing requires repair of the leak or vent problem, not only drying the lens.
Troubleshooting Loose Connections and Bad Wiring
When headlights flicker over bumps or one side cuts in and out, inspect the wiring path with the system switched off. Look for melted connectors, loose terminal fit, bent pins, pulled wires, damaged insulation, corrosion, moisture, or harness sections rubbing against metal.
Do not overlook the battery terminals and main grounds. White, blue, or green buildup can increase resistance. Clean and tighten the connections using the correct battery-service procedure.
Inspect the fuses and relays identified for your exact Camry. Replace a blown fuse only with the same amperage rating. If the replacement fuse opens again, stop replacing it and locate the short circuit or overloaded component.
Check the Headlight Relay
A worn or intermittent headlight relay is a common cause of flicker that’s easy to overlook because it can mimic a battery, alternator, or switch problem. The relay switches power to the low-beam or high-beam circuit, and a fatigued coil or a pitted contact inside it can open and close the circuit rapidly under vibration, heat, or normal current draw — some Camry model years use separate relays for the low-beam and high-beam functions.
Locate the correct headlight relay in the engine-compartment fuse and relay box using your owner’s manual or the label printed on the box cover. With the system switched off, swap the headlight relay with an identical relay from another low-current circuit in the same box, then retest the lights. If the flicker follows the relay to its new position, replace it with the Toyota-specified part rather than a generic substitute. If the flicker stays in the original position, the relay itself is not the cause — continue with the connector, ground, and switch checks below.
A headlight connector may have battery voltage with the lamp disconnected but fail when the lamp is connected. A loaded voltage-drop test is more useful than an unloaded continuity check for finding resistance in a working circuit.
Headlight troubleshooting guidance from AutoZone also identifies bulbs, fuses, relays, corrosion, moisture, wiring, switches, and grounds as major areas to inspect.
Is Your Headlamp Switch Causing the Flicker?
Your headlamp switch or steering-column stalk can contribute to flicker when its contacts, connector, or input signal becomes intermittent. Depending on model year, the switch may control part of the circuit directly or send a request to the body control module.
Consider these checks during your headlamp inspection:
- Note whether the flicker changes when you move the headlight or high-beam control.
- Check whether the parking lamps, dashboard illumination, low beams, and high beams fail together or separately.
- Inspect the switch connector for looseness, corrosion, discoloration, or heat damage.
- Test the appropriate fuses, relays, grounds, and lamp circuits before replacing the switch.
- Use Toyota-compatible scan data to confirm whether the body control module sees the correct switch command.
Do not replace the stalk based only on an intermittent symptom. A weak relay, damaged wire, poor ground, body control module fault, or unstable 12-volt supply can produce similar behavior.
Fixing LED Flickering Issues in Your Camry
If you installed aftermarket LED headlights and the flicker started immediately, treat the retrofit as the first suspect. Confirm that the bulb, driver, connector, cooling system, and beam-source position match the exact Camry housing.
Do not assume every lighting problem needs a CAN bus decoder, load resistor, or anti-flicker harness. Use an adapter or interface only when the bulb or lighting-system manufacturer specifically requires it for that vehicle application. A generic resistor can generate heat and damage nearby wiring or plastic.
For U.S. road use, do not treat a plug-in LED bulb as automatically legal because it fits the socket. In a February 2024 interpretation letter, NHTSA stated that LED replacement light sources are not permitted in replaceable-bulb headlamps under FMVSS No. 108 and noted that lower-beam headlamps must be steady burning. State rules can also apply. Restoring the specified factory light source is the safest default when a retrofit flickers or produces an incorrect beam pattern.
If the retrofit bulb sits loose, places the LED chips in the wrong position, or does not fit under the dust cap, return to the correct factory-type lamp. A poor retrofit can flicker, overheat, create glare, or produce an unsafe beam pattern.
For Toyota-specific module or control problems, use Toyota-compatible scan equipment and the site’s Toyota Camry OBD2 port and scan-tool guide, or ask a qualified technician. A basic code reader may not access body-control, headlight, or hybrid-module data.
Why Do the DRLs Flicker but the High Beams Work?
On some older Camrys, the daytime running light function uses a headlamp circuit at reduced intensity. Toyota’s 2012 Camry owner information, for example, describes daytime running lights operating at reduced intensity, and the same model’s bulb service information identifies a shared high-beam and DRL position. An LED retrofit may work at full high-beam output yet flicker, pulse, or shut off in the reduced-output DRL mode because its driver cannot process that signal correctly.
Do not diagnose this pattern as a weak alternator based on the DRLs alone. First reinstall the specified factory-type bulb. If the DRL becomes steady, the retrofit is incompatible with that operating mode. If the factory bulb also flickers, inspect the DRL control path, connector, ground, relay or module, and model-year wiring diagram.
If your Camry has factory LED headlights, do not assume the system contains a replaceable headlight bulb. Ask a Toyota dealer or qualified shop to test the assembly, driver or module, wiring, grounds, command signal, and stored diagnostic codes.
Note: If an LED headlight appears to flicker only in a phone video but looks steady to your eyes, the effect may come from the camera’s frame rate or rolling shutter. Do not use phone footage alone as proof that the vehicle has an electrical fault.
When to Get Professional Help
Arrange professional diagnosis if both headlights continue to flicker after the 12-volt battery, terminals, grounds, relay, and correct charging system have been checked. A technician can reproduce the fault under load, measure voltage drop, examine the charging waveform, monitor switch inputs, and scan body or hybrid modules.
Stop testing and do not rely on the car for night driving when:
- Either low beam cuts out while driving.
- Both lamps become sharply brighter or dimmer.
- The battery or charging-system warning light remains on.
- A fuse repeatedly blows.
- A connector, socket, relay, or wire becomes hot.
- You smell burning insulation or see smoke.
- The flicker occurs with other electrical failures, warning messages, or loss of vehicle power.
If the lights remain unreliable, arrange daytime transport or towing rather than driving after dark. Stable low beams are essential for seeing the road and making your vehicle visible to others.
Frequently Asked Questions
How Do I Get My Headlights to Stop Flickering?
First determine whether one headlight or both headlights flicker. Test the 12-volt battery, terminals, grounds, fuses, relays, and connectors. On a non-hybrid Camry, test the alternator and belt. On a Camry Hybrid, test the inverter and DC-DC converter through the correct hybrid procedure. Inspect the affected lamp, ballast, or LED driver when only one side flickers.
What Would Cause Both Headlights to Flicker?
Both headlights usually flicker together when a shared part of the system becomes unstable. Likely areas include the 12-volt battery, charging system, battery terminals, main grounds, shared fuse or relay, headlamp-switch input, body control module, or common wiring.
Why Do My Headlights Flicker at Idle or When I Accelerate?
Flicker that changes with engine speed or electrical load can point to a weak battery, loose terminal, excessive circuit resistance, or charging-system fault. On a non-hybrid Camry, the alternator, regulator, belt, or rectifier may be involved. A Camry Hybrid requires inverter and converter diagnosis instead.
Can a Weak Battery Make Headlights Flicker?
Yes. A weak or partly discharged 12-volt battery can contribute to dim or unstable lighting, especially during startup, at idle, or when several accessories operate. However, low voltage alone does not prove battery failure. Recharge and load-test the battery, then inspect the charging system and connections.
Does a Toyota Camry Hybrid Have an Alternator?
A Camry Hybrid does not use the same conventional belt-driven alternator found on a non-hybrid Camry. Its hybrid inverter and DC-DC converter support the 12-volt electrical system when the vehicle is in READY mode. Use hybrid-specific testing instead of a conventional alternator procedure.
Why Does One Headlight Flicker After I Replaced the Bulb?
The new bulb may be incorrect, loose, poorly seated, or incompatible with the housing or electrical system. Also inspect the socket, terminal tension, connector, local ground, HID ballast, LED driver, polarity, and moisture inside the assembly.
Why Do My LED Headlights Flicker Only on My Phone Camera?
A phone camera can show bands or apparent flicker when its frame rate or rolling shutter interacts with LED light modulation. If the lamps look steady to your eyes and operate normally, phone footage alone does not prove a vehicle fault.
Is It Safe to Drive With Flickering Headlights?
Do not rely on the vehicle for night driving if a low beam cuts out, both lamps change brightness sharply, wiring overheats, a fuse repeatedly blows, or you smell burning insulation. Arrange repair before driving after dark because the lights may fail without warning.
Why Do My Camry DRLs Flicker but the High Beams Work?
Some Camrys operate the daytime running light circuit at reduced intensity. An aftermarket LED driver may work at full high-beam output but flicker or shut off in DRL mode. Reinstall the specified factory-type bulb first. If the factory bulb is steady, the retrofit is incompatible. If it also flickers, inspect the DRL control circuit, connector, ground, relay or module, and wiring.
What If the Dashboard Lights Flicker Too?
If the headlights, dashboard, and interior lights flicker together, suspect a shared 12-volt supply or ground problem before replacing headlight parts. Check the battery posts and clamps, main grounds, charging system, power-distribution connections, and voltage under load. On a Camry Hybrid, use READY-mode and hybrid-specific diagnosis rather than a conventional alternator test.
Safety Disclaimer: This article is for informational purposes only and does not replace advice from a qualified mechanic. Vehicle electrical and hybrid systems can create shock, burn, fire, and equipment-damage risks. Do not work on orange high-voltage cables, hybrid inverter components, damaged wiring, or an overheating headlight circuit.
Conclusion
If one Toyota Camry headlight flickers, inspect that lamp’s bulb, socket, ballast, LED driver, connector, and local wiring. If both headlights flicker together, test the shared 12-volt supply, grounds, relay, controls, and the correct charging system for your powertrain.
A non-hybrid Camry may need alternator, belt, regulator, or ripple testing. A Camry Hybrid needs 12-volt battery and inverter or DC-DC converter diagnosis instead. Start by recording the exact flicker pattern, then test the simplest shared or local causes — including the headlight relay — before replacing parts. Stop night driving when the beam becomes unreliable, a fuse repeatedly blows, or any connector or wire overheats.
References
- Toyota Camry Goes Exclusively Hybrid Plus a New Look and More Technology — Toyota USA Newsroom, April 18, 2024
- Toyota Camry Brings Bold New Nightshade Edition to Lineup in 2026 — Toyota USA Newsroom, May 1, 2025
- Ready for Launch: The All-New 2018 Toyota Camry — Toyota USA Newsroom, June 21, 2017
- 2025 Toyota Camry Manuals and Warranties — Toyota Owners
- 2012 Toyota Camry Owner’s Manual: Headlight and DRL Sections — Toyota manual reproduced by CarManualsOnline
- Warning Signs Your Car Battery Is About to Die and How to Get Help — AAA, updated March 2026
- Key Indicators of a Healthy Battery Test — Midtronics, April 22, 2025
- FMVSS No. 108 Interpretation on LED Headlight Replacement Sources — NHTSA, February 13, 2024
- Headlights Not Working? Check These Solutions — AutoZone, accessed July 31, 2026

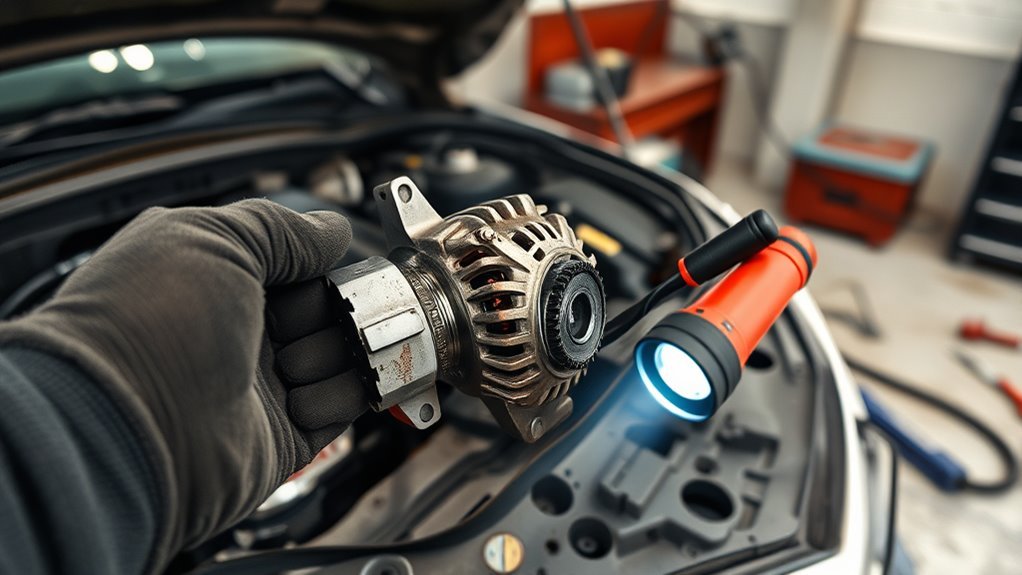

[…] and bulb code first. If both headlights fail, or the problem changes with engine speed, use the Toyota Camry headlight flickering guide and Camry charging-system warning guide to separate a bulb problem from a fuse, relay, ground, […]