How to Lower the Spare Tire on a Toyota Tundra
What’s in This Article
- What You’ll Need
- Find the Tundra Toolkit and Handle
- Locate the Spare Tire Access Slot
- Assemble and Attach the Lowering Bar
- Lower the Spare Tire Step by Step
- Check Spare Tire Pressure and Correct PSI
- Raise and Secure the Spare Tire
- Troubleshooting Common Problems
- Inspect the Undercarriage and Mounting Hardware
- Prevent Theft and Stow Tools Safely
- Practice Routine
- Frequently Asked Questions
A flat tire can turn into a long roadside delay when you can’t reach your spare. The Toyota Tundra keeps the spare under the bed with a cable-and-winch carrier that uses the factory toolkit. This guide shows you how to find the access slot, lower the tire safely, check pressure, and secure the spare again.
Quick Answer
Assemble the factory toolkit, then insert the lowering bar straight into the spare tire access slot near the rear bumper. Turn the tool in the lowering direction shown in your owner’s manual, which many Tundra instructions describe as counterclockwise, until the tire reaches the ground. To raise the tire, turn the tool the opposite direction until the tire seats firmly in the carrier.
Key Takeaways
- The spare tire access slot sits near the rear bumper, often above the license plate or toward the driver’s side.
- Always insert the lowering bar straight into the slot to avoid damage to the actuator or cable.
- Turn slowly with steady pressure and stop if the tool binds, slips, or feels misaligned.
- Check your spare’s pressure at least once a month and before long trips.
- Practice this procedure at home so you can handle it faster during a roadside emergency.
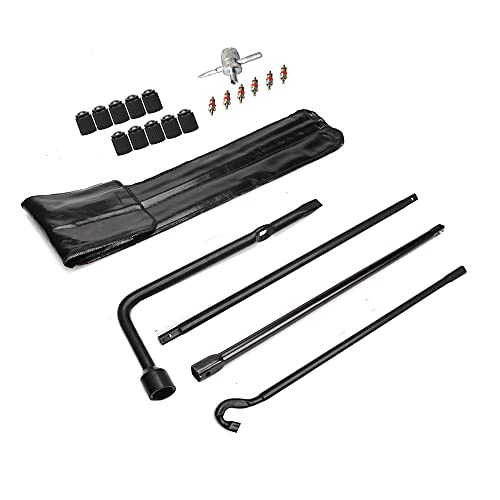
What You’ll Need
Gather these items before you start. The Toyota factory toolkit handles the lowering process, but a tire gauge and flashlight help you work safely.
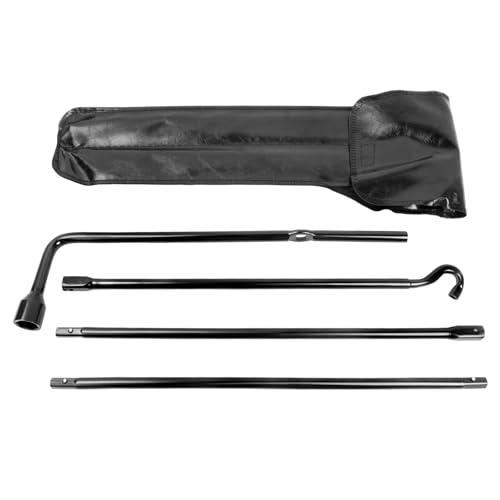
- Toyota Tundra factory toolkit, including lowering bar sections, crank handle, and adapters
- Tire pressure gauge, digital or analog, to check the spare
- Work gloves, to protect your hands from sharp edges and grime
- Flashlight or headlamp, for night work or poor visibility
- Wheel chocks or wedges, to help keep the truck stable
- Wire brush and penetrating lubricant, optional, for a rusty or stiff lowering mechanism
Estimated time: Plan for 10 to 15 minutes with practice. Allow 20 to 30 minutes on your first attempt.
Warning: Park on firm, level ground, set the parking brake, and keep your hands clear of the cable and carrier.
[Products Worth Considering]

These TPE door anti‑kick pads provide durable, water‑resistant protection for Toyota Tundra doors from 2022 to 2026. They fit precisely, are easy to install with double‑sided tape, and can be cleaned simply with water. The pads guard against scuffs and impacts while preserving the door's appearance and smooth operation.

The Pigenius windshield sunshade protects your Tundra's interior from heat and UV damage while keeping the cabin cool. Its accordion design folds easily for storage and quick setup, and the triple‑laminate construction provides durable, reflective protection. Ideal for long trips and daily commutes, it guards dashboards, seats, and steering wheels from sun‑related wear.

Upgrade your Toyota's front bumper with this premium license plate bracket that fits US and Canada plates perfectly. Made from heavy‑duty, rust‑proof plastic, it protects your paint and stays street legal. The kit includes six unique screws and a wrench for quick, tool‑free installation, ensuring a secure mount without scratches.
Find the Tundra Toolkit and Handle Inside the Truck
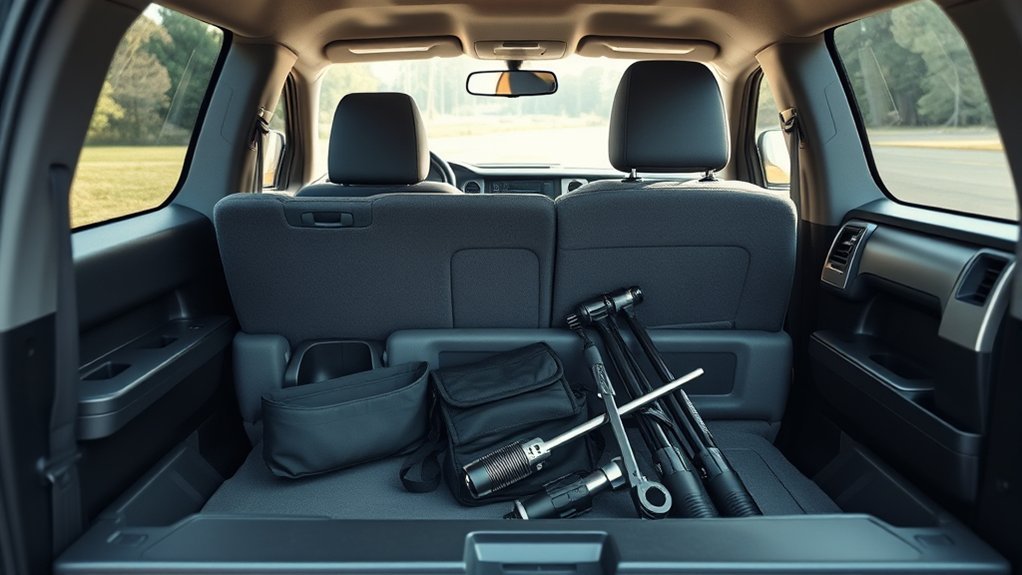
Check under the rear seat or in the rear storage compartment for the Tundra toolkit. Toyota commonly keeps the bar sections, crank handle, and adapters in a pouch or fabric roll. Confirm that every piece sits in the kit before you move to the rear of the truck.
Keep all components together in their pouch or a labeled container. Open the kit, identify each piece, and snap the sections together once to learn the sequence. A two-minute dry run can save a lot of stress during an emergency.
Add a toolkit check to your regular vehicle inspection. Remember the storage location so you can retrieve the kit without searching.
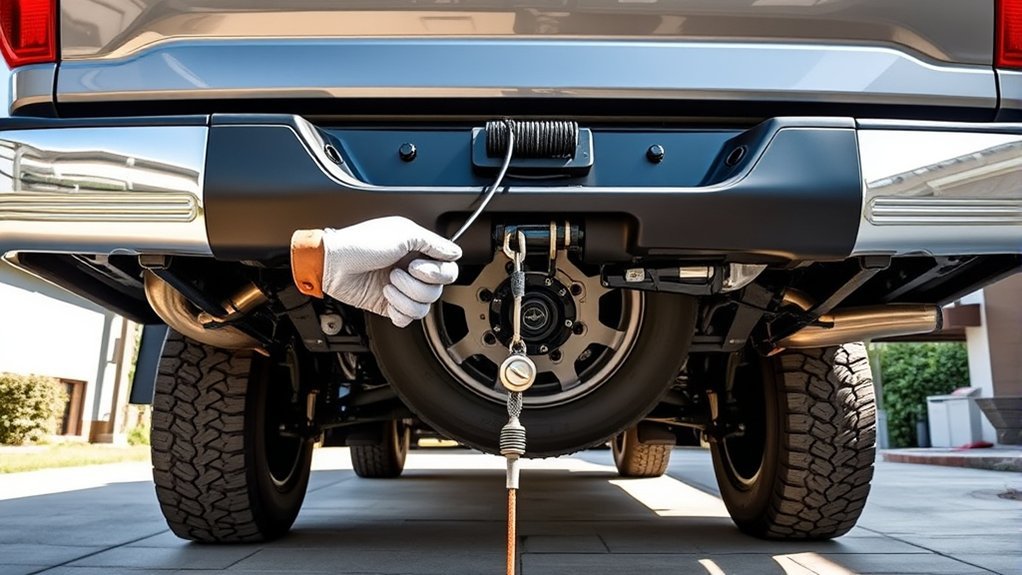
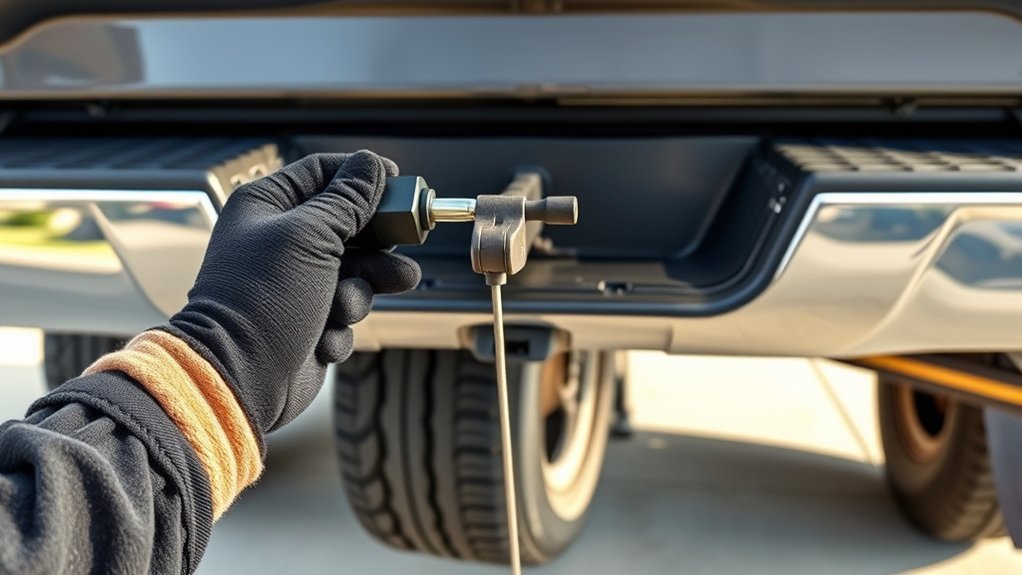
Locate the Spare Tire Access Slot Under the Rear Bumper
Move behind the Tundra and look for the spare tire lowering access slot near the rear bumper. Many Tundra instructions place the slot above the license plate or near the driver’s side of the rear bumper, but the exact location can vary by model year. Clear mud, road salt, or debris from the slot before inserting the tool.
Slide the lowering tool straight into the slot. Don’t angle it. Confirm that the tool reaches the mechanism before you turn it, because proper alignment protects the actuator and helps the tire lower smoothly.
You may feel slight resistance on the first turn. That can happen when the cable begins to move. If the tool slips, binds, or refuses to turn, stop and check the alignment against your owner’s manual.
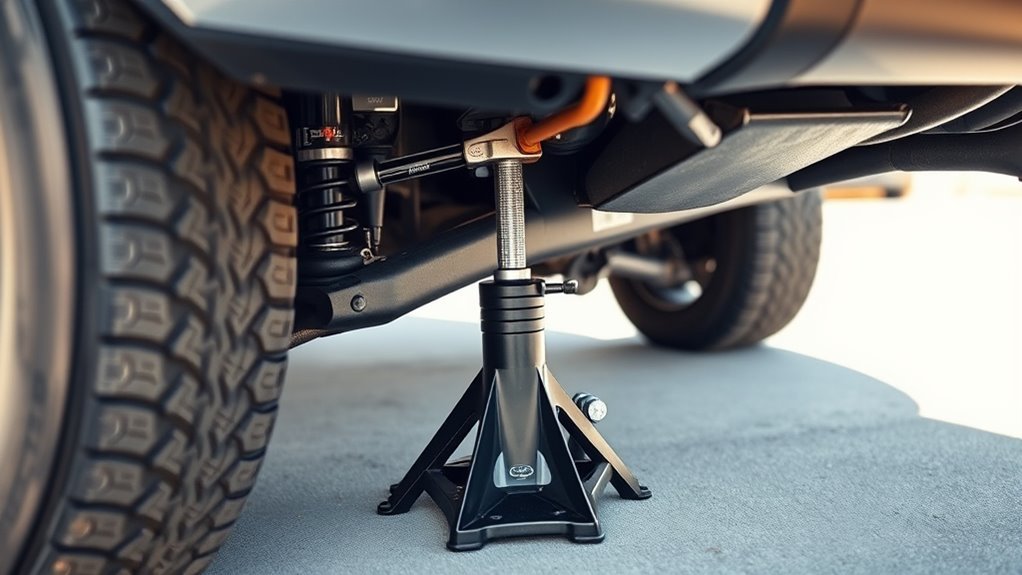
Assemble and Attach the Lowering Bar to the Silver Mechanism
Align the lowering bar with the access slot and slide it straight in until it seats in the silver mechanism. Push firmly until you feel a secure fit. This connection lets the bar turn the spare tire winch without slipping.
Keep a firm grip and check the alignment before turning. If the bar meets hard resistance, remove it, realign it, and insert it again. Never force the tool, because excess force can damage the actuator or cable drum.
Once the bar seats, test the handle with a light turn. This quick check helps you confirm that the mechanism engages before the tire starts to move.
| Action | Checkpoint | Result |
|---|---|---|
| Align bar | Access slot near rear bumper | Bar stays centered |
| Insert straight | Silver mechanism | Tool seats securely |
| Test rotate | Light movement | Ready to lower |
| Realign if stuck | Remove and reinsert | Safer attachment |
[Products Worth Considering]

Upgrade your vehicle's cargo capacity with these heavy‑duty aluminum roof crossbars that lock securely and reduce wind noise. The aerodynamic design and adjustable width provide a quiet, stable platform for luggage up to 260 lb, while the easy‑install kit and labeled front and rear bars simplify setup. Ideal for Toyota Grand Highlander and Lexus TX models from 2024‑2026 with flush side rails.

Upgrade your RAV4 roof rack with these heavy‑duty aluminum crossbars featuring an anti‑theft lock and tie‑down loops for secure cargo transport. The matte‑powder‑coated bars resist corrosion and reduce wind noise, while easy installation fits existing rails without drilling. Ideal for bike mounts, roof boxes, kayaks and more.
Durable strong rustproof automotive grade steel, tubing instead of soil designed
How to Lower the Toyota Tundra Spare Tire (Step by Step)

Use slow, steady movement from start to finish. A controlled turn protects the cable, keeps the tire from dropping suddenly, and helps you spot problems early.
- Park safely on firm, level ground and set the parking brake.
- Assemble the lowering tool sections and crank handle.
- Insert the tool straight into the rear access slot until it seats.
- Turn the tool in the lowering direction shown in your owner’s manual.
- Lower the spare until it rests fully on the ground.
- Remove the retaining bracket from the wheel center and slide the tire out.
[Products Worth Considering]

Premium OEM Upgraded Quality Spare Tire Tool: Stable strong rustproof automotive grade steel,tubing instead of soil designed made it more light,not only stong but also convenient.

Wrench Size:The Socket Size is 21mm,pls kindly confirm if the size is the same before order.
Premium OEM Upgraded Quality Spare tire tool: Stable strong rustproof automotive grade steel,tubing instead of soil designed made it more light,not only stong but also convenient.
Locate the Lowering Slot
Find the small rectangular slot near the rear bumper. This access point connects the tool to the silver release mechanism under the truck. Scan the area by sight and touch, because dirt and shadow can hide the opening.
- Check the area above the license plate and near the driver’s side of the rear bumper.
- Look for the rectangular opening that lines up with the spare carrier.
- Clear mud, rust flakes, and road debris before you insert the tool.
- Remember the slot location so you can find it quickly next time.
Connect the Lowering Tool
Place the lowering tool into the rectangular slot and engage it with the silver actuator beneath the truck. You’ll feel the tool seat when it aligns correctly. Confirm a firm connection before you start turning.
Keep your stance stable and your hands steady. Apply controlled, steady pressure and avoid jerking the tool. Stop and realign the bar if the handle slips or grinds.
Rotate the Tool Slowly
With the tool seated and the silver actuator engaged, turn the handle slowly in the lowering direction shown in your owner’s manual. Many Tundra instructions describe this as a counterclockwise turn. Keep steady, even pressure until the spare reaches the ground.
- Confirm that you inserted the tool into the correct access point.
- Apply even pressure and avoid sudden motions.
- Turn until the cable releases enough for the tire to rest on the ground.
- Stop if you feel sharp resistance, then inspect and reposition the tool.
A slow rotation helps prevent cable fraying and gives you better control during the descent.
Check the Spare tire pressure and Correct PSI to Aim For
After lowering the spare, use a tire gauge to read its pressure. Your exact pressure target depends on the model year, tire size, and trim. The National Highway Traffic Safety Administration (NHTSA) tells drivers to use the Tire and Loading Information Label on the driver’s side door edge or the owner’s manual for the correct cold tire pressure.
If the reading sits above the target, bleed a small amount of air. If it sits below the target, add air in short bursts and recheck. Proper pressure helps the truck handle more predictably when you put the spare into service.
Recommended Tire PSI
Inflate the spare to the pressure shown on your door jamb label or in your owner’s manual. Do not use the number molded on the tire sidewall as your target. That number usually shows the tire’s maximum pressure, not Toyota’s recommended cold pressure for your truck.
- Inspect the spare for cracks, bulges, nails, or sidewall damage before measuring pressure.
- Check pressure when the tire is cold for the most accurate reading.
- Bleed air slowly if the reading sits above the target.
- Add air in small bursts if the reading sits below the target.
- Check the spare monthly and before long trips.
Note: NHTSA recommends checking tire pressure when tires have not moved for at least three hours.
How to Read a tire pressure gauge
Remove the valve cap, press the gauge squarely onto the valve stem, and read the stem or digital display. Both analog and digital gauges can give reliable readings when you seat them firmly. Compare your number to the target on your door sticker and adjust the pressure as needed.
| Step | Tool | Action |
|---|---|---|
| 1 | Gauge | Press squarely onto the valve stem and hold steady |
| 2 | Valve | Read the display and compare it to your door sticker target |
| 3 | Air source | Bleed or add air until pressure matches the target |
| 4 | Log | Note the reading and date for your maintenance record |
How Temperature Affects Spare Tire Pressure
Tire pressure changes as outside temperature changes. AAA and major tire makers commonly use a rule of thumb: a 10°F drop can lower tire pressure by about 1 psi. A spare that sits through cold weather can lose enough air to affect handling when you need it.
- Use a calibrated tire gauge for more accurate readings.
- Compare your measured pressure to the target on your door sticker.
- Release air slowly if the reading sits too high.
- Add air in small increments if the reading sits too low.
- Recheck pressure after adjustment and before storing the spare.
How to Raise and Secure the Spare Tire
Warning: Keep fingers, loose clothing, and tools clear of the cable and tire carrier while you raise the spare.
Turn the crank in the raising direction shown in your owner’s manual to retract the spare into its carrier. Use steady pressure as the cable tightens. Continue turning until the wheel pulls fully into the holder.
Pause at intervals and confirm that the tire tracks squarely into its mount. Keep the truck on level ground with the parking brake set while you work.
Before you stow the tool, wipe the crank clean, inspect it for bends, and confirm that the winch socket fits snugly. Once the tire reaches the carrier, give it a firm upward shove and visually inspect the undercarriage to confirm secure seating. Stow the toolkit and close any access panels.
Troubleshooting Common Problems When Lowering or Raising
If the tool won’t engage, confirm that you’re using the correct insertion point from your owner’s manual and that the bar seats fully in the actuator. If lowering feels stiff, check for debris or obstructions around the winch and clear them before you continue. If the tire won’t retract, verify that the mechanism moves freely and that the tire lines up with the carrier.
Tool Not Engaging
Start by confirming that the tool sits fully in the designated slot under the truck. Misalignment, rust, or a damaged tool can prevent proper engagement.
- Verify the correct insertion point and adjust the bar until it seats fully.
- Clear debris and rust around the silver engagement piece with a wire brush.
- Use penetrating spray sparingly after cleaning if the mechanism feels stiff.
- Check the toolkit for missing or damaged components.
- Practice the full lowering procedure at home before an emergency.
Regular tool inspections and spare tire checks help keep the system ready when you need it.
Stiff Lowering Mechanism
Rust, dirt, or misalignment can make the spare hoist feel stiff. Always align the tool squarely before inserting it. Misalignment increases wear and can block engagement.
If the tool meets resistance during insertion, withdraw it, clean the slot with a wire brush, and try again. Apply light lubricant to moving parts after cleaning. Turn the tool with steady, consistent pressure and stop if the resistance feels sharp or uneven.
If the tire still won’t lower after cleaning and proper alignment, stop and get a professional inspection. Forcing the mechanism can damage the cable, actuator, or carrier.
Tire Won’t Retract
If the spare won’t retract, confirm that the lowering tool engages the actuator under the bumper. Clear visible debris around the cable drum before trying again.
- Verify tool engagement and realign the bar if needed.
- Inspect the cable for kinks, fraying, or visible damage.
- Remove rust, dirt, or lodged debris from around the mechanism.
- Apply light lubricant to moving parts after cleaning.
- Lower and raise the spare during routine checks to catch problems early.
Routine spare tire maintenance gives you the best chance of avoiding a retraction failure.
Inspect the Undercarriage and Mounting Hardware for Damage
Pro tip: Apply a light coat of rust-inhibiting lubricant to the lowering mechanism once a year if you drive in road salt, mud, or frequent rain.
Inspect the Undercarriage for rust, bends, or damage that could weaken the spare tire mounting hardware. Scan mounting points, brackets, and surrounding sheet metal for corrosion, cracks, or deformation. Use a mirror and flashlight to see hard-to-reach areas.
Test connections by hand and feel for looseness, play, or missing fasteners. If the lowering-tool connection plate or retaining bolt looks bent or heavily corroded, don’t lower the tire until you clear or replace the part. Note any impact marks around the spare well that suggest past retrieval problems.
Tighten fasteners to the correct specification, replace corroded hardware, and clear debris from the lowering mechanism. Regular inspections reduce the chance of failure during a roadside repair.
How to Prevent Spare Tire Theft and Stow Tools Safely
A visible spare and loose tools can invite theft. Secure the tire and stow the jack, wrench, and lowering tool out of sight after every use. Use these steps to protect your equipment without slowing down emergency access.
- Use a keyed or combination lock on the spare carrier if your setup supports one.
- Store the jack, lug wrench, and lowering tool in the Tundra’s designated compartment or a locked toolbox.
- Inspect the lock and mounting hardware after each use.
- Keep the tire and tools off the tailgate and out of view.
- Memorize the kit’s location so you can retrieve the tools quickly.
Secure storage keeps your gear in working condition and ready to use.
Practice Routine: How to Rehearse Lowering the Spare
After you secure the spare and stow the tools, run through the lowering procedure in your driveway. Assemble the toolkit, locate the slot on the truck’s underside, and insert the tool until it connects to the actuator. Turn the handle in the lowering direction shown in your owner’s manual and note how the mechanism feels.
Pause, inspect the engagement, and continue until the tire drops to a safe working height. Wear gloves, stand clear of pinch points, and keep bystanders away. Once lowered, check the tire’s position and security before you reverse the action.
Raise and stow the wheel, then confirm that it sits firmly in the carrier. Rehearse this full sequence a few times a year to keep the steps familiar and reduce stress on the road.
Frequently Asked Questions
Can I Lower the Spare Without Parking on Level Ground?
You shouldn’t lower the spare on uneven ground unless you have no safer option. The winch can bind, and the tire can drop unevenly. Park on level ground, set the parking brake, and chock the wheels before you lower the tire.
Will Lowering the Spare Activate Any dashboard warnings?
No. Lowering the spare tire normally won’t trigger dashboard warnings or indicator lights. The process should not affect sensors unless the tool or tire snags wiring, so work slowly and watch the area around the carrier.
Is a Jack Required to Lower the Spare Tire?
No. You use the cable-and-winch mechanism under the bed to lower the spare with the factory toolkit. You still need the jack when you lift the truck to replace a flat tire.
Can I Use a Cordless Drill to Turn the Lowering Tool?
Use hand tools unless your setup safely accepts a drill adapter. If you use a drill, set it to low torque and stop as soon as the tire moves or seats. Too much torque can damage the cable drum or strip the actuator.
How Often Should I Inspect the Spare’s Mounting Hardware?
Inspect the hardware monthly and before long trips. Check the bolts, cable, winch, and surrounding metal for rust and wear. Tighten loose fasteners and replace corroded parts promptly so the system works when you need it.
Conclusion
Knowing how to lower your Tundra’s spare can turn a flat tire into a manageable roadside task. Practice the process once at home, confirm that your toolkit has every piece, and check your spare’s pressure this week. A short practice session now can save you time, stress, and a tow call later.
References
- Tire Safety Ratings and Awareness — National Highway Traffic Safety Administration (NHTSA), 2026
- 2026 Tundra Owner’s Manuals and Warranties — Toyota Motor Sales, U.S.A., Inc., 2026
- How to Change a Tire on the Toyota Tundra — Vic Vaughan Toyota of Boerne, 2025
- Understanding Tire Pressure and Temperature Change — AAA, 2025