
By Ryker Calloway · Reviewed for accuracy by the Auto Review Nest Editorial Team · Last updated: July 31, 2026
To set up a Toyota Tundra weight distribution hitch, load the truck and trailer exactly as they will travel, measure the actual loaded trailer and tongue weights, and confirm every truck, receiver, tire, hitch, ball, and trailer rating. Record the Tundra’s front wheel-well height as Line A before coupling, Line B coupled without weight distribution, and Line C with the spring bars engaged. Adjust only the variables allowed by the exact hitch manual, but use the front-axle-load or fender-height target in the owner’s manual for your exact Tundra as the vehicle requirement. If the Toyota and hitch instructions cannot be satisfied together, stop and contact both manufacturers or a qualified towing installer.
Quick Answer
Start with the owner’s manual for your exact Tundra and the installation manual supplied with your hitch. Use loaded weights, not dry brochure numbers. Record Line A uncoupled, Line B coupled without weight distribution, and Line C coupled with the spring bars engaged. The Tundra owner’s manual controls the required front-axle or fender-height result; the hitch manual controls how you reach it. For the 2024 U.S. Tundra manual cited below, Toyota directs the owner to return the front axle or front fender to the pre-connection value and not go below it. If your Tundra has factory load-leveling rear suspension, follow the exact suspension sequence and verify axle loads because a level-looking truck does not prove that the front axle has been restored.
| Setup Check | Pass Standard | Controlling Source |
|---|---|---|
| Loaded tongue weight | Within the required range and every component rating | Tundra, trailer, receiver, and hitch instructions |
| Line C front height or axle load | Meets the exact Tundra requirement without over-restoring the front | Tundra owner’s manual |
| Spring-bar, chain, bracket, and head settings | Remain inside the approved adjustment range | Exact hitch manual |
| Trailer attitude | Level or at the attitude specified by the trailer maker | Trailer and hitch manuals |
| Axle and total weights | At or below every GAWR, GVWR, GCWR, tire, receiver, and trailer limit | Labels, manuals, and scale tickets |
What’s in This Article
- How to Set Up a Tundra Weight Distribution Hitch in 6 Steps
- Verify Trailer and Tundra Weight Limits
- When a Tundra Requires a WDH
- Tools and Parts You’ll Need for a WDH Install
- Before You Begin: Safety and Setup Rules
- Tundra Load-Leveling Suspension and Receiver Notes
- Measure Trailer and Truck Heights
- Calculate Front-Height Restoration
- Install the WDH Head
- Mount Spring Bars and Set Tension
- Fine-Tune Tongue Weight and Front Height
- Use a Public Scale to Verify Axle Loads
- Road-Test Checklist
- Common Tundra Towing Problems
- Owner Tips and Maintenance Checks
- Frequently Asked Questions
Plan for: 60 to 90 minutes for the first setup, plus separate time for scale passes, a low-speed road test, and a hardware reinspection.
How to Set Up a Toyota Tundra Weight Distribution Hitch in 6 Steps
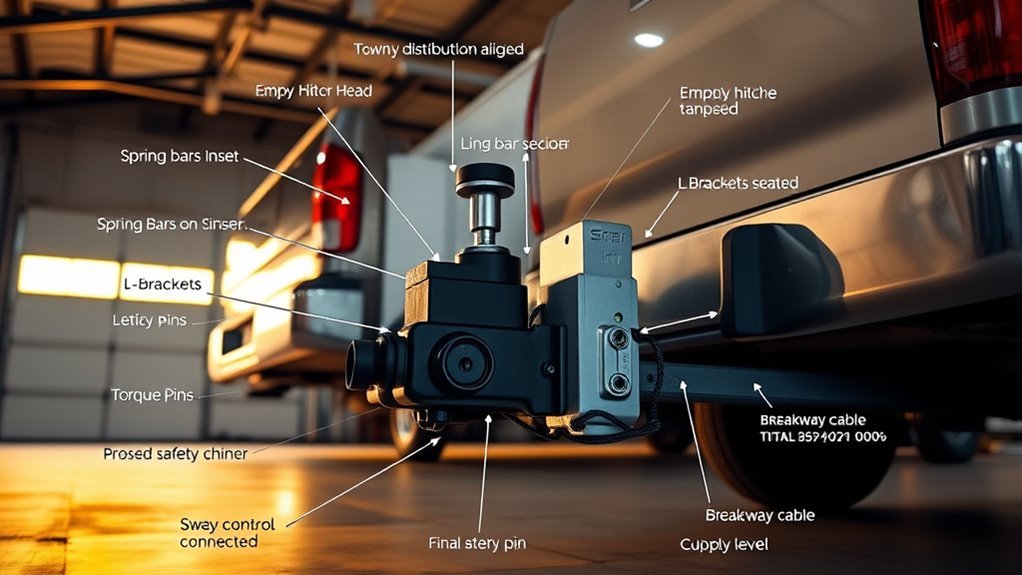
Complete the first setup on firm, level ground with the Tundra and trailer loaded as they will travel. Keep the manual for your exact hitch beside you because ball-height, head-angle, bracket, chain, lubrication, and torque procedures vary by design.
- Confirm every rating: Check loaded trailer weight, loaded tongue weight, GVWR, GAWR, GCWR, and payload, plus the receiver, ball, hitch, spring-bar, tire, and trailer ratings.
- Measure the uncoupled baseline: Load the Tundra for travel and measure from the ground to the front wheel-well lip directly above the axle. Record this as Line A.
- Couple without engaging the bars: Lower the coupler onto the ball, retract the tongue jack until the tongue load rests on the truck, and record the same front measurement as Line B.
- Install and engage the spring bars: Raise the coupled truck and trailer with the tongue jack as the hitch manual directs. Engage the bars, chains, or brackets equally on both sides.
- Measure the adjusted height: Retract the jack fully and record the front height as Line C. Adjust one approved hitch variable at a time until Line C meets the exact Tundra requirement without exceeding the hitch’s adjustment limits.
- Verify and road-test: Check trailer attitude, complete the three scale passes when possible, inspect every connection, perform a conservative test tow, and reinspect the hardware.
Repeat the measurements when you change trailers, passengers, bed cargo, water level, batteries, rear-mounted accessories, tires, suspension settings, ball height, or hitch hardware.
Verify Trailer and Tundra Weight Limits Before Setup
Start with the exact truck, not the largest number advertised for the model line. Toyota lists a maximum towing capacity of up to 12,000 pounds for a properly equipped U.S.-spec 2026 Tundra. Your truck’s real limit may be lower because cab, bed, drivetrain, powertrain, trim, equipment, passengers, cargo, and accessories affect the available capacity.
Use the Tundra towing capacity guide for model-specific rating context, then verify the final numbers in your owner’s manual and on the truck. The Tundra door labels provide GVWR, front and rear GAWR, tire information, and occupant-and-cargo information, but they may not show the complete tow rating by themselves.
[Products Worth Considering]

4 Complete Clamp Lock Markers: includes 4 trailer hitch alignment poles with yellow guide balls and 4 adjustable steel clamps, providing visual markers for trailer hookup, reversing and parking while keeping multiple trailer setups ready for use
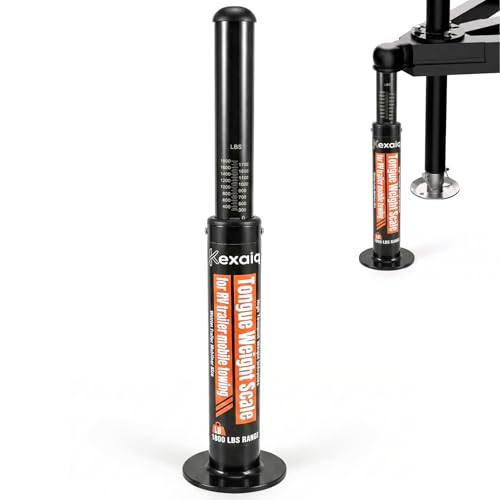
【Trailer Tongue Weight Scale 1800 LBS】Our Tongue Weight Scale has a measurement range of 300 to 1800 LBS, providing you with precise tongue weight readings to maintain a safe 10-15% ratio, eliminate dangerous trailer sway and suspension failures, and add or subtract protection for every trip you take
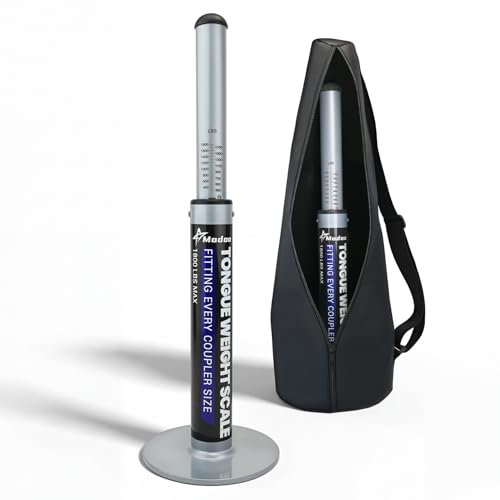
【Upgraded Large Base Trailer Tongue Weight Scale】Our tongue weight scale for RV features an upgraded 6.2-inch large base for extra stability. It effectively prevents the tongue weight scale from tipping, wobbling, or sinking into mud during use, ensuring a safer and more reliable experience
Which Tongue-Weight Range Should You Use?
Do not apply one percentage to every Tundra and trailer. The 2024 U.S. Tundra manual cited below specifies 9% to 11% of loaded trailer weight for conventional towing. Broader towing guides often use 10% to 15%, but that wider range is not a substitute for Toyota’s model-year-specific instruction. Check the manual for your exact Tundra, then use a loaded setup that also satisfies the trailer, receiver, ball, hitch, axle, tire, and payload limits.
For example, under a 9% to 11% requirement, a 6,000-pound loaded trailer calculates to 540 to 660 pounds of tongue weight. A general 10% to 15% range would calculate to 600 to 900 pounds. Use the first range only when it is the requirement for the exact Tundra and trailer; the calculation never overrides a lower payload, rear GAWR, receiver, ball, hitch, tire, or trailer limit.
| Source or Limit | What It Controls | Action |
|---|---|---|
| Tundra owner’s manual | Vehicle towing requirements and limits | Use the manual for the exact year and powertrain |
| Trailer manual and certification label | Trailer loading, GVWR, axle limits, and tongue requirements | Measure the trailer after it is loaded |
| Receiver and ball labels | Allowed trailer and tongue loads | Use the lower applicable rating |
| WDH manual | Spring-bar range, permitted adjustments, setup measurements, and torque | Do not mix procedures from another hitch brand |
Use a tongue-weight scale or certified public scale when the numbers are close. Dry trailer weight and brochure tongue weight normally exclude some combination of water, propane, batteries, dealer equipment, food, tools, and personal cargo.
Warning: Never tow above the lowest rated part of the combination. A weight distribution hitch may be required to use a receiver’s separately marked weight-distribution rating, but it does not raise any Toyota, axle, tire, trailer, ball, or hitch limit.
When Does a Tundra Require a Weight Distribution Hitch?
The 2024 U.S. Tundra manual cited below requires a weight-distributing hitch with sufficient capacity when gross trailer weight is over 5,000 pounds. Requirements can change by model year, market, receiver, and equipment, so confirm the threshold in the owner’s manual for the exact truck rather than treating 5,000 pounds as a universal rule.
A WDH may also be needed below a published threshold when the receiver’s weight-carrying limit is lower than the loaded tongue weight, when the trailer or hitch maker requires it, or when the Tundra cannot meet Toyota’s front-axle or fender-height target without weight distribution.
Tools and Parts You’ll Need for a WDH Install
Gather the tools before you begin so you can measure, adjust, and torque the hitch without shortcuts. Keep the manual supplied with the hitch beside you because torque requirements and adjustment methods change by brand and model.
- Tape measure, notepad, marker, calculator, and a small level.
- Socket set, ratchet, open-end wrenches, and breaker bar if the hitch procedure requires them.
- Calibrated torque wrench that covers every torque value listed in the hitch manual.
- Wheel chocks, gloves, safety glasses, and sturdy blocks for the trailer jack.
- The complete hitch assembly, including the shank, head, correctly sized ball, spring bars, brackets, pins, clips, chains, and sway-control parts.
- Tongue-weight scale or access to a certified public vehicle scale.
- Grease or lubricant only for the points where the hitch manufacturer permits it.
A chain-style hitch, Equal-i-zer-style hitch, round-bar hitch, trunnion-bar hitch, and hitch with separate friction sway control may use different ball-height, washer, bracket, backing, lubrication, and tension procedures.
[Products Worth Considering]
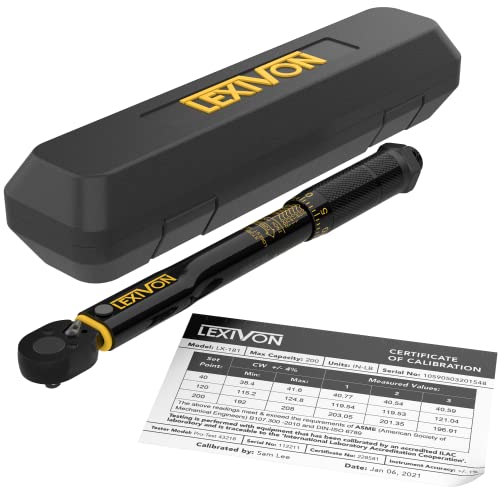
PRECISION & RELIABILITY - Manufactured in Taiwan and pre-calibrated to an accuracy of +/- 4%, ensuring dependable results. Includes a calibration certificate with a traceable serial number, so you can trust in the precision of every use.

[APPLICATION]: A beam style torque wrench is a must-have tool for automobile mechanics because it allows the user to fasten nuts and bolts to an exact tightness measured by torque, which is recommended by car manufacturers.

This 60 pound torque wrench measures torque when turned in a clockwise direction
Choose the Correct Spring-Bar Rating
Size the hitch with loaded measurements, not the empty trailer’s listed tongue weight. Use the hitch maker’s sizing method. Many systems consider the trailer’s loaded tongue weight plus cargo carried behind the Tundra’s rear axle.
Do not automatically choose the highest-rated spring bars. Bars that are too light may not provide the required adjustment range. Bars that are much stiffer than the real load may create a harsh setup that is difficult to tune correctly.
Before You Begin: Safety and Setup Rules
Park the Tundra and trailer in a straight line on firm, level ground. Chock the trailer wheels, set the parking brake, and keep bystanders away from the hitch. Spring bars and snap-up brackets can store substantial force.
Load the truck and trailer first. Include the passengers, bed cargo, water, propane, batteries, tools, coolers, bikes, generators, food, and other equipment you expect to carry. Secure every item so it cannot shift while you measure or tow.
Set the Tundra and trailer tires to the cold pressures specified by their respective placards or manuals. Do not use the maximum pressure molded on a tire sidewall as the automatic vehicle target.
Inspect the receiver, ball, coupler, trailer frame, spring bars, brackets, safety chains, breakaway cable, wiring, tires, and trailer brakes. Stop if you find damaged, bent, cracked, loose, or heavily worn parts.
Adjustment rule: Change one variable at a time. Record the change, engage the hitch completely, retract the jack, and repeat the same measurement before making another adjustment.
Compatibility stop: Confirm manufacturer approval before installing a WDH on a surge-brake coupler, pole tongue, aluminum trailer frame, V-nose trailer, frame with tanks or batteries blocking the brackets, or a Tundra with a lift, receiver extension, or non-stock suspension. These setups may require different hardware, bracket positions, or may prohibit a particular hitch design.
Tundra Load-Leveling Suspension and Receiver Notes
Some Tundra configurations have factory load-leveling rear suspension. That system can change the truck’s rear ride height after the trailer is connected. A truck that looks level may still have insufficient front-axle load restoration, excessive rear-axle weight, or an under-adjusted weight distribution hitch.
Follow the setup sequence in the owner’s manual for your exact Tundra and the instructions for your hitch. Some hitch manufacturers direct users to place the suspension at normal ride height, temporarily prevent automatic leveling from changing the initial measurements, establish weight distribution, allow the leveling system to operate, and then recheck the setup. Do not disable, alter, or override a Toyota suspension system unless the Toyota instructions for the exact truck permit that step.
If your Tundra has aftermarket helper springs or manually adjusted airbags, set their baseline pressure according to the suspension maker’s instructions before taking measurements. Do not add pressure only to hide visible squat. Helper springs support suspension height but do not increase payload or restore front-axle load in the same way as a WDH. After any automatic leveling cycle or air-pressure change, repeat Line C and use axle-scale readings when ride height no longer reliably represents front-axle load.
Read the receiver label closely. It may show separate limits for conventional weight-carrying use and weight-distribution use. The applicable receiver rating still works together with the truck, ball, hitch, trailer, axle, tire, and payload limits. It does not replace them.
Measure Trailer and Truck Heights and Record the Baseline
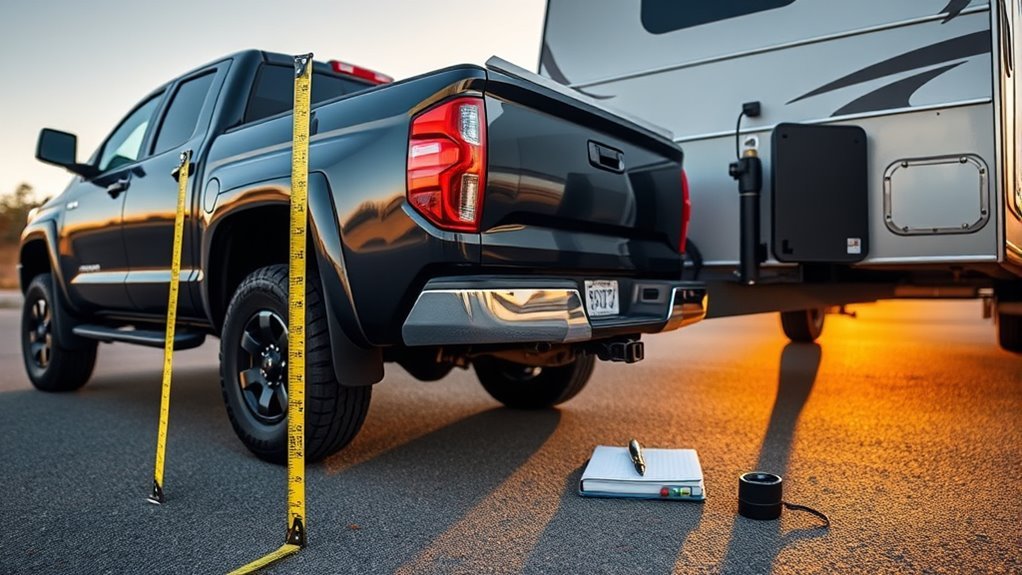
Measure from the ground to the Tundra’s front wheel-well lip directly above the front axle. Use the same point and hold the tape vertically for every reading. Measure both sides and use the average when the surface allows it.
Record three front measurements. This A/B/C process shows how much the trailer raises the front of the truck and how much of that change the engaged hitch corrects.
| Measurement | When to Take It | What It Shows |
|---|---|---|
| Line A | Tundra loaded for travel but uncoupled | The loaded truck’s front-height baseline |
| Line B | Trailer coupled with spring bars disengaged | How much the tongue load raises the front |
| Line C | Trailer coupled with weight distribution engaged | How much front-height change the hitch corrects |
The required Line C result comes first from the owner’s manual for the exact Tundra. The hitch manual explains which approved settings can be changed to reach that vehicle target. For the 2024 U.S. Tundra manual cited below, Toyota directs the owner to return the front axle to its pre-connection weight or return the front fender to its pre-connection height when axle weight cannot be measured, without lowering the front below the original value.
How Do You Calculate Front-Height Restoration?
Use the A/B/C measurements to quantify the correction instead of judging the truck by appearance. This calculation is a diagnostic aid; the pass/fail target still comes from the exact Tundra owner’s manual.
| Calculation | Formula | Meaning |
|---|---|---|
| Front-height rise caused by coupling | Line B minus Line A | How far the front rose before WD was engaged |
| Front-height correction | Line B minus Line C | How much of that rise the WDH removed |
| Restoration percentage | (Line B − Line C) ÷ (Line B − Line A) × 100 | 100% means Line C returned to Line A |
Illustrative example: If Line A is 38.00 inches, Line B is 38.75 inches, and Line C is 38.00 inches, the hitch corrected 0.75 inch and restored 100% of the front-height change. A Line C of 37.75 inches would place the front below the baseline and would be over-restored where Toyota prohibits going below Line A.
If the manuals appear to conflict: Do not average the Toyota target with a hitch-brand target. Stop the adjustment and ask Toyota and the hitch manufacturer whether that hitch is compatible with the exact truck, suspension, receiver, trailer, and loaded tongue weight.
Record Trailer Pitch
Place the uncoupled trailer at its intended towing attitude and measure from the ground to the same frame point near the front and rear. Record both measurements. Repeat the measurements after the trailer is coupled and the bars are engaged.
A trailer can sit nose-high or nose-low even when the truck’s front measurement looks acceptable. Use the trailer maker’s attitude requirement and the hitch manual’s ball-height procedure to correct pitch.
Install the WDH Head on Your Tundra
Slide the weight-distribution shank fully into the Tundra’s receiver and secure it with the specified hitch pin and clip. Confirm that the shank, pin, and receiver are rated for the loaded combination.
Set the head on the shank using the starting ball height in the manual supplied with your hitch. Do not use one universal dimension. For example, CURT’s general setup guide starts the top of the ball one to three inches above the level coupler, while the Equal-i-zer installation process uses its own ball-height, washer, and bracket sequence.
Use the correct ball diameter for the coupler and confirm the ball’s gross trailer and tongue-weight ratings. Install and torque the ball according to the ball and hitch-head instructions.
Add the washers, rivet, spacer, serrated washers, or angle hardware used by your hitch to establish the initial head tilt. Begin with the hitch maker’s base setting. Keep adjustable hardware secure enough for measurement, but complete final torque only at the stage directed by the manual.
- Align the hitch head squarely on the shank.
- Install the ball and head hardware in the required orientation.
- Confirm that no part contacts the bumper, tailgate, coupler, jack, propane tray, or trailer frame through the expected turning range.
- Use only the washer count, head-angle range, hardware sequence, and torque values specified for the exact hitch.
Do not guess torque or substitute a generic value. Loose head hardware can shift under load, while incorrectly torqued hardware can damage parts or prevent the intended clamping force.
Mount Spring Bars, Set Chain Length, and Adjust Head Tilt
Install the spring bars in the orientation shown in the hitch manual. Some systems use trunnion bars, some use round bars, and others use spring arms that rest on rigid brackets.
After coupling the trailer, use the tongue jack to raise the connection point as the manual directs. Raising the coupled Tundra and trailer reduces the force needed to engage the spring bars. Keep your hands, feet, and body away from the bar’s possible release path.
[Products Worth Considering]

Product Type: Auto Accessory

The package length is 1.092 centimeters

Compatible with CURT round bar weight distribution hitches #17002 or #17022
Proper Bar Orientation
Mount each bar exactly as its manufacturer shows. If the bars or sockets have left-right markings, keep them on the assigned sides.
- Confirm that both bars seat and lock fully in the hitch head.
- Place both frame brackets at the required and equal distance from the coupler.
- Keep the Tundra and trailer straight during the initial tension setup.
- Confirm that pins, clips, chains, L-pins, and brackets are fully engaged before retracting the jack.
- Check clearance for the trailer jack, batteries, propane equipment, frame accessories, and breakaway wiring.
Chain Length Adjustment
If your hitch uses chains, begin with the link count specified by its manual. Use the same engaged or free-link count on both sides unless the manufacturer provides a different procedure.
Do not use a universal rule such as “fewer links means more tension” without checking how the exact manufacturer counts engaged, free, or hanging links. Follow that manual’s counting convention, minimum-link requirement, and adjustment direction on both sides.
| Action | Purpose |
|---|---|
| Use equal settings on both sides | Keeps the initial side-to-side setup balanced |
| Raise the coupled truck and trailer with the jack | Reduces the force required to engage the bars |
| Adjust one link or approved increment | Makes the effect easier to measure |
| Retract the jack completely before measuring | Places the full coupled load on the setup |
Washer and Head-Tilt Adjustment
Many hitches use washers, serrated surfaces, spacers, or another mechanism to tilt the head. Changing head tilt changes the spring bars’ working angle and available leverage, but the direction and allowed range depend on the design.
- Begin with the manufacturer’s initial washer count or head setting.
- Unload the spring bars before loosening or changing the head hardware.
- Change only one approved increment at a time.
- Reassemble the hardware in the specified order.
- Engage the bars, retract the jack, and repeat the Line C measurement.
- Stop at the manufacturer’s adjustment limit.
If head-tilt changes cannot reach the target, the hitch manual may direct you to change bracket height, chain links, ball height, or another setting. Do not improvise by exceeding a washer, bracket, or head-angle limit.
Fine-Tune Tongue Weight and Front Height on the Tundra
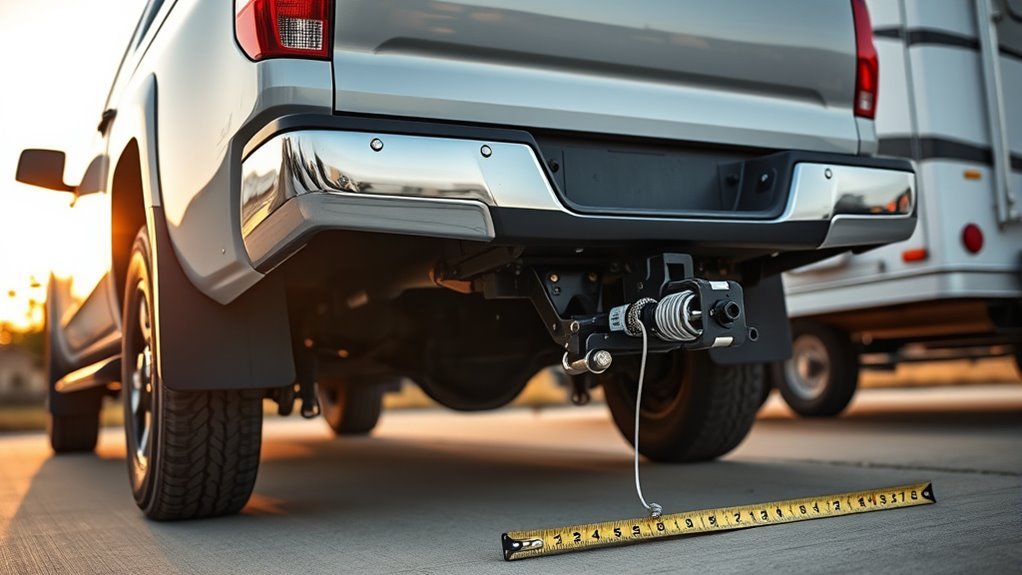
Your goal is not merely to make the truck look level. The loaded combination must stay within every rating, the tongue weight must meet the applicable requirements, the hitch must restore the required front measurement or load, and the trailer must sit at the attitude specified by its maker.
How Do You Check Loaded Tongue Weight?
Measure tongue weight with the trailer loaded for travel and the coupler at its normal towing height. Use a tongue-weight scale rated for the expected load or use a certified public scale method.
- If tongue weight is below the required range, move suitable cargo forward in small, secured steps and reweigh.
- If tongue weight exceeds a truck, receiver, hitch, ball, trailer, axle, or tire rating, remove or reduce cargo first.
- Reposition cargo only in controlled steps while preserving the required tongue-weight range.
- Keep heavy cargo low and securely restrained, but do not place it behind the trailer axles merely to reduce a scale reading.
- Recheck after changing water, propane, batteries, bikes, generators, storage racks, or rear cargo.
How Much Front Height Should the Hitch Restore?
Compare Lines A, B, and C against the target in the exact Tundra owner’s manual, then use only the approved adjustment sequence in the hitch manual. If Line C shows too little correction, increase weight distribution through one approved increment. If Line C is below the permitted target, reduce weight distribution before towing.
Do not force the front below the allowed target to eliminate rear squat. Too much weight distribution can create its own handling, traction, ride, and component-loading problems.
Once the front measurement meets the specified target, check trailer pitch again. Correct trailer attitude through the approved ball-height procedure rather than using excessive spring-bar tension to force the trailer into position.
Pro tip: Save Lines A, B, and C with the ball position, washer count, bracket position, chain-link count, loaded tongue weight, tire pressures, and trailer load description. Those records make later changes easier to diagnose.
How to Use a Public Scale to Verify Axle Loads
A certified public scale can show whether the Tundra’s front axle regained load, whether the rear axle remains within GAWR, and whether the trailer axles and total combination stay within their limits. On a three-platform scale, position the Tundra’s front axle, rear axle, and trailer axle group on separate platforms as the operator directs. The CAT Scale positioning guide shows the standard truck-and-trailer layout.
Pass 1: Weight Distribution Engaged
Load the Tundra and trailer for travel. Place the Tundra’s front axle, rear axle, and trailer axle group on separate scale platforms when the scale layout permits it. Keep the spring bars engaged and record each axle reading and the total.
Pass 2: Weight Distribution Disengaged
Keep the same passengers, cargo, fuel, and trailer load. Unload or disengage the weight distribution bars according to the hitch manual while leaving the trailer coupled. Complete a second scale pass and record the axle readings.
Pass 3: Loaded Tundra Without the Trailer
Disconnect the trailer and weigh the loaded Tundra with the same passengers, bed cargo, fuel level, and removable hitch equipment used during the other passes.
| Calculation | Formula |
|---|---|
| Loaded trailer weight | Combined rig total minus loaded Tundra-only total |
| Coupled tongue load with bars disengaged | Tundra axle total in Pass 2 minus Tundra-only total in Pass 3 |
| Front-axle load change without WD | Pass 2 front axle minus Pass 3 front axle |
| Front-axle load restored by WD | Pass 1 front axle minus Pass 2 front axle |
| Front-axle restoration percentage | (Pass 1 front − Pass 2 front) ÷ (Pass 3 front − Pass 2 front) × 100 |
Compare the scale readings with the Tundra’s front and rear GAWR, GVWR, GCWR, tire capacities, receiver limits, hitch limits, trailer GVWR, and trailer axle ratings. Tongue weight also consumes part of the Tundra’s available payload even when the hitch redistributes some axle load. A 100% front-axle restoration result means Pass 1 returned the front axle to the loaded Tundra-only value from Pass 3; a result above 100% means the front axle is heavier than the baseline.
Warning: Weight distribution changes where axle loads appear on the scale. It does not erase tongue weight or make an overloaded truck, receiver, tire, hitch, or trailer safe.
Road-Test Checklist: What to Watch For and How to Readjust
Begin in a quiet area at low speed before entering highway traffic. The Tundra should steer and brake predictably, and the trailer should follow without persistent sway, severe bouncing, binding, or repeated clunks.
- Stop and inspect: Check the coupler latch, ball, pins, clips, chains, brackets, bars, breakaway cable, safety chains, jack clearance, and wiring.
- Evaluate steering: Light, vague, or wandering steering can indicate insufficient front-load restoration, excess rear cargo, tire problems, or an overloaded setup.
- Evaluate sway: Slow down and stop safely if sway develops. Check tongue weight, cargo placement, trailer attitude, tires, speed, wind exposure, mechanical condition, and sway-control setup.
- Evaluate braking: Pushing, delayed, weak, or uneven braking requires inspection of the trailer brakes, brake-controller settings, load balance, and truck and trailer brake systems.
- Listen for binding or impacts: Check bar, bracket, chain, coupler, jack, and frame clearance before continuing.
- Repeat measurements: Recheck Line C and trailer pitch if handling changes after the short tow.
Inspect the setup after the first short tow and again at the interval stated in your hitch manual. Repeat the inspection after cargo, trailer, tire, suspension, ball-height, bracket, or spring-bar changes.
Common Tundra Towing Problems and Precise Fixes
Do not treat every handling problem as a need for more bar tension. Excessive trailer weight, poor cargo placement, insufficient tongue weight, overloaded axles, incorrect tire pressure, brake problems, worn parts, and an unsuitable hitch can produce similar symptoms.
| Problem | Likely Cause | First Check |
|---|---|---|
| Front feels light or steering wanders | Insufficient front-load restoration, excess rear cargo, overload, or tire issue | Check Lines A/B/C and scale the front and rear axles |
| Rear squats heavily | Excess tongue load, overload, under-adjustment, or suspension problem | Check loaded tongue weight, payload, rear GAWR, and hitch adjustment |
| Truck looks level but steering remains light | Air suspension or helper springs may be masking the load change | Use front measurements and axle-scale readings instead of appearance |
| Trailer sways | Insufficient tongue weight, rear-biased cargo, speed, wind, tires, alignment, or inadequate sway control | Slow down, inspect the trailer, and verify loaded tongue weight and cargo position |
| Ride feels harsh or the bars are difficult to tune | Bars may be oversized, tension may be excessive, or the head setting may be wrong | Verify loaded tongue weight and the hitch maker’s spring-bar range |
| Rig porpoises or bounces repeatedly | Overload, soft suspension, incorrect bar rating, excessive or insufficient tension, trailer pitch, or worn shocks | Check axle weights, bar range, Line C, trailer attitude, tires, and suspension condition |
| Bars make unusual or excessive noise | Normal friction, dry approved lubrication points, binding, loose hardware, or interference | Inspect clearances and lubricate only where the manual permits |
| Trailer sits nose-high | Ball height or shank position may be too high | Correct trailer attitude using the hitch maker’s ball-height procedure |
| Brackets move on the frame | Incorrect position, torque, frame compatibility, or damaged hardware | Stop towing and reinstall or inspect the brackets as the manual directs |
Air helper springs can support rear ride height, but they do not replace a correctly selected and adjusted weight distribution hitch. Neither helper springs nor a WDH increases the Tundra’s certified payload, axle, tire, receiver, or towing limits.
Owner Tips: Packing, Scales, Adapters, Maintenance, and Checks
Secure heavy trailer cargo low and in positions that maintain the required loaded tongue weight. Avoid placing heavy items at the far rear merely to reduce tongue load. Cargo can shift while braking, turning, or driving over rough roads unless it is restrained.
- Use a scale before a long trip or after a major loading change.
- Check the coupler, safety chains, breakaway cable, lights, trailer brakes, and 7-pin connection before every tow.
- Retorque hitch hardware only at the intervals and values stated in the hitch manual.
- Inspect spring bars, sockets, L-brackets, chain links, frame brackets, pins, and clips for wear or distortion.
- Keep the bars and approved contact points clean and lubricated only as directed.
- Confirm that any receiver extension, adapter, drop shank, or raised shank is approved and rated for the complete setup.
- Keep a separate setup record for every trailer and load configuration.
Note: Trailer-Sway Control can assist with certain sway events, but it cannot correct an overloaded truck, insufficient tongue weight, loose cargo, damaged tires, unsafe speed, or an incorrectly adjusted hitch.
Frequently Asked Questions
When Is a WDH Required on a Toyota Tundra?
The 2024 U.S. Tundra manual cited below requires a weight-distributing hitch with sufficient capacity when gross trailer weight is over 5,000 pounds. Check the owner’s manual and receiver label for the exact model year and configuration because the applicable threshold and ratings can differ.
What Should Line C Be on a Tundra?
Line C must meet the front-axle-load or front-fender-height requirement in the owner’s manual for the exact Tundra. The 2024 U.S. manual cited below directs the owner to return the front axle or fender to the pre-connection value and not lower it below that baseline. The hitch manual controls the approved adjustment method, not the Toyota target.
Can You Use a WDH With Surge Brakes or a Modified Tundra?
Only when the surge coupler, trailer frame, receiver, suspension, and hitch manufacturers approve the combination. A lift, receiver extension, non-stock suspension, pole tongue, aluminum frame, or blocked bracket area can change geometry or compatibility. Use the required shank and brackets, then repeat the complete loaded setup and scale verification.
Does a 4,000-Pound Trailer Need a Weight Distribution Hitch?
A 4,000-pound trailer may need a WDH if the Tundra or receiver instructions require one, the loaded tongue weight exceeds the receiver’s conventional rating, the trailer unloads the truck’s front axle beyond the allowed target, or the combination handles poorly. Use loaded weight and tongue weight rather than the trailer’s dry brochure weight.
What Is the Maximum Hitch Weight for a Toyota Tundra?
No single hitch-weight number applies to every Tundra. The limit depends on the model year, configuration, payload label, rear GAWR, receiver label, tires, ball, hitch, and whether the receiver lists separate conventional and weight-distribution ratings. Use the lowest applicable limit for your exact setup.
How Do You Choose the Correct Weight Distribution Hitch?
Choose a WDH using the hitch maker’s sizing method and the trailer’s measured loaded tongue weight. Many systems also account for cargo carried behind the Tundra’s rear axle. Select bars whose working range covers the real load without automatically choosing the stiffest available rating.
Can a Weight Distribution Hitch Reduce Actual Tongue Weight?
A WDH does not correct an excessive or insufficient static tongue weight created by trailer loading. When engaged, it uses leverage to redistribute axle loads across the Tundra and trailer. You must still measure and correct the trailer’s loaded tongue weight before adjusting the hitch.
Does a Weight Distribution Hitch Increase Tundra Towing Capacity or Payload?
No. A WDH may be required to use a receiver’s separately published weight-distribution rating, but it does not increase Toyota’s towing capacity, payload, GVWR, GAWR, GCWR, tire ratings, or any trailer or hitch limit.
Can You Use a WDH With Tundra Load-Leveling Suspension?
You may be able to use both when the Tundra, receiver, suspension, trailer, and hitch instructions permit it. Follow the exact setup sequence for the truck and hitch. Automatic leveling can change ride-height measurements, so do not tune the hitch by rear appearance alone.
Can You Back Up With a Weight Distribution Hitch Connected?
It depends on the hitch and sway-control design. Many integrated weight-distribution and sway-control systems permit normal backing, while some separate friction sway-control devices may need to be disconnected before reversing or making tight turns. Follow the manual supplied with the exact system.
How Tight Should Tundra Spring Bars Be?
No universal chain-link count, washer count, bracket height, or spring-bar angle works for every setup. Use enough tension to meet the Toyota target in the exact Tundra owner’s manual, keep the trailer at the required attitude, and stay within every component rating. Use the hitch manual to choose the permitted adjustment method.
When Should You Recheck a Tundra WDH Setup?
Recheck it after the first short tow and at the inspection interval stated in the hitch manual. Repeat the measurements after changing the trailer, passengers, bed cargo, water, batteries, tires, suspension settings, ball height, brackets, spring bars, or other hitch hardware.
Safety Disclaimer: This article provides general towing information. Follow the owner’s manual for your exact Toyota Tundra, plus the trailer, receiver, hitch, suspension, tire, brake-controller, and component instructions. Ask a qualified towing professional to inspect the setup when measurements conflict, hardware does not fit correctly, or the combination handles unpredictably.
Conclusion
A safe Tundra weight distribution hitch setup starts with loaded weights, exact ratings, and repeatable measurements. Confirm the truck and trailer limits, measure Lines A, B, and C, use the Tundra manual for the required front-axle result, and use the hitch manual for the approved adjustment method. Verify trailer attitude and axle loads before a long trip.
Your next step is to load the Tundra and trailer for the real trip, record Line A, and obtain the loaded trailer and tongue weights before changing any hitch setting. Save the A/B/C measurements, scale tickets, ball position, washer count, bracket position, chain-link count, tire pressures, and suspension settings, then repeat the checks whenever the load or towing hardware changes.
References
- 2026 Toyota Tundra specifications and maximum towing claim, Toyota
- 2026 Toyota Tundra owner’s manuals and warranties, Toyota
- 2024 Toyota Tundra Owner’s Manual, Short Version, Toyota
- 6K to 14K Model Installation Guide, Equal-i-zer Hitch
- Airbags vs. Weight Distribution Hitches, Equal-i-zer Hitch
- Weight Distribution Hitch Setup Guide, CURT Manufacturing
- How to Measure Tongue Weight, CURT Manufacturing
- Towing a Trailer: Being Equipped for Safety, National Highway Traffic Safety Administration mirror
- How to Weigh a Truck and Trailer, CAT Scale

[…] for a properly rated weight-distributing hitch when gross trailer weight is over 5,000 lb; see the Tundra weight-distribution hitch setup guide for the separate setup […]