
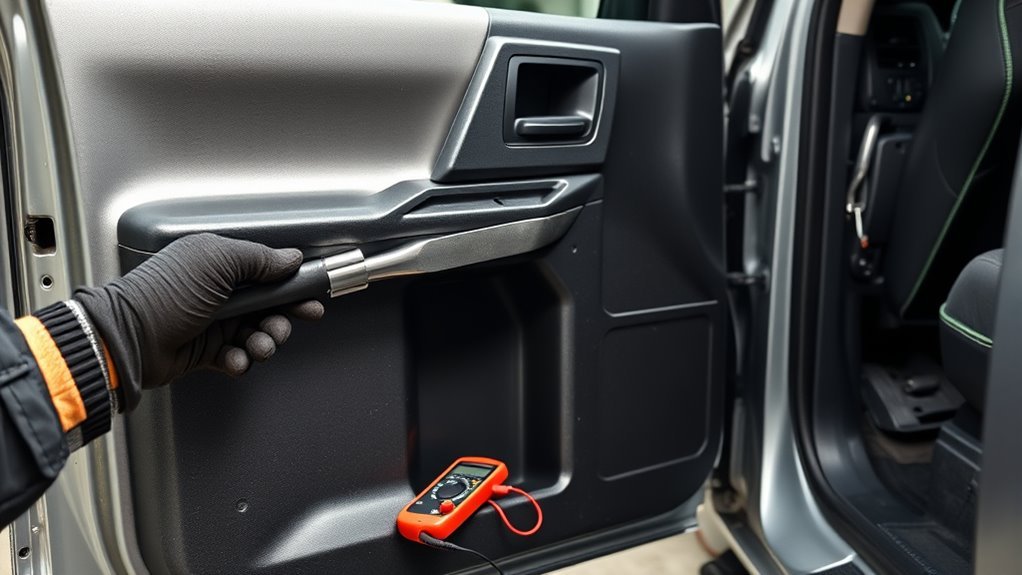
By: [VERIFY: add the article’s real author/byline] · Last updated: July 31, 2026
A Toyota Tundra door lock actuator problem usually affects one door while the other locks continue to work. If every door fails from both interior switches, look first for low 12-volt system voltage, a blown fuse, damaged wiring, a switch-input problem, or a main body ECU or integration-relay fault. If the interior switches work but the key fob does not, diagnose the fob and wireless system before replacing a door actuator.
Scope: This diagnostic order applies broadly to 2000–2026 U.S.-market Tundras, but fuse labels, wiring terminals, door-panel removal steps, and replacement assemblies vary by model year, cab configuration, door position, and equipment. Confirm every connector, fuse, and part with the manual or VIN for your truck.
What’s in This Article
- Quick Answer: Is It the Actuator or Central Lock System?
- Before You Test the Door Lock System
- Test Fuses, Relay, Key Fob, and Wiring
- Diagnose Single-Door Actuator Failures
- Multiple-Door Failures: Relay and Module Checks
- Replace a Tundra Door Actuator (Tools & Steps)
- Cost, Warranty, and When to Call a Mechanic
- Frequently Asked Questions
Toyota Tundra Door Lock Actuator or Central System?
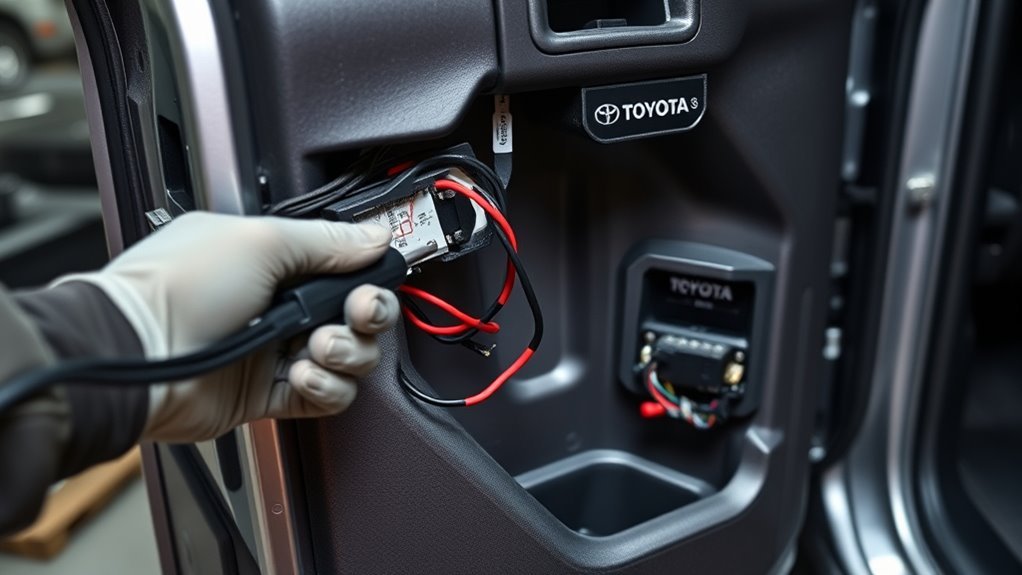
Test the truck from more than one control before buying a part. If one door fails from the key fob and both interior switches while the other doors work, the fault is probably local to that door: the actuator or latch assembly, linkage, connector, or door-jamb wiring. If every door fails from both interior switches, diagnose the 12-volt supply, fuses, switch inputs, wiring, network communication, and body-control circuitry first.
| Symptom Pattern | Most Likely Area | First Confirming Test |
|---|---|---|
| One door fails from the fob and both interior switches | Actuator or latch assembly, linkage, connector, or local wiring | Check manual movement, listen at the door, then measure across the two motor-control wires during a command |
| Every door fails from both interior switches | Low system voltage, fuse or feed, switch-input circuit, main body ECU, integration relay, or network fault | Test the 12-volt battery, verify fuses with a meter, and scan the body system before replacing parts |
| Interior switches work, but the key fob does not | Fob battery, damaged fob, wireless receiver, registration, interference, or wireless settings | Try the spare fob and replace the Tundra key fob battery with the exact type specified for the fob |
| One interior switch works, but another does not | Non-working switch, connector, or local switch wiring | Compare the driver and passenger switch inputs before testing actuators |
| The lock moves partly, returns, or feels stiff by hand | Mechanical binding, linkage, latch, trim interference, or a weak actuator | Inspect mechanical travel before condemning the motor |
Key Takeaways
- Test the key fob, driver switch, passenger switch, manual lock, and every door before buying a part.
- Check 12-volt system voltage and the exact model-year fuse diagram before opening a door panel.
- Do not assume your Tundra has a removable central-locking relay; some functions are built into the main body ECU, integration relay, or junction block.
- Measure an actuator command across the two identified motor-control wires because lock and unlock commonly use reversed polarity.
- Disconnect the battery only after completing live tests and before unplugging or removing door components.
- Order replacement parts by VIN, model year, cab, door position, side, connector, and original part number.
Before You Test the Door Lock System
Park the Tundra on level ground, set the parking brake, lower the affected window if it still works, and keep the key or Smart Key away from the truck when you are not running a command test. Door cavities can contain sharp edges, window components, wiring, and side-impact or SRS-related equipment.
Gather a high-impedance digital multimeter, back-probe leads, a plastic trim tool, the correct screwdrivers or bits, needle-nose pliers, gloves, eye protection, and a container for fasteners. Obtain the wiring diagram and door-removal procedure for the exact model year, cab, side, and door position before probing a connector.
Warning: Keep the battery connected only while performing required command-voltage tests. Before unplugging door wiring or beginning disassembly, switch the ignition off, follow the model-year battery-disconnection procedure, disconnect the negative cable, and wait at least 90 seconds where Toyota service information requires it. Some systems, including power-window functions, may require initialization after reconnection.
Test Fuses, Relay, Key Fob, and Wiring
Test the simplest shared causes before replacing an actuator. Start with 12-volt system voltage, then compare the key fob and interior switches, verify the correct fuses, inspect the door-jamb harness, and test the actuator command at the problem door.
Do not replace a door actuator until you know whether the fault follows one door, one control input, the wireless system, or the entire vehicle.
Follow this order:
- Check 12-volt system voltage: Measure at the battery before deeper diagnosis. Toyota service information uses 11–14 volts as a preliminary troubleshooting range. If voltage is below 11 volts, charge and test the battery before continuing.
- Compare every control: Try the driver switch, passenger switch, main fob, spare fob, and manual lock. If the interior switches work but the fobs do not, diagnose the wireless system rather than the door actuator.
- Test the correct fuses: Use the fuse-box cover and the exact model-year owner or service manual. With the circuit powered, check for voltage at both fuse test points. Replace a failed fuse only with the specified type and amperage.
- Identify the control architecture: Do not assume there is a removable central-locking relay. Depending on the truck, lock control may involve the main body ECU, an integration relay, or circuitry incorporated into a junction block.
- Inspect wiring: Look for broken conductors, chafing, stretched insulation, loose pins, water intrusion, corrosion, or previous repair damage in the door jamb and actuator connector.
- Measure the actuator command: Using the correct wiring diagram, back-probe across the two motor-control wires while pressing lock and unlock. Expect a brief battery-level pulse whose displayed polarity may reverse between commands.
Do not use continuity or resistance mode on a powered circuit, pierce sealed insulation unless the approved repair method permits it, or apply battery voltage directly to unknown connector pins.
[Products Worth Considering]

This two-piece front door lock actuator motor set is designed to restore reliable power door lock operation for a wide range of Toyota, Lexus, and Scion vehicles. It includes left driver and right passenger side actuators and is made as a direct replacement for common factory part numbers. With broad vehicle compatibility and a one-year warranty, it offers a practical solution for fixing faulty door locking issues.

This front left door lock actuator assembly is a direct replacement for select Toyota and Lexus models, helping restore reliable power door locking and latch operation. Built as an OEM-quality aftermarket part, it includes the latch assembly and is factory tested for dependable performance. It is designed for driver-side front door fitment across a wide range of compatible vehicles and comes with replacement support for added peace of mind.

This driver side front door lock actuator is designed to restore reliable locking performance across a wide range of Toyota, Lexus, and Scion vehicles. It serves as a direct replacement for multiple OE part numbers and helps solve issues with power door locks that are slow, unresponsive, or failing. Built for broad compatibility and backed by a one-year warranty, it is a practical solution for dependable door lock operation.
Diagnose Single-Door Actuator Failures
If one door will not lock or unlock from either interior switch or the key fob while the other doors work, focus on that door. Check whether the manual lock moves freely, listen for motor noise, inspect the linkage and connector, and measure the command across the actuator motor wires.
A correct command pulse with no actuator movement points to a failed actuator or latch assembly, mechanical binding, or a disconnected linkage. No command pulse points toward the connector, door-jamb harness, or upstream control circuit instead.
Symptoms and Sounds
The sound and mechanical feel help narrow the fault, but neither proves the actuator is bad without an electrical check.
- Slow or weak movement: A weak motor, worn gears, excess resistance, low voltage, or stiff linkage may prevent full travel.
- Buzzing or grinding: The motor may be receiving a command while internal gears or the latch mechanism stall.
- No sound: The actuator may have failed electrically, or the command may not be reaching the door.
- Manual lock feels stiff: Inspect the latch, rods, cables, trim, and alignment before ordering an electrical part.
- Lock works in only one direction: Test both lock and unlock commands because a weak actuator or circuit fault may appear under only one direction of travel.
Electrical Signal Checks
Use the wiring diagram to identify the two actuator motor-control wires. Back-probe across those wires and operate the lock switch. The command is brief, so a meter with minimum/maximum capture can make the pulse easier to see.
Depending on probe orientation, one command may display as a positive reading and the opposite command as a negative reading. That reversal is expected on a polarity-reversing motor circuit. Do not treat the negative sign as a bad ground.
| Test Result | What It Means | Next Step |
|---|---|---|
| Battery-level pulse across the motor wires, but no movement | The command reaches the door | Inspect mechanical binding and replace the actuator or latch assembly if the mechanism is free |
| Pulse appears for lock but not unlock, or vice versa | Directional control, wiring, or module output may be faulty | Compare the circuit with the model-year wiring diagram and test continuity with power removed |
| No pulse in either direction | The fault is upstream or the harness is open | Inspect the connector, door-jamb wiring, switch inputs, fuses, and body-control circuit |
| Voltage collapses while the actuator tries to move | High resistance, poor connection, weak supply, or a stalled actuator may be loading the circuit | Perform voltage-drop and connector-load checks using the correct service information |
Confirm the Correct Door Lock Assembly
Do not order a replacement from “Toyota Tundra actuator” alone. The correct part can depend on the model year, cab configuration, front or rear door, driver or passenger side, Smart Key equipment, connector, cable layout, and whether Toyota services the actuator separately or as part of the latch assembly.
- Record the VIN, model year, cab type, affected door, and left or right side.
- Compare the original part number, connector shape, mounting points, cables, rods, and latch layout with the replacement listing.
- Use a VIN-based Toyota parts lookup or have a Toyota parts department confirm fitment before ordering.
- Do not assume a part from another door position or Tundra generation will interchange.
Multiple-Door Failures: Relay and Module Checks
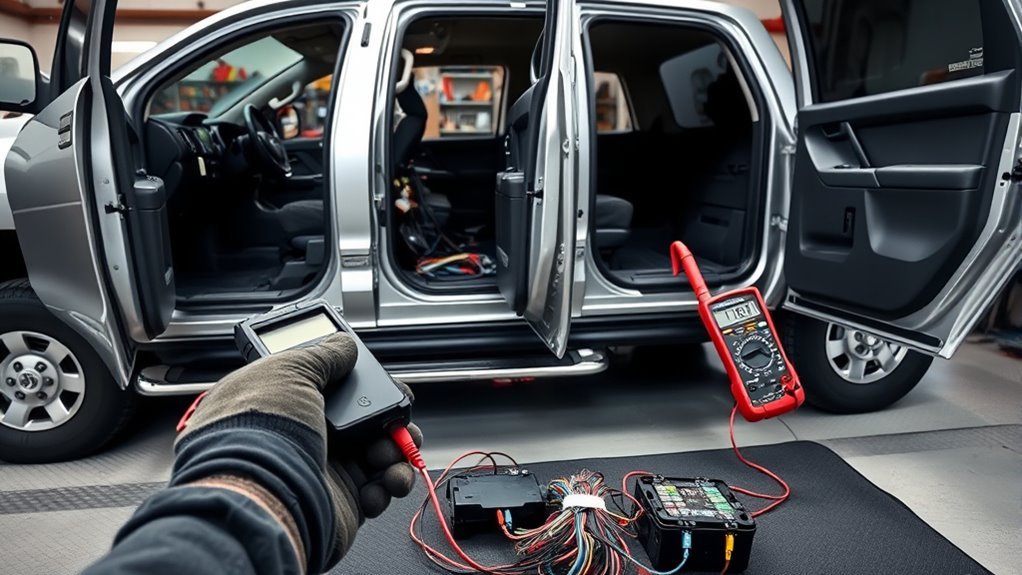
If several doors fail together, treat the problem as a shared electrical or control fault before removing a door panel. Check whether the failure occurs from both interior switches, whether the key fob is the only failed input, and whether other door functions such as power windows also fail.
If locks and windows or several cab electrical functions fail together, inspect shared power feeds, grounds, the driver-side junction-block area, network communication, and the door harness. The related Tundra power-window diagnosis can help separate a shared electrical problem from a lock-only problem.
| Component or Input | Test | Expected Result |
|---|---|---|
| 12-volt battery | Measure resting system voltage and test battery condition | Adequate voltage and battery capacity before control-system diagnosis |
| Driver and passenger switches | Compare lock and unlock operation from each switch | Both inputs should be recognized by the body-control system |
| Fuse and supply circuit | Check voltage at both sides of the correct fuse and verify the circuit under load | Battery voltage reaches the protected circuit without excessive drop |
| Door-jamb and shared harnesses | Inspect and test for opens, shorts, corrosion, loose pins, and voltage drop | Low-resistance conductors and secure, dry terminals |
| Main body ECU or integration-relay circuit | Check power, grounds, switch inputs, network communication, and outputs using model-year service information | Correct inputs are received and commands are sent to the lock circuits |
| Toyota-compatible scan tool | Read body DTCs, switch inputs, lock-position data, communication status, and Active Tests where supported | No relevant communication or body-control faults, and commanded outputs operate as specified |
Do not replace a main body ECU, junction block, or integration-relay assembly from symptoms alone. These components can be expensive, may require model-specific setup, and should be condemned only after their power, grounds, inputs, wiring, and communication paths pass the required tests.
Replace a Tundra Door Actuator (Tools & Steps)
The exact replacement sequence varies by model year, cab, door position, and latch design. Use Toyota repair information for your truck rather than relying on a universal fastener list or connector pinout.
Common tools include a plastic trim tool, the correct screwdrivers and Torx bits, sockets, pliers, a multimeter, tape for protecting painted or soft surfaces, and replacement clips if any break during removal.
- Complete the diagnosis: Confirm that the actuator receives the correct command and that the linkage or latch is not mechanically binding.
- Prepare the truck: Lower the window if possible, switch the ignition off, follow the model-year shutdown procedure, disconnect the negative battery cable, and observe the required SRS waiting period.
- Remove trim carefully: Remove the switch panel, fasteners, clips, handle trim, and door panel in the sequence specified for that door.
- Protect the moisture barrier: Peel it back without tearing it or contaminating the reusable sealing material. Restore the seal completely during reassembly.
- Document the connections: Photograph the cable, rod, connector, and latch positions before disconnecting them.
- Remove the specified assembly: Detach only the components required by the model-year procedure, then compare the old and new parts before installation.
- Reassemble and initialize: Reconnect the harness, cables, rods, moisture barrier, trim panel, and battery. Perform any required power-window or body-system initialization.
- Run a complete function test: Test lock and unlock from both interior switches, the main and spare fobs, the mechanical lock, door-open warnings, interior lights, alarm behavior, handles, windows, and mirror controls if disturbed.
Stop if the procedure requires removing or disturbing an SRS sensor, airbag component, window glass, or a component you cannot safely support. A repair shop with Toyota service information is the safer choice in that situation.
[Products Worth Considering]

This replacement key fob set is designed for select Toyota RAV4 and XB models with regular key systems, offering lock, unlock, and panic functions in a convenient two-pack. Each remote comes pre-tested with battery and electronics installed, and it must be cut and programmed by a qualified dealer or locksmith for proper use. Built from durable materials and backed by warranty support, it provides a reliable solution when replacing worn or missing remotes.

This thin stainless steel clip removal pliers tool is designed to help lift push pins, plastic clips, and trim fasteners with more control and less damage than a flathead screwdriver. Its angled jaw reaches into tight spaces around door panels, bumpers, dashboards, and interior trim, while the spring-loaded design reduces hand fatigue during repeated removals. Ideal for DIY repairs, detailing, and mechanic work, it helps make automotive trim disassembly faster and cleaner.

This automotive circuit tester checks low-voltage DC systems from 3-65V, making it useful for diagnosing headlights, taillights, fuses, sockets, and other vehicle wiring issues. The digital backlit display provides clear voltage readings with fine accuracy, while the bidirectional polarity indicator helps you test from either ground or positive. Built with a durable probe, insulated tip, and extra-long spring wire, it is designed for dependable everyday use in automotive and household electrical work.
Cost, Warranty, and When to Call a Mechanic
Repair cost depends on the model year, door position, replacement design, labor rate, diagnostic time, and whether the fault is one latch assembly or a shared electrical circuit.
RepairPal’s estimate updated June 18, 2026 lists approximately $573–$658 for a 2024 Toyota Tundra door lock actuator replacement. Its broader estimate across Tundra model years is approximately $478–$607. These ranges exclude taxes, fees, location adjustments, and related repairs.
[Products Worth Considering]

This keyless entry remote replacement is designed for a wide range of Toyota, Scion, and Lexus-compatible vehicles, offering a convenient way to restore remote locking and unlocking functions. Each fob is pre-tested, comes with the battery and electronics already installed, and is ready to be programmed for supported standard-key vehicles. It is a practical replacement choice for drivers who need a reliable, compatible remote for everyday use.

This AstroAI digital multimeter is designed for accurate everyday electrical testing at home, in the garage, or on the job. It measures AC/DC voltage, DC current, resistance, continuity, and diode checks with an easy-to-read backlit display, data hold, and helpful safety features for dependable troubleshooting.

The Autel MaxiCOM MK900BT is a professional bidirectional diagnostic scan tool built for modern vehicles with advanced system coverage and fast, accurate troubleshooting. It supports 3000+ active tests, 40+ service functions, all-system diagnostics, Auto VIN, pre/post scan reports, and newer vehicle protocols for broad compatibility. Designed for technicians and serious DIY users, it delivers efficient maintenance, smarter diagnostics, and expanded service capabilities across a wide range of makes and models.
Repair Cost Estimates
- DIY single-door repair: May reduce labor cost when the diagnosis is confirmed and the correct door-specific part is ordered.
- Professional single-door service: Includes diagnosis, trim removal, assembly replacement, reinstallation, and function testing.
- System-wide electrical diagnosis: May cost more initially but can prevent unnecessary actuator, relay, junction-block, or module replacement.
Call a mechanic when several doors fail, the vehicle has communication or body-system codes, wiring is heat-damaged or corroded, the fault involves an SRS component, or the problem returns after a correctly diagnosed repair.
Warranty Coverage Options
Toyota states that basic new-vehicle coverage lasts 36 months or 36,000 miles, whichever comes first, subject to the warranty guide’s terms and exclusions. Contact a Toyota dealer before buying parts if the truck may still be covered.
Check the in-service date, service records, extended coverage, and previous door, alarm, audio, window, or remote-start work. Accident damage, water intrusion, aftermarket modifications, and outside repairs can affect the diagnosis or coverage decision.
Owners can also check the VIN through the NHTSA recall lookup. A general model-year search does not replace a VIN-specific check for unrepaired campaigns.
Frequently Asked Questions
Why is my Toyota Tundra not locking?
A Tundra may not lock because of a weak 12-volt battery, weak key fob battery, failed switch, blown fuse, damaged wiring, mechanical binding, faulty actuator or latch assembly, or a main body ECU or integration-relay circuit fault. Compare the fob and both interior switches before replacing a door part.
How do you fix a Tundra door that will not lock?
Check whether the lock moves freely by hand, then test it from the fob and both interior switches. If the other doors work, measure across the affected actuator’s two motor-control wires. A correct command pulse with no movement points to the actuator, latch assembly, or mechanical linkage.
Can a bad key fob make all door locks stop working?
A failed key fob or weak fob battery can stop remote locking, but it should not normally stop the interior lock switches. If the interior switches work, diagnose the fob, spare fob, wireless receiver, settings, or registration before testing the actuators.
Should I replace the actuator or the whole latch?
That depends on the model year, door position, and Toyota part design. Some trucks use an actuator integrated into the latch assembly, while other replacement options may service the motor or actuator separately. Confirm the part by VIN and the original assembly number.
Does a Tundra door lock actuator need programming?
A direct replacement mechanical latch or actuator usually does not require key programming. However, body-control modules, wireless receivers, Smart Key components, and some control-system repairs may require setup, registration, initialization, or scan-tool procedures. Confirm the requirement for the exact part and model year.
Why do the locks work inside but not with the key fob?
If the interior switches operate the doors normally, the actuators and main power-lock circuit are responding. Check the fob battery, spare fob, radio interference, fob damage, wireless settings, registration, receiver, and the truck’s 12-volt battery.
Conclusion
A Toyota Tundra door lock actuator is the leading suspect when one door fails from every electrical control while the other doors work. It is not the first part to replace when every door fails, only the key fob fails, or one switch works and another does not.
Start with 12-volt system voltage and input comparison. Verify the correct fuses and wiring, then measure the command across the affected actuator’s two motor-control wires. Replace the door-specific actuator or latch assembly only when the command reaches the door and mechanical inspection rules out binding.
References
- What warranty coverage do I have on my Toyota vehicle? — Toyota Support, accessed July 31, 2026
- 2024 Toyota Tundra Door Lock Actuator Replacement Cost — RepairPal, estimate updated June 18, 2026
- Toyota Tundra Door Lock Actuator Replacement Cost — RepairPal, estimate updated June 18, 2026
- Toyota Front Door Lock Actuator Assembly Left Hand — Toyota Genuine Parts, accessed July 31, 2026
- Toyota Owners Manuals and Warranty Guides — Toyota Owners, accessed July 31, 2026
- Vehicle Service Agreements — Toyota Financial Services, accessed July 31, 2026
- VIN Recall Lookup — National Highway Traffic Safety Administration, accessed July 31, 2026


[…] than it is. Start with the simple checks first: the battery, button response, signal range, and door-lock behavior. Many Camry smart-key fobs use a CR2032 coin battery, but some older or non-smart remotes may use a […]