Toyota Tundra Sticking Brake Caliper: How to Diagnose and Fix It
What’s in This Article
- Signs of a Sticking Caliper
- Why Front Calipers Seize: Hydraulic vs Mechanical Causes
- Quick Checks Before You Jack It Up
- Step-by-Step Diagnosis
- When It’s Not the Caliper
- When to Seek a Professional
- Rebuild or Replace?
- Slide Hardware and Lubricants
- Bleeding, Flushing, and Fluid Checks
- Parts, Costs, and Maintenance Checklist
A sticking brake caliper doesn’t fail all at once. It starts with a pull to one side, then a hot smell after a short drive. Before long, you’ve got uneven pad wear eating through your rotors. This guide shows you how to diagnose the problem, find the root cause, and fix it the right way.
Quick Answer
A sticking caliper on your Toyota Tundra is most often caused by seized slide pins, a stuck piston, collapsed brake hoses, or contaminated fluid. You’ll spot it through pulling during braking, uneven wheel heat, and resistance when spinning a wheel by hand. Fix it by lubricating or replacing slide hardware, rebuilding or replacing the caliper, flushing the fluid, and swapping out old rubber hoses.
Key Takeaways
- A sticking caliper causes your Tundra to pull to one side and overheat the affected rotor, sometimes above 350°F even with light use.
- The two main causes are hydraulic failures (contaminated fluid, collapsed hoses, corroded piston) and mechanical failures (seized slide pins, rusted hardware).
- A wheel spin test and an infrared temperature check can confirm a sticking caliper before you jack the truck up.
- Rebuild the caliper if seals and pistons are serviceable; replace it if the bore is pitted or slide hardware is missing.
- Prevent repeat failures by flushing brake fluid every two years and replacing rubber hoses every five to seven years.
Signs of a Sticking Caliper on a Toyota Tundra
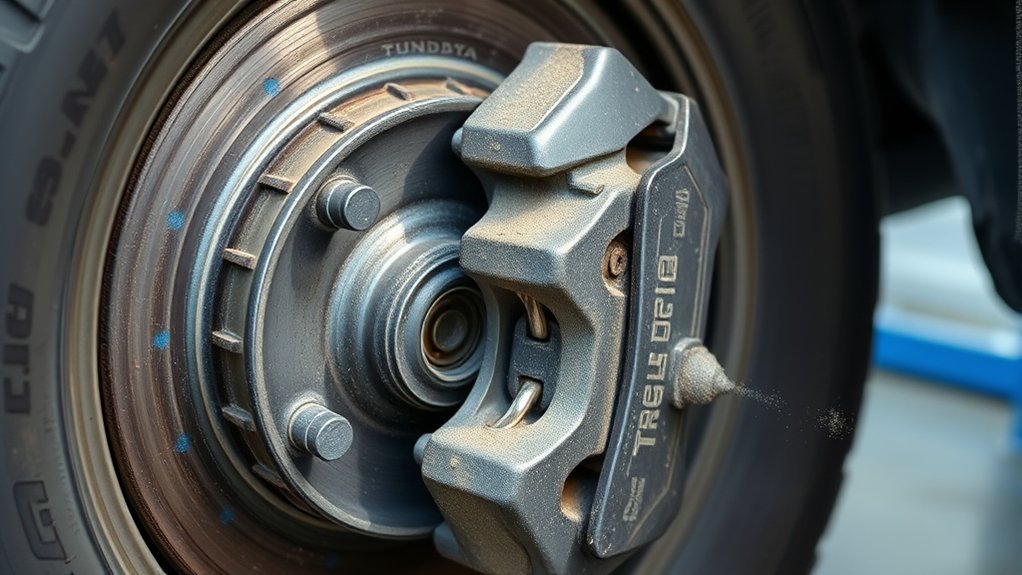
When a caliper sticks on your Toyota Tundra, the truck pulls to one side during braking, often to the right, with groaning or squealing from the affected wheel. You’ll also notice overheating rotors that can exceed 350°F even with light use, and a hot-brake smell that signals too much friction. Lift the wheel and spin it by hand; resistance or dragging confirms the caliper isn’t retracting and is causing uneven pad and rotor wear.
Inspect slide pins and pads regularly. Clean, lubricate, and replace corroded hardware before problems escalate. Catch these signs early and you’ll save your rotors, pads, and wallet.
Why Tundra Front Calipers Seize: Hydraulic vs Mechanical Causes
Those inspection clues point to two main failure modes for Tundra front calipers: hydraulic problems inside the piston and seals, or mechanical faults in the sliding and mounting hardware. On the hydraulic side, contaminated or old fluid and corroded internals cause piston swelling, seal failure, and binding. Blocked rubber lines or collapsed hoses restrict flow and trap pressure.
Mechanically, seized sliding pins, collapsed bushings, or rusted caliper bodies stop lateral movement. This keeps the pad in contact with the rotor even when the piston should retract, causing uneven pad wear and drag. Overheating above roughly 350°F signals drag from either cause. Prioritize fluid flushes and seal replacement, then check pins and hardware before replacing the entire caliper.
Quick Checks to Confirm a Sticky Caliper Before You Jack It Up
Before you jack the truck, do two quick checks to confirm a sticking caliper: a wheel spin test and a visual heat check. With the parking brake off and the truck on level ground, spin each wheel by hand. Resistance or dragging on one side points to a seized caliper. After a short drive, carefully feel the wheel hubs or use an infrared thermometer; a noticeably hotter hub on one side confirms dragging.
Wheel Spin Test
Spin each wheel by hand with the vehicle on level ground and the parking brake off. Significant resistance points to a caliper problem. Listen for groaning or squealing and check for uneven tire wear. Both are signs of dragging.
After a short drive, compare wheel temperatures by touch or with an infrared gun. A much hotter wheel almost always points to a seizing caliper.
| Observation | Interpretation |
|---|---|
| Resistance during spin | Possible sticking caliper |
| Unusual noise | Pad rubbing or guide issue |
| Uneven wear/heat | Persistent drag; service needed |
Visual Heat Check
When you pull into the driveway after a short run, check the front wheels for temperature differences. A noticeably hotter wheel usually signals a sticking caliper. Use the back of your hand or a non-contact IR thermometer to compare sides quickly; a hotter rotor means the caliper is dragging.
Scan for smoke or a burning smell. These are clear signs the brake system is overheating and needs immediate attention. Peer through the wheel spokes to inspect pad wear and dust; uneven wear or heavy buildup on one side points to caliper problems. Note any pulling to one side under braking.
Step-by-Step Diagnosis: Lift, Spin, Feel, and Thermal Checks
Warning: Don’t drive a Tundra with a confirmed sticking caliper. Overheated brakes can fail without warning and compromise your ability to stop.
Jack the Tundra and spin each wheel by hand to note resistance. Any dragging wheel points to a stuck caliper or binding pads. After a short drive, carefully feel the rotor, pad area, and caliper for uneven heat; a hotter corner means a problem. Check the caliper slide pins for free movement, then sweep the assembly with a thermal gun to pinpoint hotspots and inspect brake lines for deterioration.
Lift and Wheel Spin
Lift the truck and secure it on properly rated jack stands so you can safely access each wheel. Use correct lifting technique: place chocks, use the proper jack points, and confirm the stands are rated for the Tundra’s weight. Spin each wheel manually and note any drag, roughness, or hesitation. If a wheel resists or stops quickly, suspect a sticking caliper, seized slider, or binding pad.
Inspect brake lines and hoses while the wheel turns. Kinks, swelling, or external damage can restrict fluid return and keep the caliper engaged. After a short drive, use a thermal gun to compare left and right assembly temperatures. Readings above roughly 350°F, especially asymmetric ones, point to a caliper-related fault.
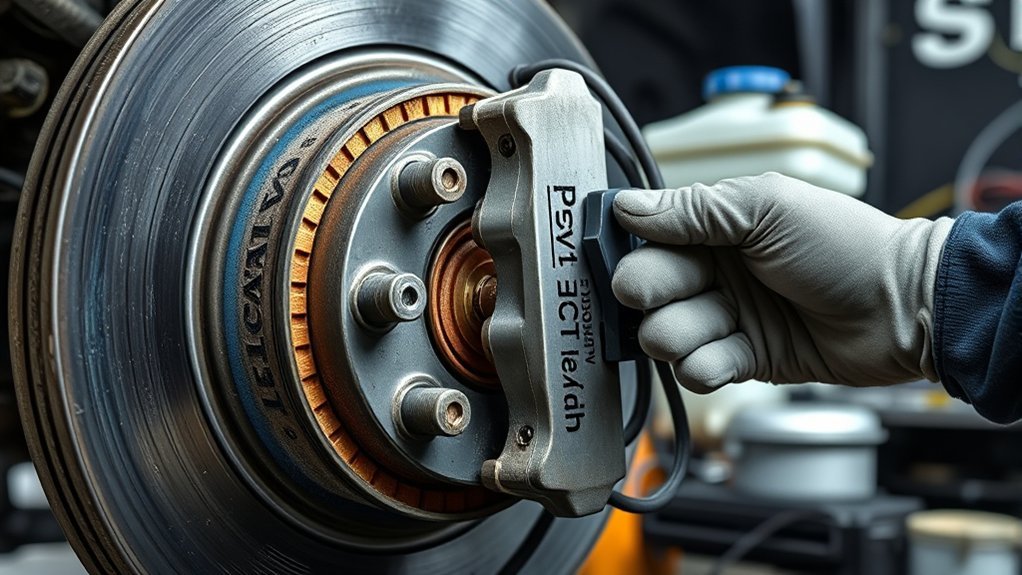
Pad and Caliper Feel
With the truck on stands and baseline resistance confirmed, move to physically checking pad and caliper movement. You’re looking for binding and checking that the piston retracts smoothly.
- Inspect pad slides and hardware; pads must move freely in brackets. Corrosion or seized clips restrict motion.
- Manually retract pistons with a C‑clamp; they should move smoothly without sudden resistance or metal grinding.
- Wiggle pads and caliper; any lateral play or tight spots indicate sticking components or worn guide pins.
- Check for visible rust, scoring, or distorted pads that would impair pad movement and demand caliper service.
Document your findings, replace seized hardware, and address the drag before reassembling.
Thermal Gun Hotspots
A handheld thermal gun highlights temperature differences across the hub, rotor, caliper, and pads quickly. Lift the truck, spin the wheel, then scan: excessive heat at one caliper or inner pad flags a sticking piston or seized slide pin. After a short drive, feel for abnormal warmth before scanning again.
Compare left and right patterns and inspect pads for uneven wear. Equal pad temps and free-moving pins mean the brakes are working correctly; seized hardware traps heat on one side. Use the table below to guide your readings.
| Component | Typical Temp | Hotspot Sign |
|---|---|---|
| Rotor | 50–120°C | >200°C |
| Caliper | 40–100°C | >180°C |
| Pad | 40–120°C | Inner >> Outer |
When It’s Not the Caliper: Brake Hoses, ABS, and Master Cylinder Checks
Even when the caliper looks fine, inspect the rest of the hydraulic system. Old or internally collapsed rubber hoses, a malfunctioning ABS module, or a failing master cylinder can all create uneven brake pressure that mimics a sticking caliper. Work through these checks methodically before replacing parts.
- Inspect brake hoses for age-related deterioration or internal collapse. Squeeze each hose and look for bulges, cracks, or soft spots that restrict return flow.
- Scan the ABS module for stored fault codes and monitor its function during road tests. Faults can trap pressure or cause incorrect pulsing.
- Verify master cylinder pressure and reservoir condition. A failing master cylinder may not release pressure consistently, causing uneven caliper engagement.
- Check brake fluid color and condition. Dark, murky, or greenish fluid signals contamination. Flush and bleed the system to remove air and debris and restore consistent pedal feel.
When to Seek a Professional
Some brake problems are beyond safe DIY repair. Take your Tundra to a certified mechanic if you have a spongy pedal that won’t firm up after a full bleed, or if you experience any loss of braking power under normal pressure. These symptoms can point to a master cylinder failure or an internal hydraulic fault that needs professional tools to diagnose.
An ABS warning light combined with dragging usually requires a scan tool to read module fault codes accurately. If the caliper bore shows deep pitting, the bracket is cracked, or the brake lines have visible external corrosion, don’t attempt a DIY repair. A truck as heavy as the Tundra carries serious braking loads; a mistake in the brake system affects everyone on the road.
Rebuild or Replace? Choosing the Right Tundra Front Caliper Fix
Calipers can often be serviced rather than swapped. First, assess wear, piston action, and slide-pin condition to decide if a rebuild will restore reliable operation or if replacement is the smarter call. Inspect pistons for pitting, check boots for tears, and confirm slide pins move freely. Missing slide pins or a damaged bracket tip the scale toward replacement. Check brake fluid for contamination and consider new rubber lines before committing to a rebuild.
Note: Always replace calipers in axle pairs. Installing one new caliper on one side and leaving the old one on the other creates uneven braking force.
Do a strict cost analysis: factor in parts kits, new lines, labor time, and the risk of repeat service if fluid or hardware issues return. Rebuild when seals, boots, and pistons are serviceable and contamination is resolved. Replace when corrosion, missing slide hardware, or repeated sticking suggest the caliper body is compromised. Choose OEM-equivalent parts matched to your Tundra to maximize reliability and avoid repeat failures.
[Products Worth Considering]

Ensure accurate engine cooling with Toyota's genuine water temperature sensor, designed for precise coolant monitoring and reliable performance. This OEM part fits seamlessly into your vehicle, offering durability and consistent temperature readings for optimal engine health.

These TPE door anti‑kick pads provide durable, water‑resistant protection for Toyota Tundra doors from 2022 to 2026. They fit precisely, are easy to install with double‑sided tape, and can be cleaned simply with water. The pads guard against scuffs and impacts while preserving the door's appearance and smooth operation.

Upgrade your Toyota's front bumper with this premium license plate bracket that fits US and Canada plates perfectly. Made from heavy‑duty, rust‑proof plastic, it protects your paint and stays street legal. The kit includes six unique screws and a wrench for quick, tool‑free installation, ensuring a secure mount without scratches.
Caliper Slide Hardware and Lubricants That Stop Re-Seizing
When you service Tundra calipers, pay close attention to slide pins, bushings, and retainer springs. Use a high-temp brake grease or silicone-based lubricant to prevent re-seizing. Correct lubrication and fresh hardware keep the caliper moving freely, resist moisture, and limit the corrosion that causes dragging. Inspect pins for pitting, confirm bushings sit true, and fit new retainer springs where worn.
- Remove pins, clean channels, and check for missing or bent components.
- Apply a thin coat of silicone-based lubricant to resist water ingress.
- Pack high-temperature grease on pin shafts and bushing interfaces; avoid pad faces and rotors.
- Replace retainer springs and any worn hardware, then test free travel before reassembly.
Do this to prevent sticking, cut drag, and avoid repeat repairs.
[Products Worth Considering]

The Pigenius windshield sunshade protects your Tundra's interior from heat and UV damage while keeping the cabin cool. Its accordion design folds easily for storage and quick setup, and the triple‑laminate construction provides durable, reflective protection. Ideal for long trips and daily commutes, it guards dashboards, seats, and steering wheels from sun‑related wear.

Stay warm and keep control with the KVAEY fluffy steering wheel cover. Its high‑density plush provides a soft, comfortable grip while the anti‑slip rubber liner ensures safety during winter drives. Easy to install and fits 15‑inch wheels on cars, trucks, and SUVs, adding a cozy, stylish touch to any interior.
Bleeding, Fluid Flushing, and Brake Fluid Quality Checks
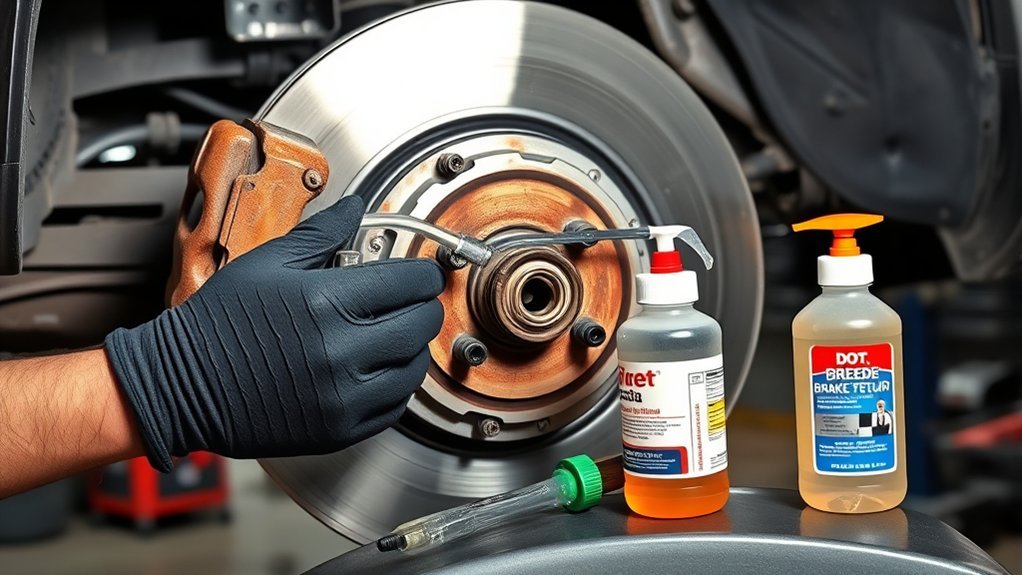
If you suspect contamination, moisture ingress, or inconsistent pedal feel, flush the system and bleed each wheel to remove air, debris, and degraded fluid before addressing caliper movement. Replace dark, murky, or green-tinted fluid right away. Use the recommended DOT-spec fluid for your Tundra to prevent the boiling and corrosion that expand seals and seize pistons.
After any component work, bleed in the correct sequence per Toyota’s specifications. Use a pressure or vacuum bleeder, or have an assistant pump the pedal slowly while you open each bleeder. Confirm pedal firmness and check for sponginess before you road test.
Pro tip: A pressure bleeder gives more consistent results than the two-person pump method and prevents air from re-entering the system between strokes.
Use a thermal gun to scan rotor and caliper temps after a controlled drive. Abnormal hotspots suggest remaining air, collapsed hoses, or contaminated fluid that needs another flush. Inspect the reservoir for particulate matter and check cap seals for moisture intrusion. These steps restore hydraulic integrity and get your Tundra brakes back to full, consistent performance.
Parts, Costs, and a maintenance checklist to Prevent Repeat Failures
Anyone replacing a sticking Tundra caliper should weigh parts quality and labor costs against long-term reliability. New calipers run about $50 to $150 each, and professional installation typically adds $100 to $200. Use OEM or vetted aftermarket units to avoid repeat failures; cheap calipers corrode and seize quickly.
- Inspect: check calipers, pads, rotors, and lines for rust and damage. Measure rotor runout and pad thickness.
- Replace: use OEM or high-quality aftermarket calipers. Change rubber brake lines every five to seven years.
- Flush: perform a full brake fluid flush every two years. Contaminated fluid causes pressure inconsistencies and sticking.
- Monitor: use a thermal gun regularly. Temperatures above roughly 350°F suggest dragging calipers that need immediate service.
Follow this checklist, document parts and torque specs, and you’ll minimize the chance of repeat caliper problems.
Frequently Asked Questions
Can You Fix a Brake Caliper That Is Sticking?
Yes. Clean and lubricate the slide pins, replace worn seals or the piston, and bleed the brake system. If hydraulic failure persists, swap the rubber lines or replace the caliper entirely.
Can WD-40 Fix a Stuck Brake Caliper?
No. WD-40 is a water displacer, not a brake lubricant, and it won’t solve a sticking caliper. Use brake cleaner to clean the assembly, then apply high-temp brake grease to the slide pins and hardware.
Can I Spray Brake Cleaner on a Caliper?
Yes, but follow basic safety steps. Use non-chlorinated cleaner, apply it to a cool caliper, keep it off painted surfaces, and let it dry fully before reassembly. Include it in your regular caliper maintenance routine.
What Type of Lubricant Is Best for Calipers?
Use high-temperature, silicone-based brake grease. It resists heat and moisture and won’t break down under the thermal stress calipers experience. Apply it to slide pins and bracket contact points only; keep it off pad faces and rotors.
Safety Disclaimer: This article is for informational purposes only and does not constitute professional automotive or safety advice. Brake system work directly affects vehicle safety. If you’re uncertain about any procedure described here, have the repair performed by a qualified mechanic.
Conclusion
Sticking calipers follow a pattern: seized slides and contaminated fluid come first, then piston problems if you let it go. Start with the quick checks in this guide, then work through the diagnosis steps to confirm the root cause before spending money on parts. If slides, fluid, and hoses check out but drag persists, a seized piston or collapsed internal hose is your next target.
Rebuild or replace the caliper, use the right lubricants, and schedule fluid flushes every two years. That’s how you stop a minor drag from becoming a brake job that sidelines your Tundra.
References
- Brake Safety Overview — National Highway Traffic Safety Administration (NHTSA)
- Toyota Tundra Owner’s Manual — Toyota Motor Corporation (brake fluid service intervals)
- Brake System Engineering Standards — Society of Automotive Engineers (SAE)