

If your Toyota Camry oil pressure light comes on while the engine is running, pull over safely and shut the engine off immediately. Check the dipstick and look for visible oil leaks, but do not assume a normal oil level means the engine has safe lubrication pressure. If the warning remains illuminated, the engine knocks or ticks, or oil is leaking heavily, have the Camry towed for a mechanical oil-pressure test. Operating an engine with true low oil pressure causes rapid, catastrophic damage to bearings, camshafts, and internal timing components.
Last updated: July 31, 2026 · Reviewed by: AutoReviewNest Technical Team · How this guide was checked: Toyota owner information, the 2025–2026 Camry maintenance guide, Toyota Technical Information System (TIS), API oil standards, and Toyota Technical Service Bulletin T-SB-0104-21 Rev2.
Quick Answer: What to Do Immediately
1. Stop Safely: Pull off the road immediately and turn off the ignition. On Hybrid models, ensure the vehicle is fully powered down (out of READY mode).
2. Inspect Level & Leaks: Check the dipstick and inspect the ground near the oil pan, drain plug, and filter for fresh leaks.
3. Add Correct Oil: If low, add only the exact oil viscosity specified on your oil filler cap or in your owner’s manual.
4. Do Not Drive if Warning Persists: If the dipstick is full, oil is leaking, the oil looks milky, or the engine makes metallic ticking/knocking noises, do not restart the car. Tow it to a certified facility for a mechanical pressure gauge test.
Key Takeaways
- Red Warning vs. Yellow Maintenance: A red oil can icon indicates a critical pressure loss emergency, not a routine 5,000-mile maintenance reminder.
- Full Dipstick Does Not Equal Good Pressure: A normal oil level cannot overcome a clogged pickup screen, failing oil pump, stuck relief valve, or spun bearing.
- Verify Before Replacing Parts: Always confirm actual system pressure using a mechanical gauge with the proper 1/8″ BSPT adapter before replacing sensors or oil pumps.
- Model-Specific Oil Specifications: Viscosity requirements differ drastically across generations (e.g., SAE 0W-8 for 2025+ Camry Hybrids vs. 0W-16, 0W-20, or 5W-30 on earlier powertrains).
- Freezing Condensation TSB: Toyota T-SB-0104-21 Rev2 covers 2018–2024 A25A-equipped Camrys experiencing frozen moisture buildup, milky oil, and trouble codes P05202A / P052477 during sub-zero short trips.
At a Glance: Toyota Camry Oil Pressure Diagnostics
| Time Required | 5–15 minutes for roadside checks; 30–60 minutes for mechanical gauge testing |
| Difficulty | Easy for level/leak checks; moderate for sensor swap; advanced for mechanical pressure testing & internal pump diagnosis |
| Tools Needed | Clean lint-free rag, flashlight, correct engine oil, OBD2 scanner, mechanical oil pressure test kit (with Toyota 1/8″ BSPT adapter) |
| Estimated Cost | $10–$35 (oil top-off/filter fix); $50–$180 (sensor/switch replacement); $600–$1,800+ (oil pump, pickup screen, or internal engine repairs) |
Do This First When the Oil Pressure Light Comes On

Emergency Warning: Never continue driving your Camry with an active red oil pressure warning. If the engine emits ticking, rattling, or deep knocking noises, shut it down immediately. Continuing to run an engine without oil pressure will cause severe bearing seizure and complete engine failure within minutes.
Follow this exact roadside protocol before attempting any mechanical diagnosis:
- Pull over safely and turn off the engine. Coast to a safe shoulder or parking lot immediately. Do not attempt to drive to the next exit or service station.
- Ensure Hybrid models are completely off. On Camry Hybrid models, ensure the instrument cluster confirms the vehicle is shut down and not in “READY” mode, as the internal combustion engine can restart unexpectedly.
- Inspect underneath for severe leaks. Check for oil pooling beneath the oil filter housing, oil pan drain plug, or front timing cover area.
- Check the oil dipstick on level ground. Allow the oil to drain down into the pan for 3 to 5 minutes. Pull the dipstick, wipe it clean, reinsert it fully, and pull it again to inspect level and oil condition.
- Add the correct specification oil if low. If the dipstick reading is below the minimum mark, add the exact viscosity and specification listed on your oil filler cap.
- Evaluate restart safety carefully. If the oil level was only slightly low, you topped it off, and there is no active oil leak or mechanical noise, perform one brief restart to see if the light extinguishes. If the light stays illuminated for more than 3–5 seconds, shut the engine off immediately and call a tow truck.
For model-specific technical documentation, refer to official resources through Toyota Manuals and Warranties.
Oil Pressure Light vs. Oil Level Light vs. Maintenance Reminder
Modern Toyota Camry instrument clusters display multiple service messages. It is essential to distinguish between a critical hydraulic emergency and scheduled maintenance.
| Dashboard Message / Icon | Visual Color | System Meaning | Required Action |
|---|---|---|---|
| Oil Pressure Warning Light / “Oil Pressure Low” | Red | Engine oil delivery pressure has dropped below safe operational limits (typically below 4–6 PSI). | Stop immediately, turn engine off, check oil level, and tow if light persists. |
| Low Engine Oil Level Warning (If equipped) | Amber / Yellow | The oil quantity in the pan is low, but minimum lubrication pressure is currently maintained. | Top off engine oil with specified grade as soon as possible. |
| Maintenance Required / Oil Maintenance | Amber / Text | Mileage-based reminder indicating scheduled 5,000 or 10,000-mile maintenance is due. | Schedule regular service; this is not an active mechanical emergency. |
Quickly Check Oil Level and Oil Quality
Checking the dipstick reveals whether the pressure loss is due to oil starvation or an internal mechanical/hydraulic restriction.
| Dipstick Inspection Result | Likely Diagnostic Condition | Recommended Action |
|---|---|---|
| Level between full and low marks | Oil volume is adequate; problem is likely a faulty sensor, clogged pickup screen, bad pump, or bearing clearance issue. | Do not add extra oil. Perform a mechanical pressure gauge test. |
| Oil below the lower dot / completely dry | Severe oil starvation. Pump is drawing aerated froth or nothing at all. | Add correct grade oil. Check for major leaks or severe oil consumption history. |
| Oil well above full mark | Severe overfill or fuel/coolant dilution. Overfilled crankshaft whips oil into foam, causing pump cavitation. | Drain excess fluid to the proper line before restarting. |
| Milky, frothy, or “coffee with cream” color | Coolant contamination (head gasket failure) or severe cold-weather moisture accumulation. | Do not run the engine. Check for cooling system leaks and review TSB T-SB-0104-21. |
| Dark, gritty oil with visible metallic specks | Sludge buildup or active rod/main bearing wear (glitter in oil). | Tow for professional mechanical inspection; remove oil pan to inspect bearings. |
Toyota’s official maintenance schedules specify replacing engine oil and filter every 10,000 miles or 12 months under normal operation, but recommend 5,000-mile intervals for severe driving conditions (repeated short trips below 32°F, extended idling, or dusty roads).
Can Freezing Weather Trigger a Low Oil Pressure Warning? (Toyota TSB T-SB-0104-21)
Yes. On certain 2018–2024 Toyota Camry and Camry Hybrid models equipped with the 2.5L 4-cylinder engine (A25A-FKS and A25A-FXS engines), freezing weather can directly cause oil pressure loss.
According to Toyota Technical Service Bulletin T-SB-0104-21 Rev2, vehicles driven on frequent short trips in temperatures below freezing do not reach full operating temperature long enough to burn off combustion blow-by moisture. This moisture mixes with engine oil, forming a milky emulsion that collects in the lower crankcase. When parked in sub-zero temperatures, the accumulated moisture freezes around the oil pickup tube or pressure relief passages, starving the oil pump upon startup.
| Diagnostic Clue | Technical Significance | Required Procedure |
|---|---|---|
| Milky oil emulsion in cold weather | Moisture accumulation described in T-SB-0104-21 Rev2. | First perform a cooling system pressure test to rule out a blown head gasket. If cooling system is intact, follow TSB cleaning and PCV update procedures. |
| Diagnostic Codes P05202A / P052477 | P05202A: Oil Pressure Sensor “A” Signal Implausible. P052477: Engine Oil Pressure Too Low. |
Do not clear codes. Allow vehicle to thaw in a heated shop, change oil and filter, and inspect oil pressure sensor. |
Use the Right Oil Grade and Filter for Your Camry
Using the incorrect oil viscosity or a low-grade filter with an improperly calibrated bypass valve can trigger low oil pressure warnings or variable valve timing (VVT-i) fault codes.
Oil viscosity requirements differ by Camry generation and powertrain:
- 2025–2026 Camry (2.5L Hybrid A25A-FXS): Requires ultra-low viscosity SAE 0W-8 meeting JASO GLV-1 standards. SAE 0W-16 is permitted only as a one-time temporary top-off.
- 2018–2024 Camry (2.5L 4-Cyl A25A-FKS / A25A-FXS): Factory filled with SAE 0W-16 (API SN Plus / SP / Resource Conserving). SAE 0W-20 is permitted as an alternate top-off.
- 2018–2024 Camry (3.5L V6 2GR-FKS): Requires SAE 0W-20 full synthetic.
- 2012–2017 Camry (2.5L 2AR-FE & 3.5L 2GR-FE): Typically specifies SAE 0W-20 or SAE 5W-20.
- 2002–2011 Camry (2.4L 2AZ-FE & 3.0L/3.3L/3.5L V6): Typically specifies SAE 5W-20 or SAE 5W-30.
Post-Service Inspection Tip: If the oil pressure light illuminates immediately after an oil change, check for: (1) an unseated or double O-ring gasket on the oil filter housing, (2) missing oil filter center cage/tube on cartridge filters, (3) significant underfill, or (4) an incorrect non-OEM filter with restrictive media.
[Products Worth Considering]

Castrol EDGE 0W-20 advanced full synthetic motor oil is engineered for drivers seeking strong wear protection, excellent viscosity control, and thermal stability. It delivers superior performance in critical engine areas, including fuel economy, high-temperature protection, sludge control, and wear defense. Designed for extended oil-change intervals, it helps keep modern engines running smoothly under demanding conditions.

These adjustable oil filter pliers are designed to help remove engine filters, conduit, and fittings with better reach and control in tight spaces. The bent head design improves access, while soft nonslip grips add leverage and comfort during use. Built with high carbon steel and a Permalock fastener, they offer dependable strength and long-lasting performance.

This long-neck automotive funnel makes pouring oil, gas, and lubricants cleaner and easier from different angles. Its wide neck and raised sides help reduce spills, dirt entry, and leaks, while the flexible, reusable plastic design stands up to regular use. Sized for convenient handling, it’s a practical tool for routine vehicle maintenance across cars, trucks, and SUVs.
Test Oil Pressure With a Mechanical Gauge
If the oil level is full but the warning light remains illuminated, a mechanical pressure test is mandatory. This isolates an electrical sending unit failure from catastrophic internal oil pump or bearing failure.
[Products Worth Considering]

This spill-proof radiator coolant filling funnel kit helps you refill cooling systems cleanly while reducing trapped air pockets that can affect heater and engine performance. It includes a 5-inch extension bar and 45-degree elbow for easier access under shrouds or at awkward angles. Color-matched caps for dedicated adapters make setup simpler and more organized.

The Mityvac MV8500 Silverline Elite is a versatile automotive service kit for brake and clutch bleeding, diesel fuel priming, and vacuum or pressure testing. Its dual-capability pump streamlines diagnostics and maintenance across motorcycles, cars, trucks, and SUVs, while the ergonomic design supports comfortable use during longer jobs. Built with a durable zinc-aluminum die-cast body and a 4.5oz fluid reservoir, it delivers reliable performance for professional and DIY repair work.

Exquisite design: Oil Pressure Tester Tool have dual display pressure gauge head, clear scale, easy to clean, and equipped with rubber buffer protection cover, shockproof and scratchproof.
What If the Oil Level Is Full?
A full dipstick only confirms that oil is present in the sump—it does not prove the oil pump is circulating it under pressure. Adding more oil to a full engine will overfill the crankcase, causing the crankshaft counterweights to aerate the oil into a spongy foam that oil pumps cannot prime.
How to Connect a Mechanical Pressure Gauge
- Allow the engine to cool down safely before working near exhaust manifolds.
- Locate the oil pressure switch or sensor on the engine block.
- Disconnect the electrical connector and carefully unthread the sensor using the correct deep socket.
- Critical Adapter Note: Toyota engine blocks typically use a 1/8″ BSPT (British Standard Pipe Taper) thread pitch. Do not force a standard American 1/8″ NPT brass fitting into the aluminum block, as cross-threading will crack the engine casting. Always use the proper Japanese Industrial Standard / BSPT adapter.
- Thread the mechanical gauge hose into the port and route the line away from hot belts or fans.
- Start the engine, observing the gauge needle instantly. If pressure does not register within 3 seconds, turn the engine off immediately.
- Record oil pressure at cold start, warm idle (around 176°F–194°F engine coolant temp), and at 3,000 RPM.
Interpreting Toyota Oil Pressure Readings
Compare your recorded mechanical gauge numbers to official factory specifications found on the Toyota Technical Information System (TIS):
| Gauge Reading Condition | Typical Spec Range | Diagnostic Meaning & Next Step |
|---|---|---|
| Meets Toyota Specification | Warm Idle: > 4.3–11 PSI 3,000 RPM: 22–75+ PSI |
Mechanical lubrication is healthy. The dashboard light is being triggered by a bad sensor, damaged wiring harness, poor ground, or cluster fault. |
| Below Specification at Idle & RPM | Warm Idle: < 4 PSI 3,000 RPM: < 20 PSI |
True low oil pressure. Inspect for stuck oil pump relief valve, restricted pickup tube screen, excessive bearing clearances, or internal leakage. |
| Pressure Drops Sharply When Hot | Cold: 45 PSI Hot Idle: < 3 PSI |
Worn engine bearings (rod/main clearances opened up), diluted engine oil, or worn oil pump housing tolerances. |
| Zero / Near-Zero Pressure | 0–2 PSI | Broken oil pump drive gear, completely dislodged pickup tube, or severe total system failure. Do not run. |
How Do You Confirm and Replace a Bad Oil Pressure Sensor?
Oil pressure sensors (sending units) are subjected to extreme heat cycles and engine vibration, making internal diaphragm failure and electrical contact degradation common.
[Products Worth Considering]

【Manufacturer Part Number】(Sensor)PS-305, 30713497, 37240PHM003, 8353005010, 30713497, 37240PHM003, 835300E010, 8353012060, 8353014060, 8353014070, 8353028010, 8353030090, 8353060020, 83530AA011, 88924478, 8971762300, 94854139, 94854295, 94859102, 97176230;(Connector)90980-11363,9098011363,S2538,7283-1114-30
Locating the Sensor by Camry Engine Family
- 2.5L 4-Cylinder (2018–2026 A25A-FKS / A25A-FXS): Located on the front-lower portion of the cylinder block, adjacent to the oil filter assembly housing.
- 2.5L 4-Cylinder (2012–2017 2AR-FE): Located on the front lower face of the engine block near the oil filter bracket.
- 3.5L V6 (2007–2024 2GR-FE / 2GR-FKS): Located on the lower oil filter bracket adapter housing near the front bank of the V6 engine.
- 2.4L 4-Cylinder (2002–2011 2AZ-FE): Threaded into the engine block above the oil filter mounting pad.
Sensor Replacement Steps
- Verify the ignition is turned completely off and the engine is cool.
- Disconnect the electrical connector by depressing the locking tab. Inspect the plastic plug for oil intrusion—oil leaking into the connector pins confirms internal diaphragm failure.
- Use a dedicated oil pressure switch socket to unthread the old sensor counter-clockwise.
- Clean the engine block port threads with a clean shop towel.
- Apply a thin coat of thread sealant (or use the pre-applied factory sealant tape) to the replacement sensor threads, leaving the first two lead threads bare to maintain electrical grounding and prevent passage clogging.
- Thread the new OEM sensor in by hand to prevent cross-threading, then torque to factory specification (typically 11–15 ft-lbs).
- Reconnect the harness, start the engine, check for leaks, and verify that the dashboard warning turns off within 2 seconds.
Inspect Wiring and Connectors for Corrosion or Loose Pins
A damaged wiring harness or loose terminal can trigger an intermittent or constant low oil pressure warning even when hydraulic pressure is optimal.
- Oil Contamination: When the pressure switch diaphragm fails, pressurized oil can push through the sensor body into the wiring harness connector, causing a high-resistance short to ground.
- Rodent Damage & Chafing: Inspect the exposed engine wiring loom running along the front of the engine block for signs of chafing against brackets or chewed insulation.
- Terminal Tension: Check that the female pin inside the harness connector has proper spring tension and is not spread wide or corroded with green verdigris.
How Incorrect Oil Grade or Filter Affects Pressure Readings

Modern Toyota engines rely on tight mechanical clearances and hydraulic pressure to operate variable valve timing (VVT-i) sprockets and hydraulic lash adjusters. Deviating from specified fluid standards disrupts lubrication dynamics:
- Excessively Heavy Oil: Installing thick conventional oil (e.g., 20W-50) in an engine designed for 0W-16 or 0W-8 delays cold-start oil delivery to top-end camshafts and causes sluggish pressure relief response.
- Sub-Standard Oil Filters: Low-quality aftermarket filters may feature poorly calibrated pressure relief bypass valves or low-grade paper media that collapses under high flow demand, restricting oil supply to the main gallery.
- Missing Cartridge Filter Center Tube: On Camry models utilizing cartridge-style oil filters (such as the 2AR-FE and 2GR-FE), the plastic or metal center core tube is sometimes accidentally discarded with the old filter element. Without this center tube, the new filter element collapses under oil pressure, choking oil flow and triggering a low pressure warning.
Refer to the American Petroleum Institute (API) Engine Oil Guidelines to ensure replacement fluids carry current API SP / ILSAC GF-6A or JASO certification.
Common Oil-Pressure Causes: Pump, Pickup Screen, and Wear
When mechanical gauge testing confirms that oil pressure is genuinely below Toyota specifications, the root cause is mechanical:
| Root Mechanical Cause | How It Causes Low Pressure | Typical Symptoms & Diagnosis |
|---|---|---|
| Clogged Oil Pickup Screen | Carbonized oil sludge or debris coats the mesh screen in the oil pan, restricting the volume of oil reaching the pump suction side. | Pressure drops progressively as RPM increases; history of extended drain intervals; sludge visible under valve cover. |
| Worn Oil Pump / Stuck Relief Valve | Scoring inside the pump housing or a pressure relief valve stuck open bleeds off hydraulic pressure back into the pan. | Low pressure across all RPM ranges; verified low reading on mechanical test gauge. |
| Excessive Engine Bearing Clearance | Worn crankshaft main bearings or connecting rod bearings allow pressurized oil to escape rapidly across journal gaps. | Deep engine knocking sound under load; pressure drops severely as engine oil reaches full operating temperature. |
| Burst External VVT-i Oil Line (Older V6) | Rubber section on early 2GR-FE V6 external oil supply line ruptures, dumping engine oil rapidly. | Massive oil puddle beneath right-front engine area; sudden total loss of oil level and pressure. |
| Oil Consumption Starvation (2.4L 2AZ-FE) | Stuck piston oil control rings burn oil rapidly, draining the oil pan between routine service intervals. | Flickering oil light during hard braking or cornering; dry dipstick reading. |
DIY Fixes vs. Repairs That Require a Mechanic
Evaluate your mechanical comfort level and equipment before attempting oil pressure repairs:
Safe DIY Troubleshooting & Repairs
| Scenario / Diagnostic Finding | Can You Fix It DIY? | When to Call a Professional / Tow |
|---|---|---|
| Oil level is low; no active leak or mechanical noise | Yes: Add correct grade oil and monitor dipstick. | Tow if warning light remains on after adding oil. |
| Leaking oil filter gasket or loose drain plug | Yes: Re-torque plug or replace filter cartridge and O-ring. | Call a mechanic if threads are stripped in the aluminum oil pan. |
| Corroded or oil-soaked sensor wiring plug | Yes: Clean with contact cleaner or splice a replacement pigtail. | Call a mechanic if wiring harness is damaged deep in the loom. |
| Faulty sensor (confirmed by normal gauge pressure) | Yes: Unthread and install new OEM oil pressure switch. | Call a mechanic if sensor is inaccessible or seized in the block. |
| Mechanical gauge confirms low oil pressure / engine knocking | No: Do not attempt to drive. | Tow immediately: Requires internal oil pump, pickup, or engine teardown. |
When to Call a Mechanic Immediately
- The red oil light remains illuminated after confirming correct oil level on the dipstick.
- The engine produces noticeable mechanical chatter, lifter ticking, or deep metallic knocking.
- The dipstick reveals milky emulsion, heavy sludge, or metal flake contamination.
- A mechanical pressure test confirms oil pressure below Toyota minimum specifications.
The golden rule of oil pressure diagnostics: If the red oil warning stays on, verify pressure with a mechanical gauge or tow the car. Guessing is cheap only until internal engine bearings are ruined.
Step-by-Step Troubleshooting Flowchart for the Oil Pressure Light
- Oil pressure light illuminates: Safely pull over immediately and shut the engine off.
- Perform visual leak inspection: Look under the vehicle for major puddles around the filter, drain plug, or oil pan.
- Check oil level and fluid condition: Pull the dipstick. If level is low, add the specified viscosity oil. If oil is milky or contains metal flakes, do not run the engine.
- Inspect recent maintenance work: Check for loose filters, double gaskets, or incorrect oil grade from a recent lube service.
- Perform a single controlled test start: If oil was low and topped off, restart briefly. If the light does not turn off within 3–5 seconds, shut down immediately.
- Hook up a mechanical pressure gauge: Connect a test gauge using a 1/8″ BSPT adapter to read actual PSI at idle and 3,000 RPM.
- If gauge pressure is within spec: Test the oil pressure sensor, inspect wiring harness connector for oil contamination, and replace the sending unit.
- If gauge pressure is below spec: Drop the oil pan to inspect for a clogged pickup tube screen, failed oil pump relief valve, or bearing wear.
Preventive Maintenance to Avoid Oil Pressure Light Warnings
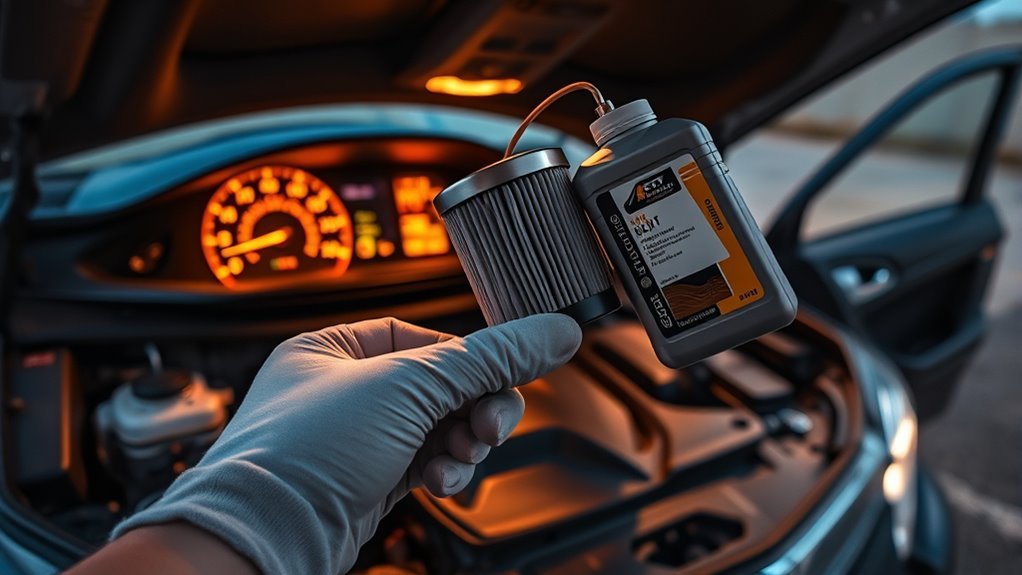
Preventing low oil pressure issues centers on consistent maintenance and using correct specification parts:
- Check your dipstick monthly: Do not wait for a dashboard warning light to notify you of low engine oil volume.
- Adhere to strict viscosity standards: Always use the exact oil specification (e.g., 0W-8, 0W-16, or 0W-20) designated on the engine oil cap.
- Shorten oil change intervals in extreme conditions: If you drive short trips in sub-freezing temperatures or idle extensively, change oil every 5,000 miles to prevent moisture and sludge buildup (referencing T-SB-0104-21).
- Use OEM Toyota oil filters: Genuine Toyota filters feature proper anti-drainback valves and exact bypass valve spring calibrations.
- Address small oil leaks promptly: Repair minor valve cover or timing cover weeping before it develops into rapid fluid loss.
- Avoid unproven oil additives: Engine oil additives can alter fluid viscosity ratings and interfere with hydraulic valve timing components.
Frequently Asked Questions
How do you fix a Toyota Camry oil pressure warning?
Pull over safely, shut the engine off immediately, and check the oil level and visible leaks. Add the correct oil if low. If the light stays on, connect a mechanical pressure gauge to measure true pressure. If gauge pressure is normal, replace the faulty oil pressure sensor or repair damaged wiring. If pressure is genuinely low, inspect the oil pickup screen, pump, and engine bearings.
Can low oil pressure be fixed?
Yes, depending on the underlying cause. Simple causes like low oil level, a failed sensor, a clogged filter, or an improper oil grade are inexpensive to fix. Deeper mechanical issues, such as a sludge-blocked pickup screen, worn oil pump, or excessive bearing wear, require professional mechanical teardown and repair.
How much does it cost to fix an oil pressure light?
Cost ranges from $15 to $35 for an oil top-off or filter replacement, and $80 to $200 for a replacement oil pressure sensor. If the issue is a clogged pickup screen or worn oil pump, repairs typically range between $600 and $1,500. Internal engine bearing damage can exceed $3,000 to $5,000 for engine replacement.
Can I drive my Camry with the oil pressure light on?
No. You should never drive with the red oil pressure light on. Low oil pressure deprives vital engine components of lubrication, which can cause catastrophic bearing, camshaft, and crankshaft failure within minutes. Pull over immediately and shut off the engine.
What oil should I add to a Toyota Camry?
Always add the oil grade listed on your oil filler cap or owner’s manual. 2025–2026 Camry Hybrids require SAE 0W-8 (0W-16 as temporary top-off). 2018–2024 2.5L 4-cylinder models typically use SAE 0W-16, while 3.5L V6 models use SAE 0W-20. Older models (2002–2011) generally specify SAE 5W-20 or 5W-30.
What if the oil pressure light came on right after an oil change?
Shut the engine off immediately. Check for underfilling, a loose or double-gasketed oil filter, a missing filter center core tube (on cartridge filters), a loose drain plug, or incorrect oil viscosity. If the level is correct and leaks are absent, test mechanical pressure before driving.
Why does the Camry oil pressure light flicker at idle or during turns?
Flickering during cornering or braking typically indicates low oil level sloshing away from the pickup tube. Flickering at hot idle indicates borderline low oil pressure caused by worn engine bearings, thinned oil, or an aging oil pressure sensor. Check your dipstick immediately.
Does the Toyota Camry oil pressure light need to be reset?
No. The oil pressure warning is an automated hardware safety circuit and turns off automatically once safe oil pressure is restored. It does not require a manual reset procedure. Do not confuse it with the “Maintenance Required” reminder, which is reset manually after oil service.
Conclusion
An illuminated Toyota Camry oil pressure light is a critical warning that requires immediate action. Always shut off the engine, inspect the dipstick on level ground, and check for active fluid leaks. Because a full oil level does not guarantee safe oil pressure, never ignore a persistent warning light. Connect a mechanical pressure test gauge using the proper 1/8″ BSPT adapter to distinguish a simple sensor failure from internal oil pump or bearing wear. Verifying mechanical pressure before driving protects your engine from catastrophic failure and prevents unnecessary parts replacement.
Sources
- Toyota Owners — Warning Lights — Official manufacturer definitions for dashboard warning indicators.
- Toyota Owners — Manuals and Warranties — Model-year owner documentation and fluid specifications.
- Toyota 2025 Camry Warranty & Maintenance Guide — Fluid inspection intervals and scheduled service specifications.
- Toyota 2025 Camry Maintenance Data — Specifications for ultra-low viscosity SAE 0W-8 and 0W-16 engine oils.
- American Petroleum Institute — Oil Categories — Current API SP, Resource Conserving, and ILSAC GF-6 performance standards.
- Toyota Technical Information System — Official factory repair manuals, wiring diagrams, and mechanical pressure specs.
- Toyota T-SB-0104-21 Rev2, filed with NHTSA — Service bulletin covering freezing moisture accumulation and low oil pressure warnings on A25A engines.

[…] Do not keep driving if the oil-pressure warning light is on, the oil level is very low, the engine is rattling loudly, the check-engine light is […]