What’s in This Article
- 5 Warning Signs Your Camry’s Control Arm Bushings Are Failing
- Why Worn Control Arm Bushings Cause Steering Shake and Instability
- Quick Visual Check: Inspect Camry Control Arm Bushings
- Physical Tests: Check Play, Clunks, and Wheel Movement
- How Failed Control Arm Bushings Harm Rotors, Calipers, and Tires
- When to DIY: Tools, Safety, and What to Expect
- Remove the Control Arm and Assess Old Bushings
- Install New Control Arm: Alignment, Torque Specs, and Tips
- Post-Install Checks for Camry Control Arm: Road Test and Re-Torque
- Cost, Common Pitfalls, and When to Consult a Pro
- Frequently Asked Questions
If your Camry’s control arm bushings start to fail, your car may feel loose, noisy, or hard to keep steady. You may feel imprecise steering, hear clunks over bumps, or notice vibration through the wheel or floor. Check for cracked, torn, oil-soaked, or deformed rubber, then look for uneven tire wear or alignment drift. This guide shows you how to inspect the bushings, test for play, decide when to replace parts, and know when to call a mechanic.
Quick Answer
Bad Camry control arm bushings often cause clunking over bumps, loose steering, steering wheel vibration, pulling, and uneven tire wear. A visual check can reveal cracked or torn rubber, but a physical suspension inspection gives you a clearer answer. Don’t keep driving hard with these symptoms because worn bushings can hurt handling, tires, and braking feel.
Key Takeaways
- Check for clunks, steering shake, wandering, and uneven tire wear before you replace parts.
- Inspect the rubber bushings for cracks, tears, oil damage, deformation, or metal-to-metal contact.
- Use jack stands, wheel chocks, and the correct lift points before you work under your Camry.
- Replace worn bushings or control arms before they damage tires, brakes, or nearby suspension parts.
- Get an alignment after control arm work so the tires track correctly.
5 Warning Signs Your Camry’s Control Arm Bushings Are Failing
Odd front-end behavior often gives you the first warning. MOOG lists front-end clunking over bumps, steering looseness, vibration, and uneven tire wear as common signs of a failing control arm or bushing.
Start with steering instability. If the wheel shakes or feels loose during turns or over bumps, worn bushings may let the control arm move too much. You may also feel vibration through the steering wheel, seat, or floor.
Listen for clunking noises when you hit rough roads, speed bumps, or driveway edges. Those impacts can make deteriorated bushings knock against their mounts. Inspect the bushings next. Cracked, torn, oil-soaked, or deformed rubber means you need a closer suspension check.
Watch the tread, too. Uneven wear can signal bushing wear that upsets steering alignment, but tire pressure, balance, and worn struts can cause similar patterns. According to the National Highway Traffic Safety Administration (NHTSA), you should rotate tires every 5,000 to 8,000 miles if your vehicle maker recommends it, or sooner when uneven wear appears.
Don’t ignore these signs. They can reduce handling and safety. Replace failed bushings, inspect related parts, and verify wheel alignment so your Camry tracks straight again.
Why Worn Control Arm Bushings Cause Steering Shake and Instability
Control arm bushings help hold the wheel in the correct position while the suspension moves. When the rubber breaks down, the control arm can shift beyond its intended range. You may feel more steering shake, reduced stability, and less precise tracking.
Worn bushings can allow side-to-side and front-to-back play. That movement changes wheel position under braking, turning, and rough-road impacts. The tire then contacts the road less evenly, and your Camry may wander or need frequent steering corrections.
The rubber also helps absorb road vibration. Once cracks, tears, or separation weaken it, more road force reaches the steering wheel and chassis. That harsh feel can grow worse at speed or during braking.
Severe bushing wear can also contribute to uneven tire wear. Uneven tread then makes the steering feel worse and can reduce grip during sudden maneuvers. Inspecting and replacing worn bushings restores suspension geometry and helps your Camry respond predictably.
Quick Visual Check: Inspect Camry Control Arm Bushings
A quick visual check can show obvious bushing damage before you start deeper testing. Park on level ground, set the parking brake, and chock the wheels. Lift the Camry only at approved lift points, then support it with jack stands before you remove a wheel.
Warning: Never work under a Camry held only by a jack because a jack can slip or lose pressure.
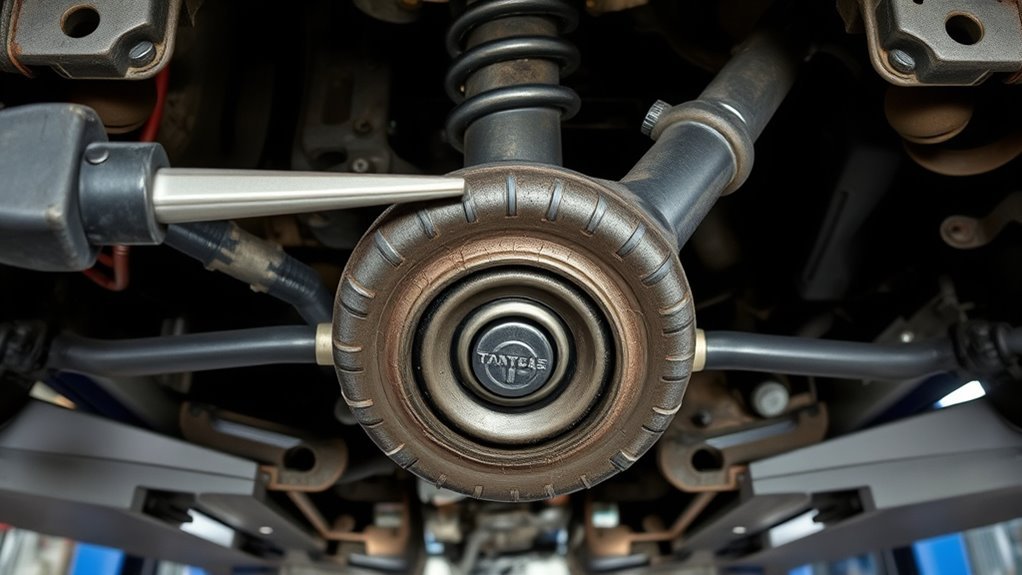
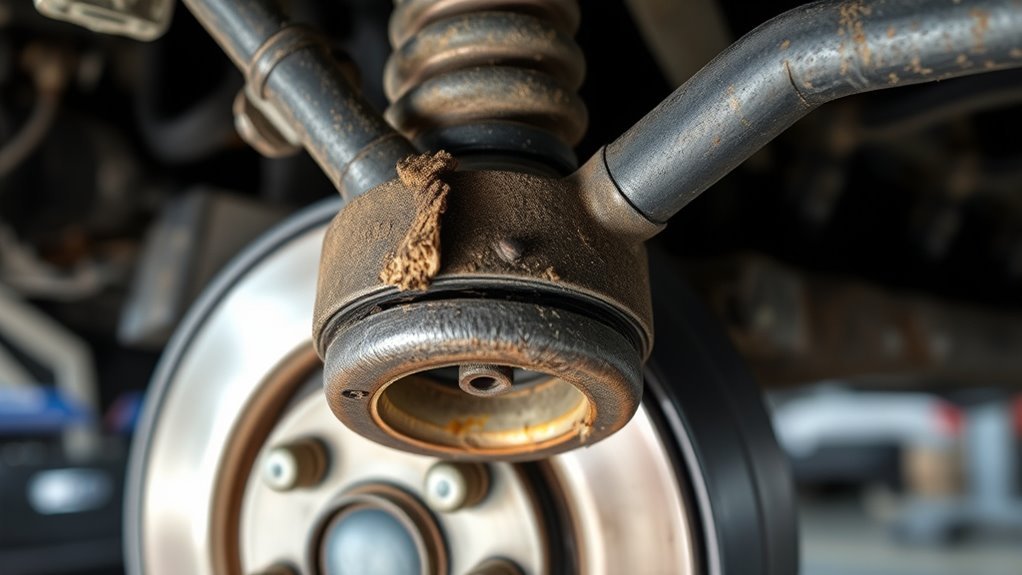
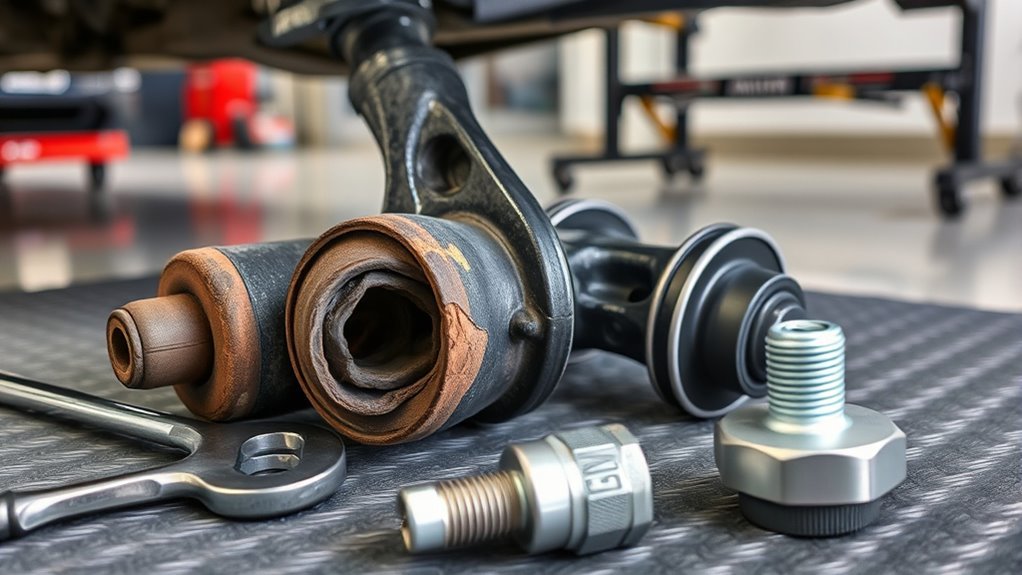
Look at each control arm bushing with a bright light. Check the rubber faces, outer edges, and center sleeve. Fluid seepage can matter on fluid-filled bushings, while oil contamination can soften normal rubber bushings.
- Examine bushing faces for cracks, tears, separation, or deformation.
- Check the center sleeve for movement, rust marks, or metal-to-metal contact.
- Scan nearby areas for oil, grease, or road grime that hides damage.
- Compare both front tires for feathering, cupping, or inner-edge wear.
- Note squeaks, knocks, or clunks during slow turns and low-speed bumps.
This inspection helps you catch damage early. Take photos of any cracks or movement, then compare both sides before you decide on repair.
Physical Tests: Check Play, Clunks, and Wheel Movement
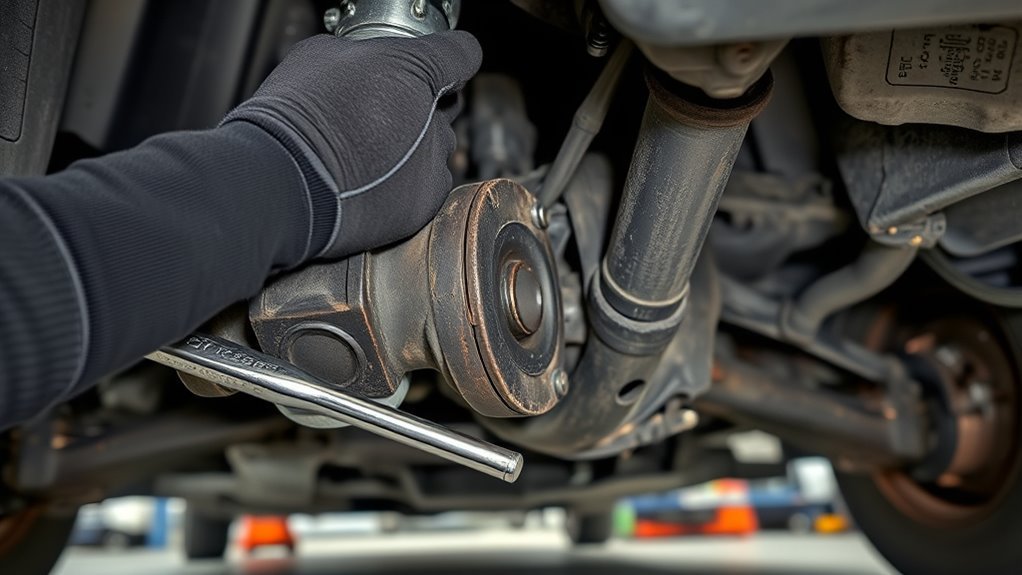
The visual check shows surface damage, but physical tests show how the bushing acts under load. Secure the Camry on jack stands, then grasp the tire at 12 and 6 o’clock. Wiggle it firmly and listen for clunks.
Movement during this test can come from bushings, ball joints, tie rods, wheel bearings, or loose hardware. Don’t treat the wheel test as final proof by itself. Use it as a clue, then inspect each suspension joint.
Next, push and pull the control arm with a pry bar while you watch the bushing. A healthy bushing may flex slightly, but it should not separate, knock, or let the sleeve move freely. Ask a helper to turn the steering slowly while you watch for shifting.
Drive slowly over a small bump only after you complete the safety check. Listen for clunks, squeaks, or a dull knock from the lower front suspension. Match those sounds with tire edge wear and steering drift before you plan repair.
How Failed Control Arm Bushings Harm Rotors, Calipers, and Tires
Failed control arm bushings let the wheel move in ways Toyota did not design. That movement can upset tire contact, steering feel, and brake feedback. It does not prove your rotors or calipers have failed, but it can add stress to nearby parts.
Replace worn bushings promptly when you confirm play, torn rubber, or metal-to-metal contact. That step helps protect tires, brake parts, and suspension geometry.
Excessive Brake Component Movement
Loose bushings can let the steering knuckle and wheel position shift under braking. You may feel a shake, pull, or dull knock when load transfers to the front suspension. Brake pulsation can also come from rotor runout, pad deposits, or hub issues, so inspect the brake system separately.
- Pad contact: shifting suspension parts can make brake feel less consistent.
- Rotor vibration: worn bushings can add shake, but rotors need separate runout checks.
- Chassis vibration: loose suspension parts can send harsh feedback into the cabin.
- Inspection priority: check bushing play, ball joints, tie rods, caliper mounts, and rotor condition.
Fix the failed bushing first when you confirm movement. Then road-test the Camry and recheck brake feel.
Uneven Tire Wear Patterns
Uneven tire wear often appears when worn control arm bushings let wheel geometry change under load. You may see feathering, bald spots, cupping, or heavy inner-edge or outer-edge wear. Poor pressure, weak struts, bad alignment, and tire imbalance can create similar wear.
You may also feel steering shake at speed. Treat that shake as a warning sign, not a diagnosis. Inspect tire pressure, wheel balance, alignment, bushings, ball joints, and tie rods before you replace parts.
Regular tire care helps you spot problems early. NHTSA recommends following your owner’s manual for rotation intervals and rotating sooner when uneven wear appears. Replacing failing bushings restores more stable geometry and helps protect tires from repeat wear.
When to DIY: Tools, Safety, and What to Expect
A Camry control arm replacement may suit you if you have safe lifting gear, basic suspension experience, and the correct service information. Don’t start if you lack jack stands, wheel chocks, eye protection, a torque wrench, or model-specific torque specs. Your Camry’s model year, engine, and production date can change hardware and procedures.
For 1992 to 1996 Camry front lower control arm work, 1A Auto lists tools such as a torque wrench, jack stands, wheel chocks, safety glasses, gloves, sockets, wrenches, a pry bar, and a floor jack. Use that kind of checklist before you remove any suspension bolt.
- Confirm wear: inspect for cracks, tears, separation, or excessive movement.
- Prepare safely: set wheel chocks, lift at approved points, and place jack stands.
- Document hardware: photograph bolt positions, bracket orientation, and bushing stopper placement.
- Remove carefully: unbolt connected parts without stretching brake hoses or anti-lock braking system (ABS) wiring.
- Finish correctly: torque fasteners to the service manual value and schedule alignment.
Stop the job if a bolt seizes, a ball joint taper will not release, or the frame mount shows rust damage. A shop can handle stuck hardware with better tools and less risk.
[Products Worth Considering]

Kit Includes: 2 Front Inner Tie Rods; 2 Front Lower Ball Joints; 2 Front Lower Control Arms; 2 Front Outer Tie Rods; 2 Front Sway Bar Links

Application: Front lower control arms kit fit for Toyota Camry 2007 2008 2009 2010 2011 (excluding Hybrid Models)

Kit Includes: 2 Rear Lower Forward Control Arms; 2 Rear Lower Rearward Control Arms
Remove the Control Arm and Assess Old Bushings
Start by lifting the Camry safely and removing the wheel so you can reach the suspension. With the car on stands, detach the sway bar end link if it blocks access. Loosen the control-arm-to-frame bolts with the correct socket, then note the rear control arm bolt’s orientation before you remove it.
Support the control arm as you pull the bolts. Do not let the arm drop against brake lines, ABS wiring, or the axle shaft. If the ball joint taper needs release, use the correct puller instead of hammering nearby parts blindly.
Once the arm comes out, complete a focused bushing inspection. Look for radial cracks, flange tears, missing rubber, sleeve movement, and metal-to-metal contact. Twist and compress the bushing by hand; any clear separation or knock means you need replacement.
Transfer any bushing stopper or bracket only when your replacement part requires it. Keep old hardware organized until you finish the job. That habit helps you avoid reversed bolts, missing washers, and alignment problems.
Install New Control Arm: Alignment, Torque Specs, and Tips
When you fit the new control arm, align the bushings and mounting sleeves before you tighten the bolts. Start all bolts by hand so you don’t cross-thread them. Keep the arm positioned naturally instead of forcing the rubber into a twist.
Don’t rely on a broad torque range for final assembly. Use the factory repair manual or a trusted repair database for your exact Camry year, engine, side, and bolt location. A calibrated torque wrench helps you avoid loose bolts, damaged threads, and crushed bushings.
The tightening sequence matters. Snug the fasteners, settle the suspension near normal ride height when the service procedure calls for it, then final-torque the bushing bolts. Tightening rubber bushings while the suspension hangs can preload the rubber and shorten bushing life.
- Align each bushing sleeve before you tighten the bolt.
- Start all fasteners by hand before you use a wrench.
- Torque every fastener to the exact service manual value.
- Check sway bar links, ball joints, tie rods, and boots while access stays open.
Replace worn nearby parts during the same job if they show clear play or torn boots. That choice can save labor and prevent a second alignment.
[Products Worth Considering]

PRECISE & HIGH QUALITY - Manufactured in Taiwan, our torque wrench is engineered for superior precision. It ships pre-calibrated to +/- 4% accuracy, ensuring dependable results every time. Includes a calibration certificate with a trackable serial number for your assurance.
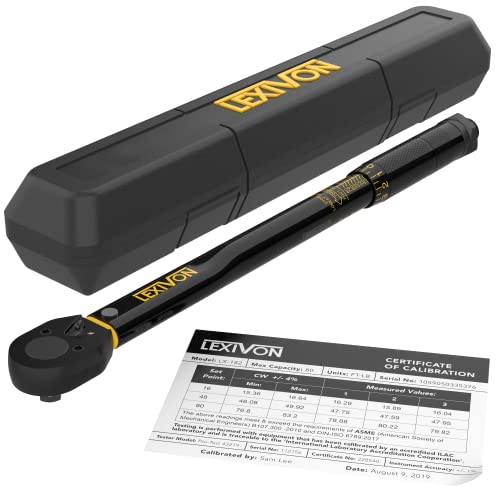
PRECISION - Ships pre-calibrated to +/- 4% accuracy and ready to use. Include calibration certificate with traceable serial number.

Durable Ratchet Head: Made from Hardened treated Chrome Vanadium steel alloy (Cr-V) Corrosion-Retardant: Satin Finish. Made in Taiwan
Post-Install Checks for Camry Control Arm: Road Test and Re-Torque
After installation, inspect the control arm, bushings, ball joint area, sway bar link, and brake hose routing before you lower the car. Confirm that each fastener sits correctly and that no wire or hose rubs against a moving part. Lower the Camry, let the suspension settle, then complete any final torque step required by the service procedure.
Start the road test slowly. Drive over smooth pavement first, then add low-speed turns and small bumps. Listen for clunks, squeaks, steering shake, brake vibration, or pulling.
Stop and recheck the work if you hear new noise or feel unstable steering. Look for shifted hardware, damaged boots, and bushing movement. After the first short drive, recheck accessible fasteners according to the repair manual and schedule a wheel alignment.
Cost, Common Pitfalls, and When to Consult a Pro
If you’re budgeting for control arm bushing replacement on a 1996 Camry, expect a wide price range. RepairPal’s 2026 estimate lists 1996 Toyota Camry control arm replacement at $365 to $781 before taxes, fees, local rates, and related repairs. Your total can change if you replace one arm, both arms, ball joints, or extra hardware.
DIY parts can cost less, but only if you already own the right tools and complete the job safely. Shop labor can cost more, but a mechanic can handle seized bolts, rust, alignment needs, and hidden suspension wear. Don’t skip a full suspension inspection because one missed part can create repeat noise and tire wear.
- Inspect bushings, ball joints, tie rods, sway bar links, struts, and tires before you order parts.
- Use exact torque specs because loose bolts can knock and overtightened bolts can damage threads or bushings.
- Get an alignment after control arm work because changed geometry can wear tires fast.
- Call a pro if steering issues remain, the job exceeds your tools, or you find rust or frame damage.
Choose professional help when the car feels unsafe during any test drive. Suspension work affects steering and braking, so caution costs less than a mistake.
Frequently Asked Questions
How Long Can You Drive With Bad Control Arm Bushings on a Toyota?
You should avoid driving longer than needed once bad bushings cause clunks, steering shake, or visible play. Light cracking may allow short-term monitoring, but torn rubber, loose movement, or unstable steering needs prompt repair. Drive gently to a repair shop if you can’t fix it at home.
How Long Does a Control Arm Bushing Last?
A control arm bushing can last tens of thousands of miles, but heat, road salt, rough roads, oil leaks, and age can shorten its life. Many owners inspect suspension bushings during tire rotation, brake service, or alignment checks. Replace the bushing or control arm when you confirm cracks, separation, or play.
Can Bad Control Arm Bushings Cause Vibration When Braking?
Bad bushings can add vibration during braking because the wheel can shift under load. Rotor runout, pad deposits, worn tie rods, and tire problems can cause similar symptoms. Inspect both the suspension and brake system before you blame one part.
Do You Need an Alignment After Replacing Control Arm Bushings?
Yes, you should schedule an alignment after control arm or bushing replacement. The repair can change toe, camber, or caster settings. Proper alignment helps your Camry track straight and protects new tires from uneven wear.
Safety Disclaimer: This article gives general information and does not replace a Toyota repair manual or a qualified mechanic. Use approved lift points, jack stands, wheel chocks, eye protection, and model-specific torque specs before you work under a vehicle.
Conclusion
Worn Camry control arm bushings can turn small clunks into steering shake, uneven tire wear, and poor handling. Inspect the bushings when you notice noise, vibration, pulling, or tire wear that returns after alignment. Confirm the fault with a visual check and physical play test before you replace parts. If you find torn rubber, clear movement, or unsafe steering, repair it promptly and get an alignment. A careful inspection now can help your Camry feel stable, quiet, and predictable again.
References
- Signs and Symptoms of a Failing Control Arm – MOOG Parts
- Tire Safety Ratings and Awareness – National Highway Traffic Safety Administration
- 1995 Toyota Camry Control Arm Replacement Cost Estimate – RepairPal, 2026
- How to Replace Front Lower Control Arms 1992-1996 Toyota Camry – 1A Auto, 2024