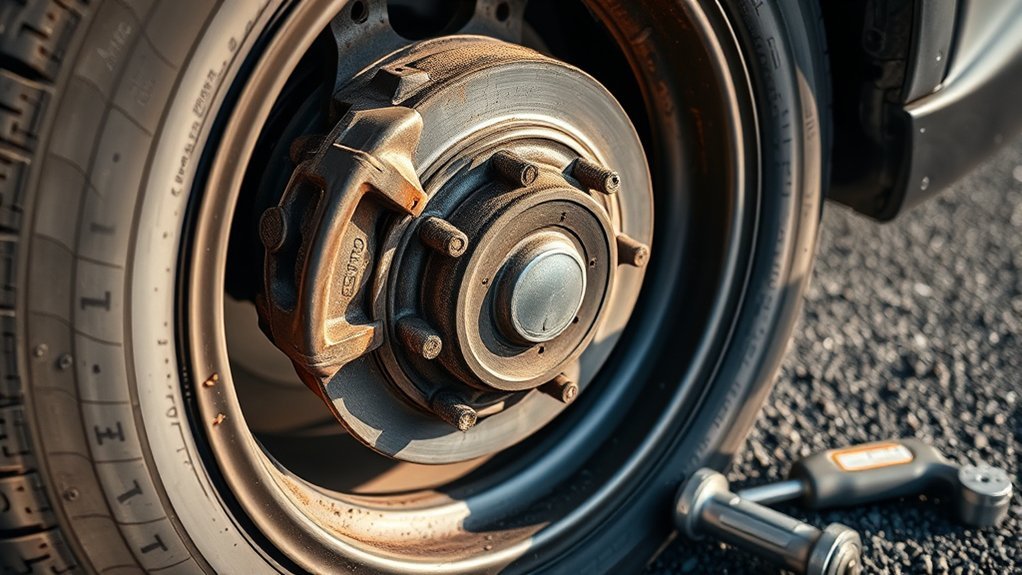
Use this Toyota RAV4 road trip checklist before any long drive: inspect the tires, brakes, fluid levels, 12-volt electrical system, Toyota Safety Sense (TSS) sensor areas, wiper blades, warning indicators, hybrid battery cooling intake on applicable models, cargo limits, and emergency gear. Complete the main mechanical inspection 1 to 2 weeks before departure so there is time to diagnose problems and obtain parts if service is needed. On departure morning, perform a final cold tire-pressure check, scan the dashboard, look for fresh leaks, and secure all cargo. For exact pressure, fluid, payload, spare-tire, charging, and service information, use the Tire and Loading Information label and the owner’s manual for your specific model year and powertrain.
Last updated: September 16, 2026 | Mechanically reviewed by
Affiliate disclosure: This page may contain affiliate links. AutoReviewNest may earn a commission from qualifying purchases at no extra cost to you.
Quick Answer: How to Prepare Your Toyota RAV4 for a Road Trip
To get your Toyota RAV4 road-trip ready, inspect cold tire pressure on all road tires and the spare if equipped, check tread and sidewalls, and confirm normal brake operation. Verify applicable oil, coolant, brake-fluid, and washer-fluid levels according to your owner’s manual. Check the 12-volt electrical system, exterior lights, wipers, climate control, and Toyota Safety Sense sensor areas. On Hybrid and Plug-in Hybrid models, locate the traction-battery cooling intake identified in the manual and make sure it is clean and unobstructed. Pack an emergency kit, stay within the exact payload limit printed on your vehicle’s Tire and Loading Information label, and address unresolved safety warnings or applicable recall instructions before leaving.
Model-Year Scope: The 2013–2018 RAV4 is fourth generation, 2019–2025 is fifth generation, and the redesigned 2026 RAV4 begins the sixth generation. Toyota’s U.S.-market 2026 RAV4 is offered with Hybrid Electric Vehicle (HEV) or Plug-in Hybrid Electric Vehicle (PHEV) powertrains rather than a conventional gasoline-only powertrain. Component locations, service procedures, Toyota Safety Sense hardware, spare-tire equipment, and charging capability can therefore differ substantially by year and grade. See Toyota’s official 2026 RAV4 announcement and your model-specific owner’s manual before applying a procedure from another generation.
Key Takeaways
- Cold Tire Placard Rule: Inflate tires to the cold pressure listed on the vehicle’s Tire and Loading Information label or specified in the owner’s manual—not the maximum pressure molded into the tire sidewall.
- Model Year Comes First: Do not assume a 2019–2025 RAV4 procedure or component location applies to the redesigned 2026 sixth-generation model.
- Hybrid Battery Air Intake: On HEV/PHEV models, keep the traction-battery cooling intake identified in the owner’s manual free of luggage, covers, pet hair, lint, and other obstructions.
- TSS Sensor Areas: Keep the windshield/camera and radar-sensor areas identified for your model clean, and investigate any driver-assistance warning instead of assuming dirt is the only cause.
- Phased Preparation: Perform mechanical checks early enough to obtain repairs or parts; reserve departure morning for cold tire pressure, warning-light, leak, document, and cargo checks.
At a Glance: Toyota RAV4 Pre-Trip Inspection Overview
| Time Required | Varies by vehicle condition; allow additional time if a problem requires diagnosis or professional service |
| Difficulty Level | Beginner for visual checks and tire pressure; professional service may be needed for brakes, electrical faults, leaks, or high-voltage systems |
| Tools Needed | Accurate tire-pressure gauge, tread-depth gauge or penny, LED flashlight, clean microfiber towels, and work gloves |
| Recommended Timing | Main inspection 1–2 weeks before departure as a planning buffer; final walkaround on departure morning |
| Estimated Cost | Varies by inspection findings, parts, labor rates, and location |
What Should You Check on a RAV4 Before a Road Trip?

Before a long drive, inspect the systems most likely to affect safety or leave the vehicle disabled: tires, brakes, applicable fluid levels, 12-volt electrical operation, exterior lighting, wipers, climate control, Toyota Safety Sense sensor areas, cooling-system condition, and emergency equipment. The goal is to find visible damage, abnormal operation, overdue maintenance, or warning messages early enough to have them diagnosed before departure.
Specifications and component locations vary across the 2013–2018 fourth generation, 2019–2025 fifth generation, and redesigned 2026 sixth generation, as well as among gasoline, HEV, and PHEV powertrains. Consult the official Toyota Owners Manuals and Warranties Portal for the exact procedures, fluids, maintenance requirements, and warnings for your vehicle.
| Vehicle System | Road-Ready Status | Requires Service Before Departure |
|---|---|---|
| Tires & Wheels | Cold pressure matches the vehicle label; tread is above 2/32 inch; wear is even; no cuts, bulges, exposed cords, or persistent pressure loss; spare or mobility kit is ready if equipped. | Tread at or below 2/32 inch, sidewall bulge, exposed cords, significant cracking, repeated pressure loss, vibration, or irregular wear. |
| Brake System | Normal pedal feel; predictable stopping; no grinding, abnormal pulling, severe vibration, fluid leak, or brake warning. | Grinding, soft/spongy pedal, abnormal pulling, strong pulsation, visible fluid leakage, or an unresolved brake-system warning. |
| Fluids & Cooling | Applicable fluid levels meet the model-specific manual requirements; no unexplained leaks or overheating symptoms. | Low fluid, repeated level loss, coolant residue, overheating warning, contaminated-looking fluid, or an unexplained leak. |
| 12V Electrical & Starting | Normal engine start or READY initialization; accessible terminals/jump points show no obvious damage; battery and charging system operate normally. | Slow cranking, intermittent no-start/READY condition, repeated low-voltage symptoms, damaged connections, or a battery that fails a proper battery/charging-system test. |
| TSS & Visibility | Clear windshield; effective wipers; clean camera/radar viewing areas identified in the manual; no unresolved driver-assistance warning. | Poor wiping, windshield damage in a sensor/camera area, obstructed sensors, or a persistent TSS/driver-assistance warning. |
| Hybrid/PHEV Cooling Intake | Traction-battery cooling intake identified in the owner’s manual is clean and unobstructed. | Vent blocked by luggage or covers, heavy lint/pet-hair buildup, or an unresolved traction-battery cooling warning. |
| A/C & Floor Mats | Climate control operates normally; driver floor mat is the correct fit and secured by its retention system. | A/C cannot maintain reasonable cooling in hot-weather travel, or a floor mat can slide toward or interfere with the accelerator/brake pedals. |
When Should You Inspect Your RAV4?
- 1 to 2 Weeks Before Departure: Use this as a practical planning buffer for a full inspection, review the RAV4 maintenance schedule, check your VIN for open NHTSA safety recalls, and arrange service if tires, brakes, fluids, electrical operation, or another safety system needs attention.
- 24 to 48 Hours Before: Top off approved windshield washer fluid, clean the glass and applicable driver-assistance sensor viewing areas, test exterior lights, verify the emergency kit, and stage luggage so you can check the final load.
- Departure Morning: Check road tires and the spare if equipped while cold, inspect beneath the vehicle for fresh unexplained fluid, confirm cargo does not obstruct visibility or applicable battery-cooling intakes, and scan the instrument panel for unresolved alerts.
- Post-Service Test Drive: If the vehicle recently had significant service, drive it locally before the trip and confirm normal braking, steering, temperature, and warning-light behavior rather than making the first post-repair drive a long highway leg.
Powertrain Note: RAV4 inspection points are not interchangeable across generations and powertrains. The 2019–2025 fifth-generation U.S. lineup included conventional gasoline and electrified variants, while Toyota’s redesigned 2026 U.S. lineup is HEV/PHEV-only. Battery access, coolant circuits, transaxle service points, charging equipment, and driver-assistance hardware can differ. Verify every procedure against your exact owner’s manual.
How Do You Check RAV4 Tires and Brakes Before a Road Trip?
Start with cold tire pressure, tread condition, visible tire damage, and normal brake operation. Use vehicle-specific limits rather than a pressure or wear figure copied from another RAV4 year or trim.
[Products Worth Considering]

NGK Iridium IX spark plugs are designed to deliver a stable spark, reliable ignition, and long-lasting performance for compatible Toyota Camry 2.5L engines. The fine-wire iridium center electrode helps improve durability and efficient combustion, making these plugs a smart replacement choice for maintaining smooth engine operation. Sold in a convenient four-pack, they are built for consistent performance and dependable fitment.
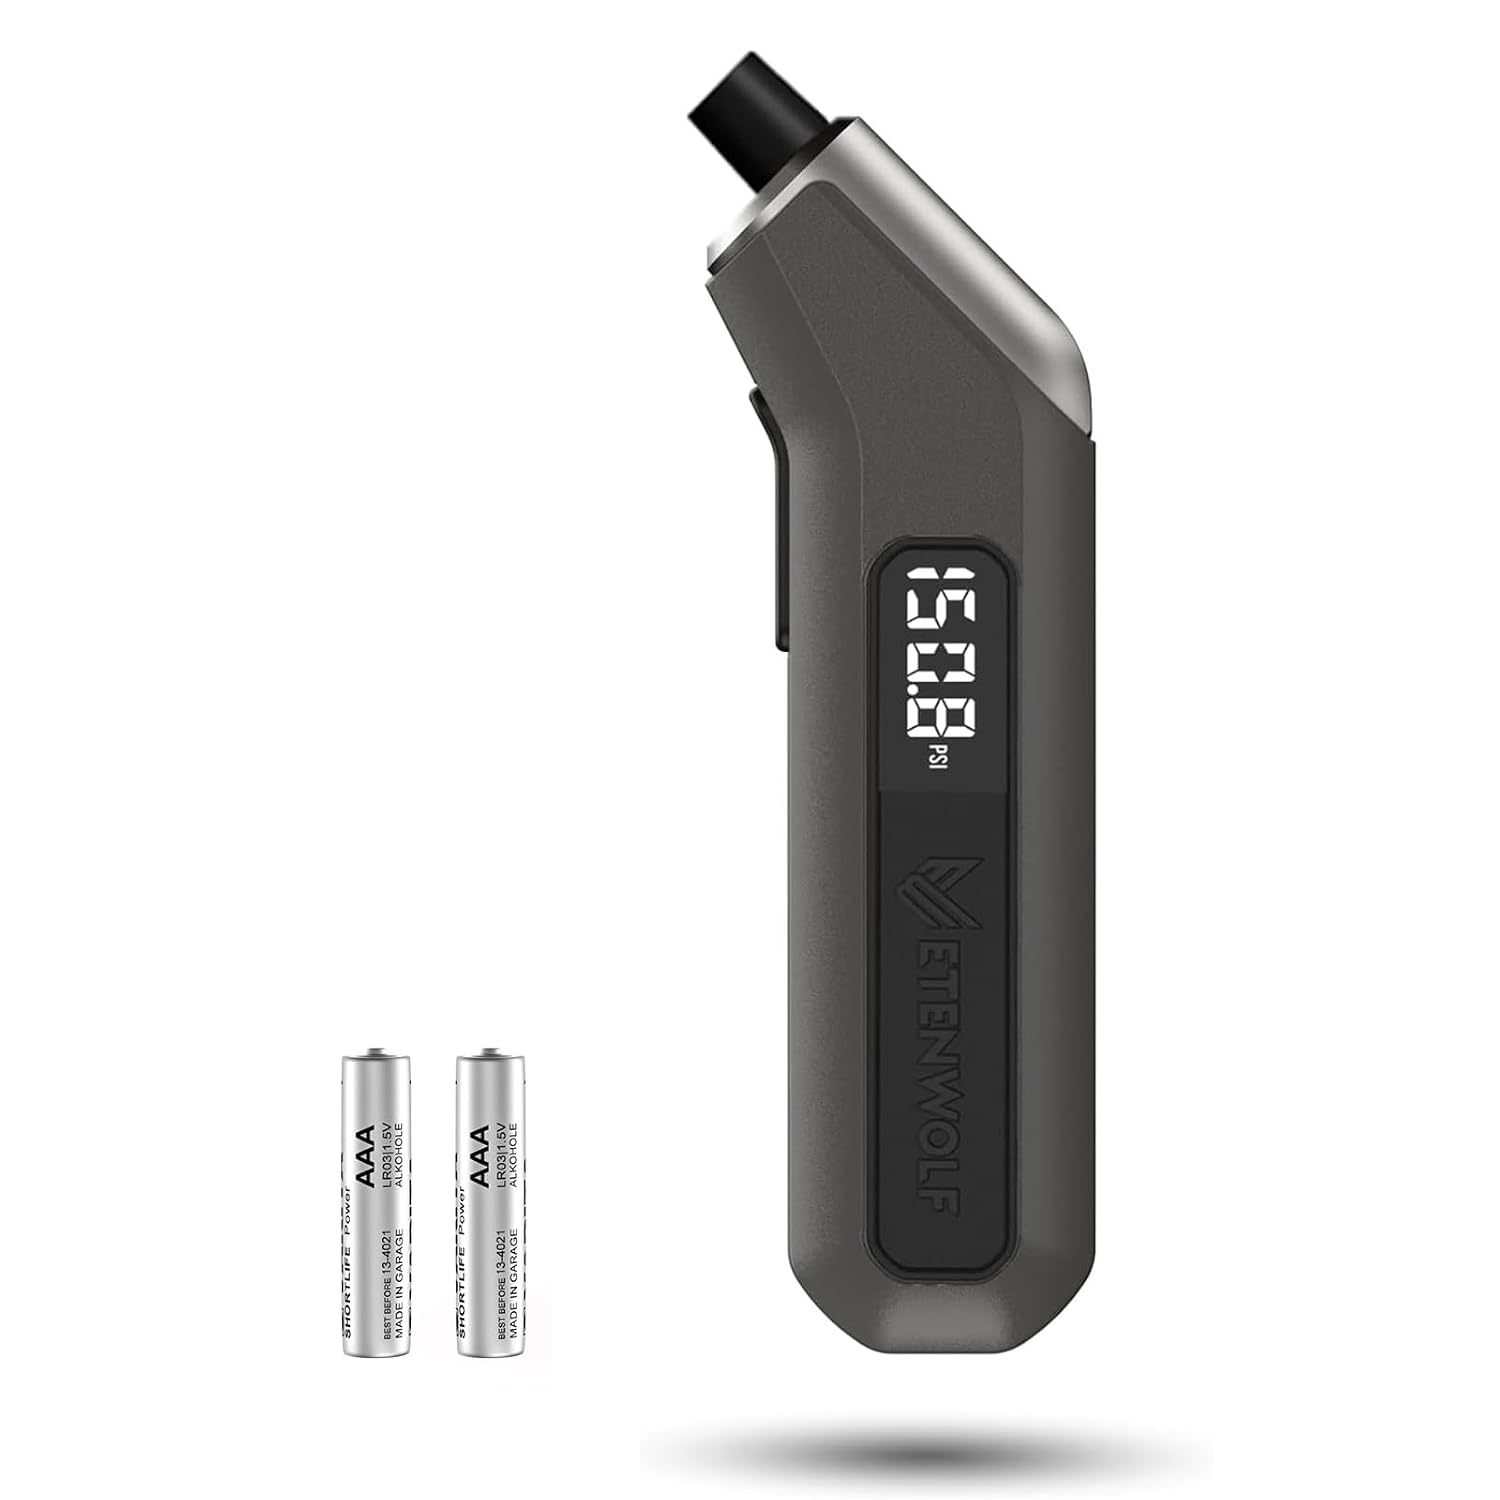
The ETENWOLF T300 digital tire pressure gauge delivers precise readings for cars, RVs, trucks, bikes, and heavy-duty vehicles with a wide measuring range and consistent accuracy. It is built to perform in extreme temperatures, includes a bright LED light for low-visibility use, and uses replaceable AAA batteries for convenient long-term operation. Durable enough to withstand rugged use, it is a practical tool for maintaining proper tire pressure across a variety of vehicles.

The AICEL TPMS Relearn Tool helps quickly reset and relearn tire pressure sensors on compatible GM vehicles after tire rotation, sensor replacement, or warning light issues. Designed for easy handheld use, it works with most cars, SUVs, and pickup trucks and can save time by eliminating unnecessary trips to the auto store. Its durable ABS housing and simple activation process make it a practical tool for keeping the tire pressure monitoring system operating properly.
Check RAV4 Tire Pressure Cold
NHTSA defines a cold tire for routine pressure checks as one on a vehicle that has not been driven for at least three hours. The correct inflation pressure is listed on the vehicle’s Tire and Loading Information label or in the owner’s manual. See the official NHTSA Tire Safety Guidelines.
- Locate the Tire and Loading Information label on the driver-side door edge or B-pillar and note the specified front and rear cold pressures.
- Remove the valve cap and press an accurate tire-pressure gauge squarely onto the valve.
- Add or release air as needed so the cold reading matches the vehicle specification. Do not substitute the maximum pressure printed on the tire sidewall.
- If your RAV4 has a spare, check its pressure against the specification for that spare. If your exact vehicle uses a factory sealant/compressor or other mobility kit instead, confirm that the kit is present, complete, and within any applicable service-life limits described by Toyota.
- Reinstall the valve caps and investigate any tire that repeatedly loses pressure.
Tire Pressure Rule: Use the vehicle manufacturer’s cold inflation specification on the Tire and Loading Information label or in the owner’s manual. The maximum pressure molded into the tire sidewall is not the vehicle’s recommended operating pressure.
Check Tread Depth and Sidewalls
Use a tread-depth gauge across the inner, center, and outer portions of each tire. NHTSA states that tires are unsafe and should be replaced when tread reaches 2/32 inch. A tire that is still above that minimum may nevertheless need professional evaluation before a long trip if it has irregular wear, repeated pressure loss, vibration, cracking, a bulge, a puncture, or poor wet-weather performance.
If a gauge is unavailable, NHTSA recommends the penny test: insert a U.S. penny into a tread groove with Lincoln’s head upside down. If the top of the head remains visible, the tread has reached the replacement point. Inspect both visible sidewalls and as much of the inner tread/sidewall area as you can safely see without crawling beneath an unsupported vehicle.
Inspect Brakes Before a Road Trip
During a short local test drive, confirm that the brake pedal feels normal and the vehicle stops smoothly without grinding, strong vibration, abnormal pulling, or a brake-system warning. Pad and rotor measurements should be compared with the service specification for the exact brake package rather than a generic millimeter threshold.
Have the braking system inspected before departure if you notice grinding, a newly soft/spongy pedal, a significant change in stopping response, repeated pulling, visible fluid leakage, or an unresolved brake warning.
Critical Safety Warning: Do not start a long highway trip with grinding brakes, a new soft/spongy pedal, visible hydraulic-fluid leakage, or an unresolved red brake-system warning. Follow the owner’s manual warning instructions and have the system diagnosed before continuing the trip.
What Fluids, Filters, Belts, and Hoses Should You Check?
Park the RAV4 on level ground and follow the model-specific cool-down and inspection procedure in the owner’s manual. Fluid types, reservoirs, service points, and inspection methods vary by generation and powertrain.
Check RAV4 Fluids
Inspect only the owner-serviceable fluids identified for your vehicle:
- Engine Oil: Check the level using the procedure in the owner’s manual. If an oil service will become due during the trip, consider completing it before departure. Do not use color alone as a substitute for the maintenance schedule or a proper diagnosis; investigate an abnormally low level, repeated oil loss, or a milky/foamy appearance.
- Engine & Electrified-Powertrain Coolant: Check the applicable coolant reservoir or reservoirs only as directed in the manual and only when it is safe to do so. Use the exact coolant specification Toyota lists for your vehicle. HEV/PHEV models may have more than one cooling circuit.
- Brake Fluid: Check the reservoir level as directed in the owner’s manual. A low level or repeated level loss requires inspection rather than simply repeated topping off.
- Windshield Washer Fluid: Fill with a washer fluid suitable for the weather expected on your route.
- Transmission / Transaxle Fluid: Do not assume your RAV4 has a consumer dipstick or that its fluid is checked like an older automatic transmission. Use the service procedure for the exact transmission/eCVT and have leaks or suspected level problems professionally inspected when the procedure requires special temperature or service steps.
Scalding Hazard: Never remove a pressurized cooling-system cap while the system is hot. Follow the cooling-system warnings and cool-down procedure in your owner’s manual.
Inspect Filters, Belts, and Hoses
Inspect the engine air filter and cabin air filter according to the procedure for your model. Replace a filter when its condition or maintenance schedule calls for replacement rather than relying only on color. A clean cabin filter also supports normal HVAC airflow and windshield defogging.
On models equipped with an accessible accessory drive belt, inspect it for obvious cracking, fraying, damaged ribs, or glazing. Look over accessible coolant hoses and connections for swelling, damage, wetness, or dried residue. Do not reach near moving components or remove covers that the owner’s manual does not identify as owner-serviceable.
High-Voltage Warning (Hybrid & PHEV): Never touch, probe, disconnect, or tamper with orange high-voltage cables/connectors, inverter covers, or the traction-battery pack. High-voltage components require the procedures and protective equipment specified by Toyota.
Cardboard Leak-Check Tip: If your parking location allows it, placing clean cardboard beneath the vehicle overnight can make a fresh drip easier to notice. Fluid color can provide a clue but does not reliably identify the failed component. Treat any unexplained recurring leak as a reason for inspection rather than diagnosing it from color alone.
How Do You Check the RAV4 Battery, Lights, and Electrical System?

Automotive 12-volt batteries have a finite service life. AAA Automotive Battery Research notes that conventional vehicle batteries commonly deteriorate over roughly three to five years, with time, heat, vibration, vehicle use, and charging conditions affecting longevity. A proper battery and charging-system test is more useful than replacing a battery from one resting-voltage reading alone.
12V Battery Health & Powertrain Locations
The 12-volt system powers low-voltage electronics and is needed for normal vehicle initialization, including on electrified models.
- Location Varies: Do not assume the 12V battery location or jump point from another RAV4 generation applies to yours. Check the battery/jump-start section of the exact owner’s manual before removing trim or connecting jumper equipment.
- Accessible Connections: Where the manual identifies owner-accessible 12V terminals or a jump point, look for looseness, damage, or heavy corrosion. Follow Toyota’s procedure before cleaning or disconnecting anything.
- Battery Condition: If starting or READY initialization is slow/intermittent, accessories behave abnormally, or the battery is suspected of weakness, have the 12V battery and charging system tested before remote travel.
- Accessory Use While Parked: Extended accessory use can discharge the 12V battery. There is no dependable universal “minutes until dead” figure. Follow the operating-state guidance in your exact owner’s manual and avoid relying on a fixed accessory-mode or engine-cycling time.
Exterior Lighting & Driver-Assist Sensors
Perform a complete lighting inspection using a helper or safe reflections against a wall:
- Verify the operation of headlights, high beams, turn signals, hazard flashers, tail lamps, brake lamps, reverse lamps, and license-plate lighting as equipped.
- Confirm the charging ports/outlets and other electrical equipment you expect to use on the trip operate normally.
- Clean Toyota Safety Sense (TSS) Sensor Areas: Clean the exterior windshield/camera and radar-sensor viewing areas identified in the owner’s manual. Sensor locations and TSS hardware differ by generation; the redesigned 2026 RAV4 uses updated Toyota Safety Sense technology. If a warning remains after the applicable viewing area is clean, follow the manual instead of assuming contamination is the cause.
How Do You Inspect Hybrid Battery Cooling Vents Before Travel?
If you drive a RAV4 Hybrid or Plug-in Hybrid, find the traction-battery cooling air intake identified in the owner’s manual. Its exact position and service procedure vary by model year. Toyota manuals for RAV4 Hybrid models instruct owners not to block the intake with luggage or covers because restricted airflow can interfere with battery cooling and may limit battery charging/discharging performance.
- Locate the Correct Intake: Use your exact owner’s manual rather than assuming every RAV4 has the vent in the same place.
- Inspect for Debris: Look for dust, lint, pet hair, or an object blocking the intake. Clean it only using the owner-serviceable method Toyota specifies for your model; on applicable models Toyota instructs owners to use a vacuum cleaner on accumulated dust.
- Keep It Unobstructed: Do not pack luggage, blankets, seat covers, or other items over the intake. A generic clearance measurement is not necessary—the important requirement is to leave the intake unobstructed as Toyota directs.
What Visibility Checks Should You Make Before Leaving?
Inspect both front wiper blades for splitting, hardening, damaged edges, chatter, or missed areas. Replace blades that cannot clear the driver’s field of view effectively. Test the washers and confirm you have washer fluid appropriate for your destination’s weather.
Clean the exterior and interior glass and any camera lens or viewing area identified in your owner’s manual. Also confirm the driver floor mat is the correct size, is secured with its retention clips, and cannot move into the accelerator or brake-pedal area.
Can You Take a RAV4 on a Road Trip With a Warning Light?
Do not treat all warning lights as equivalent, but do not ignore an unresolved warning before a long trip. The required response depends on the symbol, color, accompanying message, vehicle behavior, and model year. Use the warning-light section of your owner’s manual as the primary instruction.
| Warning Light / Alert | Road-Trip Implication | Action Required |
|---|---|---|
| Solid Check Engine Light (CEL) | A powertrain/emissions fault is stored; severity and drivability effects depend on the fault. | Read the owner’s manual and have the fault diagnosed before a long trip, especially if there are drivability symptoms. |
| Flashing Check Engine Light | A flashing engine warning is more urgent than a steady light and can accompany a serious running fault. | Reduce risk and stop safely as directed by the owner’s manual. Seek diagnosis rather than continuing a long highway trip with rough running or a flashing warning. |
| Master Warning / Hybrid-System Message | The cause varies by model and accompanying message. | Read the displayed message and owner’s manual instructions. Have an unresolved hybrid-system fault diagnosed before long-distance travel. |
| Red Brake / Oil Pressure / Temperature Warning | These warnings can indicate conditions where continued driving may cause damage or create a safety risk. | Stop in a safe location as soon as the owner’s manual directs. Follow the exact warning procedure and arrange service or towing when required. |
| TPMS / Low Tire Pressure | At least one tire may be significantly underinflated, or the monitoring system may have a fault if the indicator flashes before remaining on. | Inspect the tires and check cold pressure with a gauge. Investigate damage or persistent pressure loss instead of only resetting the warning. |
Check your VIN for open safety recalls before leaving using the official NHTSA Recalls Lookup Tool. Read the recall instructions and arrange the manufacturer’s remedy when it is available rather than assuming every open campaign has the same urgency or procedure.
[Products Worth Considering]

Bosch ICON beam wiper blades are designed to make windshield replacement simple with a vehicle-specific two-blade bundle for driver and passenger sides. The exclusive dual rubber technology helps resist heat and ozone damage for longer-lasting performance, while the beam design and asymmetric spoiler improve windshield contact and visibility in harsh weather. Installation is quick with the included hook adapter, making it a reliable upgrade for compatible vehicles.

This portable roadside emergency car kit helps drivers stay prepared with essential tools for common breakdowns and unexpected roadside situations. It includes jumper cables, a tow strap, a flashlight, a rain poncho, gloves, and a first aid kit, all stored in a durable zippered case for easy access and organization. With included roadside assistance coverage, it adds extra peace of mind for commuters, new drivers, and road trips.
What Should Be in a RAV4 Road-Trip Emergency Kit?

Pack emergency equipment where you can reach it without unloading the entire cargo area. NHTSA’s road-trip guidance recommends communications equipment, first-aid supplies, lighting, tire and basic repair equipment, water, food, medicines, maps, and weather protection.
Emergency Roadside Safety Gear
- Jumper Cables or Compatible Jump Starter: Carry a recovery method suitable for your vehicle and learn the exact Toyota jump-start connection points before an emergency. A self-contained jump starter can be useful where no donor vehicle is available.
- Tire Equipment: Carry an accurate pressure gauge and confirm that the spare/jack/lug tools or factory sealant/compressor kit supplied for your exact vehicle is present and serviceable. Use a tire plug only when it is appropriate for the puncture and the repair product’s instructions.
- First Aid & Medicines: Keep a basic first-aid kit plus necessary personal medications.
- Visibility & Lighting: Pack a flashlight or headlamp, spare batteries or charging capability, and suitable roadside warning equipment.
- Basic Work Supplies: Work gloves, basic tools appropriate for owner-serviceable tasks, duct tape, and other simple contingency supplies.
- Water, Food & Weather Gear: Carry enough drinking water and nonperishable food for the route and expected conditions, plus blankets, rain/cold-weather gear, and seasonal equipment where appropriate.
- Communication & Navigation: Carry a charged phone and charger and keep an offline map or another navigation backup for areas with weak cellular coverage.
Comfort, Electronics & Car Camping Gear
The RAV4’s folding rear seats can create useful sleeping or gear space, but the usable length, floor shape, seat angle, and cargo configuration vary by generation and trim. Measure your own vehicle before buying a mattress or platform. Bring appropriate sunshades, charging cords, offline navigation, and other comfort gear you actually need.
If you plan to use climate control or electrical accessories while parked, follow the operating and safety instructions for your exact powertrain. Do not rely on a universal accessory-mode battery-drain time or assume the gasoline engine will cycle at a fixed interval on an HEV/PHEV.
How Do You Load a RAV4 Safely for a Road Trip?
Use your vehicle-specific load information instead of a generic RAV4 payload number. Added passengers, luggage, accessories, and roof cargo all affect how the vehicle is loaded.
- Check Total Payload Limit: Read the Tire and Loading Information label on your exact vehicle for the combined occupant-and-cargo limit. For cargo-volume information, see our RAV4 cargo space dimensions guide.
- Respect Roof-System Limits: Do not apply a generic roof-load figure across RAV4 years, factory rails, crossbars, cargo boxes, aftermarket racks, and rooftop tents. The usable limit is controlled by the vehicle and installed equipment instructions. Review our RAV4 roof load vs cargo limit guide and the documentation for the exact roof hardware.
- Distribute and Secure Cargo: Put heavy items low and forward where practical, secure loose objects using suitable cargo restraints, keep required battery-cooling intakes unobstructed, and maintain adequate visibility.
How Should You Plan the Route, Fuel, Charging, and Service Stops?
Plan around the range and capabilities of your exact RAV4 rather than using a generic miles-per-tank estimate:
- Map Fuel & Charging Stops: Use the vehicle’s actual fuel/energy status and route conditions conservatively. PHEV charging connectors and supported charging speeds vary by model year and grade, so verify compatibility before relying on a particular charger.
- Download Offline Navigation Maps: Save the route or relevant map areas before entering remote locations where cellular reception may be unreliable.
- Plan Rest Breaks: Build sufficient time into the itinerary to stop, stretch, hydrate, and change drivers. If you become drowsy, stop rather than trying to meet a fixed mileage target.
- Monitor Weather & Road Conditions: Review weather, state/provincial transportation information, closures, construction, and seasonal mountain-pass conditions before departure and again during the trip when conditions change.
The Complete Toyota RAV4 Road Trip Checklist
Use this phased checklist so repairs happen early and departure morning is limited to final confirmation:
| Phase | Action Items | Target Standard / Metric |
|---|---|---|
| Phase 1: 1–2 Weeks Prior |
• Evaluate brake operation and condition • Measure tire tread and inspect damage • Check maintenance/service status • Check VIN for NHTSA safety recalls • Test 12V battery/charging system if weakness is suspected |
• No unresolved brake-safety symptoms • Tread above 2/32 inch and no unsafe damage • Required maintenance current for the trip • Recall instructions reviewed; available remedies scheduled/completed as appropriate • Battery/charging system passes an appropriate test if tested |
| Phase 2: 24–48 Hours Prior |
• Top off approved windshield washer fluid • Clean windshield & applicable TSS sensor areas • Inspect applicable hybrid/PHEV battery cooling intake • Test exterior lighting and A/C • Verify spare/mobility kit and emergency gear • Stage and weigh/assess luggage as needed |
• Applicable fluid levels correct per manual • Required camera/radar viewing areas clean • Battery-cooling intake unobstructed • Required lights and climate control operate normally • Vehicle-specific roadside equipment present • Occupants + cargo remain within the vehicle placard limit |
| Phase 3: Departure Morning |
• Cold tire-pressure check • Verify spare pressure or mobility kit if equipped • Look for fresh unexplained leaks • Scan instrument panel on startup • Confirm registration, insurance, route, and contact information • Secure cargo |
• Cold pressures match the vehicle label • Spare/kit meets exact vehicle instructions • No unexplained recurring leak • No unresolved stop-now/critical warning • Required documents/information accessible • Cargo secure and cooling intakes/visibility unobstructed |
Frequently Asked Questions
Is a Toyota RAV4 good for long road trips?
A properly maintained RAV4 can be well suited to long trips, but comfort, cargo space, fuel or electric range, drivetrain, and driver-assistance features vary by generation and trim. Before leaving, use the exact vehicle’s load label, owner’s manual, maintenance status, and actual condition rather than relying on a generic RAV4 specification.
What cold tire pressure should I use for a RAV4 road trip?
Use the cold inflation pressure printed on the Tire and Loading Information label on your specific RAV4 or specified in its owner’s manual. Do not substitute a generic RAV4 PSI range or the maximum pressure molded into the tire sidewall. NHTSA defines cold for this check as the vehicle not having been driven for at least three hours.
How do I find the 12-volt battery or jump-start point on a RAV4?
The 12-volt battery and approved jump-start connection points vary by RAV4 generation and powertrain. Use the battery or emergency-starting section of the owner’s manual for your exact model year before removing trim or connecting cables. Do not assume a 2019–2025 Hybrid or Prime layout applies to the redesigned 2026 RAV4.
Can I sleep or car camp inside a Toyota RAV4 on a road trip?
The folding rear seats can provide useful sleeping space, but usable length, width, floor angle, and cargo layout vary by generation and trim, so measure your own vehicle before buying a mattress or platform. If you plan to use climate control or electrical accessories while parked, follow the operating and safety instructions for your exact powertrain rather than assuming a fixed engine-cycling pattern.
How do I reduce the risk of the 12V battery dying during road-trip stops?
Avoid unnecessary extended accessory use when the vehicle is not in the operating state specified by Toyota for powering those accessories. Battery condition, temperature, and electrical load make discharge time highly variable, so there is no reliable universal number of minutes before a 12V battery goes flat. Consider carrying properly rated jump-start equipment and learn the approved connection procedure before the trip.
What happens if luggage blocks the RAV4 Hybrid battery air intake?
Blocking the traction-battery cooling intake can interfere with battery cooling and may restrict battery charging/discharging performance. Find the intake identified in the owner’s manual for your exact model and keep it unobstructed by luggage, covers, pet hair, lint, or other debris. Toyota does not require a generic 2- or 3-inch clearance rule across every RAV4 generation; follow the model-specific instructions.
How far in advance of a road trip should I have my RAV4 serviced?
Using 1 to 2 weeks before departure as a planning buffer gives you time to diagnose an issue, order the correct parts, complete repairs, and drive the vehicle locally afterward. It is a trip-planning recommendation, not a Toyota maintenance interval; scheduled service should still follow the requirements for your exact model and operating conditions.
Is the 2026 Toyota RAV4 still a fifth-generation gasoline model?
No. Toyota identifies the 2026 RAV4 as the start of the sixth generation in the U.S., and the 2026 lineup is offered with Hybrid Electric Vehicle (HEV) or Plug-in Hybrid Electric Vehicle (PHEV) powertrains. Do not automatically apply fifth-generation gasoline-model component locations or procedures to a 2026 RAV4.
Conclusion
A useful Toyota RAV4 road trip checklist should identify problems before departure without pretending one specification fits every RAV4 from 2013 through 2026. Start early enough to address tires, brakes, maintenance, 12V electrical health, fluids, recalls, and warning messages. Before leaving, set cold tire pressure from the vehicle label, confirm the applicable hybrid/PHEV cooling intake is unobstructed, secure the load within the placard limit, verify your roadside equipment, and perform a final dashboard and leak check. For any model-specific value or procedure, use the owner’s manual for the exact year and powertrain.
Sources & Authoritative References
- Toyota Owners Official Portal — model-specific owner manuals, maintenance information, warnings, and vehicle procedures.
- Toyota USA Newsroom: All-New 2026 RAV4 — official confirmation of the sixth-generation redesign and HEV/PHEV U.S. powertrain lineup.
- Toyota 2026 RAV4 Owner’s Manual Resource — model-specific maintenance and safety guidance.
- NHTSA TireWise Tire Safety — cold-pressure, Tire and Loading Information label, tire inspection, and tread-depth guidance.
- NHTSA Summer Driving & Road Trip Tips — pre-trip cooling, fluid, battery, lighting, wiper, floor-mat, emergency-kit, and route-planning guidance.
- NHTSA Recalls Lookup — VIN-based safety-recall lookup.
- AAA Automotive Battery Research — factors affecting conventional 12V battery aging and service life.