If your 2009 Toyota Camry shows a battery or charge warning light, dim headlights, radio dropouts, slow cranking, or a new battery that keeps dying, the alternator may not be charging the battery. Do not replace it blindly. A weak battery, blown charging fuse, loose terminal, slipping serpentine belt, poor ground, or damaged alternator wiring can cause the same symptoms.
Quick Answer
A 2009 Camry alternator is likely not charging if battery voltage stays below the normal charging range with the engine running, the charge light stays on, or the battery dies after driving. First check the battery, terminals, ALT/ALT-S fuses, belt, grounds, and alternator wiring before replacing the alternator.
Key Takeaways
- A healthy resting battery is usually about 12.5–12.9 volts at 68°F after surface charge is removed.
- For the 2.4L 2AZ-FE charging check, Toyota service data lists 13.2–14.8 volts at 2,000 rpm.
- Check the ALT, ALT-S, GAUGE No. 1, and GAUGE No. 2 fuses before condemning the alternator.
- For the common 2.4L non-hybrid layout, expect 10 mm wiring hardware, a 19 mm belt tensioner, and 14 mm/12 mm alternator mounting bolts.
- Do not disconnect the battery while the engine is running. That old “test” can damage electronics and is not a safe diagnostic method.
At a Glance
| Time Required | 1.5–3 hours for an experienced DIYer; 1–3 hours at many shops |
| Difficulty | Moderate DIY on the 2.4L non-hybrid Camry; harder on tight or rusty cars |
| Tools Needed | Multimeter, 10 mm, 12 mm, 14 mm, and 19 mm sockets/wrenches, ratchet, extensions, torque wrench, gloves, eye protection |
| Cost | Professional replacement is commonly estimated around $465–$872 before taxes/fees; DIY cost depends on alternator quality and core charge |
Warning: Never disconnect the battery cable while the engine is running to “test” the alternator. Use a multimeter instead. Disconnecting the battery on a running modern vehicle can spike voltage and damage electronics.
Confirm Your Camry Version First
This guide is written for the common 2009 Toyota Camry non-hybrid 2.4L 2AZ-FE alternator layout. The V6 and hybrid models use different packaging and service procedures. If your engine bay does not match the steps below, stop and check the correct service information for your exact engine.
Toyota often calls the alternator the generator in service information. In this article, “alternator” and “generator” refer to the same charging-system component.
Camry Alternator Symptoms

Think of the alternator as your Camry’s on-board battery charger. When it fails, the car may run only until the battery is drained. Watch for these common symptoms:
- Battery or charge warning light: This is the clearest sign to test the charging system.
- Dim or flickering headlights: Lights may fade at idle or brighten when the engine revs.
- Radio, dash, or accessory dropouts: Unstable system voltage can make electronics act strangely.
- Slow cranking or clicking: The battery may be low because the alternator did not recharge it.
- A new battery that dies quickly: This often points to a charging issue, but a parasitic draw, loose cable, or bad ground can also drain a battery.
- Whining, grinding, or pulley noise: Bearing or clutch-pulley wear can come from the alternator area.
A shifter that will not come out of park can sometimes happen with low voltage, but do not assume the alternator is the only cause. Brake-light switch and shift-lock faults can create similar symptoms.
Confirm It’s the Alternator, Not the Battery or Fuses
Start with simple tests before buying parts. A low battery can make a good alternator look bad, and a blown fuse or corroded cable can make a good alternator fail to charge the battery.
- Charge and test the battery first. With the engine off and surface charge removed, a healthy battery is usually about 12.5–12.9 volts at 68°F.
- Start the engine and measure voltage at the battery posts. On the 2.4L charging-system check, the service range is 13.2–14.8 volts at about 2,000 rpm.
- Turn on electrical loads. Switch on high beams, blower motor, and rear defogger. Voltage should remain controlled instead of dropping steadily.
- Inspect the fuses, belt, wiring, and grounds. A failed connection can mimic a failed alternator.
- Replace the alternator only after the checks point to low or unstable alternator output.
Note: If the battery is deeply discharged, charge it with a battery charger before testing. A very low battery can pull heavy current and confuse charging-voltage readings.
[Products Worth Considering]

【Reliable Quality】: Our voltmeter consists of electronic board and ABS and PC material. The plastic casing is not only resistant to dirt and abrasion, but also gives solid and all-around protection to the electronic components inside, making the meter less prone to malfunction.

【Reliable Car Battery Tester】: The alternator tester can accurately determine whether the car battery needs to be replaced or if there is a power outage, and at the same time evaluate the output status of the alternator, clearly presents real-time voltage data, battery health and charging status. It can effectively prevent the battery from being damaged due to overcharging or undercharging, and extend the battery's service life.
Quick Checks: Fuses, Battery, and Connections
These checks take less time than replacing an alternator and often catch the real problem.
[Products Worth Considering]

【Reliable Automotive Car Battery Tester】 KW208 is the most cost-effective battery load tester compared to other brands, it has all the functions you need and the lowest cost that you can afford. KW208 can test all 12V batteries(100-2000CCA) including regular flooded, AGM flat plate, AGM spiral or gel batteries. Provide overall analysis of batteries’ condition and help you know their status in advance before it dies. KW208 battery analyzer supports cranking and charging system tests also alternator and starter test. Conveniently store this car battery tester for batteries in your glove box or garage, ready for use whenever needed.

Nerites Fuse Tester – Ideal for One-Time Fuses The Nerites fuse tester is perfect for checking disposable fuses. It allows quick and easy removal and helps inspect whether a fuse is blown, making it an essential tool for removing and testing fuse arrays.
Check the Charging Fuses
With the ignition off, inspect and test the charging-system fuses. On the 2AZ-FE charging-system check, the important fuses include:
- ALT fuse
- ALT-S fuse
- GAUGE No. 1 fuse
- GAUGE No. 2 fuse
Use the fuse-box cover and owner information to identify fuse locations. A visual check is helpful, but a multimeter continuity test is better. Replace any blown fuse with the same amperage rating. If the new fuse blows again, there is a wiring fault that needs diagnosis before more parts are installed.
Inspect Battery Connections and Grounds
Loose or corroded battery terminals can stop charging current from reaching the battery. Before blaming the alternator, do this:
- Disconnect the negative terminal first. Loosen the 10 mm terminal nut, remove the negative cable, then remove the positive cable if needed.
- Clean corrosion. Use a terminal brush and battery-safe cleaner. Do not let baking-soda solution enter battery cells.
- Check cable fit. Terminals should clamp tightly and not twist by hand after tightening.
- Inspect grounds. Look for loose, rusty, or frayed ground straps between the battery, body, and engine.
- Check the alternator output cable and plug. Make sure the connector is seated and the charging cable is not burned, loose, or oil-soaked.
Prep the Car and Battery Safely
Before repair work, park on a flat surface, set the parking brake, let the engine cool, and keep keys away from the ignition. Wear gloves and eye protection because the job puts your hands near battery terminals, belt pulleys, and tight brackets.
Disconnect the negative battery terminal before touching alternator wiring. This reduces the chance of a short circuit when removing the alternator output cable.
Gather the tools before starting:
- 10 mm socket or wrench for battery and wiring hardware
- 12 mm socket or wrench for the lower alternator mounting bolt
- 14 mm socket or wrench for the upper alternator mounting bolt
- 19 mm socket, wrench, or serpentine-belt tool for the belt tensioner
- Ratchet, extensions, and a small ratchet for tight spaces
- Torque wrench
- Multimeter
- Phone camera for belt-routing photos
Pro Tip: Take a clear picture of the serpentine-belt routing before removing the belt. A 20-second photo can save a long fight during reassembly.
Remove the Serpentine Belt and Access the Alternator

The alternator is driven by the serpentine belt. If the belt is loose, cracked, glazed, or not seated in the pulley grooves, the alternator may not spin correctly.
- Locate the belt tensioner.
- Place a 19 mm socket and ratchet on the tensioner.
- Rotate the tensioner to relieve belt tension.
- Slip the belt off the alternator pulley only.
- Slowly release the tensioner.
- Inspect the belt for cracks, missing rib chunks, exposed cords, glazing, or oil contamination.
If the belt has deep cracks, exposed cords, missing rib sections, or will not stay seated in the grooves, replace the belt before final testing.
Unbolt the Old Alternator: Bolts and Tools Needed
With the battery disconnected and the belt off the alternator pulley, remove the wiring and mounting hardware. On the common 2.4L non-hybrid layout, expect 10 mm wiring hardware plus upper and lower mounting bolts.
- Disconnect the alternator electrical connector.
- Remove the 10 mm nut from the alternator output cable and move the cable aside.
- Remove any 10 mm bolt or bracket holding the wire harness to the alternator.
- Unclip wiring from the alternator bracket carefully with a flat-blade screwdriver if needed.
- Remove the upper 14 mm alternator mounting bolt.
- Remove the lower 12 mm alternator mounting bolt.
- Support the alternator as the last bolt comes out, then lift the alternator out of the engine bay.
Warning: Do not let the alternator output cable touch metal while the battery is connected. If you forgot to disconnect the negative terminal, stop and disconnect it before removing alternator wiring.
Install the New Alternator: Alignment and Bracket Tips
Compare the old and new alternators before installation. The pulley, electrical connector, mounting ears, and output stud should match. Transfer any brackets or wire clips from the old unit if the replacement does not include them.
- Set the new alternator into the bracket.
- Start both mounting bolts by hand to avoid cross-threading.
- Leave the bolts slightly loose until the alternator sits square in the bracket.
- Tighten the upper mounting bolt to about 38 ft-lbf if it matches the 52 N·m service specification for this layout.
- Tighten the lower mounting bolt to about 16 ft-lbf if it matches the 21 N·m service specification for this layout.
- Reattach the alternator output cable, harness bracket, and electrical connector.
- Reinstall the serpentine belt and confirm every rib sits correctly in every pulley groove.
If the alternator does not sit flush, do not force the bolts. Remove it and check for a trapped spacer, wrong replacement unit, bent bracket, or corrosion in the mounting ears.
Verify Camry Alternator Charging
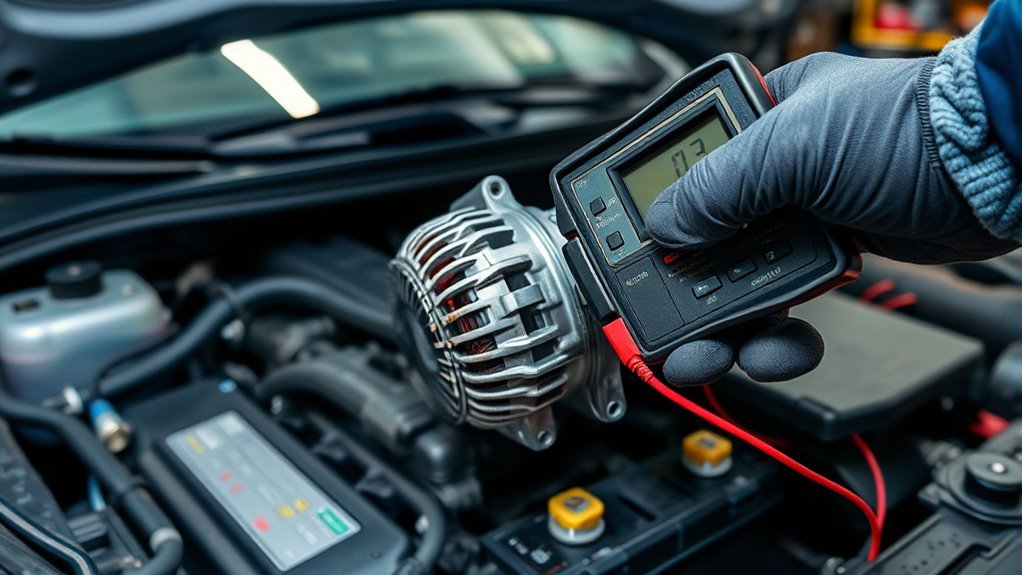
After installation, verify the repair before closing the hood. This is the step that proves the battery is actually being charged.
Battery Voltage Test
- Reconnect the battery terminals, positive first and negative last.
- Set your multimeter to DC volts.
- Measure voltage directly at the battery posts with the engine off.
- If it is much below 12.5 volts, charge the battery before judging the alternator.
- Start the engine and measure again at the battery posts.
- Bring engine speed to about 2,000 rpm and look for charging voltage in the normal range.
For the 2.4L service check, the charging voltage target is 13.2–14.8 volts at 2,000 rpm. A slightly different reading at idle can be normal, but voltage that stays low, swings wildly, or climbs too high needs more diagnosis.
Alternator Output Check
If battery-post voltage is low, measure at the alternator output terminal and compare it with battery-post voltage. A large difference can point to a bad charging cable, blown fuse, loose terminal, or poor ground rather than a bad alternator.
Turn on high beams, the heater blower on high, and the rear defogger. The voltage should remain controlled. If voltage collapses under load, inspect the belt, tensioner, wiring, alternator plug, and grounds again.
Belt and Connections
Watch the belt while the engine idles. It should run straight, stay centered in the pulley grooves, and avoid fluttering. Shut the engine off immediately if the belt walks off a pulley, squeals loudly, or the alternator pulley wobbles.
- Recheck battery terminals for tightness.
- Confirm the alternator connector clicked into place.
- Confirm the alternator output cable nut is tight.
- Check for abnormal alternator noise.
- Make sure the charge warning light turns off after startup.
Common Mistakes to Avoid During This Repair
| Mistake to Avoid | Why It Matters | Better Fix |
|---|---|---|
| Skipping battery and fuse tests | A weak battery or blown fuse can mimic a bad alternator | Test battery voltage, ALT/ALT-S fuses, and grounds first |
| Disconnecting the battery while running | Can create voltage spikes and damage electronics | Use a multimeter with the battery connected |
| Forcing misaligned bolts | Can strip threads or crack brackets | Start bolts by hand and align the alternator before torquing |
| Misrouting the serpentine belt | Can cause squealing, overheating, no charging, or belt failure | Use a routing photo and confirm ribs sit in every pulley groove |
| Ignoring bad grounds | Poor grounds create voltage drop and repeat charging issues | Clean and tighten battery, engine, and chassis grounds |
Cost, Time, and When to Call a Pro
Professional alternator replacement for a 2009 Toyota Camry is commonly estimated around $465–$872 before taxes and fees, with the final price depending on parts quality, labor rate, location, and whether related wiring or belt repairs are needed.
A skilled DIYer can often complete the 2.4L non-hybrid alternator replacement in about 1.5–3 hours. A shop may finish faster because it has lifts, tools, and charging-system testers.
[Products Worth Considering]

Alternator Fitment: New alternator is compatible with Toyota Camry 2.4L 2007-2009 (Note: Not for Hybrid) ( Mfd in Japan OR Mfd in USA), for Corolla XRS 2.4L 2009 2010, for Matrix 2.4L 2009-2013, for Scion xB 2.4L base 2008-2013 (Note:Please carefully check whether the model you need matches before purchasing. Thank you for your understanding)

FOR TOYOTA ALTERNATOR REPLACEMENT - For Camry Alternator Replacement 2007 2008 2009 [ L4 2.4L ]; For Corolla Alternator Replacement 2009 2010 [ L4 2.4L ]; For Matrix Alternator Replacement 2009 2010 2011 2012 2013 [ L4 2.4L ]

Compatible with: for Toyota Camry L4 2.5L 2012-2015 (To 9/2014; 100Amp), for RAV4 L4 2.5L 2009, for RAV4 L4 2.5L 2010-2012 (2494CC; 100Amp, Mfd in Japan or USA); for Scion tC L4 2.5L 2011-2016; Note: Not Fit For Hybrid
Repair Cost Estimates
- DIY: Usually the alternator price, core charge, belt if needed, and any missing tools.
- Shop repair: Commonly includes diagnosis, alternator, labor, and post-repair charging test.
- Extra costs: Battery replacement, serpentine belt, tensioner, corroded cables, blown fuses, or damaged connectors.
When to Hire a Mechanic
Call a professional if you cannot safely access the alternator, if the wiring is burned, if fuses keep blowing, if the battery is leaking or swollen, or if voltage stays wrong after replacement. A technician can run a full charging-system test and find wiring or control-circuit problems that a basic parts swap will miss.
Frequently Asked Questions
What will cause an alternator to not charge?
Common causes include worn alternator brushes, a failed internal regulator, bad diodes, pulley or bearing failure, a slipping serpentine belt, blown ALT or ALT-S fuse, loose battery terminals, corroded grounds, damaged alternator wiring, or a battery that is too weak to accept a charge.
What voltage should a 2009 Camry alternator show?
For the 2.4L 2AZ-FE charging check, service data lists 13.2–14.8 volts at about 2,000 rpm. If voltage stays below that range with a charged battery and clean connections, continue testing the belt, fuses, wiring, grounds, and alternator output.
Can a bad battery look like a bad alternator?
Yes. A weak, sulfated, shorted, or deeply discharged battery can pull charging voltage down and make the alternator look weak. Charge and test the battery before replacing the alternator.
Can I drive with the battery light on?
Only for a short emergency distance if the car is still running normally. The vehicle may stall once the battery is drained, and power steering, lights, ignition, and electronics can fail. Turn off nonessential electrical loads and get the car tested as soon as possible.
Should I replace the serpentine belt with the alternator?
Replace the belt if it is cracked, glazed, oil-soaked, missing rib chunks, showing cords, squealing, or not seating properly in the pulley grooves. If the belt is in good condition and correctly tensioned, it can usually be reused.
Conclusion
A 2009 Camry alternator problem is easiest to fix when you diagnose it in order: battery, terminals, grounds, fuses, belt, wiring, then alternator output. If the battery is charged, the ALT/ALT-S fuses are good, the belt is seated, and running voltage is still low or unstable, alternator replacement is the likely repair. Work safely, torque the hardware correctly, and always verify charging voltage before calling the job done.
Sources
- Toyota Owners: 2009 Camry Manuals and Warranties — owner manual and vehicle-specific reference access.
- Toyota Camry 2007–2009 Service Manual: 2AZ-FE Charging — battery voltage, charging voltage, fuse checks, belt inspection, precautions, and torque specifications.
- 1A Auto: How to Replace Alternator 2006–11 Toyota Camry — replacement sequence, tool sizes, and mounting hardware cross-check.
- RepairPal: 2009 Toyota Camry Alternator Replacement Cost — current cost estimate range and labor/parts breakdown.