Your GR Supra uses a 5×112 bolt pattern and a 66.5 mm center bore, so you’ll need wheels that match those specs and M14 x 1.25 lug threads to seat securely. OEM sizes are 18″ (2.0L) or 19″ (3.0L) with staggered widths; offsets and tire sizes affect clearance and handling. Use hub‑centric spacers if required, torque to 103 ft‑lbs, and re‑check after 50–100 miles — continue for detailed fitment, spacer, and rubbing guidance.
GR Supra Bolt Pattern & Hub Bore

Although it shares a name with earlier Supras, the GR Supra (2019–2023) uses a distinct 5×112 bolt pattern rather than the 5×114.3 of previous generations, so you must choose wheels sized for 5×112 lugs; its center bore measures 66.5 mm, the lug threads are M14 x 1.25, and wheel bolts must be torqued to 103 ft‑lbs to guarantee proper fitment and safety. You’ll prioritize wheel compatibility when selecting alloys or aftermarket wheels to avoid adapter reliance. Inspect hub bore seating and lug thread engagement; mismatches force compromises that limit liberation through unsafe fitment. For performance upgrades, choose wheels specified for 66.5 mm bore or use properly machined hub-centric rings. Follow torque spec and thread standards to maintain handling precision and safety.
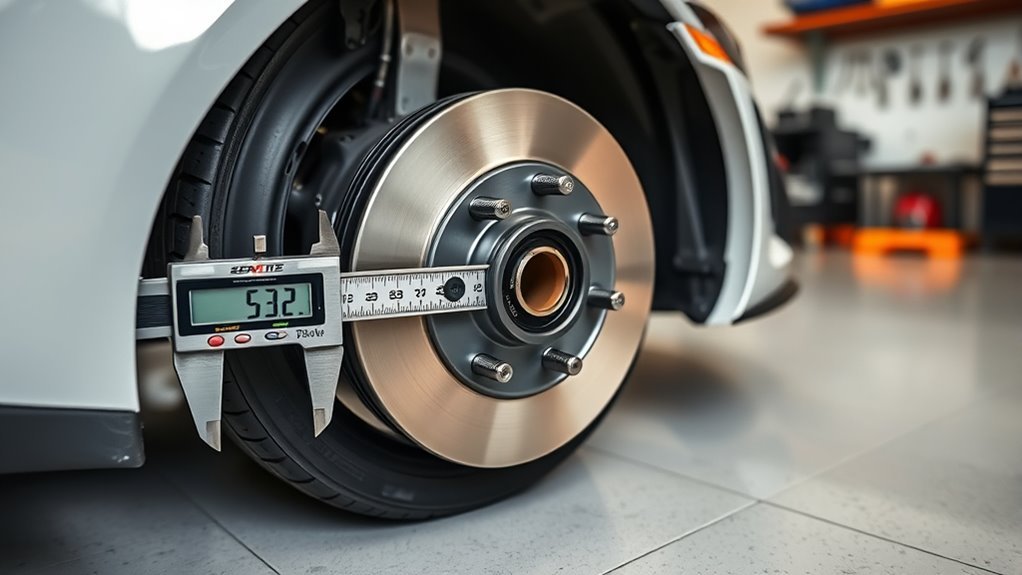
How to Measure Bolt Pattern and Center Bore on Your Supra
Start by counting the lug holes (the GR Supra uses five) and measuring the Pitch Circle Diameter (PCD) — the diameter of the circle through the centers of opposite bolt holes — to confirm a 5×112 bolt pattern; use calipers for accuracy. You’ll measure between center points of opposite bolts or adjacent-to-opposite methods for precision. For center bore, measure the wheel’s hub hole diameter; the Supra hub is 66.5mm. Use a digital caliper, record three radial measurements to detect out-of-round conditions, and average results. These bolt measurement techniques reduce error and prevent vibration. Verify wheel compatibility factors — bolt pattern, center bore, and hub-centric fit — before installing aftermarket wheels or spacers. Accurate data frees you from fitment guesswork and unsafe setups.
OEM Wheel, Tire & Hub Specs (2.0L vs 3.0L)
Compare the 2.0L and 3.0L Supra wheel specs to confirm fitment: the 2.0L ships with 18×9 +32 (front) and 18×10 +40 (rear) wearing 255/40ZR18 and 275/40ZR18, while the 3.0L uses 19×9 +32 and 19×10 +40 with 255/35ZR19 and 275/35ZR19. Both share a 5×112 bolt pattern and 66.5mm center bore, so mounting hardware and hub compatibility remain consistent. You can upgrade the 2.0L to 19-inch wheels for improved aesthetics and handling without altering the OEM offsets.
0L Vs 3.0L Wheels
When choosing between the 2.0L and 3.0L Supra wheel setups, note that the 2.0L uses 18×9 (+32) front and 18×10 (+40) rear wheels with 255/40ZR18 and 275/40ZR18 tires, while the 3.0L steps up to 19×9 (+32) front and 19×10 (+40) rear with 255/35ZR19 and 275/35ZR19 tires. You’ll appreciate that both share a 5×112 bolt pattern and 66.5 mm center bore, simplifying aftermarket selection. Opting for 19-inch wheels improves wheel aesthetics and handling performance without harshly compromising comfort. For aftermarket fitment, reduce offset by 10–20 mm from stock to free up track width and stance. Below is a concise comparison for quick reference.
| Spec | 2.0L vs 3.0L |
|---|---|
| Wheel sizes | 18″ vs 19″ |
| Offset | +32/+40 |
| Bolt/Center | 5×112 / 66.5mm |
Tire Size Differences
Although both Supras share the same 5×112 bolt pattern and 66.5 mm center bore, the tire size differences between the 2.0L and 3.0L—255/40ZR18 and 275/40ZR18 versus 255/35ZR19 and 275/35ZR19—change effective rolling diameter, sidewall height, and gearing feel; the 40-series tires on the 2.0L give roughly more sidewall compliance and a slightly larger overall diameter, while the 35-series on the 3.0L reduces sidewall flex for crisper response and marginally lowers the rolling radius for a firmer ride and quicker steering. You’ll notice the 18×9/18×10 OEM wheel widths with 40 aspect ratio prioritize controlled comfort and predictable slip thresholds. The 19×9/19×10 setup with 35 aspect ratio sharpens turn-in and improves tire performance at the limit, aiding liberated drivers seeking precise feedback without extreme ride penalty.
Hub And Bolt Specs
Start with four key hub dimensions you’ll need to match: the Supra uses a 5×112 bolt pattern, a 66.5 mm center bore, M14 x 1.25 wheel studs, and a 103 ft‑lb wheel torque spec. Both 2.0L and 3.0L models share those hub specs, so wheel compatibility hinges on wheel size and offset rather than bolt or bore differences. OEM setups: 2.0L uses 18×9 +32 front and 18×10 +40 rear; 3.0L uses 19×9 +32 front and 19×10 +40 rear. When selecting aftermarket wheels, verify hub-centric fit or use rings to maintain preload and eliminate runout. For confident, liberated installation, torque to 103 ft‑lb in a star pattern, inspect studs for M14 x 1.25 engagement, and follow manufacturer installation tips to guarantee safety and true fitment.
Aftermarket Wheel Sizes and Ideal Offsets for GR Supra
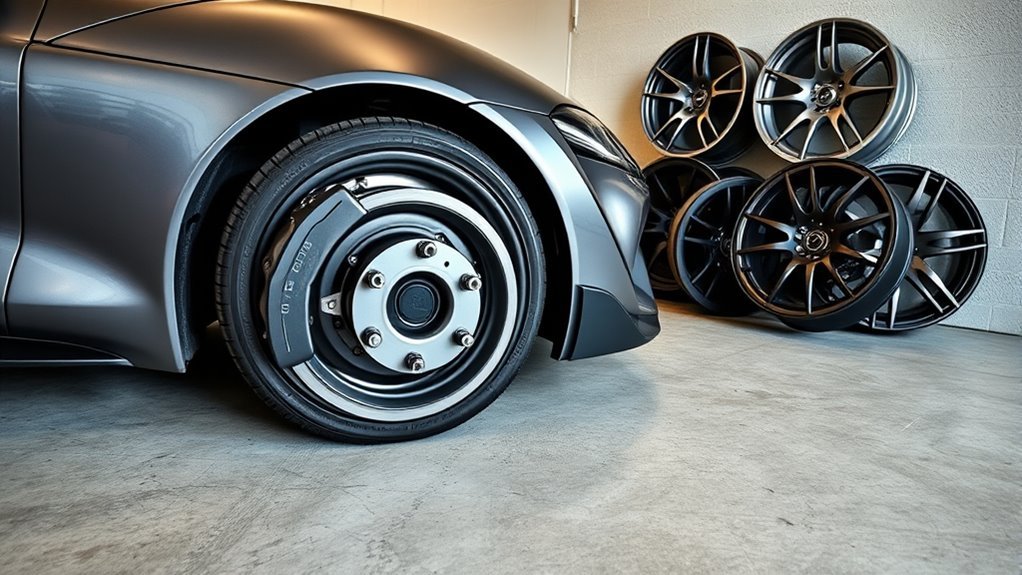
1 clear rule for fitting aftermarket wheels to a GR Supra is to match the 5×112 bolt pattern and 66.5 mm center bore, then choose diameter, width, and offset to balance handling, clearance, and aesthetics. You’ll typically pick 18, 19, or 20-inch wheels; common widths span 9 to 10.5 inches. For square setups, 19×10 with +28 to +38 offset gives strong wheel aesthetics and measurable performance gains through improved contact patch and predictable handling. Staggered fits use 19×9 or 19×9.5 fronts (+28 to +40) with 19×10 rears (+28 to +38) to enhance rear grip and stance. If you opt for 20-inch wheels, target +32 to +40 offsets to preserve clearance, suspension travel, and tire profile integrity.
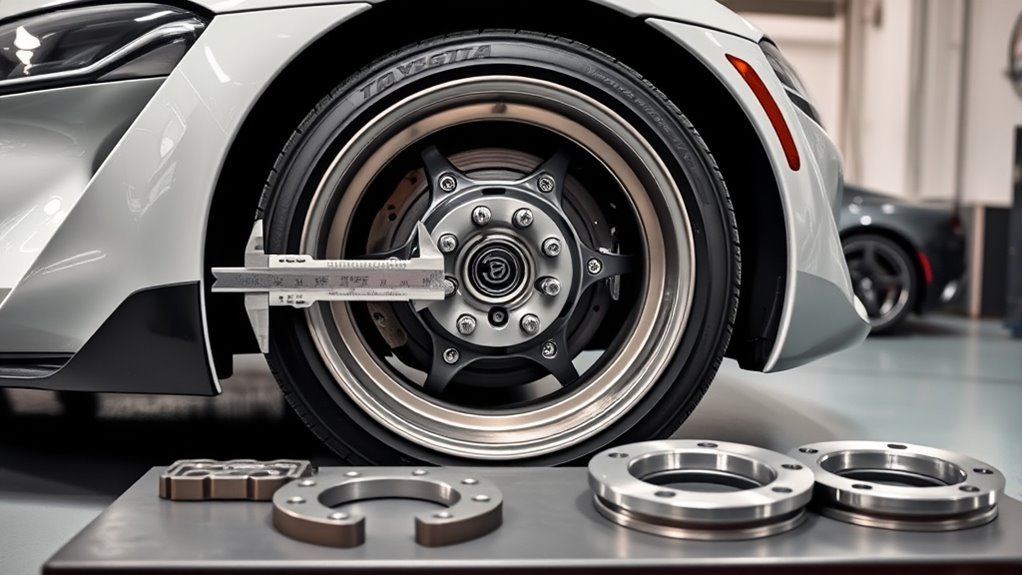
Wheel Spacers & Adapters: When to Use Them and Safety Tips
When you need to widen the GR Supra’s track for improved cornering, clearance, or stance, wheel spacers offer a precise solution by moving the wheel hub outward without altering suspension geometry. You’ll gain spacer benefits like improved stability, performance enhancements, and expanded customization options. Use spacers made from proven spacer materials (7075-T6 aluminum) and follow sizing considerations—typically 10mm–15mm.
- Installation tips: fit with extended lug bolts, seat surfaces clean, and follow torque specifications of 105 ft-lbs.
- Safety precautions: inspect for runout, use hub-centric spacers, and re-torque after 50–100 miles.
- Performance enhancements: modest track widening improves grip; avoid excessive widths that stress wheel bearings.
You’ll stay liberated when you choose correct parts and install precisely.
Brake Clearance, Suspension Mods, Rubbing Risks, and Fixes
Check brake clearance against the Supra’s 5×112 bolt pattern and 66.5 mm center bore before fitting larger wheels or aftermarket calipers to guarantee rotor and caliper clearance. If you lower or re-geometry the suspension, expect camber, toe, and roll-center changes that can induce inner‑edge rubbing or altered steering feedback. Diagnose rubbing by reproducing load/steer conditions and fix it with targeted solutions—fender rolling, controlled camber adjustments, wheel spacers of correct thickness and hub-centric fit, or adjusted ride height—while inspecting for wear after each change.
Brake Clearance Checks
Start by measuring axle-to-wheel centerline clearance and the distance from the inner wheel face to the caliper hat to confirm the wheel will clear both stock and any larger aftermarket calipers. Check brake pad compatibility and caliper size against wheel inner geometry before mounting. Verify clearance at full lock and under suspension compression to avoid contact.
- Measure: inner wheel face to caliper hat, rotor thickness, and pad protrusion.
- Simulate: full steering lock and bump travel; include spacers if planned.
- Fixes: choose narrower wheel, increase offset, roll fender lip, or select different caliper/rotor combo.
Consult a fitment expert for performance builds. You’re freeing your setup from guesswork; validate dimensions, then act.
Suspension Geometry Changes
You’ve already measured caliper-to-wheel clearance and simulated full lock and bump; now consider how altering suspension geometry will change those clearances under real-world loads. When you lower springs or fit coilovers, suspension tuning shifts roll center, camber gain, and track width; these geometry adjustments can move tires toward inner fenders and control arms, increasing rubbing risk. Wider tires or lower-offset wheels amplify contact probability. Wheel spacers or altered backspacing solve fitment but affect scrub radius and load paths, so treat them as geometry adjustments, not cosmetic fixes. Verify brake clearance with any wheel change—larger calipers may need specific wheel designs or more backspacing. After modifications, inspect components under static and dynamic conditions to confirm freedom and maintain your mobility.
Rubbing Diagnosis & Fixes
Rubbing manifests as irregular sidewall wear, scuffing on fender lips or liners, and audible contact during turns or compression—so inspect those signs after any wheel, tire, brake, or suspension change. You’ll diagnose by checking tire wear signs, visualizing rotor/caliper clearance, and compressing the suspension to replicate contact. Address causes decisively.
- Measure clearance: confirm wheel offset, spacer thickness, and pad-to-rotor gap to prevent brake interference.
- Correct geometry: reverse or adjust lowering, install proper bump stops or roll fenders when coilovers change tumble or camber.
- Select fitment: choose narrower tires, different offsets, or hub-centric spacers; test for new contact points.
These rubbing prevention tips let you free the car from constraint while preserving safety and component life.
Quick Checklist for Buying Wheels or Spacers That Fit Your GR Supra
One clear checklist will save you time and prevent fitment issues when buying wheels or spacers for your 2019–2023 GR Supra. Confirm 5×112 bolt pattern and 66.5 mm center bore for hub-centric fit; avoid adapters that change centering. Verify wheel brands list 5×112 and M14 x 1.25 lug compatibility. Choose spacer materials (aluminum billet preferred) and widths between 10–15 mm to balance stance and clearance. Check spacer bolt pattern is 5×112 and threads match factory M14 x 1.25. Measure offset, brake clearance, and fender clearance before purchase. Plan to torque wheel bolts to 103 ft-lbs after installation and re-torque after initial 50–100 miles. Keep receipts, specs, and photos for warranty and future freedom to modify.
Frequently Asked Questions
What Is the Bolt Pattern on a Toyota Supra?
The bolt pattern on a Toyota Supra is 5×112. You’ll use this specification when selecting Supra wheel aftermarket options, ensuring proper fitment, center bore adaptation, and confident, liberated choices for performance and aesthetic upgrades.
What Is the Bolt Pattern and Bore Size?
The bolt pattern is 5×112 and the center bore is 66.5mm. You’ll guarantee wheel compatibility and safe performance upgrades, so you’ll fit wheels precisely, liberating your car’s handling without compromise.
What Is the Wheel Fitment of the Supra?
Hit the ground running: you’ll fit 18”–20” wheel sizes stock-to-aftermarket, commonly 19×9.5/19×10.5; tire options vary by width and profile, and you’ll often reduce offset 10–20mm or use 10–15mm spacers for clearance.
Is Supra 5×112?
Yes — the 2019–2023 Supra uses a 5×112 bolt pattern. You’ll guarantee Supra wheel compatibility and explore Supra aftermarket options confidently, knowing hubs measure 66.5mm center bore for correct fitment without compromise.
Conclusion
You’ve got the facts to fit wheels to your GR Supra without guesswork. Measure bolt pattern and center bore precisely, match OEM specs for your 2.0L or 3.0L, and pick offsets that preserve brake clearance and suspension geometry. Use spacers or adapters only when necessary and torque everything to spec — don’t cut corners. If rubbing shows up after mods, address camber, fender clearance, or wheel size immediately to avoid bigger problems down the road.