Decide front or rear tow based on pull direction, then remove the small bumper plug to expose the pre-tapped chassis hole. Inspect threads for debris or damage, apply anti-seize if clean, and fit the rated tow eye or a 10,000 lb strap securely through the tow point. Use a 24 mm six‑point socket for rear hardware, remove slack, and test with a firm tug. Follow torque specs and safety kit procedures—continue for detailed steps and troubleshooting.
Decide Whether You Need the Front or Rear Tow Hook
Wondering whether to use the front or rear tow hook? You assess direction: front towing strategies apply when you need to pull the Supra forward or extract it from a forward-bound obstruction; verify compatibility with the bumper setup and track-day requirements before attaching. For reverse moves, prioritize rear towing considerations; inspect placement and note that bumper removal can improve access if factory positioning obstructs engagement. In both cases, check the hook mounts on the chassis rails, check for wear or damage, and ascertain fasteners meet load specs. You’ll avoid failure by choosing the hook aligned with the intended tow vector, prepping the attachment path, and confirming clear lines for recovery. Act decisively to reclaim mobility and preserve freedom.
Find Tow Hook Access and Threaded Holes
Locate the small tow hook covers on the front bumper and press the bottom to slip the top out, exposing the chassis rails. Remove the covers carefully, clear debris, and inspect the pre-tapped threaded holes for damage or obstructions. If alignment requires, drill a precise starter hole (about 1″) and finish to the specified oval shape before installing the tow hook.
Locate Tow Hook Covers
Before installing a tow hook, press the bottom of the cover and pop the top out to reveal the threaded access points used for bolting in the tow eye. Locate these covers on the front chassis rails; they sit flush with the bumper and give you entry to pre-tapped holes for tow hook installation. Press firmly and lever outward to expose the threads without damaging the bumper skin. Verify the presence of factory threading—Cusco or equivalent tow hooks require proper pre-tapped holes to secure safely. Confirm alignment to the factory bumper profile and check front tow eye height so towing safety isn’t compromised or the bumper deformed. You’re reclaiming control: locate covers precisely, verify threading, and prepare for secure, compliant installation.
Remove Covers Carefully
Start by pressing the bottom edge of the cover and levering the top out gently, taking care not to flex or scratch the bumper skin; you’ll expose the pre-tapped chassis holes where the tow hook threads in. You’ll work deliberately: choose tools that match cover materials, avoid prying points, and keep parts organized for reassembly or modification.
- Inspect cover materials for clips or adhesive before removing.
- Press bottom, slip top outward, and rotate cover free.
- Locate and clear the threaded holes for direct installation techniques.
- If drilling, tape center, drill 1″ initial hole, then oval for alignment.
- Consider cutting revised openings in the cover to restore a factory-look after installation.
Stay precise, controlled, and ready to reclaim mobility.
Inspect Threaded Holes
One clear method is to remove the bumper cover and visually confirm the pre-tapped chassis holes directly behind it, then clean and inspect each thread for debris, corrosion, or damage before threading the tow hook. You’ll locate the factory threaded holes designed for the tow hook and verify alignment with the vehicle body to prevent stress during towing. Use a brush and solvent to perform threaded hole maintenance, removing dirt and old sealant; apply a light anti-seize or approved lubricant for corrosion prevention if specified by Toyota. Inspect for stripped, cross-threaded, or corroded threads; damaged holes must be repaired or assessed by a professional. Only then screw the tow hook main shaft in hand-tight before final torque.
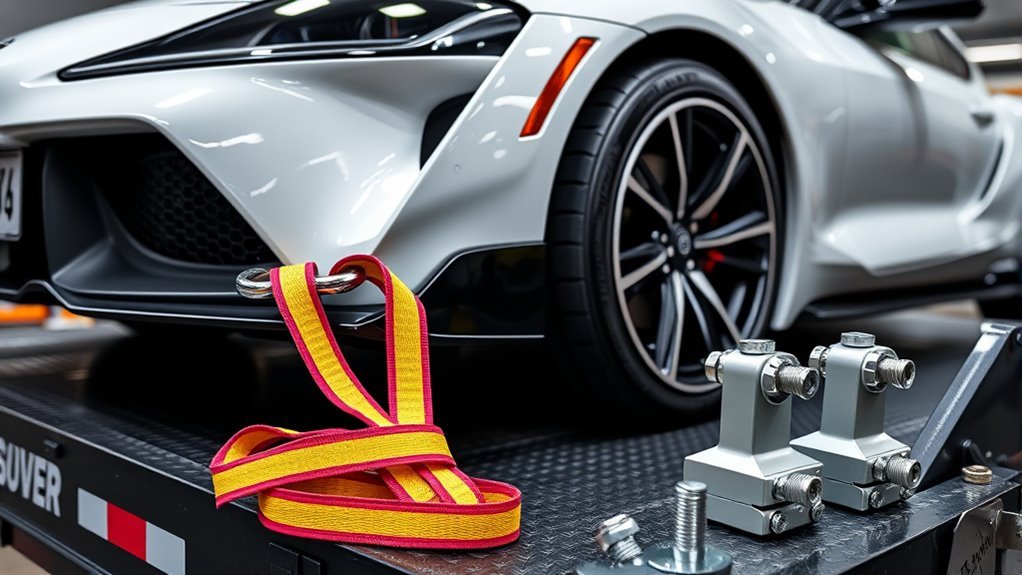
Tools & Gear: Tow Strap, Sockets, and Safety Kit
Gear matters: you’ll want a tow strap rated at least 10,000 lb, a 24 mm six‑point socket for the rear tow hook, adjustable wrenches for final torqueing, and a safety kit with gloves, reflective triangles, and basic tools. Choose tow strap selection that meets the 10,000 lb minimum to prevent failure. Pack safety kit essentials so you’re ready for roadside work. Verify tow hook alignment with the chassis rail before connecting to avoid bumper damage. Use a second person to assist during setup for alignment and safety. Follow torque specs when tightening.
- 10,000+ lb synthetic or web strap
- 24 mm six‑point socket + breaker bar
- Adjustable wrenches (set)
- Gloves and reflective triangles
- Basic tool kit and flashlight
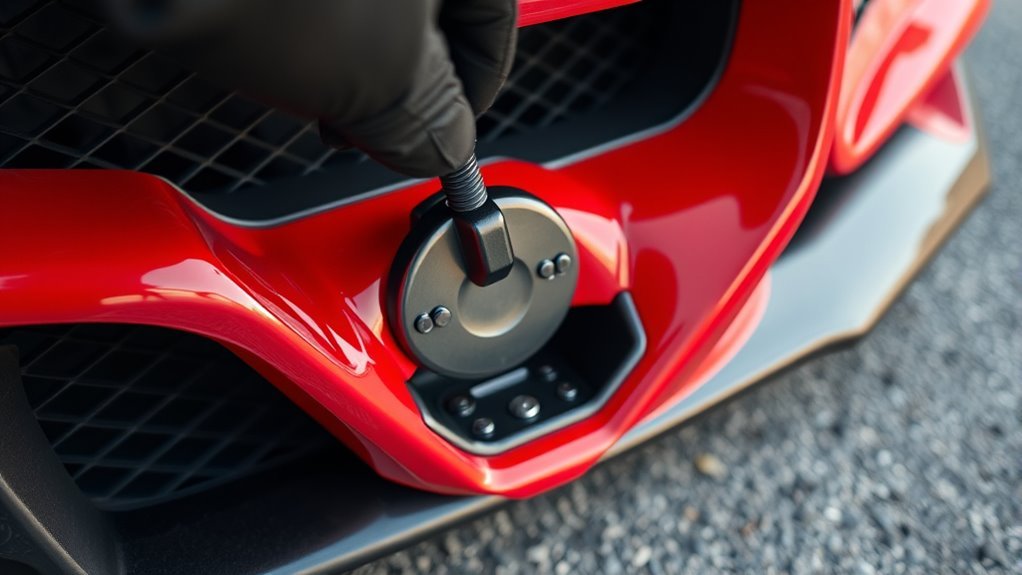
Attach a Tow Strap to the Supra’s Front Tow Hook
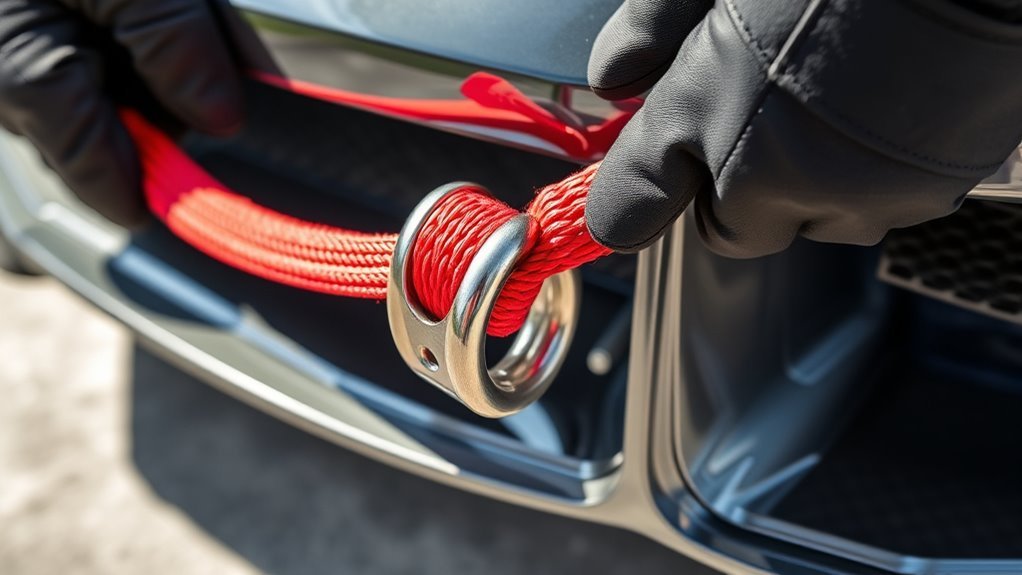
Locate the Supra’s front tow hook on the chassis rail, remove any cover blocking access, and inspect the hook and surrounding area for damage or obstructions before you attach the strap. Use a certified tow strap whose safe working load exceeds the Supra’s ~3,000 lb mass. Verify tow hook placement is correct on the chassis rail and free of corrosion. Thread the strap through the hook, pull tight to remove slack, and secure any tail to prevent flapping. Inspect the strap for frays or defects; replace if compromised. Confirm fasteners and routing clear sharp edges. Keep communications clear with your partner before movement. This procedure enforces towing safety and preserves your autonomy when recovering the vehicle.
| Step | Action | Check |
|---|---|---|
| 1 | Locate hook | Accessibility |
| 2 | Remove cover | No obstruction |
| 3 | Thread strap | Tight, no slack |
| 4 | Inspect strap | No frays |
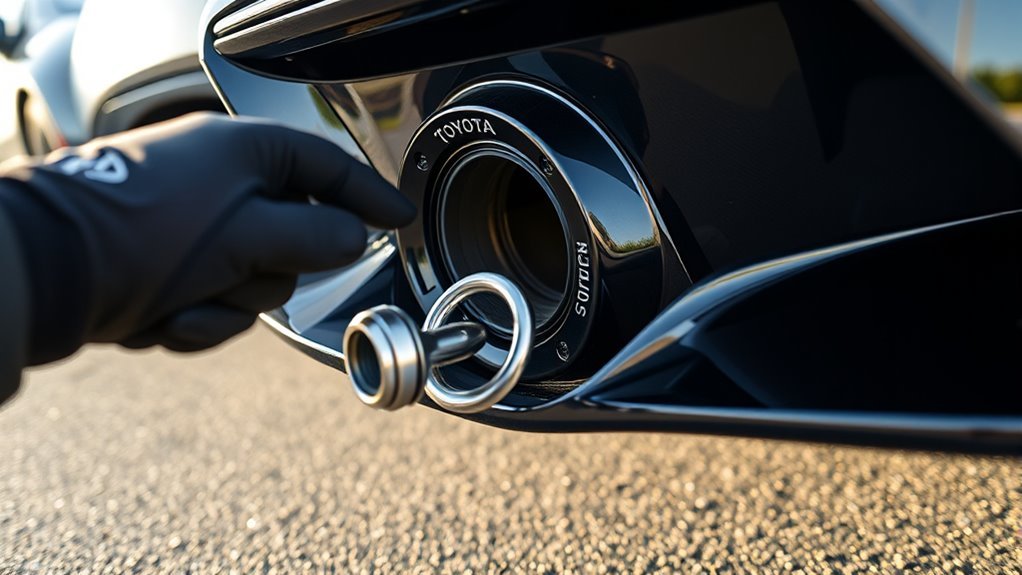
Attach a Tow Strap to the Supra’s Rear Tow Hook
Locate the rear tow hook on the Supra’s chassis rail (you may need to remove the rear bumper for access). Thread the tow strap through the hook, making sure the webbing is fully seated and the strap is rated for ~3000 lbs. Secure the connection, put the car in neutral, and test stability before towing.
Locate The Rear Tow Hook
Before attaching a tow strap, check the owner’s manual to verify the rear tow hook’s exact position on the chassis rail and remove any covers or panels blocking access. You’ll locate a reinforced mounting point; confirm it matches diagrams and is free of debris. Inspect hardware and welds for corrosion or cracks—tow hook maintenance prevents failure and supports towing safety. Tighten or replace fasteners per torque specs before use.
- Verify exact chassis-rail location from manual
- Remove access panels or plastic covers
- Visually inspect hook, welds, and bolts
- Confirm manufacturer torque and attachment method
- Ascertain strap rating matches vehicle weight
Work methodically, stay focused, and don’t bypass inspections that protect freedom on the road.
Thread The Tow Strap
Thread the tow strap through the exposed rear tow hook, feed the loop or soft shackle fully through the opening, then pass the strap’s body or hardware back through the loop so the connection cinches tight around the hook. Confirm you removed any factory cover and that the hook on the chassis rail is clear and accessible. Use a strap rated for the Supra’s weight—roughly 3000 lbs—and inspect for frays, cuts, or damaged stitching as part of routine tow strap maintenance. Pull the assembly snug until the loop seats solidly against the hook, avoiding twists or knots that concentrate load. You’re creating a reliable anchor so you can tow free of constraint; this step is critical to basic towing safety before any movement.
Secure And Test Connection
Start by attaching the tow strap’s hook to the exposed rear tow hook on the Supra’s chassis rail, making certain the hook seats fully and the latch engages. You’ll then secure and test the connection with deliberate checks to guarantee reliable towing techniques and observe safety precautions.
- Visually inspect tow hook and strap for cracks, corrosion, fraying, or deformity.
- Confirm strap hook is fully seated and latch is locked; rotate slightly to verify engagement.
- Remove slack, align strap straight with chassis; avoid sharp edges or bumper contact.
- Apply a firm tug by hand to confirm tightness; watch for movement or slippage.
- Recheck after a short drive or before recovery; stop immediately if any signs of failure appear.
Proceed only when connection is confirmed secure.
Common Mistakes That Damage Rims, Bumpers, or Tow Hooks
When you secure a Supra for towing or lifting, common mistakes—like routing straps over the rims, using tow hooks as jack points, or skipping cross tie-downs—can easily damage rims, bumpers, or the hooks themselves; always thread straps through or around proper anchor points, use designated frame rails for jacking, and employ cross ties to prevent lateral movement. Maintain rim protection and bumper safety by routing straps correctly, inspecting for obstructions prior to install, and avoiding over-tensioning. Use cross ties to stop side load. Check tow hook rating and condition before load. If you see deformation, stop and reassess.
| Mistake | Consequence |
|---|---|
| Straps over rims | Scratches, bends |
| No cross ties | Lateral movement |
| Hook used for jack | Hook failure |
| Over-tightening | Stress fractures |
| Hidden obstructions | Bumper misalignment |
Wheel Straps vs T‑Hook Straps vs Custom Adapters for Supras
Although wheel straps are generally the best choice for a Toyota Supra, you should evaluate T‑hook straps and custom adapters based on attachment points, bumper design, and transport method; wheel straps wrap around the tire to prevent rim damage, T‑hooks work where oblong undercarriage slots exist, and custom adapters let you mount secure points to aftermarket bumpers—use ratchet mechanisms and cross ties in all cases to eliminate lateral movement. You’ll choose by matching strap materials comparison to load and abrasion risk, then apply securing techniques analysis to your plan. Follow procedural checks, use ratchets, and always cross‑tie. Consider liberation: pick solutions that free you from improvisation and damage risk.
- Inspect attachment points
- Select strap material per load
- Fit wheel straps when possible
- Use T‑hooks for oblong slots
- Fabricate adapters for aftermarket bumpers
Best Trailer Tie‑Downs for Transporting a Supra
When prepping your Supra for transport, use wheel straps routed through the rims or over-the-tire sleeves to avoid rim damage and distribute load evenly. Cross-tie the car left-to-right and right-to-left, anchor to the front/rear tow hook mounts or approved undercarriage slots, and fit at least one tow hook where required. Tighten with ratchets to remove slack and verify the car can’t shift before transit.
Wheel Strap Best Practices
If you’re hauling a Supra, secure it with wheel/tire straps routed through the rim or fitted over the tire, attach them to the factory tie-downs (front/rear tow hook mounts), and cross them left-to-right to prevent lateral movement; inspect for at least one tow hook and any oblong undercarriage slots before loading. Use straps routed through the rim when possible to maximize wheel strap durability; over-the-tire straps can reduce rim scratches. Anchor to factory tie-downs only. Cross ties prevent sway.
- Choose rated wheel straps with abrasion-resistant coating.
- Route straps through rim spokes or over tire bead as needed.
- Tighten evenly, monitor strap tension management during loading.
- Protect paint and suspension components with soft buffers.
- Recheck anchors and tension after a short test tow.
Follow these steps to secure freedom of movement without risking damage.
Tow Hook Usage Tips
Having secured the Supra with wheel straps and cross ties, focus next on using the factory tow hook mounts and appropriate trailer tie‑downs to lock the car to the trailer. You’ll attach one using the supplied tow hook and should source a second to balance loads; this supports towing safety and reduces yaw. Route ratchet straps from mount to anchor, then set opposing cross ties left-to-right and right-to-left for rigidity. If oblong undercarriage slots exist, consider T-hook straps as alternative anchors. Use protective sleeves where straps contact rims or choose over-the-tire straps to prevent scratching. Inspect tow hook threads and mounts before departure as part of tow hook maintenance; torque to specification and recheck tension after a short drive to guarantee secure, liberated transport.
Protecting Rims And Tires
Because rim scratches and tire distortion are common during transport, you should use wheel/tire straps or route tie‑downs through the wheel openings rather than around the rim itself to protect finish and distribute load. Use one tow hook per end as an anchor and confirm straps are rated for vehicle weight. Cross tie downs left-to-right add stability; tension incrementally and recheck. Prioritize rims protection and tire safety by eliminating sharp contact points and avoiding over-tightening.
- Thread straps through wheel openings, not over the lip
- Use over-the-tire straps when rim contact can’t be avoided
- Implement cross tie‑downs for lateral restraint
- Attach at least one secure tow hook per end
- Inspect straps, hardware, and tire pressure before departure
Follow this procedure to transport your Supra with control and freedom.
If Tow Hook Threads or Covers Don’t Line Up, Try This
When the tow hook threads don’t line up with the bumper cover, inspect the bumper for obstructions or misalignment and mark the exact center with tape before cutting or drilling. Verify tow hook alignment against the marked point; remove any clips, foam, or brackets blocking the shaft. If the factory cover won’t accommodate the hook, plan minimal bumper modifications: cut a one-inch pilot hole at the tape center, then file or grind to an oval matching the hook shaft. Install and snug the main shaft first to confirm fit and angle; adjust hole shape only as needed. Recheck alignment and torque after final positioning. You’re reclaiming control of fitment—precise, deliberate steps keep the Supra functional and visually clean.
Final Safety Checklist Before Towing or Hauling Your Supra
You’ve confirmed fit and alignment of the tow hook; now run a final safety checklist before towing or hauling your Supra. Confirm tow hook maintenance and towing safety steps so you leave constraints behind and move with confidence.
- Verify the tow hook is securely attached to the pre-tapped threading; check for missing parts.
- Ascertain front and rear tow hook locations are accessible and unobstructed by bumper design.
- Inspect surrounding structure for damage or deformation that could compromise load paths.
- Confirm compatibility with your bumper and any aftermarket modifications before applying load.
- Double-check all safety straps, tie-downs, and attachment points to prevent vehicle movement during transport.
Follow this procedural checklist every time to maintain freedom and reduce risk.
Frequently Asked Questions
Can You Tow With a Supra?
Yes, you can tow with a Supra if you respect its towing capacity and use proper towing accessories. You’ll inspect attachment points, use rated hardware, avoid overloading, and consider aftermarket hitches to protect the bumper and chassis.
Conclusion
Decide front or rear, locate the threaded access, and use the right sockets and a rated tow strap—don’t improvise. Attach straps to the factory tow hook points or use wheel/axle-approved tie‑downs for transport, and prefer T‑hook or custom adapters when fitment’s off. If threads or covers misalign, try the OEM cover removal and alignment tool. Run a final safety checklist: secure hardware, test tension, chock wheels—like a compass guiding each precise move.