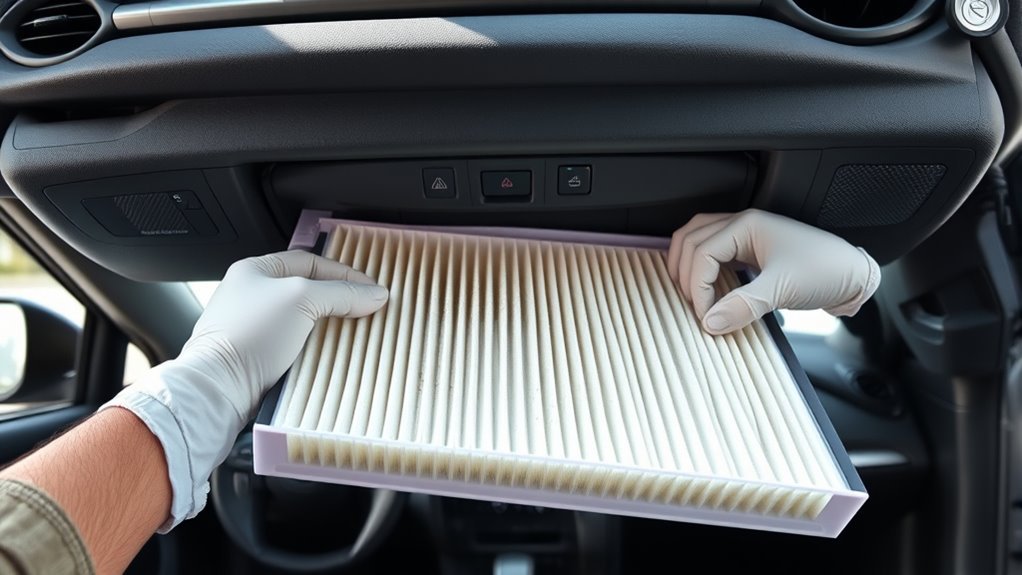
A P0441 code on a Toyota RAV4 means the EVAP system is seeing incorrect purge flow: fuel vapors are not being pulled from the charcoal canister into the engine at the expected time or rate. The fix usually starts with simple checks, such as the fuel cap and purge valve, before moving to EVAP hoses, the canister vent valve, charcoal canister, wiring, and smoke testing.
Quick Answer
To fix P0441 on a Toyota RAV4, tighten or replace the fuel cap first, then test the purge valve, inspect EVAP hoses and wiring, and run a smoke test if the code returns. Do not replace the charcoal canister until you have confirmed the purge valve, vent valve, hoses, and cap are working correctly.
Key Takeaways
- P0441 is an EVAP purge-flow code, not a direct “replace the canister” code.
- Start with the fuel cap, filler neck seal, purge valve, hoses, and wiring before buying larger parts.
- A purge valve that is stuck open can cause rough idle, hard starting after refueling, fuel smell, or poor fuel economy.
- A smoke test is the fastest way to find hidden leaks after the easy visual checks are complete.
- Use model-year-specific repair information because EVAP part locations vary between RAV4 generations and engine options.
At a Glance
| Time Required | 15 minutes for basic checks; 1–2 hours for valve testing and hose inspection |
| Difficulty | Beginner for fuel-cap checks; intermediate for purge valve, vent valve, and smoke testing |
| Tools Needed | OBD-II scanner, flashlight, basic hand tools, multimeter, hand vacuum pump or scan tool, smoke machine if available |
| Typical Cost | About $15–$50 for a fuel cap, $30–$120 for many purge or vent valves, more if diagnosis or canister replacement is needed |
Quick Fix Summary: 3 Steps to Clear P0441 on a RAV4

Start with the three checks that solve many RAV4 P0441 problems without wasting money: confirm the fuel cap seals correctly, test the purge valve and its wiring, then inspect EVAP hoses, fittings, and the vent valve for leaks, cracks, blockages, or loose connectors.
- Check the fuel cap and filler neck. Toyota warns that a loose fuel cap can trigger a “Check Fuel Cap” message and recommends using a genuine Toyota fuel tank cap designed for the vehicle when replacement is needed. Toyota’s RAV4 owner guidance also tells owners to turn the vehicle off and tighten the cap securely if the message appears.
- Test the purge valve. The purge valve is normally under the hood near the intake area on many RAV4 models, but exact location varies by year and engine. A normally closed purge valve should not pass air when it is off. If it sticks open, leaks, will not click when commanded, or has damaged wiring, it can cause incorrect purge flow.
- Inspect hoses and run a smoke test if needed. Cracked hoses, loose fittings, a stuck vent valve, or a damaged charcoal canister can all affect the sealed EVAP system. If the easy checks do not reveal the fault, a smoke test helps find leaks you cannot see.
Warning: EVAP work involves fuel vapor. Work in a ventilated area, keep sparks and flames away, do not smoke, and do not apply shop air pressure to the fuel tank unless the service procedure and test equipment are designed for EVAP diagnostics.
What P0441 Means on a Toyota RAV4
The P0441 diagnostic trouble code means the engine computer detected incorrect purge flow in the evaporative emission control system. The EVAP system stores gasoline vapors in a charcoal canister and later routes those vapors into the engine to be burned instead of venting them to the air. Modern OBD systems are required to monitor emission-related systems and store fault codes when malfunctions are detected, as described in federal OBD rules under 40 CFR § 86.1806-17.
On a RAV4, P0441 usually points to one of these conditions:
- A loose, damaged, or non-sealing fuel cap
- A purge valve stuck open, stuck closed, restricted, or leaking
- Damaged purge-valve wiring or a poor connector fit
- Cracked, disconnected, pinched, or blocked EVAP hoses
- A vent valve or canister close valve that is not sealing or opening correctly
- A saturated, cracked, or restricted charcoal canister
- A leak at the fuel filler neck or EVAP line connections
EVAP System Overview
The RAV4 EVAP system is basically a sealed vapor-control system. The fuel tank produces vapor, the charcoal canister stores that vapor, and the purge valve controls when engine vacuum draws vapor into the intake. A vent valve allows filtered air into the system during normal purge operation and closes when the system needs to run a leak check. CARB explains that evaporative emission programs reduce fuel vapor and refueling emissions from on-road vehicles through standards and test procedures, which is why EVAP faults can affect emissions readiness. CARB’s evaporative emission control overview covers that purpose at a high level.
Purge Flow Failure
Purge flow must happen at the right time and in the right amount. If the purge valve opens when it should stay closed, the engine may pull extra vapor at idle or during startup. If it does not open when commanded, stored vapors may not move out of the charcoal canister. If the system leaks or cannot vent correctly, the computer can see pressure and flow readings that do not match expected behavior.
A scan tool that can command EVAP components is the best way to verify purge operation. If you only have a basic code reader, you can still inspect the fuel cap, hoses, wiring, and purge valve behavior, but a professional diagnostic tool can save time by commanding the valve and watching fuel tank pressure data.
Quick Pre-Check Checklist Before You Start Repairs
Before replacing parts, confirm the code and look for clues. P0441 often appears with related EVAP codes such as P0440, P0442, P0446, P0455, or P0456. Those codes can change the diagnostic path, so do not ignore them.
- Scan the vehicle. Record all stored, pending, and permanent codes before clearing anything.
- Check freeze-frame data. Note fuel level, coolant temperature, speed, and when the code set. EVAP monitors often run only under specific conditions.
- Check the fuel level. EVAP self-tests may not run when the tank is very full or very low. A mid-level tank is often better for retesting.
- Inspect the fuel cap. Look for a torn seal, loose cap, dirt on the sealing surface, damaged threads, or an aftermarket cap that does not fit properly.
- Inspect visible EVAP hoses. Look for splits, loose clamps, disconnected lines, kinks, and rodent damage.
- Inspect wiring. Check the purge valve and vent valve connectors for corrosion, broken locking tabs, loose pins, or rubbed-through wiring.
- Clear the code only after repairs or testing. Then drive the vehicle through a few normal trips so the EVAP monitor can run again.
Note: A cleared check-engine light does not always mean the repair is confirmed. Some EVAP monitors need multiple drive cycles and the right fuel level, temperature, and soak time before they run again.
How to Inspect and Test the Gas Cap
The fuel cap is the easiest and cheapest place to start. A damaged cap can let vapor escape and prevent the EVAP system from holding the pressure or vacuum it expects during a monitor test. It is also one of the few items owners can check without tools.
Check Cap Fitment
Remove the cap and reinstall it carefully. Make sure it threads on smoothly, sits flush, and tightens fully. If your RAV4 uses a clicking cap, tighten it until it clicks. A cap that wobbles, cross-threads, or never seats evenly should be replaced.
Inspect the Rubber Seal
Look closely at the rubber gasket or O-ring. Replace the cap if the seal is cracked, flattened, hardened, swollen, missing, or coated with dirt that cannot be cleaned off. Also inspect the filler neck sealing surface. Rust, dents, dirt, or damage where the cap seal contacts the neck can mimic a bad cap.
Use Correct Replacements
Do not guess on fuel-cap fitment. Toyota specifically warns against using anything except a genuine Toyota fuel tank cap designed for the vehicle when replacing the cap. If you choose an aftermarket cap, verify it is listed for your exact RAV4 year, engine, and emissions configuration. A cheap universal cap can cause repeat EVAP codes even when it appears to fit.
Pro Tip: After replacing a loose or damaged cap, clear the code and drive normally. The light may not stay off until the EVAP monitor runs successfully, so give it a few trips before assuming the repair failed.
How to Find and Test the Purge Valve on a RAV4
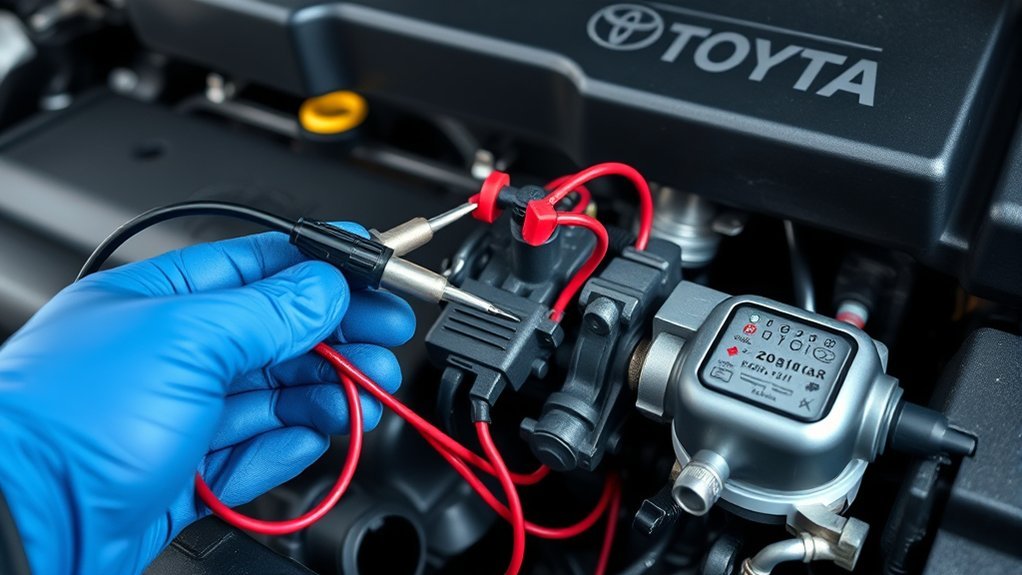
On many Toyota RAV4 models, the purge valve is in the engine bay near the intake manifold or throttle-body area. It is usually a small solenoid with an electrical connector and vapor hoses attached. Exact location varies, so use your model-year repair information if you cannot identify it quickly.
1. Visually Check the Purge Valve
Before applying power or replacing anything, inspect the valve and nearby hoses. Look for:
- Broken or brittle hose nipples
- Loose, swapped, cracked, or oil-soaked hoses
- Corrosion inside the electrical connector
- A broken connector lock
- Wiring rubbed through near the engine cover, intake, or brackets
- Signs that a hose was recently removed and not fully reinstalled
2. Check Whether It Leaks When Closed
Most purge valves are normally closed. With the valve disconnected and not powered, air should not pass through it. If you can blow through the valve when it is off, it may be stuck open. A stuck-open purge valve can cause rough idle, hard starts after refueling, fuel odor, and P0441.
3. Command the Valve Open
The cleanest test is to use a scan tool that can command the purge valve while you listen and watch data. If the valve clicks when commanded and airflow changes as expected, the valve is probably responding. If it does not click, does not change airflow, or behaves intermittently, continue with electrical testing.
4. Test Power, Ground, and Resistance
Use a multimeter and the correct wiring diagram for your RAV4. Check for damaged wiring, poor ground control, and abnormal coil resistance. Do not hold jumper power on a solenoid for a long time unless the service information says it is safe. A momentary actuation test may be useful, but overheating or shorting the valve can create a new problem.
A purge valve should control vapor flow, not leak all the time. If it passes air while unplugged and unpowered, treat it as a strong suspect.
Check EVAP Hoses and the Most Common Leak Points
EVAP hoses and fittings can fail from heat, age, road debris, poor previous repairs, or rodents. A small crack can be hard to see, but it can still affect purge flow or EVAP monitor results.
Trace the system as far as you can from the engine bay toward the fuel tank and charcoal canister. Pay close attention to:
- Hose bends near the purge valve
- Plastic quick-connect fittings
- Rubber sections near the fuel tank and canister
- Hoses routed near sharp brackets or moving parts
- Lines close to the rear suspension and underbody
- Connections at the charcoal canister and vent valve
- The fuel filler neck and cap sealing area
Replace cracked or swollen hoses with fuel-vapor-rated hose. Do not use random vacuum hose if it is not rated for fuel vapor exposure. Secure loose hoses and clamps, and make sure every line returns to the correct port.
Use a Smoke Test to Find Hard-to-See EVAP Leaks
If the cap, purge valve, and obvious hoses check out, a smoke test is the next best step. A smoke machine introduces low-pressure visible vapor into the EVAP system so leaks show up as escaping smoke. This test is especially useful because many EVAP leaks are too small or hidden to find by eye.
Good smoke-test practice includes:
- Use EVAP-safe test equipment. The EVAP system is not designed for high shop-air pressure.
- Seal the system correctly. Depending on the vehicle and tool, the test may connect near the service port, purge line, filler neck adapter, or another approved point.
- Command or close the vent valve as needed. If the vent valve is open during the wrong part of the test, smoke may exit normally and look like a leak.
- Inspect slowly. Check the cap, filler neck, canister, vent valve, hose joints, and underbody lines.
- Mark the leak before turning the machine off. Small leaks can disappear quickly once pressure is removed.
Warning: Never use an unregulated air hose to pressurize the tank. Excess pressure can damage EVAP parts, push fuel vapor into unsafe areas, or create a fire risk.
[Products Worth Considering]

This replacement fuel gas cap is designed to fit a wide range of Toyota and Lexus vehicles, making it a practical solution for a lost, worn, or damaged original cap. It helps restore a secure fuel tank seal and supports proper vehicle operation while offering broad compatibility across many popular model years. The package includes one gas cap, and buyers should confirm fitment before ordering.

This fuel tank filler cap is designed as a direct replacement for a wide range of Toyota and Lexus vehicles, helping restore a secure seal for the fuel system. It is tested before shipping and built from durable materials for dependable fit and long-lasting use. Installation is simple, making it a practical solution for replacing a lost, worn, or damaged gas cap.

This genuine Toyota vent valve is designed as a vehicle-specific replacement part to support proper engine ventilation and reliable PCV system performance. It helps maintain correct airflow and crankcase function, making it a dependable choice for restoring original operation. Built to Toyota specifications, it offers a direct-fit solution for compatible vehicles.
If the Purge Valve Passes: Inspect the Charcoal Canister and Vent Solenoid

If the purge valve works correctly, move to the rear EVAP components. The charcoal canister stores fuel vapors, and the vent valve controls airflow into the canister during purge and leak testing. A vent valve that sticks closed can restrict airflow. A vent valve that will not seal can cause EVAP monitor failures. A damaged or saturated canister can also create flow and pressure problems.
[Products Worth Considering]

This engine water pump kit is designed to help maintain reliable cooling performance across a wide range of compatible Toyota, Lexus, Scion, and Pontiac vehicles. Built with aluminum and tested for leak-free operation, it offers a direct replacement solution that supports engine efficiency and long-term service life. The kit includes a professional water pump and gasket for a convenient installation-ready repair.

This coolant bypass valve is a direct replacement for select Toyota models, helping regulate coolant flow for stable engine temperature and dependable performance. Built from high-temperature, corrosion-resistant materials, it is designed to handle demanding driving conditions while supporting long-term durability. Its straightforward design also makes installation quick and hassle-free.
Charcoal Canister Checks
Inspect the canister for cracks, impact damage, loose fittings, broken hose nipples, fuel saturation, or charcoal pellets escaping into lines. If the vehicle was repeatedly overfilled after the pump clicked off, liquid fuel may have entered the canister. That can damage the charcoal bed and cause repeat EVAP faults.
Vent Valve Checks
The vent valve should open and close when commanded. Use a scan tool if available. If testing manually, follow the service procedure for your exact model. Check the electrical connector, coil resistance, and airflow through the valve. Dirt, dust, and spider webs can also restrict the vent path or filter.
Wiring and Connector Checks
Do not skip wiring. A good valve cannot work if the connector is loose or the circuit is damaged. Look for corrosion, water intrusion, loose terminals, pinched wires, and rubbed insulation near the canister and underbody.
Parts Cost and Replacement Estimates for Common EVAP Fixes
EVAP repair costs vary by model year, brand, parts source, and labor rate. Use the ranges below as planning estimates, not guaranteed prices.
| Part or Service | Typical Parts Range | Notes |
|---|---|---|
| Fuel cap | About $15–$50 | Use the correct cap for your exact RAV4. |
| Purge valve | About $30–$120 | Often accessible under the hood, but location varies. |
| EVAP hose or fitting | About $10–$60+ | Use hose rated for fuel vapor exposure. |
| Vent valve / canister close valve | About $40–$150+ | Usually near the charcoal canister. |
| Charcoal canister | Often $150–$500+ | Do not replace until diagnosis points to it. |
| Professional smoke test / diagnosis | Usually 0.5–1.5 hours of labor | Often cheaper than guessing at parts. |
The smartest repair order is usually diagnose first, replace second. A fuel cap and purge valve are common enough to check early, but the charcoal canister is too expensive to replace on a hunch.
[Products Worth Considering]

【VEHICLE FITMENT 1】 Vapor Canister Purge Valve Solenoid compatible with Toyota: 4Runner (2010-2017), FJ Cruiser (2009-2014), Highlander (2008-2018), Tacoma (2012-2015), Tundra (2007-2015), Camry (2007-2017), Corolla (2009-2013), Matrix (2009-2013), Prius (2016-2018).
DIY vs. Professional: When to Repair a P0441 on a RAV4
You can handle the first round of P0441 diagnosis yourself if you are comfortable with basic tools and safe fuel-vapor precautions. You should consider a professional diagnosis if the code returns after the basic checks, if you find multiple EVAP codes, or if you need smoke testing and bidirectional scan-tool control.
When to DIY
DIY is reasonable when:
- The only code is P0441
- The fuel cap is loose, damaged, or clearly wrong
- The purge valve is easy to access
- You can inspect hoses and connectors safely
- You have a basic scanner to clear and recheck codes
- You are not dealing with fuel leaks, broken fuel lines, or strong raw-fuel odor
When to Hire a Professional
Bring the RAV4 to a qualified technician when:
- P0441 returns after replacing a damaged cap or failed purge valve
- You also have P0440, P0442, P0446, P0455, or P0456
- You smell strong fuel vapor but cannot find the source
- You need a smoke test, fuel tank pressure data, or bidirectional component control
- The charcoal canister, vent valve, or underbody lines need diagnosis
- You are unsure how to test circuits without damaging the ECM or solenoids
A professional scan tool can command the purge valve and vent valve, view fuel tank pressure changes, and confirm whether the EVAP monitor completes after repair. That can prevent unnecessary parts replacement.
How to Prevent P0441 from Coming Back
Once the repair is complete, a few habits can reduce repeat EVAP problems:
- Stop refueling when the pump clicks off; do not repeatedly top off the tank.
- Tighten the fuel cap fully after every fill-up.
- Replace a worn fuel cap with the correct vehicle-specific part.
- Inspect EVAP hoses during oil changes if the vehicle is older or driven in harsh climates.
- Fix rodent-damaged wiring or hoses quickly.
- Do not ignore related EVAP codes, even if the RAV4 seems to drive normally.
Frequently Asked Questions
How do I fix a P0441 code on my Toyota RAV4?
Start by checking the fuel cap, filler neck, purge valve, purge-valve wiring, EVAP hoses, and vent valve. If those checks do not reveal the fault, run a smoke test. Replace only the component that fails testing, then clear the code and confirm the EVAP monitor runs successfully.
Can a loose gas cap cause P0441 on a RAV4?
Yes. A loose, damaged, or incorrect fuel cap can affect the sealed EVAP system and trigger EVAP-related warnings or codes. Check the cap first because it is simple, inexpensive, and directly mentioned in Toyota owner guidance for fuel-cap warnings.
What are the symptoms of incorrect purge flow?
Many drivers only notice the check-engine light. Depending on the failure, symptoms can include rough idle, hard starting after refueling, fuel smell, reduced fuel economy, stalling at idle, or a failed emissions inspection.
Is it safe to drive with a P0441 code?
The RAV4 may still drive normally, but you should not ignore the code. EVAP faults can increase fuel vapor emissions, cause fuel odor, prevent emissions readiness, and hide other issues. If you smell strong fuel vapor or see fuel leakage, stop driving and have the vehicle inspected.
Will P0441 clear itself after tightening the fuel cap?
It can, but not always right away. The EVAP monitor needs the correct drive conditions before the computer confirms the repair. You can clear the code with a scanner after fixing the issue, but the monitor still needs to run and pass.
Should I replace the charcoal canister for P0441?
Not first. The charcoal canister can cause EVAP problems, but it is usually more expensive than the fuel cap, purge valve, hoses, or vent valve. Test the simpler and more common failure points before replacing the canister.
Conclusion
A P0441 on your Toyota RAV4 is an EVAP purge-flow problem, and the best fix is a step-by-step diagnosis rather than random parts replacement. Start with the fuel cap and filler neck, test the purge valve, inspect hoses and wiring, then move to the vent valve, charcoal canister, and smoke testing if needed. Once the failed part is repaired, clear the code and confirm the EVAP monitor completes before calling the job done.
Sources
- Toyota Owners — 2022 RAV4 fuel tank cap guidance — supports fuel-cap tightening and genuine Toyota cap replacement guidance.
- Toyota Owners — Manuals and Warranties — supports using model-year-specific Toyota owner information.
- eCFR — 40 CFR § 86.1806-17 Onboard diagnostics — supports the explanation that OBD systems monitor emission-control malfunctions and store diagnostic codes.
- U.S. EPA — Federal onboard diagnostic regulations update — supports OBD coverage of emission-control and evaporative systems.
- California Air Resources Board — Evaporative emission controls — supports the role of EVAP systems in reducing evaporative and refueling emissions.
- Snap-on Diagnostics — EVAP system operation — supports purge-solenoid and vent-valve function descriptions used in the diagnostic steps.