If your Sonata has an EVAP fault, start with the gas cap: check the seal for cracks, verify it clicks and sits flush, and clear debris from the filler neck—worn or misaligned caps commonly leak vapor and trigger codes. Also sniff for fuel odors and watch for a persistent check-engine light; if symptoms persist, hoses, purge valve, or charcoal canister may be at fault. Keep going to see how those components are tested and fixed.
Is My Sonata’s Gas Cap Causing an EVAP Leak?
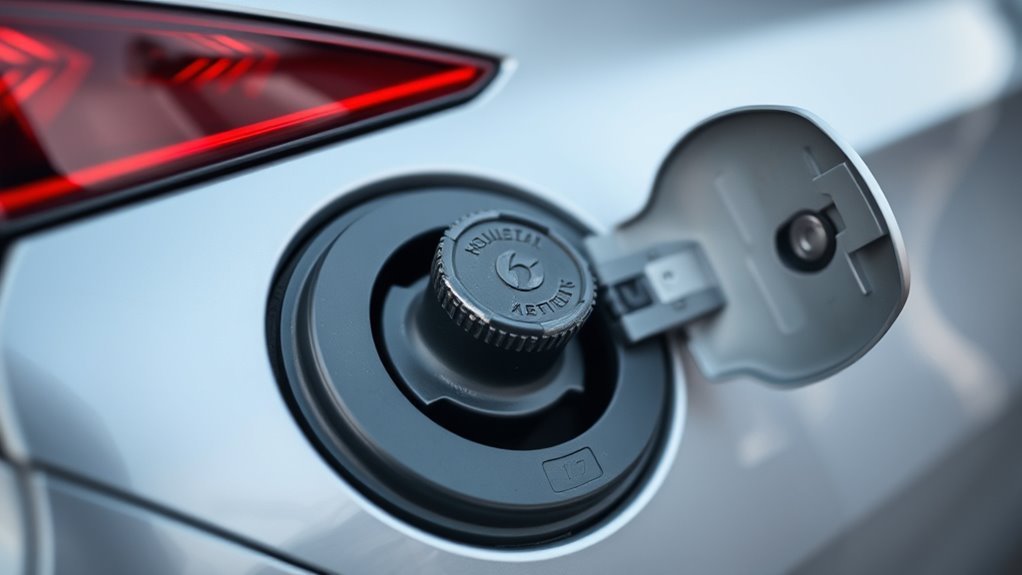
Wondering if your Sonata’s gas cap is the culprit? You’ll check gas cap maintenance first: a worn seal or cracked body is the most common EVAP leak source and often trips the check engine light. You should understand mechanics—seal degradation lets fuel vapor escape, degrading fuel economy and raising emissions impact. Over-torquing or misalignment can also create leaks by deforming the seal. Inspect visually and feel the seal for brittleness; replacement is straightforward but matters to system integrity. Fixing a faulty cap restores proper pressure management, reduces vapor loss, and keeps emissions controls compliant, which frees you from avoidable failures and fines. Treat the cap as a small, essential control point in emissions stewardship.
[Products Worth Considering]

【FUEL CAP / GAS CAP TETHER COMPATIBLE WITH】31010-3L600U, 31010-3L600, Fuel Tank Filler Cap Is 100% Rigorously Tested Before Shipping. Check The Part Number To Confirm The Compatibility Before Purchase. GAS CAP For Kia & Hyundai Vehicles (Includ 2004 2005 2006 2007 2008 2009 2010 2011 2012 2013 2014 2015 2016 2017 2018 2019 2020 Years Series), Not All Of The Vehicles Are Listed, PLESE CHECK THE DROP DOWN BAR TO CHECK THE COMPATIBLE.

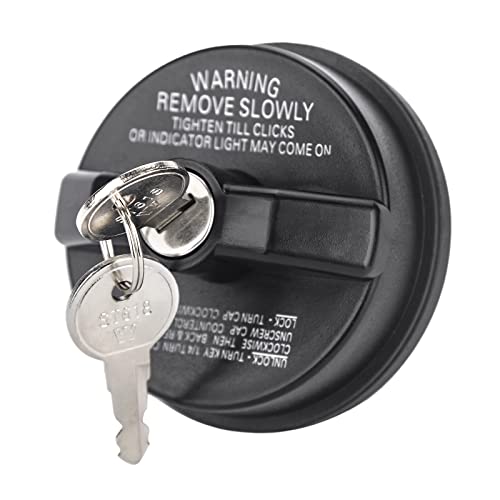
Premium Material: The Fuel Tank Filler Cap is crafted from premium plastic, offering excellent waterproof, rustproof, and corrosion-resistant properties for long-lasting durability. It is designed for easy installation: simply align the product with the fuel tank opening, rotate it clockwise, and listen for a click to confirm proper installation.

【Gas Cap Fuel Cap Replacement】31010-3L600U, 31010-3L600, Check The Part Number Before Your Order, It saves you the time of buying back and forth, and also helps you save money.
Quick Checks You Can Do Now (Cap, Seals, Simple Fixes)
Start by confirming the gas cap fits flush and clicks when tightened; a loose cap is the simplest EVAP fault. Then inspect the rubber seal on the cap for cracks or compression that could let vapour escape. Finally, do a quick sniff around the tank and filler neck for any fuel smell that would indicate an active leak.
[Products Worth Considering]

High Quality Material: This product is crafted from high-quality ABS plastic. ABS offers good wear resistance and impact resilience, effectively withstanding everyday driving knocks and external abrasion while preventing cracking or deformation due to material ageing. Furthermore, ABS's superior durability ensures an extended service life for the fuel cap, providing long-term, reliable protection for your vehicle.

Compatibility Information: This gas cap is Nissan Infiniti. Replacement OE: 17251-1VZ0D, 17251-3JA0A. Please check your vehicle model before purchase to avoid incompatibility.
【Replacement Part Number】 - #10504, 31780, 77300-47020. Before Ordering, Please Confirm Compatibility And Wether Are Suitable For Your Vehicle!
Check Gas Cap Fit
Anyone can check the gas cap fit quickly to rule out a common EVAP leak source: tighten the cap until it clicks, inspect the rubber seal for cracks or hardening, clear any dirt from the filler neck seating surface, and sniff for fuel odor—if it doesn’t click or the seal’s damaged, replace the cap.
You’ll perform basic gas cap maintenance for immediate leak prevention. Tighten until you hear the click; a missing click suggests poor fit or stripped threads. Clean debris from the filler neck to guarantee full contact. Smell for fuel—persistent odor signals failure. Swap the cap if seals show visible damage or the click is absent. These steps free you from unnecessary diagnostics and keep the EVAP system intact.
| Step | Result |
|---|---|
| Tighten till click | Proper fit |
| Clean seating | Full seal |
| Smell test | Detect failure |
| Replace damaged cap | Restore containment |
Inspect Cap Seal
Check the gas cap seal every few oil changes: remove the cap, inspect the rubber for cracks, hardening, or compressed spots, and press the seal with your thumb to verify it still springs back. For practical gas cap maintenance, clear dirt and debris from the cap and filler neck to guarantee an unbroken mating surface; contamination can prevent a seal and mimic EVAP faults. If the seal shows brittleness, tears, or permanent deformation, replace the cap—don’t gamble with a worn gasket that can trigger the check engine light. After reinstalling, hand-tighten until you hear clicks or feel resistance to confirm a secure fit. Regular seal inspection during routine maintenance preserves emissions compliance and gives you control over avoidable EVAP issues.
Look For Vapour Smell
A quick sniff around the filler neck and rear quarter panel can reveal vapour leaks you can fix yourself: check for faint fuel odors near the cap, seals, and charcoal canister area. If you detect smell, tighten the cap, inspect the seal for cracks, and avoid overfilling past the first click. Use vapor detection by nose first, then inspect vacuum hoses and canister for saturation or damage.
| Checkpoint | Action | Result |
|---|---|---|
| Filler neck | Tighten cap | Stops common leaks |
| Cap seal | Inspect/replace | Restores seal integrity |
| Hoses/canister | Scan for cracks/saturation | Prevents EVAP faults |
You’ll reclaim control: simple checks prevent check‑engine lights and restore efficient vapor containment.
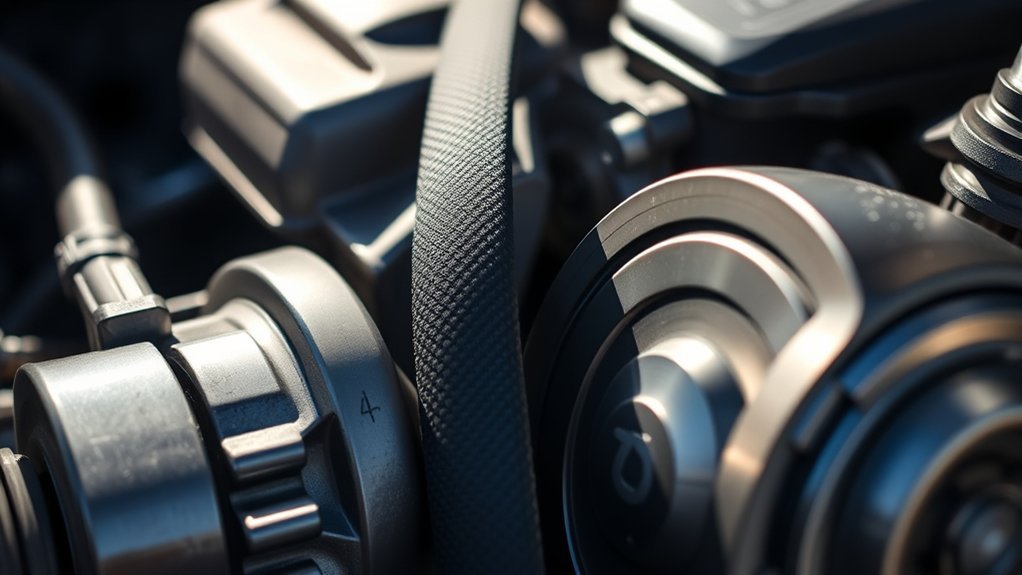
How the Sonata EVAP System Works
The charcoal canister traps fuel vapors from the tank so they don’t vent to atmosphere, and you’ll see its condition affect EVAP performance. Valves, solenoids and sensors—controlled by the onboard computer—open and close to isolate, pressurize, and test the system. When conditions are right the system routes stored vapors into the intake manifold for combustion, improving efficiency and enabling leak diagnostics.
Charcoal Canister Role
Because fuel vapors can’t just vent to the atmosphere, the Sonata’s charcoal canister captures and stores them from the gas tank, then releases those vapors into the intake manifold for combustion when the engine control unit opens the purge valve. You’ll rely on that charcoal function to lock down vapors, preserve fuel, and enable emissions reduction. The canister is passive storage and only frees vapors under controlled conditions, so a fault there steals performance and compliance.
- Captures vapors from the tank for safe storage.
- Holds charge until the system commands purge for combustion.
- Prevents atmospheric hydrocarbon release, aiding compliance.
- A failure triggers onboard diagnostics and can lower fuel efficiency.
Maintain the canister to keep your freedom from emissions failures.
Valve And Sensor Control
Now that you know the canister stores vapors, look at the valves and sensors that control their movement into the engine. You rely on the purge valve and vent valve plus solenoids to time vapor release; the ECU monitors each component and opens or closes them under defined engine conditions. If you want freedom from breakdowns, perform routine diagnostics: pressure tests, solenoid activation checks, and sensor calibration. A valve malfunction or sensor failure will trigger diagnostic trouble codes and reduce emissions compliance, so replace faulty parts promptly. Keep wiring and connectors clean, follow service intervals, and use OEM replacements when possible. You’ll maintain performance, avoid limp modes, and assert control over your vehicle’s evaporative system.
Vapor Routing To Intake
When the engine reaches the right conditions, the EVAP system routes stored fuel vapors from the charcoal canister into the intake manifold via controlled valves and solenoids so those vapors burn in the combustion chamber instead of escaping to atmosphere. You control vapor flow indirectly: the PCM opens purge and vent solenoids based on engine load and intake pressure, allowing canister vapors to mix with incoming air. That routing prevents emissions and preserves efficiency while the computer watches for leaks and faults. Maintain clear lines and functioning valves so you stay free from unnecessary codes or limp-mode restrictions.
- Purge solenoid times vapor flow to engine demand.
- Vent valve seals system during self-tests.
- PCM compares intake pressure against expected values.
- Blocked lines raise emissions and set codes.
Common EVAP Leak Causes on Sonatas (Cap, Hoses, Valves, Canister)
If your Sonata throws an EVAP-related code or fails an emissions check, start by checking the gas cap, hoses, purge valve, and charcoal canister, since these components account for most leaks. First, inspect cap seals: worn or damaged seals let vapors escape, so replace the cap if seals look compromised. Next, trace vacuum hoses for cracks or brittleness; any damaged hose breaks the vapor containment path. Test purge valves for proper operation—sticking open alters idle and fuel economy and indicates replacement. Finally, examine the charcoal canister for saturation or physical damage from prolonged vapor exposure; a leaking canister undermines system efficiency. You’ll regain control and emissions compliance by addressing these four common, fixable points.
[Products Worth Considering]

【FUEL CAP / GAS CAP With 2 Seals COMPATIBLE WITH】31010-3L600U, 310103L600, GAS CAP For Kia & Hyundai Vehicles (Includ 2004 2005 2006 2007 2008 2009 2010 2011 2012 2013 2014 2015 2016 2017 2018 2019 2020 Years Series), Not All Of The Vehicles Are Listed, PLESE CHECK THE DROP DOWN BAR TO CHECK THE COMPATIBLE,Fuel Tank Cap Is 100% Rigorously Tested Before Shipping. Check The Part Number To Confirm The Compatibility Before Purchase.

Universal Compatibilit: Fits all range of vehicles and gas cap sizes.

Perfect Fit Gas Cap: Tired of a loose or faulty gas cap? Our premium replacement is engineered to exact OEM standards, directly replacing part numbers 31010-3L600/ 31010-3L600U. It's the perfect fit for KIA & HYUNDAI. Each fuel accessories is 100% tested before shipping to ensure a secure seal, restoring your check engine light and maximizing fuel efficiency.
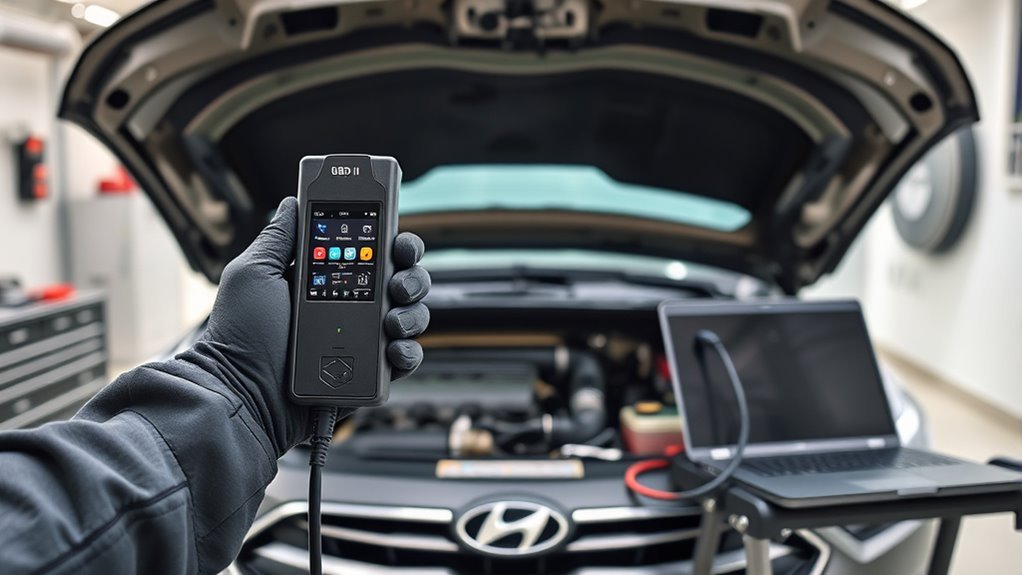
How Mechanics Diagnose EVAP Leaks (Smoke Test, Scan Codes, Hose Checks)
Because EVAP leaks are often small and intermittent, mechanics use a combination of diagnostic tools—scan codes, pressure data, and targeted inspections—to pinpoint the fault quickly. You’ll see them run a scan to pull DTCs and monitor system pressure, which narrows failures to purge, vent, or canister circuits. They’ll perform a smoke test to force harmless vapor through the lines, revealing vacuum leaks and cracked hoses. During solenoid inspection they bench-test actuators and check wiring for continuity.
- Scan tool: read codes, freeze-frame, live pressure data.
- Smoke test: visually locate escaping vapor.
- Hose check: flex, probe, replace brittle lines.
- Solenoid inspection: apply power, verify operation and sealing.
This workflow frees you from guesswork.
Repair vs. Replace: When to Call a Mechanic in Destin, FL
Although a loose or damaged gas cap is an easy DIY fix that often clears an EVAP fault, you should call a Destin mechanic when replacing the cap doesn’t stop the check engine light, you detect a persistent fuel smell, or symptoms return intermittently. If a new cap fails, pursue professional diagnostic repair strategies: a mechanic will run a smoke test, scan codes, and inspect purge valves, hoses, and the charcoal canister. You should replace simple parts yourself, but quit and call for anything beyond the cap or if smoke testing locates elusive leaks. Use maintenance tips—regular inspections, prompt seal replacement, and scheduled EVAP system checks—to avoid escalated repairs. Choosing a qualified Destin technician frees you from recurring faults and uncertain DIY fixes.
Frequently Asked Questions
Will a Bad Gas Cap Cause an Evap Leak?
Yes — a faulty gas cap can cause an EVAP leak. You’ll protect EVAP system function with regular gas cap maintenance; replace worn caps promptly so vapors don’t escape, emissions stay low, and you retain control.
What Are the Symptoms of a Bad Evap System?
You’ll probe whether theory matches reality: a failing EVAP system causes check engine lights, fuel smell, poor fuel economy, rough idle, failed leak detection tests, and possible emissions test failure—so you’ll act quickly to regain freedom.
What Is the Most Common Evap Leak?
The most common EVAP leak is a faulty gas cap; you’ll notice a loose, cracked, or worn seal that lets vapors escape, triggers diagnostics, and undermines fuel-system integrity—inspect and replace it promptly to regain control.
Conclusion
If your Sonata shows an EVAP code, don’t dismiss the gas cap — it’s often the loose thread that unravels the system. You can quickly check and tighten the cap, inspect seals and hoses, and listen for hisses, but persistent codes, smoke-test findings, or damaged components mean you’ll need a pro. Treat minor fixes like tightening screws; bigger leaks demand diagnostic tools and expertise. In Destin, call a mechanic when DIY checks don’t clear the fault.