If your Toyota Camry’s EVAP monitor shows as “not ready,” it often indicates issues with the emissions system. Check your gas cap for tightness and cracks, inspect hoses for leaks, and use an OBD-II scanner to identify trouble codes like P0440 or P0455. Conduct a proper drive cycle to reset the monitor after addressing issues. Keep an eye out for signs like decreased fuel economy or a Check Engine Light. More details on effective troubleshooting await you.
Understanding the EVAP System and Its Role in Emissions Control
The Evaporative Emission Control (EVAP) system plays an essential role in managing fuel vapors and controlling harmful emissions. By capturing and redirecting fuel vaporization from the fuel tank to the engine, it prevents these harmful substances from escaping into the atmosphere, ensuring compliance with emissions regulations. A well-functioning EVAP system is vital for passing emissions tests; malfunctions can trigger issues like detected leaks, leading to failure. If you see the Check Engine Light (CEL) illuminated or notice decreased fuel economy, these could indicate potential EVAP problems. Common Diagnostic Trouble Codes (DTCs) such as P0440, P0442, and P0455 signal general failures or leak detections. To maintain peak performance and prevent emissions-related issues, regular inspection and maintenance of components like the gas cap, purge valve, and vent valve are essential. Taking these steps not only enhances your vehicle’s efficiency but also supports environmental health.
Signs Your EVAP Monitor Needs Attention
When your vehicle’s EVAP monitor shows signs of trouble, you might notice several indicators that require your attention. A Check Engine Light (CEL) often illuminates, signaling potential EVAP symptoms that need immediate investigation. If you’re experiencing decreased fuel economy, this could indicate a malfunctioning EVAP system, leading to wasted fuel and increased emissions. Additionally, if you fail an emissions test, it’s a strong sign of underlying EVAP problems that necessitate a thorough inspection.
You should also be alert for unusual fuel odors, as these can point to vapor leaks in the EVAP system. These leaks not only impact performance but can also be hazardous. Common trouble codes like P0440, P0442, and P0455 often accompany these symptoms, providing a clearer picture of specific malfunctions within the system. Addressing these signs promptly can help maintain your vehicle’s efficiency and compliance with emissions standards.
Key Diagnostic Trouble Codes for EVAP Problems
Diagnosing EVAP issues often involves interpreting specific Diagnostic Trouble Codes (DTCs) that provide insight into the system’s health. Here are key codes you might encounter:
- P0440: General malfunction, indicating potential leaks or faulty components in the EVAP system.
- P0442: Small leak, often due to a loose gas cap or minor hose damage.
- P0455: Large leak, frequently linked to a loose gas cap or a failed valve, needing immediate attention.
Codes like P0456 denote very small leaks that are tough to pinpoint and may require specialized diagnostic tools like smoke testers. Additionally, P0496 and P0497 signal purge flow issues, reflecting abnormal flow rates caused by malfunctions in the purge valve. Understanding these DTCs is essential for effective troubleshooting and ensuring the EVAP system operates correctly.
How to Inspect EVAP Components Easily
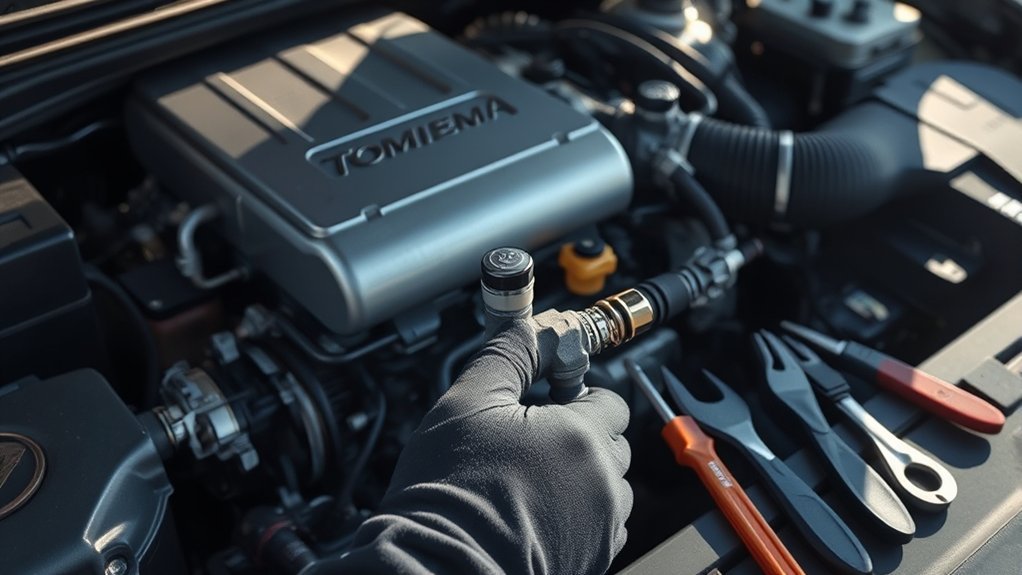
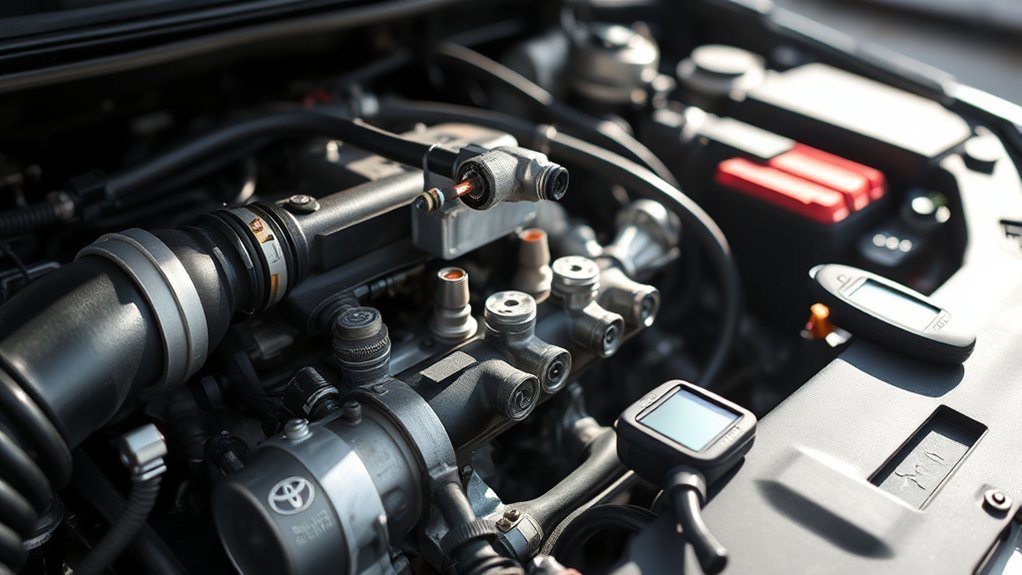
Inspecting EVAP components can be straightforward if you follow a systematic approach. Start by checking the gas cap; verify it’s tight and free from cracks, as a loose or damaged cap often causes EVAP monitor failures. Next, inspect the EVAP hoses for visible signs of wear, cracks, or disconnections that could lead to vapor leaks in the system.
To enhance leak detection, consider using a smoke machine for a smoke test, which can reveal hidden leaks in components like the canister or purge valve. After that, test the purge valve and vent valve with a multimeter to confirm they’re functioning correctly—make certain neither is stuck open or closed.
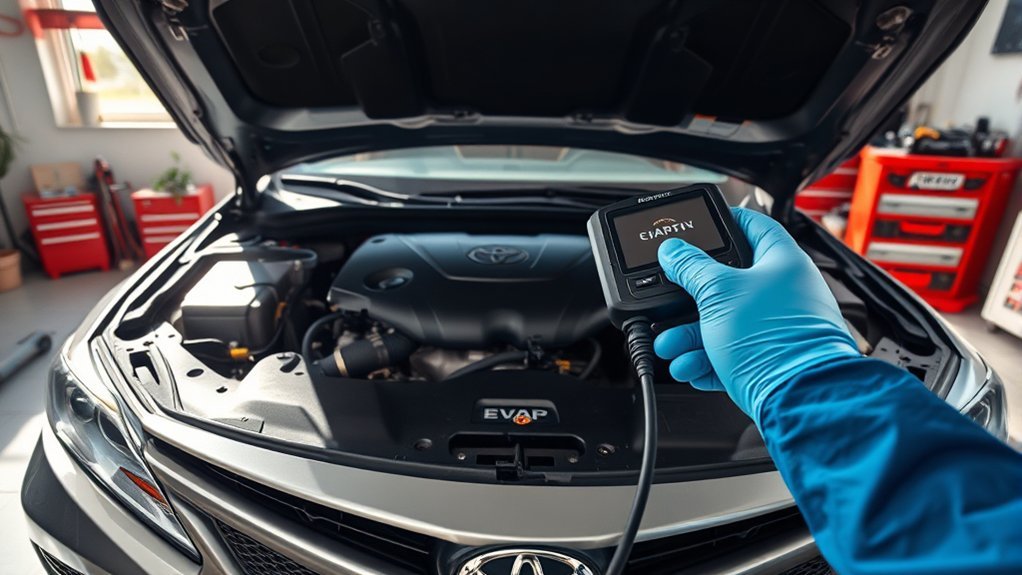
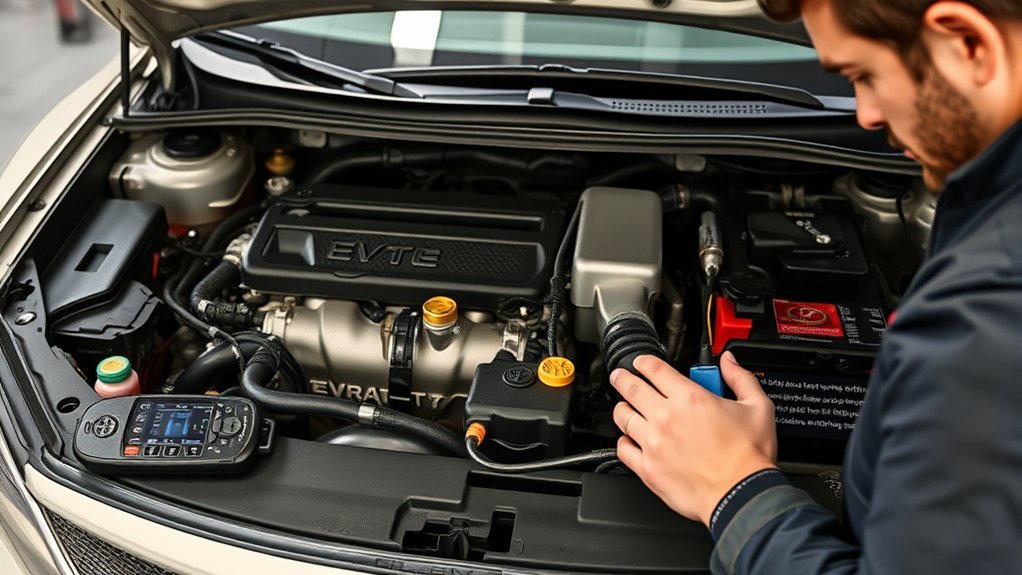
Finally, check for any Diagnostic Trouble Codes (DTCs) related to the EVAP system using an OBD-II scanner; this can help you identify specific issues needing attention. By systematically checking these components, you can effectively diagnose and address EVAP system problems.
Performing a Drive Cycle for EVAP Monitor Reset
To reset the EVAP monitor, you’ll need to follow specific drive cycle steps to guarantee accuracy. Start by idling the engine and then drive at a consistent speed, making sure to incorporate smooth changes in speed. After completing the drive cycle, verify the monitor’s readiness to confirm the reset.
Proper Drive Cycle Steps
While performing a drive cycle for the EVAP monitor reset, it’s essential to follow specific steps to guarantee accurate testing. The drive cycle’s importance can’t be overstated, especially regarding fuel tank levels. Start with the tank between 1/4 and 3/4 full. Here’s a quick guide:
- Let the engine idle for at least 10 minutes to stabilize the temperature.
- Drive steadily at 55-60 mph for a minimum of 16 minutes.
- Gradually reduce speed to 40-55 mph for 7 minutes, then to 35-45 mph for another 7 minutes.
Finally, park the vehicle and let it sit for at least 5 hours or overnight. Following these steps guarantees your EVAP monitor resets properly, enhancing your vehicle’s performance.
Key Driving Conditions
Understanding the key driving conditions is essential for successfully performing a drive cycle to reset the EVAP monitor. Start with a cold engine and guarantee your fuel tank is between 1/4 and 3/4 full. Allow the engine to idle for at least 10 minutes to reach ideal temperature. Next, drive steadily at speeds of 30-40 mph for at least 20 minutes, incorporating smooth accelerations and decelerations. After this, take the vehicle on the highway at 55-60 mph for a minimum of 16 minutes. Finally, let the car sit for at least 5 hours or overnight. Repeat this cycle as needed to guarantee any potential evap leaks are addressed and the fuel cap is secure for monitor readiness.
Monitor Reset Verification
Resetting the EVAP monitor requires a systematic approach to guarantee all conditions are met for successful verification. Follow these steps to verify your monitor reset achieves the desired readiness status:
- Fuel Level: Keep the tank between 1/4 and 3/4 full.
- Idle Time: Start by idling the engine for at least 10 minutes to reach ideal operating temperature.
- Driving Cycle: Drive steadily between 30-40 mph for approximately 20 minutes, with smooth deceleration and acceleration.
After completing the driving cycle, let the vehicle sit for about 5 hours for a cold soak. Finally, use an OBD-II scanner to check if the EVAP monitor status is now “Ready.” Following this methodical process helps verify your monitor reset is effective.
Using an OBD-II Scanner to Check EVAP Status
To effectively check the EVAP monitor’s status, you can use an OBD-II scanner, which provides a straightforward way to assess readiness. When connected, the scanner displays a green check mark if the monitor is ready or a red X if it’s not. This instant feedback allows you to quickly determine if the EVAP monitor has completed its diagnostic tests after the required drive cycles. Additionally, the scanner offers real-time data on your vehicle’s emissions system, helping you identify any trouble codes related to EVAP leaks. Many scanners come equipped with features that guide you through specific drive cycle requirements for your model, ensuring proper monitor activation. If you encounter existing trouble codes, you can clear them using the OBD-II scanner, giving you a fresh start for your monitor readiness checks. This process empowers you to take control of your vehicle’s emissions health effectively.
Troubleshooting Persistent EVAP Monitor Readiness Issues
Persistent EVAP monitor readiness issues can be frustrating, especially after using an OBD-II scanner to check for readiness. To tackle these problems effectively, consider the following steps:
- Inspect the gas cap: A loose or faulty gas cap is a common cause of EVAP system codes, like P0440 and P0442.
- Conduct a proper drive cycle: Confirm you drive with varied speeds after a cold soak of at least 8 hours to activate the EVAP system.
- Check EVAP components: Look for leaks or damage in parts like the purge valve or canister, as these can prevent monitor readiness.
Utilizing diagnostic tools will help you monitor your EVAP system’s readiness status and aid in sensor calibration. Regular vehicle maintenance, including leak detection, is essential for passing emissions testing and keeping your vehicle running efficiently.
When to Seek Professional Help for EVAP System Problems?
If your warning light stays on, it’s time to contemplate professional help, as this could indicate an underlying issue with your EVAP system. A failed emission test also signals a need for expert diagnosis, especially if your vehicle’s performance is affected. Additionally, if you’re experiencing unusual fuel consumption, consulting a technician can help identify and resolve potential EVAP system problems efficiently.
Persistent Warning Light
A persistent warning light, like the Check Engine Light (CEL), often signals a problem within your vehicle’s EVAP system that requires immediate attention. Ignoring it can lead to costly repairs down the line. If you notice the CEL illuminated, consider the following warning light causes:
- Decreased fuel economy
- Unusual fuel odors
- Diagnostic codes such as P0440 or P0455
These symptoms indicate potential EVAP system malfunctions that need professional inspection. While you might be tempted to use light reset methods, doing so without addressing the underlying issues can lead to repeated failures. Regularly monitoring your vehicle’s performance helps catch these issues early, ensuring a smoother, more efficient driving experience. Don’t delay; consult a mechanic to diagnose and rectify any problems.
Failed Emission Test
When your Toyota Camry fails an emission test, it’s vital to address the situation promptly to avoid legal and financial repercussions. This failure often indicates an unset EVAP monitor, signaling potential issues within the EVAP system. If you notice a persistent check engine light, decreased fuel economy, or unusual fuel odors, it’s time to seek professional help. These symptoms can point to malfunctions that need expert diagnosis. Mechanics can analyze diagnostic trouble codes (DTCs), like P0440 or P0455, using specialized equipment to pinpoint the exact problem. Regular inspections and timely repairs guarantee compliance with local emission regulations, keeping your vehicle in top shape and preventing costly fines. Prioritize vehicle maintenance to maintain both legality and performance.
Unusual Fuel Consumption
Unusual fuel consumption often signals issues within the EVAP system, particularly if you’ve already dealt with a failed emission test. If you notice a drop in fuel efficiency, it’s essential to act. Here are key indicators that warrant professional help:
- A persistent check engine light (CEL) alongside decreased MPG
- Fuel odors or excessive engine roughness at idle
- The EVAP monitor remains unset after extensive driving
Ignoring these symptoms can lead to more severe engine problems. Regular maintenance tips include timely inspections of the EVAP system and addressing any signs of malfunction immediately. By staying proactive, you can maintain ideal fuel efficiency and avoid costly repairs down the road.
Frequently Asked Questions
How to Get an Evap Monitor Ready on a Toyota?
To get your EVAP system ready, make sure your fuel tank’s between 1/4 and 3/4 full. Perform the drive cycle, then allow the vehicle to cool for five hours. Check monitor readiness with an OBD-II scanner.
How Do You Fix an Evap System Not Ready?
To fix an EVAP system not ready, make certain your fuel tank’s between 1/4 and 3/4 full, check the gas cap, perform a proper drive cycle, and inspect components for leaks. Monitor readiness will follow.
Conclusion
To summarize, addressing your Toyota Camry’s EVAP monitor isn’t just about fixing a warning light; it’s like tuning a musical instrument for a flawless performance. By understanding the system and following the outlined steps, you can harmonize your vehicle’s emissions control. If you encounter persistent issues, don’t hesitate to seek professional help—sometimes, a seasoned mechanic can strike the right chord that you can’t. Keep your Camry running smoothly, ensuring it meets environmental standards and performs at its best.