If your Camry cranks but won’t start, first isolate fuel, spark, and timing: listen for the fuel pump whine with ignition ON, check fuel rail pressure (30–40 psi), and verify spark by grounding a plug while cranking. Scan for CKP codes (P0335–P0338) and backprobe the crank sensor for pulses. Inspect the in-tank pump connector, relay, and fuse, then bench or apply battery power to confirm pump failure. Continue for step‑by‑step tests and replacement guidance.
Quick Checklist: Is It Fuel, Spark, or Timing?
Wondering whether it’s fuel, spark, or timing? Start methodically: confirm fuel presence visually and by listening for the pump whine with ignition on—if silent, check the fuel pump connector and power circuit; a bright test light at the pump suggests mechanical failure and replacement with an OEM unit. For fuel injection, a no-start with pump operation still needs injector pulse inspection and pressure verification (saved for the next subtopic). Next, verify spark: pull a plug, test for spark—no spark points to ignition coil faults, crank sensor failure, or wiring issues; isolate the ignition coil and related circuits. For timing, listen to cranking cadence—abnormal sounds or no compression likely mean a broken timing belt preventing combustion despite cranking. You’ve got clarity when you isolate each system: fuel delivery, ignition coil and spark, then mechanical timing. Act deliberately; replacing quality parts and following these checks frees you from guesswork.
How to Confirm There’s No Fuel Delivery (Fast Tests)
First, turn the ignition to ON and listen for the fuel pump prime—silence often points to no fuel delivery. Next, attach a fuel pressure gauge to the fuel rail and compare the reading to Toyota specs to confirm low or no pressure. Finally, inspect the fuel relay and fuse (and pump connector) for corrosion or a blown fuse that would prevent the pump from receiving power.
Listen For Pump Noise
When the Camry cranks but won’t start, you can quickly confirm there’s no fuel delivery by listening at key moments: turn the ignition to ON (not start) and listen for a faint hum from the rear of the car indicating the pump priming. If you hear it, the fuel pump is being commanded and you can move to pressure tests. If you don’t, follow diagnostic procedures: listen for a relay click at ignition—no click suggests relay or wiring fault. Visually inspect the pump connector for damage or corrosion that blocks power. Use a multimeter at the connector to verify voltage; power present with no hum points to a failed pump. As a fast confirmation, apply direct battery power to the pump; activation frees you to replace it.
Check Fuel Pressure
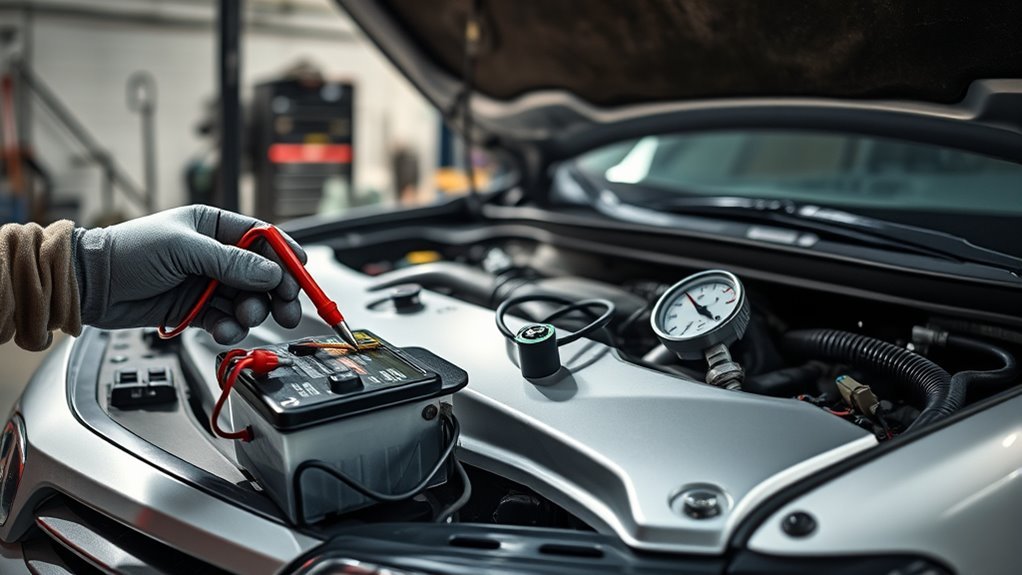
If the pump didn’t hum or voltage checks were inconclusive, the next quick check is fuel pressure at the rail. With the engine off, attach a fuel pressure gauge to the Schrader test port using a proper gauge setup; secure fittings to avoid leaks. Turn the ignition to ON and observe the reading — a 2007 Camry should show about 30–40 psi with no run. Below that range signals a likely pump failure or a clogged filter restricting flow. If you heard no pump noise earlier, low pressure confirms delivery loss; if pressure is intermittent, suspect wiring or connector issues. You can then perform a continuity test on the pump circuit to verify there are no breaks or shorts affecting fuel delivery.
Inspect Fuel Relay/Fuse
Because most no-starts are electrical, start by checking the fuel pump relay and fuse so you can quickly confirm whether the pump is getting power. Locate the relay in the fuse box, perform fuel relay testing with a multimeter for continuity and coil activation, and listen for the pump prime when you cycle the ignition. Perform fuse inspection for blown elements or heat damage. If you don’t hear the pump, use a fuel pressure gauge at the rail; low pressure confirms delivery failure. Check wiring and connectors for corrosion or open circuits. These steps free you from guesswork and pin the fault to relay, fuse, wiring, or pump so you can act decisively.
| Test | Tool | Expected Result |
|---|---|---|
| Relay | Multimeter | Coil continuity/activation |
| Fuse | Visual/meter | Intact element/12V present |
| Pump | Gauge/listen | Spec pressure/prime sound |
Quick Spark and Compression Checks to Rule Out Ignition
Although it’s quick to check, you should verify both spark and compression before chasing fuel problems. Remove a plug, reconnect it to the coil and ground it while cranking to confirm a strong, consistent spark; note spark timing and look for irregularities that indicate timing belt failure. If you see no spark, stop and address ignition components. If spark is present but the engine still won’t fire and you don’t smell fuel, fuel delivery remains suspect.
Next, perform a compression test with a gauge on each cylinder. Healthy readings typically fall between 150–200 psi; consistent low or widely varying numbers point to compression issues—worn rings, valves, or a broken timing belt causing loss of valve timing. Compare cylinder-to-cylinder values; a 10–15% variance is acceptable, larger gaps require diagnosis.
Together, these quick checks let you eliminate ignition and mechanical compression faults, focusing your next steps on fuel-system liberation rather than chasing the wrong subsystem.
Quick In‑Car Fuel Pump Test (Relay, Fuse, and Listen)

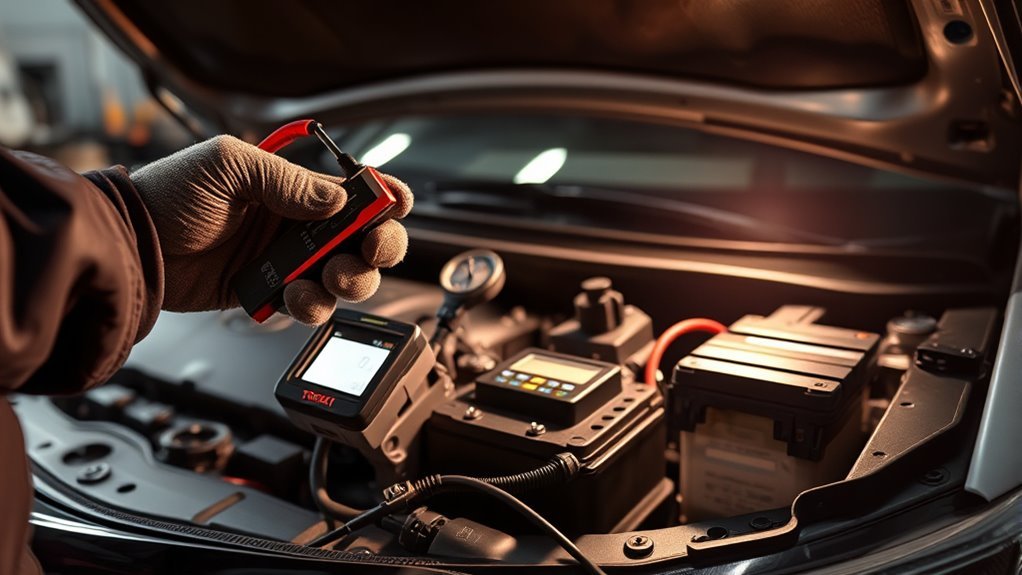
When you suspect a fuel-delivery problem, start by checking the fuel pump relay and fuse for continuity, then turn the ignition to ON and listen at the rear of the car for a faint humming from the tank—this confirms the pump is getting power and spinning. For efficient fuel pump diagnostics, verify relay function: swap the relay with an identical known-good unit or bench-test it for coil continuity and contact switching. Check the fuse with a multimeter; continuity rules out an open circuit.
If you don’t hear the hum, inspect the pump connector for damage or corrosion that could interrupt power. Back-probe the connector with a voltmeter while someone turns the key to ON and while cranking; absence of voltage indicates an upstream electrical fault rather than pump internals. If relay, fuse, wiring, and voltage are good but the car won’t start, the pump itself can be mechanically failed and should be replaced. Keep tests systematic and free from guesswork.
Inspect the In‑Tank Pump Access and Wiring on a Camry
Pop up the rear seat cushion to access the in‑tank pump access panel and visually inspect the fuel pump connector for corrosion, bent pins, or melted insulation. Trace and test the wiring at the access panel with a multimeter and a substituted load to confirm continuity and pump drive voltage. If wiring or the connector fails inspection or tests, plan for repair or OEM/quality aftermarket pump replacement.
Inspect Fuel Pump Connector
Before you drop the rear seat, verify that you’ve isolated the battery and have a fire extinguisher nearby, then remove the cushion to expose the fuel pump connector under the seat; this gives direct access to the in-tank pump for visual and electrical inspection. You’ll perform fuel pump testing and wiring inspection at that connector. Visually confirm pins and wiring are intact, free of corrosion, chafing, or heat damage. Use a multimeter to check for voltage at the connector with ignition on; absence of voltage points to supply or relay faults, not the pump. A bright light on bench testing the pump suggests internal failure. If connector and wiring show correct voltage and continuity but the pump won’t run, plan on replacing the in-tank pump to regain control.
Check Access Panel Wiring
If you’re accessing the Camry’s in-tank pump through the rear-seat panel, disconnect the battery first and then remove the cushion to expose the access cover and harness for a focused inspection. You’ll perform a fuel pump inspection aimed at wiring integrity: visually check the connector for corrosion, broken strands, melted insulation or pin distortion. Verify larger supply wires are intact and seated; these carry pump current and fail often. Use a substituted load or test light to confirm power at the connector while someone cranks the engine—no light suggests wiring or relay fault, a bright light with no pump action suggests pump failure. Repair or replace damaged harness sections with proper crimped terminals and heat shrink, then retest to restore reliable operation.
Diagnose the Pump: Noise, Relay, and Voltage Checks
Wondering whether the fuel pump is the culprit? You’ll apply focused fuel pump maintenance and troubleshooting techniques: turn the key to ON and listen for a faint humming from the tank — that confirms the pump spins. If you don’t hear it, move to electrical checks. Swap the fuel pump relay with an identical relay in the fuse box; a replaced relay that restores function isolates a bad relay. Next, probe the pump connector with a voltmeter: expect ~12 volts at ignition ON. If voltage is present but you still have silence, inspect the connector for corrosion, bent pins, or damaged insulation — poor connections rob the pump of current. If connector integrity and voltage are good yet no hum exists, the pump may be seized or internally failed and needs replacement. These steps keep you in control, minimize guesswork, and free you from unnecessary parts swaps.
Test the Crankshaft Position Sensor and Scan Codes
Start by scanning the ECU for codes and then test the crankshaft position sensor itself: codes P0335–P0338 point directly to CKP circuit faults, and confirming a stored or pending code narrows whether you need wiring, connector, or sensor checks. You’ll use sensor diagnostics and reading codes to direct your troubleshooting flow—don’t guess. Pull DTCs with an OBD-II scanner, record freeze-frame data, and note crank/no-crank status.
Next, inspect wiring and connectors for abrasion, corrosion, or loose pins; repair faults before replacing parts. Measure sensor resistance against Toyota specs with the connector disconnected. Backprobe the signal while cranking to verify AC or digital pulse voltage output; absence or erratic pulses indicates a bad sensor or wiring issue. If resistance and output meet spec but codes persist, trace the harness and test ECU input for continuity. Document results, clear codes, and retest. This methodical approach frees you from unnecessary parts swaps and restores control.
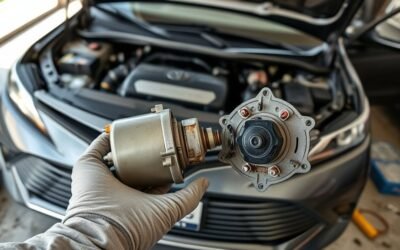
Replace the Camry Fuel Pump: OEM vs. Aftermarket Advice

Because the fuel pump is a high-failure but easily accessible component on a 2007 Camry, you should confirm it’s the root cause with circuit checks before buying parts, then weigh OEM versus aftermarket options based on reliability, compatibility, and warranty coverage. You’ll access the pump via the rear-seat cushion access hole; don’t replace parts without verifying power, ground, and pump draw. OEM benefits include exact fit, tested calibration, and factory warranty that reduce repeat repairs. Aftermarket risks are variable quality, fitment gaps, and inconsistent flow that can cost you time and freedom.
| Option | Reliability | Warranty |
|---|---|---|
| OEM | High | Factory-backed |
| Branded Aftermarket | Moderate | Limited/varies |
| Generic Aftermarket | Low | Often minimal |
Choose OEM when you want resistance to failure and legal-road confidence; choose reputable aftermarket only if you accept potential rework and check warranty coverage first.
Cost, Time, and Tools for a Camry Fuel Pump Swap
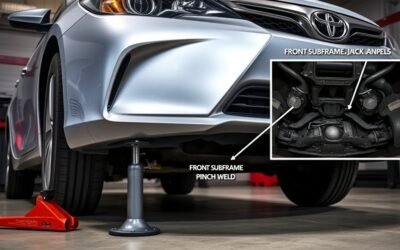
Plan for about 2–4 hours to complete the swap, with diagnostic checks and reassembly occupying roughly half that time and the pump swap itself taking 1–2 hours. Expect parts to run $100–$300 for OEM (less for some aftermarket units) and labor around $150–$250 depending on your shop and region. You’ll need a jack and jack stands, a socket set, pliers, a fuel line removal tool (if required), and a 2007 Camry repair manual for procedure accuracy.
Time Estimate Breakdown
When you tackle a fuel pump swap on a 2007 Camry, expect the job to take roughly 2–4 hours depending on your experience and whether you access the pump through the rear seat or must drop the tank. You’ll pair fuel pump maintenance discipline with troubleshooting tips as you diagnose symptoms, relieve fuel pressure, and isolate electrical faults before replacement. Time varies with rust, fittings, and whether the pump is OEM or aftermarket.
- Parts cost: OEM $150–$300, aftermarket ≈ $100; factor ordering time.
- Labor/time: 2–4 hours; add 30–60 minutes if tank removal is required.
- Safety/testing: battery disconnect, pressure relief, multimeter checks — don’t skip them.
Required Tools List
A compact set of hand tools and a few specialty items will let you complete a 2007 Camry fuel pump swap in roughly 2–4 hours; expect to spend about $50–$100 if you already need only the disconnect tool, or more if you buy a quality battery of sockets and pliers. You’ll need a socket set (metric), flat and Phillips screwdrivers, locking pliers, and a fuel line disconnect tool. Use safety glasses and gloves; removing the rear seat cushion gives direct access to the pump via the access hole and avoids tank removal. Consider OEM versus aftermarket cost/benefit: OEM ~$300–$400 for durability, aftermarket $100–$200 risks repeat repairs. Follow fuel pump maintenance and troubleshooting tips: isolate fuel, depressurize lines, and test pump current before installation.
Five Common Post‑Replacement Mistakes and How to Avoid Them
After replacing the fuel pump, double‑check the job before you walk away: improper fuel connections, a clogged filter, loose electricals, unprimed lines, or overlooked diagnostic codes can all recreate no‑start symptoms. You want control — verify fuel line integrity and perform electrical connection checks immediately. Tighten fittings, inspect hoses for cuts, and confirm clamps seat correctly. Replace the fuel filter as a rule; a restricted filter masks as pump failure. Clean terminals, secure harness clips, and probe for voltage under cranking to rule intermittent faults. Prime the system by cycling ignition to purge air from lines. Finally, liberate yourself from guesswork: scan for stored OBD‑II codes that point to unrelated faults.
After replacing the fuel pump, verify fittings, electricals, filter, and prime lines — then scan for codes before you leave.
- Check all fuel fittings, hoses, and clamps for correct seating and leaks.
- Inspect and secure pump power and ground; measure voltage while cranking.
- Replace filter, cycle ignition to prime, then scan for codes before testing.
Frequently Asked Questions
What Could Be the Problem With a Car That Cranks but No Start?
It’s likely fuel delivery failure, but you’ll also check ignition issues, battery problems, injectors, fuel pump or filter, fuel pressure, wiring or fuses; you’ll diagnose methodically and reclaim control over your vehicle’s start-up.
What Are the Symptoms of a Bad Toyota Fuel Pump?
Like a failing heartbeat, you’ll notice weak engine performance, cranking with no start, no fuel smell, whining from the tank, intermittent stalling or power loss, and dashboard warnings; the fuel pump’s delivery will be inconsistent or gone.
Conclusion
If your Camry cranks but won’t start, focus on fuel, spark, then timing—these three account for over 90% of failures. Start with a quick fuel cut test and listen for the pump, verify spark at a plug, and scan for crank sensor codes. Replacing the in‑tank pump often fixes feeding issues; expect 2–4 hours and $300–$800. Avoid poor grounding, wrong filters, or reused seals after replacement to prevent repeat no‑start problems.