RAV4 Headlight Condensation: Causes, Fixes, and Prevention
What’s in This Article
- What Causes RAV4 Headlight Condensation?
- Common Causes of Moisture in Headlights
- How to Tell Normal Fogging From a Water Leak
- How to Fix RAV4 Headlight Moisture at Home
- How to Use Silica Gel Packs in Headlights
- Tips for Inspecting and Cleaning Headlight Vents
- Why You Should Replace Headlight Seals and Gaskets
- How to Handle Warranty Claims for Headlight Problems
- Long-Term Maintenance Tips to Prevent Headlight Moisture
- Best Practices for Avoiding RAV4 Headlight Issues
- Frequently Asked Questions
If you’re dealing with RAV4 headlight condensation, start by checking whether the fog clears on its own. Light mist after rain, a car wash, or a quick temperature change often comes from normal moisture inside a vented headlight. Heavy water drops, pooled water, stains, or fog that keeps coming back may point to a failed seal, blocked vent, cracked housing, or poor fitment. You can inspect vents, clean debris, replace worn gaskets, and use silica gel packs as a short-term moisture control step.
Quick Answer
RAV4 headlight condensation usually happens when warm, moist air meets a cooler headlight lens. Normal light mist may clear as the headlight vents release moisture. Persistent fog, water drops, or pooled water often means you need to clean the vents, check the seals, or ask a dealer to inspect the headlight assembly.
Key Takeaways
- Light mist after rain, washing, or temperature swings can be normal if it clears soon.
- Heavy droplets, pooled water, stains, or repeated fogging often point to a leak or seal issue.
- Clean headlight vents before you seal anything, because blocked vents can trap moisture.
- Use silica gel packs only as a temporary moisture control step, not as a permanent repair.
- Check your Toyota warranty before paying for a headlight assembly replacement.
What Causes RAV4 Headlight Condensation?
Headlight condensation in your RAV4 starts when moisture inside the housing meets a cooler lens surface. Most modern headlight assemblies use vents to manage pressure and moisture, so a small amount of mist can appear in certain weather.
Faulty seals or gaskets can let too much moisture enter the housing. If you ignore the issue, the lens may stain, light output may drop, or electrical parts may suffer damage over time.
Automaker service guidance filed with the National Highway Traffic Safety Administration (NHTSA) separates normal environmental condensation from water leaks. Normal mist often appears after a car wash, rain, or temperature swing, while pooled water or long-lasting moisture can signal a defect.
Common Causes of Moisture in Headlights
Several issues can put moisture inside your RAV4’s headlights. Start with the simplest causes before you assume the whole assembly needs replacement.
- Temperature changes: Warm, moist air can fog the inside of a cooler headlight lens.
- Faulty seals or gaskets: Cracked, loose, or worn seals can let water vapor enter the housing.
- Blocked vents: Leaves, dust, spider webs, or dirt can stop the vents from releasing moisture.
- Cracked housing: A small crack in the lens or body can let rainwater enter.
- Poor installation: Loose dust caps, bulb covers, or connectors can break the moisture barrier.
High humidity and damp parking areas can make the problem worse. But persistent water inside the headlight needs closer inspection, not just a quick wipe of the outer lens.
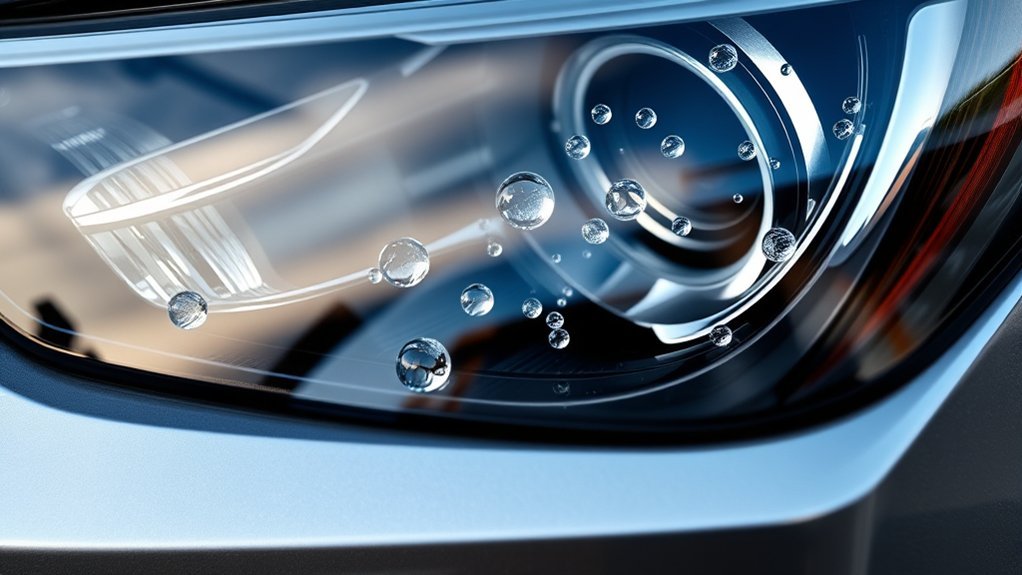
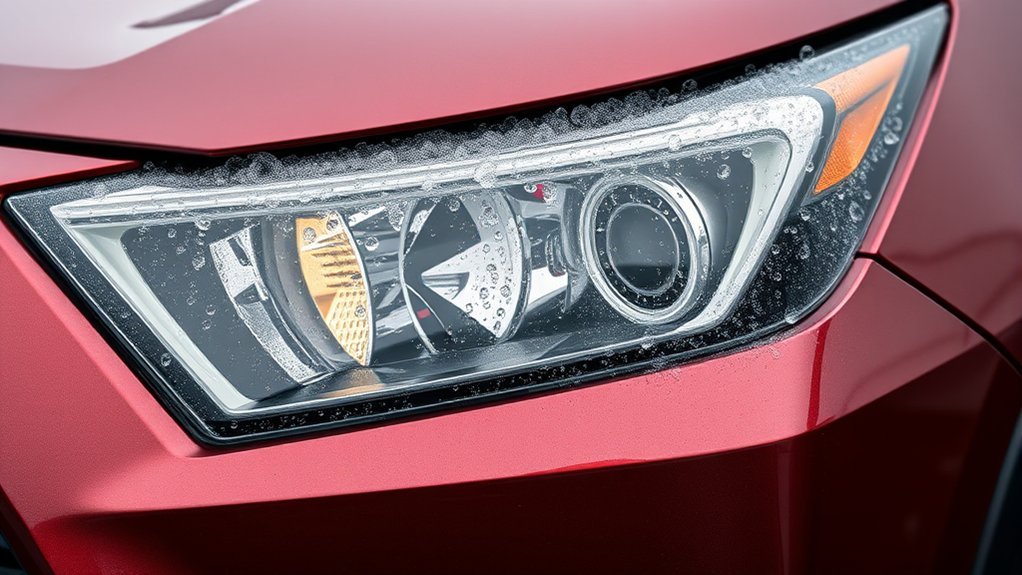
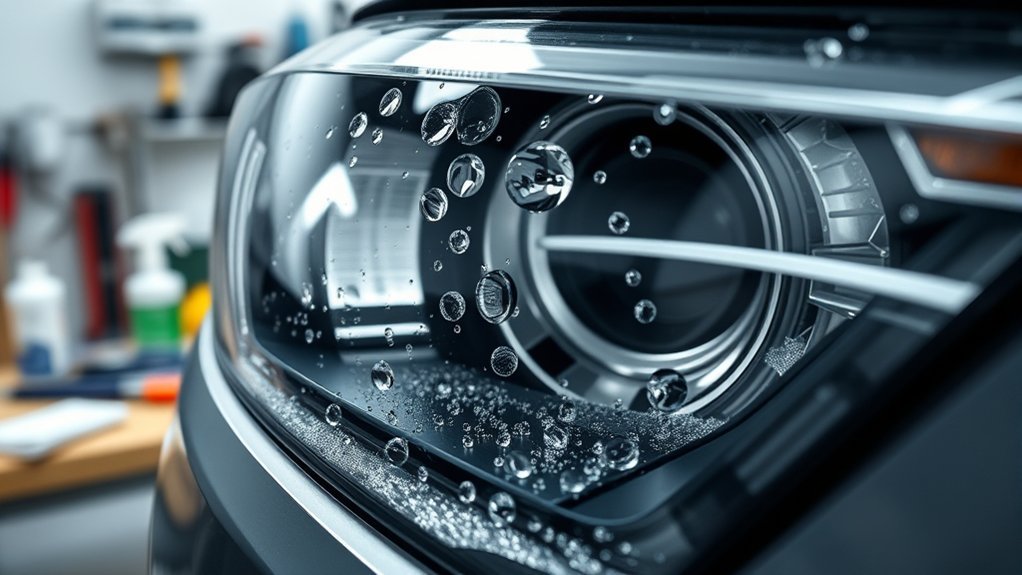
How to Tell Normal Fogging From a Water Leak
Normal headlight fogging usually looks like a light mist on part of the inner lens. It often appears after rain, washing, or a fast shift from cold to warm air.
A water leak looks more serious. Watch for large droplets, water pooling at the bottom of the headlight, streak marks, corrosion, or fog that does not improve after the lights run for a short drive.
Note: Light-emitting diode (LED) headlights may not create as much heat as older halogen lights, so normal mist may clear more slowly.
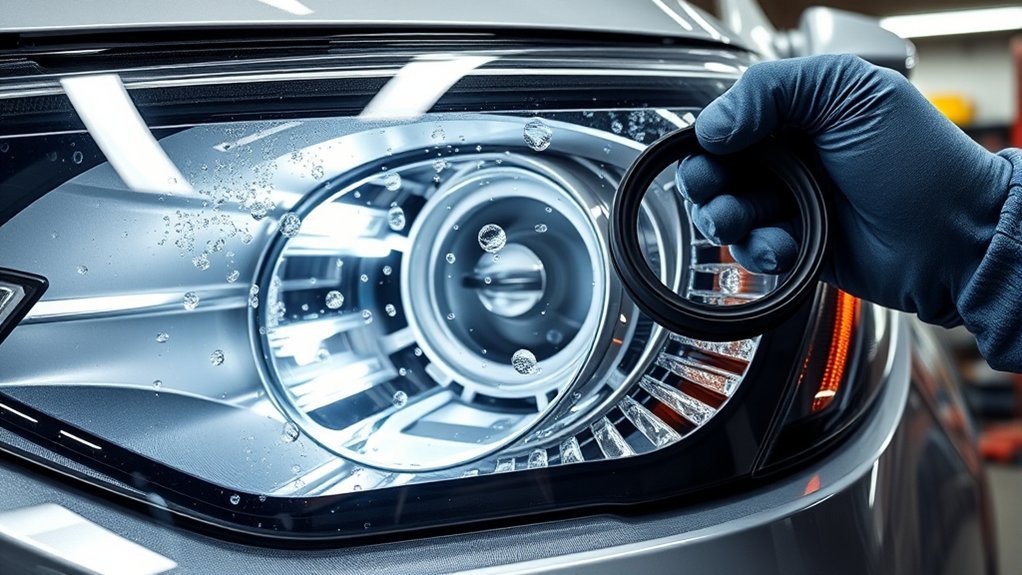
How to Fix RAV4 Headlight Moisture at Home
Before you start, park your RAV4 on a dry, level surface and let the lights cool. Keep water, metal tools, and loose cloth away from bulbs, wiring, and connectors.
Most basic checks take 15 to 30 minutes. You may need a flashlight, a damp cloth, compressed air, gloves, replacement seals, and silica gel packs.
- Inspect the headlight vents: Look for leaves, dirt, dust, or spider webs that block airflow.
- Clean the vents: Use a damp cloth or short bursts of compressed air to clear the openings.
- Check dust caps and bulb covers: Push each cover into place so it seals the opening.
- Inspect seals and gaskets: Look for cracks, gaps, hard rubber, or missing sections.
- Dry minor moisture: Remove accessible bulbs only if your manual allows it, then let the housing air out in a dry place.
- Replace damaged seals: Use original equipment manufacturer (OEM) seals or high-quality parts that match your RAV4 model.
Warning: Do not drill holes, block factory vents, or seal bulb openings because you can trap heat and moisture inside the headlight.
[Products Worth Considering]

Protect your Toyota RAV4 interior with this custom‑fit windshield sun shade that blocks 99% of harmful UV rays and reduces cabin heat. The mirror cut‑out ensures a seamless fit without gaps, while durable 240T polyester and bendable wire keep it sturdy through repeated use. Foldable and stored in a convenient pouch, it offers easy installation and removal for everyday comfort.

The Autovir windscreen shade offers full windshield coverage for Toyota RAV4 models from 2019 to 2026, blocking up to 99.95% of UV rays and reducing interior heat. Its multi‑layer reflective material provides SPF 100 and UPF 80+ protection while keeping the dashboard, seats, and steering wheel cooler. The foldable design installs quickly and stores conveniently in the glove box, and reinforced stitching ensures long‑lasting durability for daily use.
The KUST Black Dashboard Cover Mat offers a custom, eco‑friendly fit for Toyota RAV4 models from 2019 to 2025, protecting the dash from UV damage, scratches, and glare. Made from post‑consumer recycled polyester with a silicone anti‑slip underside, it stays soft, breathable, and odorless while securely adhering to the surface. Installation is quick and reversible, and the foldable design allows easy storage when not in use.
Inspect Headlight Vents
A quick vent inspection can save you from repeated moisture buildup. These small openings help the headlight release moisture and pressure during normal use.
Check the vent areas for leaves, road dust, mud, and spider webs. If you find debris, clean it gently with a damp cloth or compressed air.
Some vents sit behind covers or tight body panels. If you cannot reach them without removing trim or the headlight assembly, ask a qualified mechanic to inspect them.
Replace Seals and Gaskets
Faulty seals and gaskets can let moisture enter your RAV4’s headlight assembly. Start by checking each visible gasket for cracks, gaps, hard spots, or signs of poor fit.
If a seal looks worn, replace it with an OEM part or a high-quality aftermarket seal made for your exact model year. Clean the mounting surface before you install the new seal so dirt does not create another gap.
You may use automotive-grade RTV silicone only where the service method allows it. Keep sealant away from vents, bulbs, connectors, and drain paths.
How to Use Silica Gel Packs in Headlights
Silica gel packs can help absorb extra moisture inside an accessible headlight housing. Treat them as a temporary aid, not a fix for a bad seal or cracked assembly.
First, make sure the headlight has dried as much as possible. Then place the silica gel pack at the bottom of the housing where it cannot touch bulbs, LED modules, wiring, or moving parts.
Replace the pack after it absorbs moisture because saturated silica gel loses its effect. If condensation keeps coming back, inspect the seal, vent, dust cap, and lens instead of adding more packs.
[Products Worth Considering]

Upgrade your vehicle's cargo capacity with these heavy‑duty aluminum roof crossbars that lock securely and reduce wind noise. The aerodynamic design and adjustable width provide a quiet, stable platform for luggage up to 260 lb, while the easy‑install kit and labeled front and rear bars simplify setup. Ideal for Toyota Grand Highlander and Lexus TX models from 2024‑2026 with flush side rails.

Upgrade your RAV4 roof rack with these heavy‑duty aluminum crossbars featuring an anti‑theft lock and tie‑down loops for secure cargo transport. The matte‑powder‑coated bars resist corrosion and reduce wind noise, while easy installation fits existing rails without drilling. Ideal for bike mounts, roof boxes, kayaks and more.
Tips for Inspecting and Cleaning Headlight Vents
Vent cleaning helps your RAV4’s headlights release normal moisture. A blocked vent can trap humid air and make the lens fog again after each drive or wash.
Use gentle pressure when you clean the area. Strong air pressure or sharp tools can damage small vent screens, rubber parts, or nearby wiring.
Inspecting Vent Condition
Check each visible headlight vent for dirt, dust, dead leaves, or spider webs. Clear the area with a damp cloth or a light burst of compressed air.
Look at the dust cover and the seal around each access point. A loose cover can let moisture enter even when the main lens looks fine.
If you clean the vents and still see heavy moisture, inspect the housing for cracks or have a mechanic pressure-test the assembly. A hidden leak can keep the issue coming back.
Cleaning Techniques and Tools
Use basic tools and a light touch when you clean headlight vents. Follow these steps in order:
- Inspect the vents: Look for debris that blocks airflow.
- Clean the openings: Use a damp cloth or short bursts of compressed air.
- Check the seals: Replace cracked or loose rubber seals before they let more moisture enter.
These steps help keep airflow moving through the headlight assembly. Clear vents also help normal condensation dry faster.
Why You Should Replace Headlight Seals and Gaskets
Good seals protect your RAV4’s headlight from rain, spray, and humid air. Worn seals can let moisture reach the lens, reflectors, bulbs, and wiring.
Replace damaged seals before the fog turns into a bigger repair. A small gasket repair often costs less than a full headlight assembly replacement.
| Benefit | New Seals | Worn Seals |
|---|---|---|
| Moisture Protection | Help block rain and spray | May allow water entry |
| Visibility Maintenance | Help preserve light output | May cause cloudy lenses |
| Electrical Protection | Help protect bulbs and connectors | May increase corrosion risk |
| Long-Term Cost Control | May reduce repeat repairs | May lead to assembly replacement |
Choose seals that fit your exact RAV4 model and headlight type. Poorly fitted parts can create the same moisture problem again.
How to Handle Warranty Claims for Headlight Problems
Before you pay for a repair, check your Toyota warranty status. Toyota lists Basic Coverage for 36 months or 36,000 miles, whichever comes first, for covered components other than normal wear and maintenance items.
Use these steps to prepare your claim:
- Check coverage: Confirm your in-service date, mileage, and warranty terms through Toyota or your dealer.
- Document the problem: Take clear photos of moisture, water drops, streaks, or pooling inside the lens.
- Record the pattern: Note whether the fog appears after rain, washing, cold mornings, or every drive.
- Visit the dealer: Ask the service advisor to inspect the headlight for seal failure, cracks, or water entry.
If the dealership says the fog looks normal, ask what signs would qualify as a leak. If pooled water, stains, or repeated heavy condensation appears, request a second inspection.
Long-Term Maintenance Tips to Prevent Headlight Moisture
Fixing condensation once does not always stop it from returning. Regular checks help you catch seal, vent, and housing problems early.
| Action | Frequency | Benefit |
|---|---|---|
| Inspect gaskets and seals | Every 6 months | Helps stop moisture entry |
| Use silica gel packs | After drying, if accessible | Helps absorb leftover moisture |
| Clean headlight vents | Every 3 months | Helps maintain ventilation |
| Check dust caps | After bulb service | Helps protect access points |
Avoid parking for long periods in damp, shaded areas when you have a known moisture issue. If you replace a bulb, confirm every cover, cap, and connector sits firmly before you close the hood.
Best Practices for Avoiding RAV4 Headlight Issues
You can reduce headlight moisture problems with simple habits. Focus on airflow, sealing, and quick inspections after bad weather.
- Inspect seals and gaskets: Look for cracks, gaps, or hard rubber before moisture gets worse.
- Park in a dry area when possible: Dry airflow helps normal fog clear faster.
- Use silica gel packs carefully: Place them only where they cannot touch hot parts or wiring.
- Clean vents often: Clear airflow helps the headlight release normal moisture.
- Fix cracks quickly: A cracked lens or housing can let water enter during rain or washing.
Consider a professional inspection if your RAV4 uses sealed LED headlight assemblies. Many sealed units need full assembly repair or replacement when water enters.
When to Get Professional Help
Call a qualified mechanic or Toyota dealer if you see water pooling inside the headlight. You should also get help if the headlight flickers, dims, shows corrosion, or triggers a dashboard warning.
Do not keep driving at night with weak or distorted headlight output. Poor lighting reduces your view of the road and makes your vehicle harder for others to see.
Pro tip: Take photos before your service visit because condensation may clear before the technician inspects the vehicle.
Frequently Asked Questions
How Do I Stop Condensation in My Headlights?
Start by cleaning the vents, checking dust caps, and inspecting seals for cracks or gaps. If moisture returns after these steps, ask a mechanic or Toyota dealer to check for a leak or housing damage.
Why Do Toyota Headlights Get Foggy?
Toyota headlights can fog when moisture inside the housing meets a cooler lens. Light mist can happen after rain, washing, or temperature changes, but heavy water droplets often point to a seal or vent problem.
How Much Does It Cost to Repair Headlight Condensation?
The cost depends on the cause, headlight type, parts, and labor rate. A vent cleaning may cost little if you do it safely, while a sealed LED assembly can cost much more, so get a written estimate first.
What Is the Best Moisture Absorber for Headlights?
Silica gel packs work well for short-term moisture absorption inside accessible headlight housings. They do not repair failed seals, cracks, or blocked vents, so treat them as support rather than a full fix.
Should I Drill a Hole in My Headlight to Remove Moisture?
No. Drilling can damage the housing, create a larger leak path, and affect the headlight’s light pattern or safety. Clean the vents and inspect the seals instead.
Safety Disclaimer: This guide shares general information and does not replace advice from a qualified mechanic or Toyota dealer. Do not open, seal, or modify a headlight assembly if you feel unsure or if the repair could affect wiring, lighting, or road safety.
Conclusion
RAV4 headlight condensation needs quick attention when it keeps coming back or turns into visible water. Start with simple checks: clean the vents, inspect the seals, confirm dust caps fit tightly, and document the problem. If you see pooled water, stains, weak light output, or electrical issues, contact a Toyota dealer or qualified mechanic. Clear headlights help you see better, drive safer, and avoid bigger repairs later.
References
- Toyota Manuals and Warranties — Toyota Motor Sales, U.S.A., accessed 2026
- What warranty coverage do I have on my Toyota vehicle? — Toyota Support, accessed 2026
- Moisture/Condensation in the DRL Headlight — BMW of North America via NHTSA, 2023
- Lamp Condensation Identification — Hyundai Motor America via NHTSA, 2023
- How to Remove Moisture from Headlights — AutoZone, accessed 2026
- Stopping Condensation in Your Headlights — Halfords, accessed 2026