Your 4Runner’s OBD2 port sits under the driver’s side dash near the steering column, about 2–3 inches below your knee and slightly left of center; it’s an exposed, trapezoid 16‑pin connector (often black, white, or purple) you can reach while seated. Models from 1996 onward use this spot, with minor shifts toward the center on some 2003–2009 units. Firmly plug your scanner with ignition on; keep going for tips on access, troubleshooting, and variations.
Quick Answer: Where the OBD2 Port Is on a Toyota 4Runner
Looking for the OBD2 port on a Toyota 4Runner? You’ll find it under the driver’s side dashboard, near the steering column, roughly 2–3 inches below your knee when seated. The trapezoid-shaped, 16-hole connector—often black, white, or purple—is exposed and reachable without removing panels. Knowing OBD2 basics lets you plug in a scanner quickly to read codes, monitor live data, or reset faults.
Use practical troubleshooting techniques: position the key to accessory, connect the scanner firmly, and confirm power and communication LEDs. If the scanner shows no response, check vehicle battery voltage and connector pins for debris or corrosion. Community reports confirm the port’s consistent placement on 1996-and-later 4Runners, so you can approach diagnostics with confidence and autonomy. This direct access empowers you to diagnose issues, avoid unnecessary shop labor, and reclaim control of your vehicle maintenance.
Exact Spot by Year: 1996–2002, 2003–2009, 2010–2024
For 1996–2002 4Runners, you’ll find the trapezoid 16‑pin OBD2 connector under the driver’s dash near the steering column, just below the knee area. In 2003–2009 models the port shifts slightly toward the center console but remains under the driver’s dash and equally accessible. From 2010–2024 the port returns close to the steering column under the dash, so you can reach it without removing panels.
1996–2002 Location
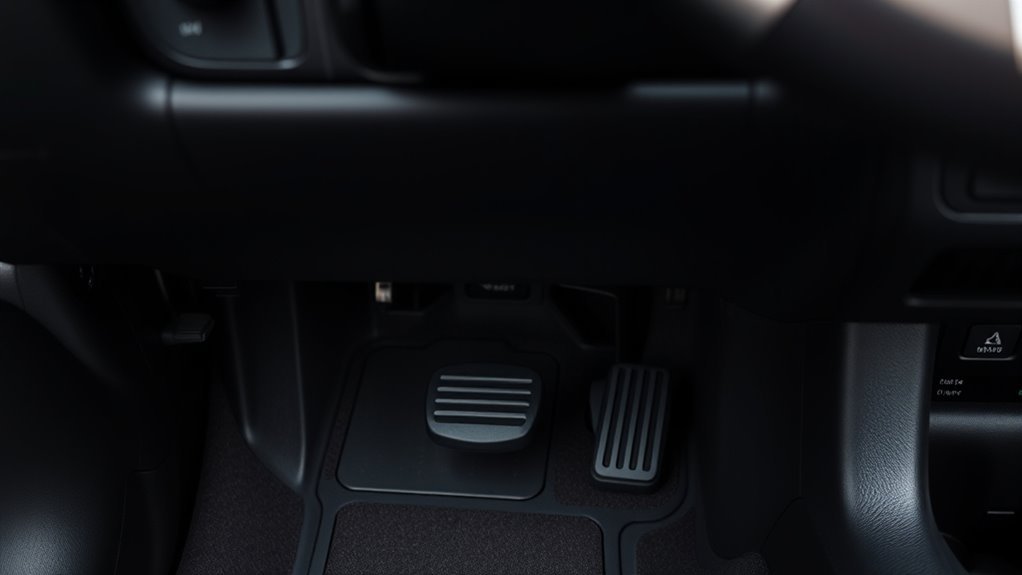
On 1996–2002 Toyota 4Runners you’ll find the OBD2 port tucked under the driver’s side dashboard just to the left of the steering column, easily reachable while seated and above the pedal cluster. You can access the trapezoid-shaped, 16-pin connector without crawling under the vehicle; that port accessibility lets you connect diagnostic tools quickly and reclaim control of vehicle troubleshooting. Reach under the dash, feel for the standard-sized socket near the fuse box area, and plug in your scanner—no panels need removal. This consistent, ergonomic placement empowers you to run emissions checks, read trouble codes, and reset systems on your terms. Keep a compact adapter in your kit so you’re always ready to diagnose and liberate yourself from dealer dependence.
2003–2024 Location
Across model years 1996 through 2024 the OBD2 port stays consistently under the driver’s side dash near the steering column, so you can reach the trapezoid-shaped, 16-pin socket while seated without removing panels. For 1996–2002 units it sits just above the pedals, tucked under the lower dash; in 2003–2009 models the position is fundamentally unchanged, remaining reachable and visible from the driver’s seat. From 2010–2024 Toyota preserved the same placement for straightforward access. Knowing this frees you to use OBD2 benefits immediately: plug in scanners or wireless dongles to read live data, clear codes, and monitor emissions. Keep diagnostic tools at hand and you’ll maintain autonomy over troubleshooting and repairs.
Feel and Identify the OBD2 16‑Pin Trapezoid Connector
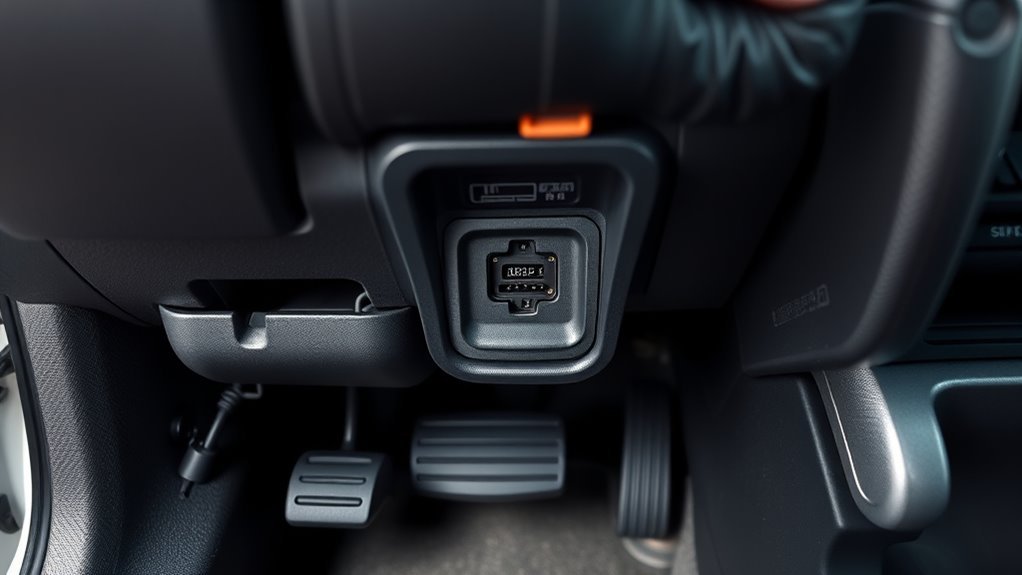
Reach under the driver’s side dash and you’ll feel a 16‑pin trapezoid connector about 2–3 inches below your knee, often recessed or behind a snap‑on plastic cap. The connector’s flat top, angled bottom and two rows of eight pins make its shape and pin layout unmistakable, with pins 6 and 14 used for the CAN bus on modern 4Runners. If a protective cover’s present, press the tab or pry gently to expose the pins before plugging in your scanner.
Visual And Tactile Features
The OBD2 port in a Toyota 4Runner is a 16‑pin, trapezoid-shaped connector—often black, white, or purple—that you can feel beneath the driver’s side dash near the steering column; it sits about 2–3 inches below your knee and to the right of the wheel, sometimes protected by a removable cap. For visual identification, look for the distinctive trapezoid housing and color contrast against the underside of the dash; it’s usually exposed or behind a thin plastic cover. For tactile recognition, slide your fingers along the dash edge until you encounter the rectangular outline and the cap’s lip, then press to remove. The connector’s size and guarded placement let you access diagnostics quickly, empowering you to reclaim control of vehicle troubleshooting.
Pin Layout And Shape
One quick way to confirm you’re at the OBD2 port is to feel for the 16-pin trapezoid housing—its flat top and angled bottom give a distinctive profile under the driver’s dash that you can both see and press into when removing a protective cap. The standardized connector standards mandate 16 contacts arranged in two rows; that predictable geometry guarantees any compliant scanner mates reliably. You’ll note pins are numbered; each pin’s functionality is defined—power, ground, manufacturer lines, and diagnostic buses. On Toyota 4Runners post-2008, pins 6 and 14 are actively used for CAN bus communication, giving you live sensor data and trouble-code access. Reach in, align the trapezoid, and plug your tool with confidence in universal compatibility.
Common Protective Covers
Having identified the trapezoid footprint and pin layout, check for a protective cover that often snaps over the OBD2 receptacle on 4Runners; you’ll usually feel a thin plastic flap or cap about 2–3 inches below your knee that conceals the 16-pin opening. These protective covers are low-profile, molded to the trapezoid shape, and resist dirt and accidental contact. Reach beneath the dash, clear any loose panels, and press the cover’s lower edge to release its clip. Use steady finger pressure or a flat tool to pry gently—avoid sharp leverage that deforms the housing. Removal tips: work with the ignition off, note clip engagement for reinstallation, and keep the cover to preserve port integrity. This simple step frees you to access diagnostics safely.
Step-by-Step: Find the Port While Seated
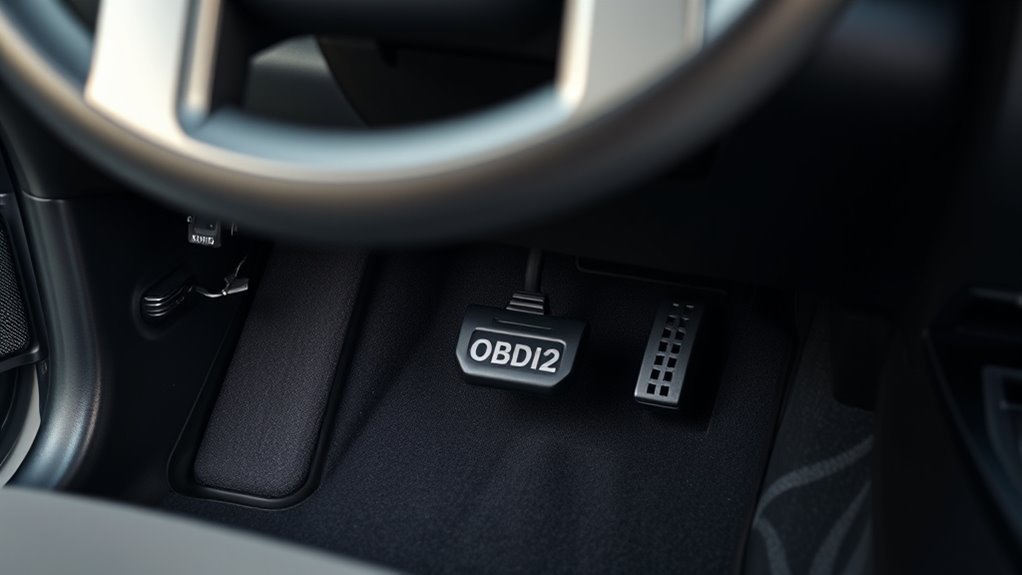
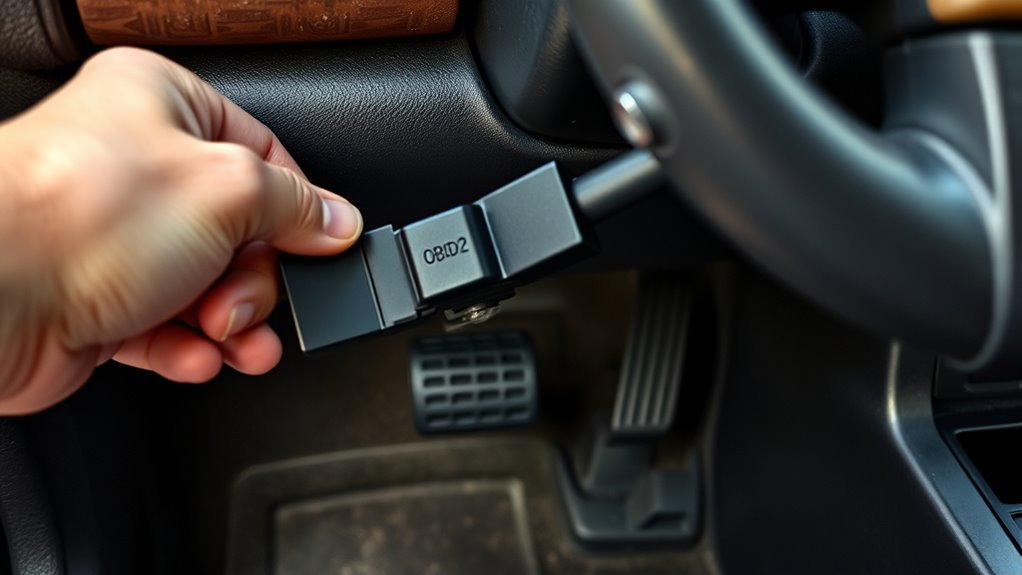
Sit in the driver’s seat, rest your feet, and look under the dashboard near the steering column—you’ll find the trapezoid-shaped OBD2 connector about 2–3 inches below your knee, roughly above your shin and easily reachable without removing any panels. Use this practical sequence to gain quick access and stay in control.
- Lean forward slightly, keep both feet on the floor, and visually scan the area just under the steering column for a black, white, or purple 16-hole connector.
- Reach down with your hand, feel for the trapezoid shape, and confirm the 16-pin pattern before connecting diagnostic tools.
- Plug in your scanner or dongle firmly; secure connection avoids false readings and speeds up troubleshooting tips implementation.
- Start your diagnostic session with ignition on but engine off, then follow your tool’s prompts to read codes and clear faults.
This concise, technical approach gives you immediate access and autonomy, freeing you from uncertainty when you need actionable vehicle data.
If You Can’t Find It: Hidden Spots and Access Panels
If you can’t spot the OBD2 port under the dash, check beneath the driver’s kick panel and remove any clips to expose the wiring cavity. You may need to take out the glove box panel or peel back trim covers near the center console to reveal a concealed trapezoid-shaped, 16-pin connector. On older 4Runners check for an OBD1 plug and confirm the year before assuming the OBD2 layout.
Check Under Kick Panel
Look under the driver-side kick panel for a small access cover—removing it often reveals the trapezoid-shaped, 16-pin OBD2 connector about 2–3 inches below your knee. You want kick panel accessibility so you can seize control and run diagnostics without delay. Use a flashlight; components sometimes obscure the port. Confirm your 4Runner is OBD2-compliant (post-1996) before you search.
- Remove the cover by hand or with a flat tool; feel for retaining clips.
- Identify the black trapezoid connector with 16 holes; align your scanner before plugging.
- Use troubleshooting tips: illuminate, clear debris, and check wiring if port seems recessed.
- If still hidden, inspect adjacent panels and wiring harnesses for obstruction.
This approach is direct, technical, and liberating.
Remove Glove Box Panel
Sometimes the port still hides after checking the driver kick panel, so you’ll need to remove the glove box panel to expose hidden access points. Inspect the glove box for screws or clips along the top and sides; these fasteners secure the panel. Use the right driver or prying tool, work deliberately, and avoid stripping hardware. Once fasteners are out, gently pull the glove box down or outward—don’t yank—to release hinges and reveal compartments behind it. In some 4Runner models the OBD2 port sits behind or adjacent to the glove box, so panel removal is essential for clear visibility and connection. Handle clips and hinges carefully during panel removal to prevent damage and retain full control of your vehicle’s access.
Look Behind Trim Covers
Begin by checking the small trim covers and access panels under the dashboard and above the pedals; these often conceal the OBD2 connector. You’ll liberate access by inspecting seams and panels near the steering column and pedal area. Turn the vehicle off before any work.
- Use basic access tools (trim removal pry tool, flat screwdriver) to gently open panels without damage.
- Look for a small rectangular cover; some models hide the port behind a hinged or snap-fit panel.
- If you don’t see it, remove adjacent trim sections methodically to expose wiring harnesses and the connector.
- Refer to the owner’s manual for model-year specifics if panels differ or the port remains obscured.
Work precise, avoid force, and reclaim control of your vehicle diagnostics.
Check If Your 4Runner Uses CAN Bus (Inspect Pins 6 & 14)
How can you tell if your 4Runner uses the CAN bus? Inspect the OBD2 port under the driver’s dashboard and look specifically at pins 6 and 14. CAN bus, which became standard on Toyota models from 2008 onward, uses those two pins for high-speed differential communication. If both pins are populated and show continuity to the vehicle harness, you’ve confirmed CAN bus presence and OBD2 compatibility. Check your model year first—pre-2008 vehicles may use ISO or other protocols and won’t have active pins 6 and 14.
Use a small flashlight and a probe or multimeter to verify voltage or continuity; you don’t need to power any modules for a visual check. When pins 6 and 14 are solidly connected, plan to use an OBD scanner that explicitly supports CAN bus. That guarantees accurate data access and preserves your autonomy to diagnose and liberate your vehicle’s systems.
What to Do Before Plugging in a Scanner (Safety & Prep)
Before you plug a scanner into the 4Runner’s OBD2 port, put the vehicle in park (or neutral for a manual), turn off the ignition, and verify the battery has enough charge to avoid interruptions. You’ll reduce risk and keep control as you begin diagnostics. Follow these practical scanner safety and vehicle preparation steps to stay effective and free.
- Read the 4Runner’s manual for OBD2 port notes and compatibility before connecting.
- Power off the ignition to prevent electrical surges that can damage the scanner or ECU.
- Verify the battery’s charge level; use a charger or maintainer if voltage is low to avoid mid-scan drops.
- Review your scanner’s user manual so you understand modes, power options, and safe connect/disconnect procedures.
This concise prep routine protects your tools and vehicle, keeps you autonomous in troubleshooting, and guarantees scans run cleanly without unexpected faults or interruptions.
Common Connection Problems and Quick Fixes
If your scanner won’t talk to the 4Runner, start by checking the basics: confirm the ignition is in the “On” position, then inspect the OBD2 connector and wiring harness for loose plugs, bent or corroded pins, and debris that could block contacts. Next, apply focused OBD2 troubleshooting tips: blow compressed air into the port to remove dust, visually check pin alignment, and reseat the harness connector until it clicks. If pins are damaged or pushed back, replace the port or have a harness repair done; don’t force a plug into a warped socket.
Address scanner compatibility issues by verifying your tool supports Toyota protocols for your model year, especially post-2008. Try a known-good scanner to isolate the fault. If intermittent connection persists, probe for power at pin 16 and ground continuity; no power means a blown fuse or wiring fault. These steps free you from guesswork and get your diagnostics communicating reliably.
Use Photos and Apps to Confirm Your Port Location
Want to confirm the OBD2 port on your 4Runner fast? Use clear photo sources and targeted app recommendations to locate the trapezoid-shaped, 16-hole connector under the driver’s dashboard near the steering column. Community-shared images and model-specific screenshots remove guesswork and give you confident access without removing panels.
- Check forum photo sources for step-by-step images showing the port’s exact placement and any protective cap to remove.
- Use app recommendations that include vehicle diagrams or a searchable database to pinpoint the OBD2 socket for your 4Runner year.
- Compare in-app diagrams with photographed angles from community threads to verify orientation and reachability under the dash.
- If the connector is hidden by a trim edge, photos reveal the minimal manipulation needed; apps guide you to the same spot.
This combination frees you from uncertainty, speeds up diagnostics, and keeps you in control of access and next steps.
When to Get Professional Help for OBD2 Diagnostics
When your OBD2 scanner keeps returning codes you can’t interpret or clearing them doesn’t stop warning lights, it’s time to bring in a pro; certified technicians have the diagnostic tools and system-specific knowledge to pinpoint root causes, especially for complex issues like misfires, transmission faults, or electrical failures. You should contact professional services when codes recur, performance doesn’t improve after DIY fixes, or multiple systems report faults. Technicians use manufacturer-grade diagnostic tools, oscilloscope traces, and repair databases to isolate intermittent faults and validate sensor data under load. If your 4Runner has aftermarket modifications or your generic scanner shows incompatible data, a shop with vehicle-specific calibration tools can avoid misdiagnosis. Prioritize professional assessment when persistent dashboard warnings could risk safety or further damage. Getting timely professional services preserves your vehicle’s reliability and your mobility, freeing you from guesswork and ensuring repairs follow proper procedures, parts specifications, and verified test protocols.
Frequently Asked Questions
Where Is the OBD2 Port on a 2002 Toyota 4runner?
You’ll find the OBD2 location on the 2002 4Runner under the driver’s dash, above the brake pedal about 2–3 inches below your knee; plug the scanner into the trapezoid 16-pin port to reclaim diagnostic control.
Does Toyota Have an OBD Port?
Yes — you’ve got universal access: Toyota diagnostics use OBD ports, with OBD port locations standardized across models. You’ll plug a scanner into the 16-pin OBD-II connector, freeing diagnostics and repair control.
What Is the Best OBD2 Scanner for Toyota 4runner?
The BlueDriver is the best OBD2 scanner for Toyota 4Runner; it’s precise, supports Toyota diagnostics, and tops scanner reviews. You’ll get live data, enhanced codes, and mobile freedom to fix issues yourself.
Conclusion
Now that you know where the OBD2 port is on your 4Runner, check it like a tech would — methodically and without guessing. Reach under the dash at the driver’s side, around the fuse panel or knee bolster, and feel for the 16‑pin trapezoid connector. Treat the port like a delicate instrument: plug and unplug carefully to avoid bent pins. If access is unclear or signals fail, get a pro to avoid misdiagnosis.