Replacing a front CV axle on a Toyota Tacoma is a doable driveway repair if you work safely, keep the steering knuckle supported, and verify the torque specs for your exact model year before reassembly. This guide covers the front CV axle on 4WD Tacoma models, including the key safety checks, removal steps, seal inspection, axle installation, torque notes, troubleshooting, and final road test.
Quick Answer
To replace a Tacoma front CV axle, safely lift and support the truck, remove the wheel, axle nut, tie rod connection, and lower ball joint bracket, then pull the axle from the hub and front differential. Inspect the axle seal, install the new axle straight into the differential, reassemble, torque all fasteners to your model-year spec, refill any lost gear oil, and road test.
Key Takeaways
- Use jack stands on solid ground and never work under a Tacoma supported only by a hydraulic jack.
- Keep the steering knuckle supported so the brake hose, ABS wire, and ball joint are not stretched.
- Inspect the front differential axle seal before installing the new CV axle; a torn or hardened seal should be replaced.
- Tacoma torque specs vary by generation, drivetrain, and model year, so verify the axle nut and suspension torque values in Toyota service information before tightening.
- After installation, check front differential oil level, listen for clicking or vibration, and recheck for leaks after the road test.
At a Glance
| Time Required | 2–4 hours for one side; longer if bolts are rusted or the axle is stuck |
| Difficulty | Intermediate DIY repair |
| Tools Needed | Floor jack, rated jack stands, wheel chocks, breaker bar, torque wrench, pry bar, 19 mm and 21 mm sockets, large axle-nut socket, cotter-pin tool, soft-faced mallet, drain pan, ratchet strap, gear oil, gloves, and safety glasses |
| Cost | Usually the cost of one CV axle, possible axle seal, cotter pin, and front differential gear oil |
Before You Start: Tools, Parts, Time, and Safety for a Tacoma CV Axle Job
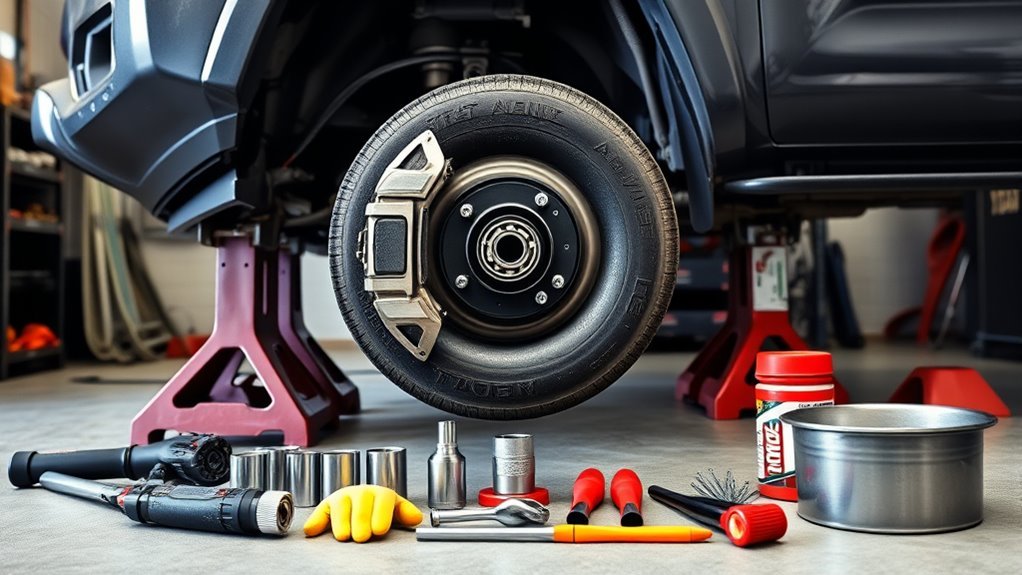
Before you lift the truck, gather the correct tools and parts so the job does not stall halfway through. You will usually need a 21 mm socket for the wheel lug nuts, a 19 mm socket for the tie rod and lower ball joint bracket bolts, a large pry bar, a ratchet strap, a soft-faced mallet, a drain pan, and a torque wrench that covers the axle nut range. You will also need the replacement CV axle, a new cotter pin, gear oil for the front differential, and an axle seal if the old seal is torn, hardened, or leaking.
Warning: A jack is for lifting, not long-term support. OSHA jack guidance says lifted loads should be blocked, cribbed, or otherwise secured after raising. Use rated jack stands on a solid, level surface before working around or under the Tacoma.
Start with a simple preparation checklist. Confirm that the new axle matches the side you are replacing, the spline count is correct, and the axle length and ABS tone-ring style match the old part. Some Tacoma axle nuts and aftermarket replacement nuts require different socket sizes, so test-fit your axle-nut socket before taking the truck apart.
Work on level ground, set the parking brake, chock the rear wheels, and loosen the front lug nuts slightly before lifting. Place the jack at the correct Toyota jacking point for your model year, then lower the truck onto rated jack stands. If you are not sure where the lift and support points are, check your Tacoma owner’s manual or Toyota’s official owner manual library before starting.
Note: Toyota service information is model-year specific. Use Toyota Technical Information System or the correct factory repair manual for final torque specs, seal replacement procedures, and any model-specific steps.
[Products Worth Considering]

This click torque wrench delivers accurate, repeatable tightening for automotive and home repair tasks, helping prevent over-tightening and fastener damage. Its dual-range scale, knurled non-slip grip, and durable ratchet head make it easy to use, while the included extension bar and storage case add extra convenience.

This upgraded Dorman OE FIX oil filter housing replaces failure-prone plastic on select Chrysler, Dodge, Jeep, and Ram vehicles with a durable aluminum design. It includes the oil cooler, filter element, cap, and required gaskets to help deliver a complete repair and updated fitment. Engineered for reliable sealing and long-term leak resistance, it is designed to help solve recurring oil filter housing failures.

The EcoNour foldable car windshield sun shade helps block UV rays and reduce interior heat, keeping your vehicle cooler while protecting the dashboard and seats from sun damage. Its compact, collapsible design makes it easy to install, remove, and store, and the broad coverage is ideal for many cars and SUVs.
Confirm the CV Axle Is the Problem Before Replacing It
A bad Tacoma CV axle often makes a rhythmic clicking or popping sound during tight turns, especially under throttle. Other signs include vibration during acceleration, grease slung around the inner fender or lower control arm, a torn CV boot, or visible play in the inner or outer joint.
Do not replace the axle only because you hear a front-end noise. A wheel bearing, loose lower ball joint, worn tie rod, damaged steering rack bushing, or loose skid plate can sound similar. Inspect the CV boots first. If a boot is torn and the joint has been run dry or contaminated with grit, replacing the full axle is usually faster and more reliable than rebooting it.
- Clicking during turns usually points to outer CV joint wear.
- Vibration under acceleration can point to inner CV joint wear or a bent axle shaft.
- Fresh grease around the boot means the boot is split or the clamp has failed.
- Gear oil near the front differential opening can mean the axle seal is leaking.
Remove Wheel, Dust Cap, and Axle Nut Safely
With the Tacoma safely supported, remove the six lug nuts with a 21 mm socket and take the wheel off. Set the wheel flat under the frame or lower control arm area as a backup safety measure, but do not rely on it instead of jack stands.
Next, remove the dust cap from the front hub. Work around the edge with a small pry tool or screwdriver and avoid crushing the cap if you plan to reuse it. Pull the cotter pin, remove the axle nut cap or retainer if equipped, and loosen the axle nut with the correct large socket and a breaker bar.
If the axle splines are stuck in the hub, thread the axle nut back on a few turns to protect the threads and tap the end of the axle with a soft-faced mallet. Do not mushroom the axle threads with a steel hammer. If the axle still will not move, use penetrating oil and a proper hub puller rather than beating on the hub.
Pro Tip: Break the axle nut loose before the knuckle is disconnected. With the wheel on the ground or with a helper holding the brake pedal, the hub is easier to control and you are less likely to damage the studs or bearing.
[Products Worth Considering]

This spill-proof radiator coolant filling funnel kit helps you refill cooling systems cleanly while reducing trapped air pockets that can affect heater and engine performance. It includes a 5-inch extension bar and 45-degree elbow for easier access under shrouds or at awkward angles. Color-matched caps for dedicated adapters make setup simpler and more organized.

The Scepter AM07029 Oil Drain Pan makes oil changes cleaner and easier by helping contain spills and reducing mess in the garage or driveway. Its lidded opening, removable drain screen, and gasketed pour spout support convenient collection, transport, and disposal of fluids. Built from durable high-density polyethylene, it resists rust, dents, and corrosion for reliable use with engine oil, transmission fluid, hydraulic fluid, and antifreeze.
Protect the ABS Wire, Brake Hose, and Front Differential
Before freeing the steering knuckle, look at the ABS speed sensor wire, brake hose, and any small brackets attached to the knuckle or upper control arm. Remove brackets as needed so the knuckle can swing forward without pulling on the wire or hose. Do not let the knuckle hang by the brake hose.
Place a drain pan under the front differential. Some Toyota service procedures call for draining the front differential oil before axle removal. At minimum, expect some oil to drip when the inner axle joint pops out. If you drain the front differential, refill it with the correct Toyota-specified gear oil after reassembly until the level reaches the fill opening, following the owner’s manual or service manual for your model year.
Loosen Tie Rod and Ball Joint and Free the Knuckle
Loosen the outer tie rod nut with a 19 mm socket, leaving a few threads engaged so the tie rod does not drop suddenly. Strike the steering knuckle near the tie rod taper with a hammer to shock the taper loose. Avoid hitting the tie rod threads directly.
Loosen Outer Tie Rod
Back off the outer tie rod nut while keeping a few threads engaged. Once the taper breaks free, remove the nut and move the tie rod out of the knuckle. Keep the tie rod from spinning or binding, and do not twist the steering rack boot.
This step gives the knuckle enough movement for axle extraction. You are not changing the tie rod adjustment, so your alignment should not change from this step alone. However, if you loosen the tie rod sleeve, change tie rod length, or disturb other alignment hardware, schedule an alignment check afterward.
Separate Ball Joint
Remove the two 19 mm bolts that hold the lower ball joint bracket to the steering knuckle. Keep the hardware organized for reinstallation. Pull the knuckle forward while guiding the axle splines out of the hub.
The goal is controlled movement, not force. If the axle will not slide out of the hub, stop and free the splines before pulling harder on the knuckle. Too much force can stretch the brake hose, stress the ABS wire, or damage the lower ball joint boot.
Support and Hang Knuckle
Once the tie rod and lower ball joint bracket are free, support the knuckle with a ratchet strap, wire, or bungee cord. Attach the strap to a solid suspension or frame point so the knuckle hangs in a natural position without pulling on the brake hose.
- Use the 19 mm socket only on the specified nuts and bolts.
- Tap the knuckle body to release the tie rod taper without damaging the threads.
- Support the knuckle before removing the axle from the hub and differential.
Remove Old Axle: Inspect Seal, Hub, and Differential

Slide the outer end of the axle through the hub while pulling the knuckle forward. Once the outer splines are clear, support the axle shaft with one hand. Do not let it hang by the inner joint.
At the differential, use a pry bar between the inner CV housing and the differential case. Pry with a quick, controlled motion to release the internal retaining clip. Do not pry against the thin axle seal surface, and do not pull on the shaft so hard that the inner CV joint separates.
Inspect Axle Seal
With the axle removed, inspect the front differential axle seal closely. Look for cuts, tears, hardening, a folded lip, or gear oil tracks. A damaged seal can leak immediately after the new axle is installed, which means you would have to take the same area apart again.
- Check the seal lip for nicks, flattening, hard spots, and embedded dirt.
- Clean the differential opening carefully without pushing debris inside.
- Inspect the axle sealing surface on the old axle for grooves that may explain a leak.
If the seal is clean, flexible, and dry, it may be reused. If it is torn, leaking, or questionable, replace it before installing the new CV axle. Seat the new seal squarely and at the correct depth using the proper seal driver or an evenly sized driver.
Check Hub and Differential
Before installing the replacement axle, check the hub splines and the differential opening. The hub splines should be clean and free of burrs. The bearing should rotate smoothly without grinding, roughness, or looseness. The differential splines should be clean enough for the new axle to slide in straight.
| Item | What to Check | What to Do |
|---|---|---|
| Hub splines | Rust, burrs, damaged threads | Clean lightly; do not grind away spline material |
| Wheel bearing | Roughness, growling, play | Repair before final assembly if bearing is worn |
| Axle seal | Leaks, tears, hardened lip | Replace if damaged or questionable |
| Differential opening | Debris, scoring, fluid loss | Clean carefully and refill oil after assembly |
Install New CV Axle: Seat Splines and Reseat or Replace Seal
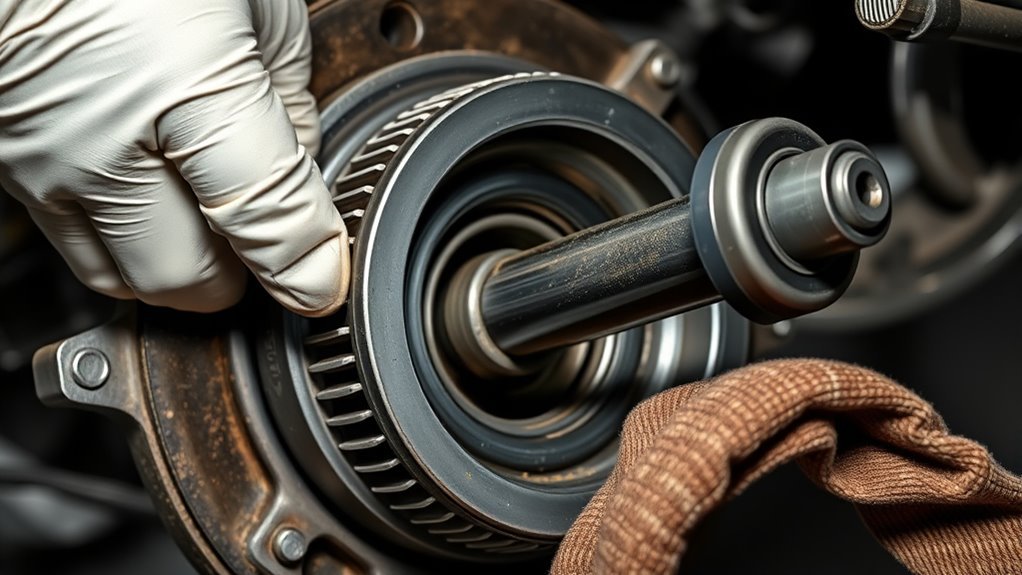
Compare the old and new CV axles before installation. Confirm the compressed length, spline count, ABS tone-ring design if used, inner joint style, and axle nut thread size. A small mismatch can cause vibration, seal leaks, ABS issues, or hub damage.
Lightly coat the inboard splines with clean gear oil, then align the new axle with the front differential. Push the axle straight into the differential. If it does not seat by hand, use a soft-faced mallet or a brass drift on the correct solid area of the inner joint housing. Do not hammer on the shaft or the boot clamp.
- Keep the axle level so the splines do not cut the seal lip.
- Listen or feel for the retaining clip to snap into place.
- Pull outward gently on the inner joint housing to confirm it is locked in the differential.
Next, guide the outer splines through the hub while moving the knuckle back into position. If the splines do not slide through easily, rotate the hub slightly and keep the axle straight. Never use the axle nut to force a badly misaligned axle through the hub.
Warning: If the inner CV axle is not fully seated, it can leak gear oil, pop out under load, or cause vibration. Confirm the retaining clip is engaged before reassembling the suspension.
Reassemble the Knuckle and Torque Fasteners Correctly
Reinstall the lower ball joint bracket to the steering knuckle and start both bolts by hand. Reinstall the outer tie rod into the knuckle and install a new cotter pin after the nut is torqued and aligned. Reattach any ABS wire brackets, brake hose brackets, and clips removed earlier.
Install the axle nut and draw the axle fully into the hub only after the splines are properly engaged. Use the correct retainer, cap, and new cotter pin. Reinstall the dust cap and wheel, then lower the Tacoma enough to keep the tire from spinning while torquing the lug nuts in a star pattern.
Use the repair manual for your exact Tacoma before final torque. The following values are common references for many Tacoma front-end jobs, but they are not a substitute for the factory spec for your VIN:
| Fastener | Common Tacoma Reference | Important Note |
|---|---|---|
| Front axle hub nut | Varies by generation; some 2005–2015 4WD references list 173 ft-lb, while many 2016–2023 4WD references list 184 ft-lb | Verify by model year and axle type before tightening |
| Lower ball joint bracket bolts | Often listed around 118 ft-lb on many Tacoma 4WD applications | Use clean threads and tighten evenly |
| Outer tie rod nut | Often listed around 67 ft-lb, then tighten further only as needed to align the cotter pin hole | Never loosen the nut to align the cotter pin |
| Wheel lug nuts | Varies by model year and wheel type | Check the owner’s manual and torque in a star pattern |
Do not guess on torque. Over-tightening can damage bearings, studs, threads, or suspension parts. Under-tightening can allow movement, noise, looseness, or unsafe handling.
Refill Front Differential Fluid and Check for Leaks
If you drained the front differential or lost oil during axle removal, refill it before driving. Make sure the truck is level. Remove the fill plug first if you have not already done so, then fill with the correct Toyota-specified gear oil until the oil reaches the bottom edge of the fill opening or follows the procedure listed for your model year.
Clean the area around the axle seal and differential housing after filling. This makes fresh leaks easier to spot during the road test. If oil appears immediately around the new axle, the axle may not be seated, the seal lip may have folded, or the seal may need replacement.
Torque Specs, Troubleshooting Tips, and Final Road Test
Before the road test, verify every fastener you touched: axle nut, lower ball joint bracket bolts, outer tie rod nut and cotter pin, ABS brackets, brake hose brackets, lug nuts, and differential fill or drain plugs. Pump the brake pedal if you moved the caliper or hub enough to disturb pad position.
Start with a slow test in a safe area. Turn left and right at low speed and listen for clicking, popping, scraping, or ABS noise. Then drive at neighborhood speed and moderate road speed. A good installation should feel smooth with no vibration, no clicking on turns, and no gear oil smell.
A quiet road test is only half the check. After the drive, look again at the axle seal, boot clamps, axle nut, and lug nuts before calling the repair finished.
If you hear clicking, feel vibration, or see grease or gear oil, stop and inspect the work. Clicking can come from a defective new axle, a loose axle nut, or a joint that was damaged during installation. Vibration can come from the wrong axle length, a partially seated inner joint, a worn wheel bearing, or a bent hub. Gear oil leakage usually points to a damaged seal, debris under the seal lip, or an axle that is not fully locked into the differential.
Common Mistakes to Avoid
- Letting the knuckle hang by the brake hose: Always support the knuckle with a strap or wire.
- Forcing the axle through the hub with the nut: Fix alignment first so the splines slide in smoothly.
- Damaging the axle seal during installation: Keep the axle straight as it enters the differential.
- Reusing a destroyed cotter pin: Install a new cotter pin during reassembly.
- Skipping the front differential oil check: A low front differential can cause expensive damage.
- Using one torque spec for every Tacoma: Verify your model year, drivetrain, and fastener specs.
Frequently Asked Questions
How do you tell if a CV axle is bad in a Tacoma?
Common signs include clicking during turns, vibration under acceleration, grease around a torn CV boot, and looseness in the inner or outer CV joint. Confirm the problem before replacing the axle because wheel bearings, tie rods, ball joints, and loose brake or skid plate hardware can make similar noises.
Can I replace only the torn CV boot instead of the whole axle?
Yes, if the boot tore recently and the joint is still clean, quiet, and tight. If the joint has been clicking, contaminated with dirt, or run without grease, replacing the complete CV axle is usually the better repair.
Do I need an alignment after replacing a Tacoma CV axle?
Usually not if you only disconnect the outer tie rod from the knuckle and remove the lower ball joint bracket without changing tie rod length or control arm adjustments. If you loosen alignment cams, change tie rod adjustment, or notice the steering wheel is off-center, get an alignment.
Should I replace the axle seal when replacing the CV axle?
Replace the axle seal if it is torn, hard, leaking, distorted, or if the old axle sealing surface shows wear. If the seal is clean, flexible, and dry, it may be reusable, but replacing it while the axle is out can prevent repeat labor.
Why is my new CV axle leaking gear oil?
The most likely causes are a damaged axle seal, a folded seal lip, dirt trapped at the seal, a worn sealing surface, or an inner axle joint that is not fully seated in the differential. Recheck the retaining clip engagement and inspect the seal before driving more.
Conclusion
You have finished the Tacoma front CV axle replacement when the axle is fully seated, the seal area is dry, the knuckle and tie rod are torqued correctly, the axle nut is secured with its retainer and cotter pin, and the front differential oil level is correct. Take the truck for a cautious road test, listen for clicks or vibration, then inspect the seal and fasteners again. If everything stays quiet, smooth, and dry, the repair is complete and the drivetrain is ready for normal use.
Sources
- Toyota Technical Information System — factory repair manual access, service procedures, and model-specific torque specifications.
- Toyota Owners Manuals and Warranties — owner manual access, jacking information, and model-specific owner guidance.
- OSHA 1926.305: Jacks — jack capacity, firm foundation, blocking, and safe support requirements.
- eCFR 29 CFR 1910.244: Other portable tools and equipment — jack loading, marking, operation, and maintenance requirements.