Inspecting your Toyota Supra’s brake rotors helps you catch wear, rust, grooves, cracks, and vibration problems before they turn into poor stopping power. The most important rule is simple: do not guess. Supra brake specs vary by generation, model year, trim, axle, and rotor design, so compare your measurements with the minimum thickness stamped on the rotor or listed in official Toyota service information.
Quick Answer
Inspect Toyota Supra brake rotors by safely lifting the car, removing the wheel, checking both rotor faces for cracks, grooves, rust pitting, heat spots, and uneven wear, then measuring rotor thickness in several spots. Replace rotors that are at or below the stamped minimum thickness, cracked, deeply scored, heavily pitted, or causing confirmed runout-related vibration.
Key Takeaways
- Use the minimum thickness stamped on the rotor or the official service specification; do not rely on a generic millimeter number.
- Measure rotor thickness with a micrometer or rotor gauge in several spots and use the lowest reading.
- Brake pulsation is often tied to lateral runout or disc thickness variation, so a dial indicator is the right tool for vibration complaints.
- Replace rotors in axle pairs when one rotor on that axle is below spec, cracked, or unsafe.
- If you hear grinding, feel a sinking pedal, see a brake warning light, or are unsure about the inspection, stop driving and have the Supra checked by a qualified technician.
At a Glance
| Time Required | 30–60 minutes for a careful visual and thickness inspection; longer if checking runout or removing caliper brackets. |
| Difficulty | Moderate. Basic inspection is DIY-friendly; disassembly, runout diagnosis, or rotor replacement should be done only if you are comfortable with brake work. |
| Tools Needed | Wheel chocks, jack, jack stands, torque wrench, flashlight, gloves, eye protection, brake cleaner, wire brush, rotor micrometer or gauge, and dial indicator for runout checks. |
| Cost | Inspection is mostly tool-based if you already own the equipment. Replacement cost varies by Supra generation, trim, axle, rotor type, and labor rate. |
Why You Should Care About Brake Rotor Inspections
Your Supra’s brake rotors convert speed into heat every time the pads clamp down. When rotors become too thin, grooved, cracked, heavily rusted, or uneven, braking can feel rough and stopping performance can suffer. Rotor wear also affects brake pads, pedal feel, brake noise, and heat control.
The safest inspection starts with the correct reference. Use your Toyota owner’s manual and warranty/manual resources for model-specific guidance, and use the official service data or the rotor’s own markings for specifications. A modern GR Supra and an older A80 Supra may not use the same rotor size, caliper setup, or wear limit.
Warning: Brake work is safety-critical. Never work under a vehicle supported only by a hydraulic jack. Use wheel chocks, jack stands on solid ground, eye protection, and gloves. If the brake pedal sinks, the car pulls hard while braking, you hear grinding, or a brake warning light is on, do not rely on a driveway inspection—have the vehicle serviced before driving normally.
Common Signs of Brake Rotor Problems
Rotor problems usually show up as changes you can feel, hear, or see. Inspect the rotors soon if you notice any of these symptoms:
- Steering wheel or pedal vibration: A shaking wheel or pulsing pedal can point to rotor runout, disc thickness variation, uneven pad deposits, or heat damage.
- Grinding or scraping noise: This can mean the brake pad friction material is worn out and the backing plate is contacting the rotor.
- Deep grooves or scoring: Light marks can be normal, but deep channels reduce contact area and may require replacement or machining if service data allows it.
- Heavy rust, pitting, or scaling: Light surface rust after rain or washing is normal. Deep pitting, flaking edges, or rust on the friction surface that does not clean off during normal braking is a problem.
- Blue, purple, or dark heat spots: Discoloration can indicate repeated overheating, especially after track use or aggressive mountain driving.
- Longer stopping distance or weak bite: This can involve pads, fluid, tires, calipers, or rotors, so inspect the full brake system.
Note: A rotor can look acceptable at a glance and still be below minimum thickness. Visual inspection and measurement are both needed.
Confirm Your Supra Before Checking Rotor Specs
Before measuring or ordering parts, confirm the Supra generation, model year, engine, trim, axle, and brake package. Rotor diameter and thickness can differ between older Supra models and modern GR Supra trims. The most reliable way to match parts is by VIN or by using official Toyota parts resources such as Toyota’s official parts catalog.
For the modern GR Supra, do not assume that a front rotor, rear rotor, 2.0 model rotor, 3.0 model rotor, and performance-package rotor all share the same wear limit. The correct minimum thickness may be stamped on the rotor hat or edge as “MIN TH” or listed in Toyota service information.
Step-by-Step Guide to Inspecting Brake Rotors
1. Prepare the Car Safely
Park on a flat surface, shift into Park or gear, set the parking brake only as appropriate for the axle you are inspecting, and chock the wheels that stay on the ground. Loosen the wheel fasteners slightly before lifting. Raise the Supra at the correct lift point, support it with jack stands, and remove the wheel.
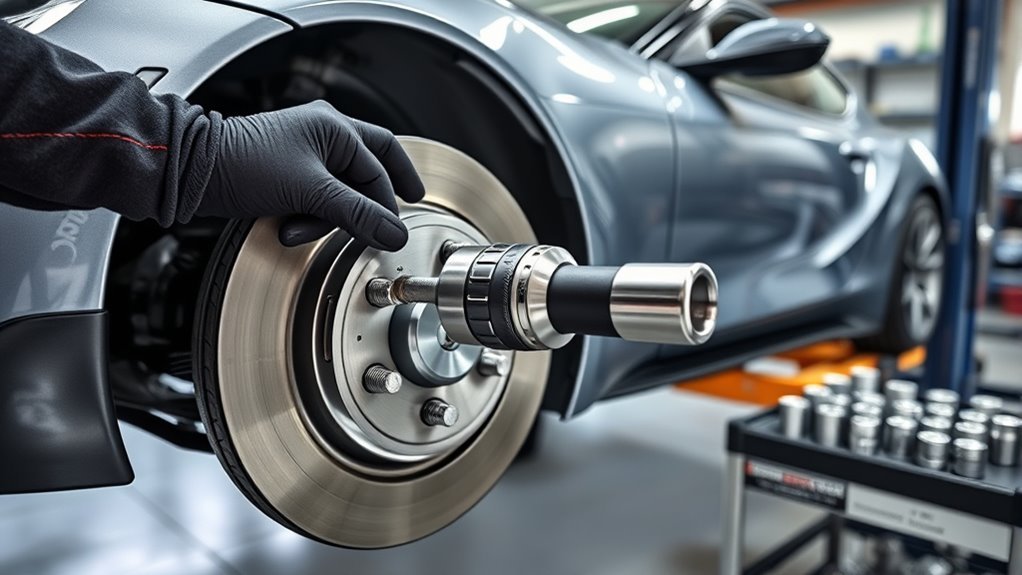
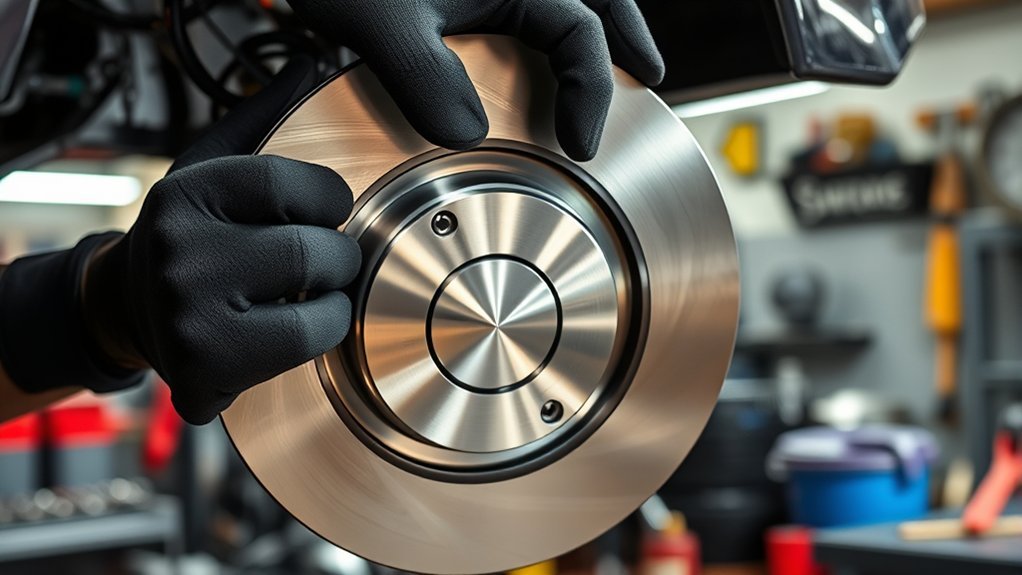
2. Do a Visual Rotor Check
Use a flashlight to inspect the outer rotor face first, then look at the inner face through the caliper opening or from behind the hub. Check for cracks, heavy rust, missing chunks, grooves, scoring, heat spots, and uneven pad contact. The inner face often wears worse than the outer face, so do not inspect only the side you can see easily.
3. Clean the Rotor and Hub Area
Spray brake cleaner on the rotor surface and wipe away loose dust. Use a wire brush on rust around the hub face and rotor hat, but do not gouge the braking surface. Rust or debris trapped between the rotor and hub can contribute to runout after reassembly.
4. Measure Rotor Thickness Correctly
Use a rotor micrometer or brake rotor gauge. Measure the friction surface in at least four spots around the rotor, away from the outer lip and away from deep grooves. For a more complete check, measure several points around the same path on the rotor and record the lowest reading. Compare that lowest reading with the “MIN TH” marking on the rotor or the Toyota service specification.
The lowest thickness measurement matters most. If any safe measuring point is at or below the rotor’s minimum thickness, the rotor is no longer a safe service candidate.
5. Check Runout if There Is Vibration
If the Supra has pedal pulsation or steering shake under braking, use a dial indicator to check lateral runout. Secure the rotor to the hub with the wheel fasteners or washers so it sits flat, mount the dial indicator to a fixed suspension or knuckle point, place the indicator tip on the braking surface, and rotate the rotor slowly. Compare the reading with Toyota service specifications.
Runout is not the same thing as rotor thickness. A rotor can be thick enough but still wobble side-to-side. Over time, runout can lead to disc thickness variation, which is a common cause of pedal pulsation. MAHLE’s brake measurement guide explains that runout is checked with a dial indicator and that disc thickness variation is measured with a precision micrometer.
6. Inspect Pads, Calipers, and Hardware
Rotor condition is tied to the rest of the brake assembly. Check pad thickness, pad taper, pad cracks, caliper slide movement, uneven wear, loose hardware, leaking brake fluid, and damaged rubber brake hoses. If one pad is much thinner than the other, the rotor may be a symptom, not the root cause.
Pro Tip: Photograph each rotor face and write down thickness readings by corner: left front, right front, left rear, right rear. This makes it easier to spot uneven wear at the next inspection.
7. Reassemble and Test Carefully
Reinstall the wheel, tighten the fasteners by hand first, lower the vehicle, and torque the wheel fasteners to the correct specification from service information. Before driving normally, press the brake pedal several times until it feels firm. Start with a slow test in a safe area and listen for scraping, grinding, or abnormal vibration.
Tools and Materials for Rotor Inspection

You do not need a full shop to perform a basic inspection, but accurate measurement does require the right tools. A visual check alone is not enough when deciding whether a rotor is still safe.
Essential Tools Required
- Jack, jack stands, and wheel chocks: Needed to lift and secure the vehicle safely.
- Torque wrench: Needed to reinstall wheel fasteners correctly.
- Flashlight or inspection light: Helps you see the inner rotor face and caliper area.
- Brake cleaner and shop towels: Removes loose dust and contamination from the inspection area.
- Wire brush: Cleans the hub face and rotor hat area without damaging the braking surface.
- Rotor micrometer or brake rotor gauge: Measures rotor thickness accurately.
- Dial indicator with a stable mount: Checks lateral runout when diagnosing vibration or pedal pulsation.
Recommended Inspection Materials
Keep a notepad or phone handy to record measurements, and use only brake-safe lubricant where the service manual calls for it. Do not put grease, anti-seize, or lubricant on the rotor friction surface or brake pad friction material. If brake cleaner contacts painted surfaces, rinse and wipe according to the cleaner label.
Safety Gear Considerations
Wear safety glasses and gloves. Brake dust and rust particles can irritate your eyes and skin. Work in a ventilated area, avoid blowing brake dust with compressed air, and wash your hands after handling brake parts.
How to Read Minimum Rotor Thickness
Many rotors have a minimum-thickness marking etched or stamped on the rotor hat, edge, or hub area. It may appear as “MIN TH” followed by a millimeter value. Brembo’s brake rotor maintenance guidance explains that the measured value should be compared with the MIN TH value and that rotors below that value must be replaced.
If you cannot find the marking, use official Toyota service information or ask a Toyota dealer or qualified brake technician to verify the specification by VIN. Do not use a generic online number unless it matches your exact rotor part number and service data.
When to Replace Brake Rotors?
Replace Toyota Supra brake rotors when any of these conditions apply:
- The lowest measured thickness is at or below the rotor’s minimum thickness.
- The rotor has cracks, missing material, severe heat checking, or structural damage.
- Rust pitting or scaling remains on the braking surface after normal cleaning and use.
- Grooves or scoring are too deep for safe pad contact.
- Runout or disc thickness variation exceeds the service specification.
- The rotor cannot be resurfaced while staying safely above minimum thickness.
- One rotor on an axle is unsafe; in that case, replace rotors in axle pairs.
Resurfacing is not always the right answer. Some performance, drilled, slotted, coated, or two-piece rotors may have special restrictions. A rotor should only be machined if service information allows it, the shop has the correct equipment, and the final thickness remains above the required limit.
Warning: Do not continue driving a Supra with grinding brakes, visible rotor cracks, fluid leaks, a soft pedal, or a brake warning light. These are not “monitor it later” symptoms.
Why Genuine Parts Matter for Brake Rotors
Brake rotors must fit the hub, caliper, wheel, and brake pad shape correctly. Toyota says Toyota Genuine Parts are made to fit the exact specifications of your Toyota, and Toyota’s brake rotor product information notes that front rotors should stay clean, in good condition, and free from wear for proper brake function.
For a Supra, correct fitment matters even more because parts can differ by generation and trim. Use the VIN when buying rotors and pads, especially if the car has aftermarket wheels, upgraded calipers, track pads, or previous brake modifications.
Quality Assurance Benefits
Genuine or correctly specified equivalent rotors help preserve proper hat offset, diameter, thickness, ventilation design, and wheel clearance. A poor-fit rotor can create noise, vibration, uneven pad contact, and installation problems.
Enhanced Performance Consistency
A Supra’s braking feel depends on the rotor, pad compound, caliper condition, tire grip, brake fluid, and wheel torque. When replacement is needed, use rotors and pads designed for your exact model and driving use. Street, autocross, and track use may call for different pad compounds and maintenance intervals.
Essential Maintenance Tips for Your Toyota Supra’s Brake System
- Inspect before symptoms get severe: Check rotors during tire rotations, brake pad service, seasonal storage, and before or after track events.
- Measure, do not guess: Use a rotor micrometer or gauge and record the lowest thickness reading.
- Watch the inner rotor face: Inner pads and inner rotor faces can wear faster than the outside face you see first.
- Check brake pads at the same time: New pads on a damaged rotor can lead to noise, poor bedding, and uneven wear.
- Keep hub faces clean: Rust or debris between the hub and rotor can create runout.
- Use the correct torque: Uneven or incorrect wheel-fastener torque can contribute to brake vibration and wheel/hub issues.
- Use the right brake fluid service interval: Brake fluid absorbs moisture over time, and overheated or old fluid can reduce pedal feel and braking consistency.
Frequently Asked Questions
When should the brake rotors be inspected?
Inspect the rotors during routine brake service, tire rotations, before track days, after hard track use, and any time you feel vibration, hear grinding, notice longer stopping distance, or see uneven pad wear. Follow your Toyota owner’s manual and service information for model-specific maintenance guidance.
What is the minimum brake rotor thickness for a Toyota Supra?
There is no single safe number for every Supra. Check the “MIN TH” marking on the rotor or the official Toyota service specification for your exact model year, trim, axle, and rotor part number. Replace the rotor if the lowest measured thickness is at or below that limit.
Can I inspect Supra brake rotors without removing the caliper?
Yes, you can perform a basic visual inspection and some thickness checks with the wheel removed and the caliper installed. For a full inspection of both faces, pad condition, rotor runout, or rotor removal, caliper or bracket removal may be needed. Do that only if you are comfortable with brake work and have the service procedure.
Is light rust on Supra brake rotors normal?
Light orange surface rust after rain, washing, or storage is common and often clears after a few normal stops. Heavy pitting, flaking rust, rust ridges, or rough patches that remain on the braking surface are not normal and should be inspected closely.
Should I replace rotors and pads together?
If the rotors are below minimum thickness, cracked, deeply scored, or badly rusted, replace the rotors and install pads that are compatible with the rotor and your driving use. If the rotors are safely above spec and the surface is healthy, pads may be serviced without rotor replacement, depending on Toyota service guidance and the condition of the rotor.
Conclusion
Your Toyota Supra’s brake rotors are too important to inspect casually. Look for visible damage, but also measure thickness correctly, check the inner and outer faces, and use the rotor’s stamped minimum thickness or official service data as the deciding point. If the rotor is too thin, cracked, heavily pitted, deeply scored, or causing confirmed vibration problems, replace it before it compromises braking performance.
When in doubt, let a qualified Toyota or brake technician inspect the system. A good brake inspection protects more than the rotors—it protects the pads, calipers, tires, wheels, and everyone riding in the car.
Sources
- Toyota Owners — Manuals and Warranties — official owner manual and vehicle-specific maintenance reference point.
- Toyota Owners — Toyota Genuine Parts — supports using parts made to fit Toyota specifications.
- Toyota Autoparts — Front Brake Rotor Product Information — supports rotor condition, wear, heat, and fitment guidance.
- Brembo — Minimum Brake Rotor Thickness — supports MIN TH measurement, multiple-point measurement, and axle-pair replacement guidance.
- MAHLE Service Solutions — Measuring Brake Rotors to Eliminate Pedal Pulsation — supports runout, dial-indicator use, and disc thickness variation guidance.
- Toyota Service and Repair Manuals — Supra Service Repair Manual — supports using official service information for model-specific repair procedures.