
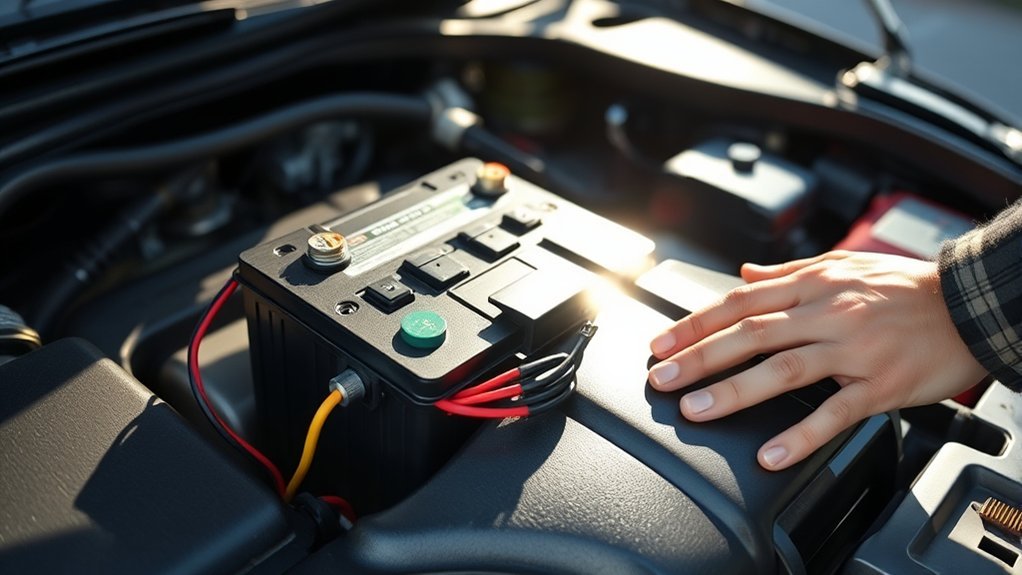
Replacing the 12V battery in a Toyota Camry is a manageable DIY job on many non-hybrid models, but the exact battery location, battery type, and parking-brake procedure can vary by year and powertrain. Before you loosen a terminal, confirm your Camry’s battery specification in the Toyota owner’s manual for your exact year and model, then work slowly and safely.
Quick Answer
To replace a Toyota Camry 12V battery, turn the vehicle off, confirm the correct replacement battery, remove the hold-down bracket, disconnect the negative terminal first, then the positive. Install the new battery, connect positive first, connect negative last, secure the hold-down, and test that the vehicle starts normally.
Key Takeaways
- Always disconnect the negative terminal first to reduce short-circuit risk.
- Install the new battery by connecting the positive terminal first and the negative terminal last.
- Do not assume every Camry battery is in the same place; hybrid models and newer Camry Hybrid models may require special battery type and handling.
- A fully charged auxiliary battery should generally read about 12.6 volts or more at rest, but recent driving or charging can affect the reading.
- Recycle the old battery through an auto-parts store, battery retailer, or approved battery collection site.
At a Glance
| Time Required | 20–45 minutes |
| Difficulty | Beginner to moderate, depending on corrosion and battery location |
| Tools Needed | 10 mm wrench or socket, ratchet, gloves, safety glasses, terminal brush, battery carrier or strap, and a multimeter |
| Cost | Usually about $100–$250 for the battery, depending on type, warranty, and local core charge |
Before You Start: Confirm Your Camry Battery Type

Do not buy or install a battery by appearance alone. Match the replacement battery to your Camry’s year, engine, powertrain, terminal layout, hold-down style, cold-cranking amps, and battery chemistry. Many non-hybrid Camry models use an under-hood 12V battery, while some Camry Hybrid models place the auxiliary battery in the luggage area and may require a sealed or vented battery design.
Warning: If you have a Camry Hybrid or a 2025-or-newer Camry Hybrid, check the exact Toyota manual before replacing the 12V battery yourself. Toyota’s 2025 Camry Hybrid guidance says to use a 12V battery designed for the vehicle and to contact a Toyota dealer for replacement. Never touch orange high-voltage cables or high-voltage components.
For hybrid safety details, Toyota also publishes Emergency Response Guides for electrified Toyota vehicles. Those guides are meant for safety professionals, but they are a useful reminder that the 12V battery and the high-voltage hybrid system are separate systems and should not be treated the same way.
[Products Worth Considering]

The ANCEL AD410 PRO combines engine diagnostics and 12V battery testing in one easy-to-use tool, helping you read and clear check engine codes while checking battery health, cranking, and charging performance. It also provides live data, freeze frame details, and I/M readiness checks to help you diagnose issues faster and prepare for emissions testing. With plug-and-play operation, a clear screen, and broad vehicle compatibility, it is a practical solution for home mechanics and everyday drivers.

This POWOXI solar battery maintainer helps keep 12V batteries charged and protected with intelligent charging and built-in safety features. Its durable tempered glass construction, scratch-resistant frame, and easy installation make it a practical solution for cars, motorcycles, boats, tractors, ATVs, and other battery-powered equipment. An LED indicator helps show charging status at a glance, while the waterproof design supports low-maintenance use.
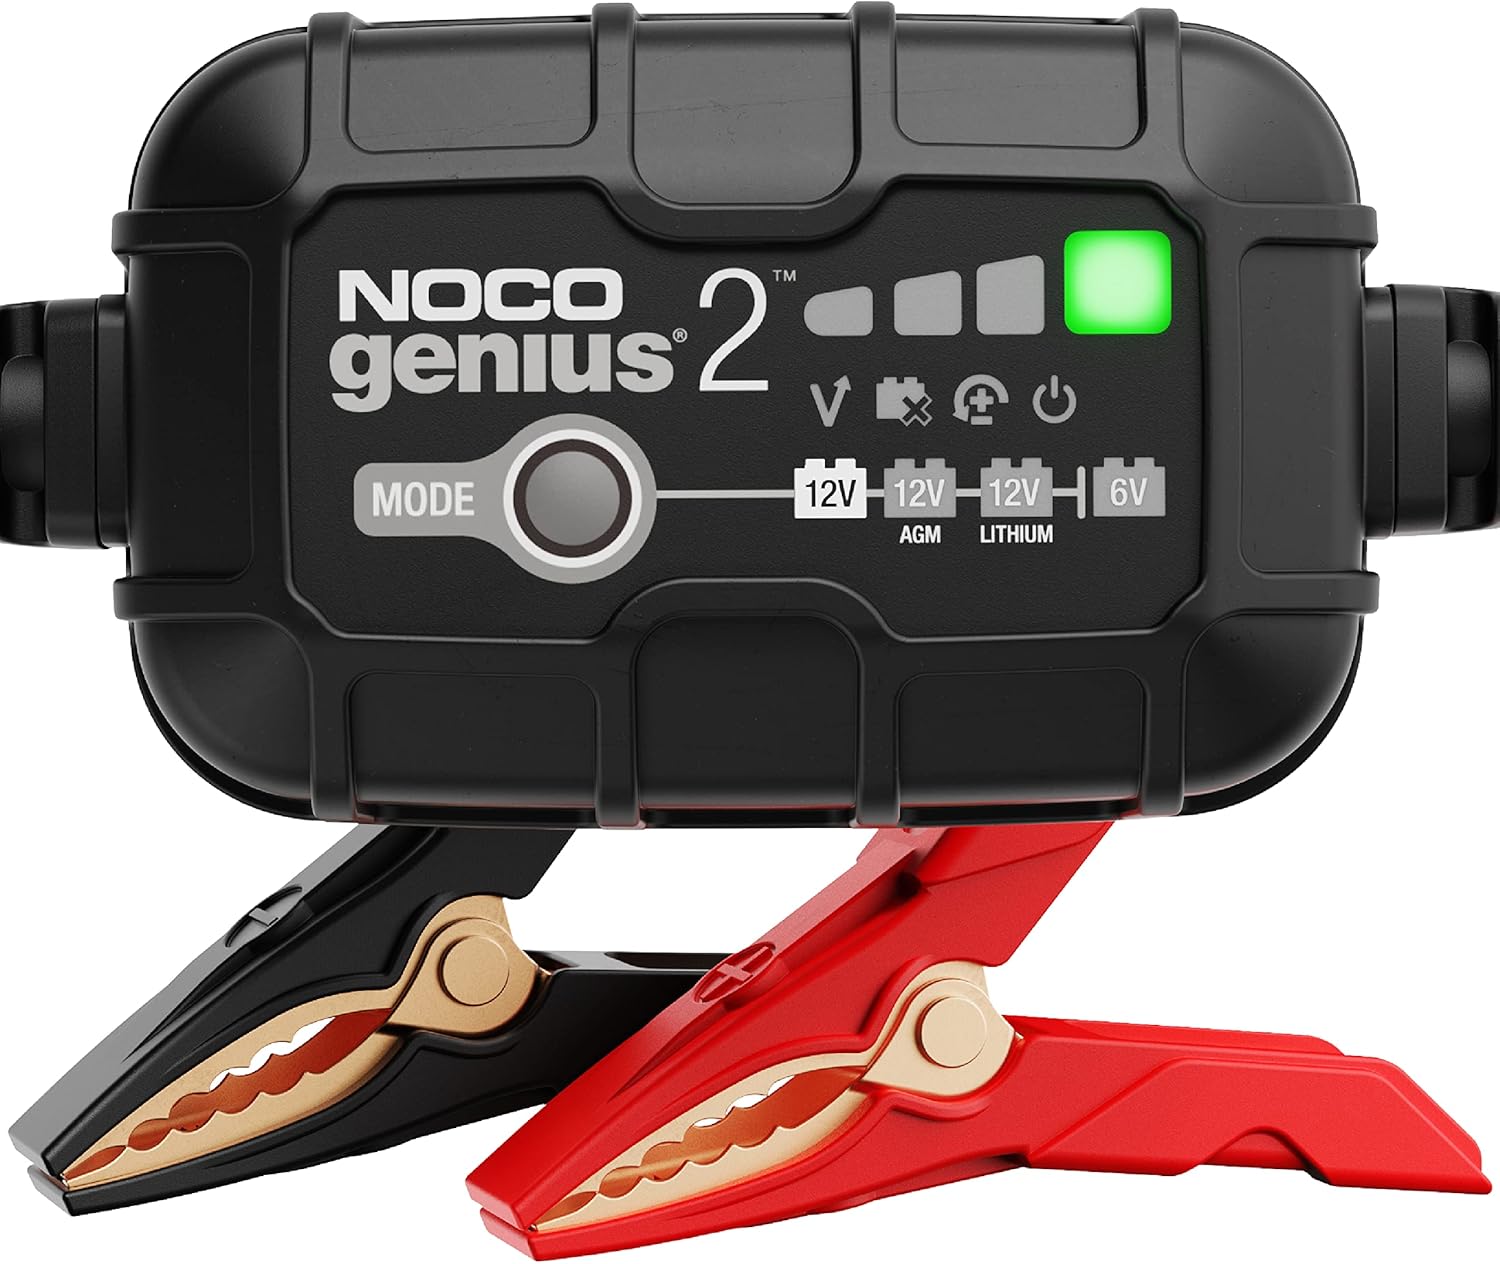
The NOCO GENIUS2 is a compact, all-in-one smart charger that automatically charges, maintains, and restores 6V and 12V lead-acid and lithium batteries. It features temperature compensation, overcharge protection, pulse desulfation, and Force Mode for reviving deeply discharged batteries, making it ideal for long-term battery care across many vehicle types. Designed for safe indefinite connection, it helps extend battery life and keep batteries ready to go.
Tools and Supplies Needed
Gather everything before you open the hood or luggage compartment. You do not want to leave a loose battery cable sitting near a terminal while you search for a tool.
- Correct replacement 12V battery for your exact Camry
- 10 mm wrench or 10 mm socket with ratchet
- Safety glasses and chemical-resistant gloves
- Battery terminal brush or small wire brush
- Battery carrier, strap, or both hands with a firm grip
- Multimeter for a basic voltage check
- Baking soda and water for cleaning corrosion, used carefully and kept out of the battery cells
- Shop towel or rag
Pro Tip: Take a clear photo of the old battery before disconnecting anything. Capture the positive terminal, negative terminal, hold-down bracket, and cable routing so you can compare the new installation before closing the hood.
[Products Worth Considering]

Battery Tender Plus is a smart 12V charger and maintainer designed to keep automotive, motorcycle, and powersports batteries in optimal condition. Its adaptive 4-step charging program helps extend battery life while the quick disconnect harness and included cables make setup simple and convenient. The two-color LED status indicator provides clear charging feedback for easy, worry-free maintenance.

The TOPDON BT100 helps you quickly check the health and charge status of 12V lead-acid batteries with clear analytical results, including state of health, state of charge, voltage, and cranking performance. It supports a wide range of battery types and vehicles, making it a practical tool for diagnosing starting and charging issues at home or in the shop. Compact and easy to use, it provides fast, reliable testing without needing to charge the device first.

Reliable Quality: Our battery memory protector uses PVC cables with excellent insulation and reliability. Durable materials ensure long-term performance. The sturdy construction prevents wear and tear from daily use, making it a reliable choice for car maintenance
Essential Safety Tips for Battery Removal
A car battery can release hydrogen gas, leak corrosive acid, or create a dangerous short if a tool bridges the terminals. Treat the job as a small electrical and chemical-safety task, not just a simple parts swap.
- Turn the vehicle off and remove the key or keep the smart key away from the vehicle.
- Shift to Park and work on a flat, stable surface.
- For models with an electronic parking brake, follow your owner’s manual before disconnecting the 12V battery. Toyota hybrid service guidance includes special notes about disabling the Auto function in some disconnect procedures.
- Wear safety glasses and gloves to protect against acid and corrosion.
- Work in a well-ventilated area and keep sparks, cigarettes, and open flames away from the battery.
- Remove metal jewelry before working near the terminals.
- Never let a wrench touch the positive terminal and body metal at the same time.
- Stop if the battery case is cracked, swollen, leaking, or hot to the touch.
Preparing for Battery Replacement in Your Toyota Camry
Open the hood and locate the battery if your Camry uses an under-hood battery. On models with a luggage-compartment auxiliary battery, remove the proper trim panel only after confirming the procedure in the owner’s manual. Check that the replacement battery’s positive and negative posts match the cable positions on the old battery.
If your Camry has a battery support bar or hold-down bracket, use a ratchet and 10 mm socket to loosen the fasteners. Set the fasteners aside in a safe place. The hold-down is important because a loose battery can move, damage cables, or crack its case during driving.
Note: Disconnecting the 12V battery may erase clock settings, radio presets, automatic window calibration, trip data, or other learned settings. Some warning lights may appear briefly after reconnection and clear after a short drive, but persistent warning lights should be diagnosed.
Step-by-Step Guide to Disconnecting the Old Battery
Follow the terminal sequence carefully. The safest removal order is negative first, positive second.
Step 1: Power the Vehicle Down
Make sure the ignition or power switch is off, all accessories are off, and the vehicle is stable. Keep the smart key away from the vehicle so the system does not wake up while you are working.
Step 2: Remove the Hold-Down Bracket
Use the 10 mm socket and ratchet to loosen and remove the support bar or hold-down clamp. Do not let the hold-down hardware fall into the engine bay.
Step 3: Disconnect the Negative Terminal First
Use a 10 mm wrench to loosen the negative terminal, usually marked with a minus sign or black cable. Lift it off the post and position it away from the battery so it cannot spring back and touch the terminal.
Step 4: Disconnect the Positive Terminal
Remove the red or rubber protective cover from the positive terminal. Loosen the positive terminal with the same 10 mm wrench, then lift it away from the battery post. Keep the positive cable from touching metal body parts.
Step 5: Lift Out the Old Battery
Lift the battery straight up and out of the tray. Batteries are heavy, so use a battery strap or a firm two-hand grip. Keep the battery upright to reduce the chance of acid leakage.
Installing Your New 12V Battery: A How-To

Before installing the new battery, inspect the tray and cable ends. Clean light corrosion with a terminal brush. If you use a baking soda and water mixture, apply it sparingly to the cable ends and tray only, then dry the area well. Do not let cleaning solution enter any battery vent or cell opening.
[Products Worth Considering]

Fitment:Compatible for Camry 2007-2011,OEM Part Number:7440406040

Practical Functions: Battery hold down effectively secures the battery to prevent it from loosening or falling off during bumpy roads or sudden braking situations. It also reduces friction between the battery and the body to ensure stability and safety during driving and extends the time of the battery

Fitment:Compatible for Toyota Tundra 2007-2021,Sequoia 2008-2022
Step 1: Seat the New Battery
Place the new battery in the tray in the same orientation as the old one. Confirm that the positive post lines up with the positive cable and the negative post lines up with the negative cable. If the battery uses a vent tube, reconnect it exactly as required for your model.
Step 2: Connect the Positive Terminal First
Install the positive cable on the positive battery post and tighten it with the 10 mm wrench until snug. Do not over-tighten, because battery posts and clamps can be damaged. Replace the red or rubber protective cover over the positive terminal.
Step 3: Connect the Negative Terminal Last
Install the negative cable on the negative battery post and tighten it until snug. A small spark can happen when reconnecting the final terminal, but a large spark, smoke, heat, or burning smell means you should stop immediately and get professional help.
Step 4: Reinstall the Hold-Down
Reinstall the battery support bar or hold-down bracket with the 10 mm socket. The battery should not slide, rock, or lift out of the tray. A secure hold-down protects the battery case and helps keep the terminals from loosening while driving.
A 12V battery that is fully charged should generally read about 12.6 volts or more at rest; Toyota service guidance uses 12.6V as a key auxiliary-battery charge threshold.
Final Steps for a Secure Battery Installation
Before closing the hood or trim panel, make one final pass over the battery area. Confirm that both terminals are fully seated, both clamps are snug, the positive cover is in place, and no tools are left near the battery.
- Check that the battery is sitting flat in the tray.
- Check that the hold-down bracket is secure.
- Check that the positive cable is on the positive post and the negative cable is on the negative post.
- Check that the cables are not stretched, twisted, or rubbing on sharp edges.
- Start the Camry or, on a hybrid, confirm the READY light appears as expected.
If you use a multimeter, measure voltage after the vehicle has been off long enough for surface charge to settle. Toyota service guidance notes that recent running or charging can affect readings and may require waiting before measuring. If your new battery is below about 12.6 volts at rest, charge it with a compatible charger or have it tested before assuming the vehicle has another problem.
Troubleshooting After Battery Replacement
If the Camry does not behave normally after the battery replacement, start with the simple checks before replacing more parts.
| Problem | Likely Cause | What to Do |
|---|---|---|
| No lights or no power | Loose terminal, wrong terminal connection, or discharged battery | Recheck terminal seating and battery voltage. |
| Clicking sound when starting | Weak charge or poor cable contact | Clean and tighten terminals; test battery voltage. |
| Warning lights stay on | System initialization, low voltage, or stored fault | Drive briefly if safe; scan codes if lights remain. |
| Hybrid READY light will not appear | Auxiliary battery connection, low charge, or hybrid system fault | Stop guessing and consult the manual or a Toyota technician. |
| Smoke, heat, melted cable, or large spark | Possible short circuit or reversed polarity | Stop immediately, disconnect only if safe, and call a professional. |
Maintaining Your New Battery: Tips and Tricks
Good battery maintenance starts with keeping the battery charged and the terminals clean. Short trips, long storage, extreme heat, and deep discharge can shorten battery life. If your Camry sits for long periods, use a compatible battery maintainer and follow the maintainer’s instructions.
- Inspect the terminals every few months for corrosion or looseness.
- Keep the top of the battery clean and dry.
- Check resting voltage with a multimeter if the vehicle cranks slowly or sits unused.
- Do not add water or check electrolyte levels unless your specific battery is a serviceable flooded battery with removable caps.
- Have the charging system tested if the new battery repeatedly loses charge.
- Recycle the old battery through a retailer, repair shop, or approved collection program; do not place it in household trash.
The U.S. Environmental Protection Agency publishes battery collection best practices, and federal rules also address spent lead-acid batteries being reclaimed. Returning the old battery also helps you recover any local core charge paid at purchase.
Frequently Asked Questions
Does a Toyota Camry have a 12-volt battery?
Yes. Toyota Camry models use a 12V battery for low-voltage electrical systems. Gas-only Camry models typically use a conventional under-hood 12V battery, while Camry Hybrid models use a 12V auxiliary battery in addition to the high-voltage hybrid battery.
Where is the 12V battery located in a Toyota Camry?
On many non-hybrid Camry models, the 12V battery is in the engine compartment. On some Camry Hybrid models, the auxiliary battery may be in the luggage compartment. Always verify the location in the owner’s manual for your exact year and powertrain before starting.
Which battery terminal do I remove first?
Remove the negative terminal first, then remove the positive terminal. When installing the new battery, reverse the order: connect the positive terminal first and the negative terminal last.
What type of 12V battery does a Toyota Camry need?
The correct battery depends on the model year, engine, trim, and whether the vehicle is hybrid or non-hybrid. Match the group size, terminal orientation, hold-down style, cold-cranking amps, and battery chemistry. Hybrid models may require a sealed, AGM, or vented battery designed for that vehicle.
Do I need to reset anything after replacing the Camry battery?
Possibly. Disconnecting the 12V battery can reset the clock, radio presets, trip data, automatic windows, or learned system values. Some systems relearn after a short drive, but warning lights that stay on should be diagnosed with a scan tool.
Can I replace a Camry Hybrid 12V battery myself?
Only if you are confident, have the exact replacement battery, and understand the difference between the 12V auxiliary system and the high-voltage hybrid system. Toyota’s 2025 Camry Hybrid guidance recommends contacting a Toyota dealer for 12V battery replacement, so dealer service is the safer choice for many hybrid owners.
Conclusion
Replacing a Toyota Camry 12V battery is straightforward when you use the correct battery, follow the proper terminal order, and secure the hold-down bracket before driving. The main rule is simple: remove negative first, install negative last. For hybrid models, unusual battery locations, heavy corrosion, leaking batteries, or warning lights that stay on, choose professional service instead of forcing the repair.
Sources
- Toyota Owners Manuals and Warranties — supports checking the exact owner’s manual by year and model.
- Toyota 2025 Camry Hybrid 12-Volt Battery Guidance — supports hybrid-specific replacement caution and designed-battery requirement.
- Toyota T-SB-0033-22 Rev2 via NHTSA — supports 12.6V auxiliary-battery charge threshold, negative-terminal disconnect guidance, and ventilation/no-spark cautions.
- Toyota Emergency Response Guides — supports hybrid high-voltage safety awareness.
- OSHA Battery Charging Standard and OSHA Eye and Face Protection Standard — support ventilation, gas hazard, acid exposure, and eye-protection safety guidance.
- EPA Battery Collection Best Practices — supports proper battery recycling and collection guidance.




[…] assume one universal throttle body relearn sequence applies to every Camry year and engine. After a battery disconnect or throttle body cleaning, first confirm that the battery is charged, the intake hose […]