
Affiliate disclosure: As an Amazon Associate, AutoReviewNest earns from qualifying purchases. This does not affect our editorial independence or the price you pay.
Last updated: July 31, 2026
Most consumer tire pressure gauges cannot be truly calibrated at home. The practical home procedure is an accuracy check: compare the gauge with a more accurate reference under the same conditions, repeat the readings, and judge the result against the manufacturer’s stated tolerance. Adjust the gauge only when its manual provides an approved procedure. Replace or service it when the readings are unstable or the confirmed error is clearly outside tolerance. A borderline result needs a better reference or a professional comparison.
This guide covers handheld digital, dial, and pencil gauges. For a gauge built into an inflator, see the tire inflator gauge calibration guide.
Quick Answer
To check a tire pressure gauge, record a reading with a more accurate reference gauge, test your gauge three times, and finish with another reference reading. Compare the two averages and interpret the result using the gauge’s published tolerance. Recalibrate only when the exact model has an approved adjustment procedure. Treat a result near the pass-or-fail limit as inconclusive until it is checked with a better reference.
Key Takeaways
- A home comparison normally verifies gauge accuracy. It is not the same as a documented laboratory calibration.
- Use a reference gauge with a known accuracy specification and, when possible, a current calibration record.
- Compare a reference reading before and after testing because each measurement can release a small amount of air.
- Read the tolerance format correctly: a fixed PSI value, percentage of full scale, and percentage of reading do not mean the same thing.
- Do not treat one measured offset as a permanent correction across the gauge’s full pressure range.
- Replace or service a gauge that is inconsistent, damaged, or clearly outside its published accuracy tolerance.
Editorial method: This guide compares consumer tire-gauge use with current NHTSA tire-safety guidance and pressure-calibration guidance from NIST, Ashcroft, WIKA, and gauge-manufacturer technical documentation. It does not claim laboratory testing of a specific gauge model.
What’s in This Article
- Before You Begin: Tools, Time, and Setup
- What a Home Accuracy Check Can and Cannot Prove
- Step-by-Step Tire Pressure Gauge Accuracy Check
- How to Evaluate Your Results
- Worked Accuracy-Check Example
- How to Read Gauge Accuracy Specifications
- Digital, Dial, and Pencil Tire Pressure Gauges
- Preparing Your Gauge: Cleaning and Inspection
- How to Check an Analog Tire Pressure Gauge
- How to Verify a Digital Tire Pressure Gauge
- Common Accuracy Problems and Fixes
- Maintaining Tire Gauge Accuracy
- How Often Should You Check Gauge Accuracy?
- When to Replace Instead of Calibrate
- Where to Get Calibration Help
- Frequently Asked Questions
- Conclusion
Before You Begin: Tools, Time, and Setup
Plan about 15 to 30 minutes for a careful tire gauge accuracy check. Work in a stable temperature and use the same tire or controlled pressure source throughout the comparison.
You’ll need your tire pressure gauge and a more accurate reference gauge. A suitable reference should have a published accuracy specification, cover the pressure range you use, and ideally have a current calibration record.
Ashcroft’s pressure-gauge calibration guidance describes a commonly used principle in which the reference instrument is at least four times more accurate than the gauge being checked. A reference that is only as accurate as your gauge may confirm that the readings differ, but it cannot reliably identify which gauge is correct.
Do not use a dashboard TPMS value, an unverified gas-station inflator gauge, or a second unknown handheld gauge as the final reference. Those readings can provide a quick cross-check, but they do not establish which instrument is accurate.
Warning: Use the cold tire pressure on your vehicle placard or in the owner’s manual when inflating tires. Do not use the maximum pressure printed on the tire sidewall as your normal target. See the door-jamb tire pressure sticker guide if you need help finding the correct value.
What a Home Accuracy Check Can and Cannot Prove
A home comparison can show whether your gauge is repeatable and reasonably close to a better reference around the pressure you tested. It does not create a traceable calibration certificate or prove that the gauge is accurate across its complete scale.
| Check | What It Tells You | What It Does Not Prove |
|---|---|---|
| Zero check | Whether a dial pointer or electronic display starts at zero with no applied pressure | Accuracy at normal tire pressure |
| Repeatability check | Whether the gauge gives nearly the same result during repeated measurements | Whether those repeated results are correct |
| Reference comparison | Estimated error near the pressure being tested | Accuracy across the gauge’s full measurement range |
| Multi-point comparison | Whether error changes at several pressures you actually use | Traceability or a formal calibration certificate |
| Documented calibration | Error at controlled pressure points using a traceable standard | A user adjustment unless the gauge supports an approved procedure |
For a gauge used only on passenger-car tires, a comparison near the vehicle’s normal placard pressure is the most relevant home check. If the same gauge is used at widely different pressures, check it near the low, middle, and high pressures you actually use. Professional calibration takes the full measuring range into account, including zero, intermediate points, and the upper range.
Step-by-Step Tire Pressure Gauge Accuracy Check
Most drivers should perform an accuracy check rather than attempt to alter the gauge. This reference-test-reference sequence helps account for the small pressure loss that can occur each time a gauge is pressed onto the valve.
- Inspect the gauge. Check the nozzle, case, display, pointer, hose, and seals for dirt, cracks, corrosion, impact damage, or leaks.
- Check the zero reading. With no pressure applied, confirm that a dial pointer rests at zero or that the digital display initializes normally.
- Stabilize the equipment. Keep both gauges and the pressure source in the same environment before testing. Avoid moving directly between extreme heat and cold.
- Choose the working pressure. Use a cold tire near its normal placard pressure or a controlled pressure source that remains stable during repeated measurements.
- Take the first reference reading. Press the reference gauge straight onto the valve stem, stop the air leak, and record the reading.
- Test your gauge three times. Remove and reapply it for each reading. Use the same angle and firm seal every time.
- Take the final reference reading. Recheck the pressure with the reference gauge after the three test readings.
- Compare repeatability. If your three readings vary noticeably, repeat the test. Replace the gauge if it continues to give unstable results.
- Estimate the error. Average your three test readings. Subtract the average of the first and final reference readings from that result.
- Compare the result with the stated tolerance. A result clearly inside tolerance supports continued use at that pressure. A result clearly outside tolerance supports service or replacement. Treat a result close to the limit as inconclusive because the reference and measurement technique also contribute uncertainty.
- Adjust only when approved. Follow the manufacturer’s calibration procedure if the exact model supports adjustment. Do not open the case or turn an unidentified screw.
- Verify again. Repeat the complete comparison after any approved adjustment.
Simple calculation: Estimated gauge error = average test-gauge reading minus the average of the first and final reference readings. A positive result means your gauge reads high. A negative result means it reads low.
[Products Worth Considering]

The JACO ElitePro Digital Tire Pressure Gauge delivers shop-grade accuracy with a clear digital readout, making it easy to maintain proper tire pressure for safer driving and better performance. Built with rugged brass and steel components, a protective guard, and a flexible air hose, it is designed for reliable use across cars, trucks, motorcycles, bikes, RVs, and trailers. The lock-on display, built-in bleeder valve, and bright backlit screen add convenience in any lighting condition.

These replacement windshield wiper blades are designed for Toyota Camry models from 2018 through 2024, delivering a precise fit for reliable all-weather visibility. Built with durable rubber and a beam-style design, they help resist cracking and ensure even pressure across the windshield for smoother, clearer wiping. The complete front set is made for easy home installation without special tools, making maintenance simple and convenient.

The S ZEVZO ET03 is a powerful 12V jump starter designed to revive gas and diesel vehicles quickly, including cars, trucks, motorcycles, lawnmowers, and boats. It also doubles as a portable power bank with USB charging ports, a bright LED flashlight, and an LCD display for added convenience during roadside emergencies. Built with multiple safety protections and included carrying case, it offers dependable backup power whenever you need it.
Worked Example: Reference-Test-Reference Calculation
This example shows the math only. Use the tolerance published for your exact gauge.
| Reading | PSI | Calculation |
|---|---|---|
| First reference | 35.0 | Reference average: (35.0 + 34.8) ÷ 2 = 34.9 PSI |
| Final reference | 34.8 | |
| Test gauge readings | 35.6, 35.6, 35.7 | Test average: 35.6 PSI when rounded to one decimal place |
| Estimated error | +0.7 PSI | 35.6 − 34.9 = +0.7 PSI, so the test gauge reads high near this pressure |
If the gauge specification is ±1.0 PSI, this example is inside tolerance at the tested pressure. If the calculated error is very close to ±1.0 PSI, repeat the check with a better reference before making a pass-or-replace decision.
Do not use an offset measured at one pressure as a permanent correction across the gauge’s full range. A gauge may have a different error at 30 PSI than it has at 60 or 100 PSI.
The National Highway Traffic Safety Administration advises drivers to check all tires, including the spare, at least monthly when the tires are cold. NHTSA defines cold tires as tires that have not been driven for at least three hours.
How to Evaluate Your Results
Use repeatability, estimated error, and the gauge’s published tolerance together. A high-resolution display is not automatically accurate. A screen that shows tenths of a PSI may still allow a larger measurement error.
| Result | Decision | Next Step |
|---|---|---|
| Repeatable and clearly inside tolerance | Passes the home check near the tested pressure | Continue using it and recheck after impact, contamination, or unusual readings |
| Repeatable but close to the tolerance limit | Inconclusive | Repeat with a more accurate reference or use a qualified service |
| Repeatable and clearly outside tolerance | Fails the check | Use approved adjustment, manufacturer service, or replacement |
| Not repeatable | Cannot be trusted | Correct sealing and technique, then replace it if instability continues |
| Reference pressure changes too much | Test is invalid | Stabilize or reinflate the source and restart |
Two ordinary gauges that disagree do not identify which one is wrong. Use a third independently specified gauge or ask a tire shop or calibration service to compare them with its reference instrument.
How to Read Gauge Accuracy Specifications
The tolerance format changes the calculation. Read the manual or product data for the exact model before deciding whether an error passes.
- Fixed tolerance: ±1 PSI means the allowed error is 1 PSI throughout the stated range.
- Percentage of full scale: ±1% of full scale on a 0–100 PSI gauge means ±1 PSI because 1% of 100 PSI is 1 PSI.
- Percentage of reading: ±1% of reading at 35 PSI means ±0.35 PSI.
- Segmented accuracy: Some dial gauges allow different errors in the lower, middle, and upper thirds of the scale. Use the limit for the pressure zone being tested.
JACO’s explanation of accuracy and resolution gives a tire-gauge example of a full-scale specification. The specification for another brand or model may use a different format.
Four terms help explain the results:
- Accuracy: How close the reading is to the reference value.
- Repeatability: How closely repeated readings agree with one another.
- Resolution: The smallest increment the gauge displays or marks.
- Tolerance: The maximum error allowed by the gauge’s published specification.
- Measurement uncertainty: The doubt contributed by the reference, pressure source, resolution, environment, and measurement method.
Digital, Dial, and Pencil Tire Pressure Gauges: What Changes During an Accuracy Check
Digital, analog dial, and pencil gauges can all provide useful readings. Gauge type alone does not determine accuracy. The published specification, working pressure range, condition, and repeatability matter more.
| Gauge Type | Common Accuracy Problems | User Adjustment |
|---|---|---|
| Digital | Weak battery, damaged sensor, electronic drift, moisture, or a poor valve seal | Model-specific; many consumer models provide no calibration mode |
| Analog dial | Pointer zero error, sticking movement, parallax, shock damage, or worn linkage | Only when the manufacturer identifies an adjustment procedure |
| Pencil or stick | Dirty piston, sticking slide, worn scale, bent body, or poor nozzle alignment | Usually not user-adjustable |
Digital gauges reduce viewing errors because the result appears as a number. Analog dial gauges must be viewed straight on to avoid parallax. Pencil gauges should be held so the sliding scale moves freely without rubbing against another surface.
Analog dial gauges may use a Bourdon tube, diaphragm, piston, spring, or linked mechanical movement. A drop or impact can shift or damage these parts even when the outer case still looks normal.
Preparing Your Gauge for Calibration: Cleaning and Inspection
Before checking your tire pressure gauge, make sure it is clean and operates normally. A brief inspection can reveal problems that no comparison procedure will correct.
- Clean loose dust, grit, and rubber debris from the nozzle.
- Inspect the case, hose, chuck, and seals for cracks or impact damage.
- Replace a weak digital-gauge battery with the type listed in its manual.
- Look for leaks or cloudy fluid if you use a liquid-filled dial gauge.
- Confirm that an analog pointer returns to zero with no pressure applied.
- Confirm that a pencil gauge’s sliding scale moves freely and is not bent.
Do not apply oil, solvent, compressed cleaning chemicals, or lubricant unless the manufacturer approves it. Some products can damage seals, plastics, sensors, or printed scales.
Store the gauge in a protective case away from moisture, vibration, direct sunlight, and extreme heat. Rough storage can damage the seal, screen, pointer movement, or sliding piston.
How to Check and Adjust an Analog Tire Pressure Gauge

Confirm that the pointer rests at zero before applying pressure. Then compare the gauge with the reference using the reference-test-reference sequence.
Press the chuck straight onto the same valve stem used for the reference gauge. View the dial directly from the front. Reading from an angle can make the pointer appear above or below its actual position.
Some dial gauges include an identified zero adjustment or calibration mechanism. Use it only when the manufacturer’s instructions explain the procedure. An exposed screw may control another part of the movement and should not be turned by trial and error.
Do not strike, open, lubricate, or force a gauge whose pointer sticks. Replace it or have it serviced when the pointer does not return to zero, stops at different positions, or gives inconsistent readings.
[Products Worth Considering]

This portable 12V tire inflator delivers fast, convenient inflation for cars, SUVs, trucks, motorcycles, and other inflatables. It features a digital display, bright LED lighting, auto shutoff, and multiple nozzle adapters to help you inflate accurately and safely, even in low-light situations. The long power cord and air hose make it easy to reach all tires and handle roadside emergencies or routine maintenance.

HIGH ACCURACY: Every ETENWOLF's pencil tire gauge is calibrated to ANSI B40.1 Grade B, it is accurate to 2% of span in the middle 50% of range and 3% of span in the lower and upper 25% of range. Each ETENWOLF pencil tire pressure gauge is manually calibrated and has its unique calibration number printed on the pencil

PROCESS LEVEL ACCURACY: This heavy duty tire pressure gauge is calibrated manually to ANSI B40.1 Grade A (±1% of span)
How to Verify a Digital Tire Pressure Gauge
Start by checking the battery and display. A weak battery can cause a dim screen, slow startup, or unstable results.
Compare the digital tire pressure gauge with a qualified reference under the same conditions. A power, zero, or mode button does not automatically mean the gauge supports sensor calibration. These controls may only turn the gauge on, change units, illuminate the screen, or establish a normal electronic zero.
Note: Many consumer digital gauges do not offer true user calibration. Do not use a generic button sequence or battery-removal procedure unless the manual for your exact model identifies it as a calibration step. Do not use the vehicle’s TPMS display as the calibration reference.
[Products Worth Considering]

PROCESS LEVEL ACCURACY: Each ETENWOLF’s digital tire pressure gauge is calibrated manually to ANSI B40.7 Grade 2A(plus-minus 1 PSI).Presta valve adapter not included, if used for bicycles, it must be purchased separately

PROCESS LEVEL ACCURACY: Each ETENWOLF’s digital tire pressure gauge is calibrated manually to ANSI B40.7 Grade 2A(plus-minus 1 PSI).Presta valve adapter not included, if used for bicycles, it must be purchased separately

【Accurate Digital Tire Gauge】Safeguard your every trip. HYVOHEX tire pressure gauge is certified by ANSI B40.7 Grade 2A standard and equipped with a high-sensitivity sensor to provide you with instant, error-free results (±0.1 PSI). The intelligent anti-interference chip ensures stable operation in extreme temperatures (-4°F-130°F). Whether it is daily commuting or long-distance driving, you can always know the tire condition
Checking Battery Levels
Battery condition matters because a digital gauge needs steady power. Replace the battery when a low-battery symbol appears, the screen flickers, or the gauge behaves differently without another clear cause.
- Use the battery type listed in the gauge manual.
- Install the battery with the correct polarity.
- Clean accessible battery contacts only as the manual permits.
- Repeat the full reference comparison after replacing the battery.
A fresh battery may correct a power problem, but it does not prove that the pressure sensor is accurate.
Comparing Reference Gauges
Use a reference gauge with a stated accuracy that is tighter than the gauge being tested. For a higher-confidence result, use a gauge with a current calibration record.
The National Institute of Standards and Technology maintains national pressure standards and provides specialized calibration services for pressure instruments. That laboratory-level service exceeds the needs of most drivers, but it demonstrates why traceability and a qualified reference matter.
Take the first reference reading, three test-gauge readings, and a final reference reading. If the reference pressure changes enough to affect your conclusion, restore a stable pressure and restart the comparison.
Common Accuracy Problems and How to Fix Them
Many apparent gauge errors come from the measurement process rather than the gauge itself. Check sealing, viewing angle, pressure stability, batteries, and temperature before deciding that the instrument has failed.
Common Calibration Errors
- Poor valve seal: Press the gauge straight onto the valve stem until the hissing stops.
- Parallax: Read an analog dial directly from the front.
- Zero error: Do not trust a pointer that rests above or below zero unless the manufacturer provides a correction procedure.
- Weak battery: Replace the digital gauge battery and repeat the complete comparison.
- Changing source pressure: Take reference readings before and after the test-gauge readings.
- Temperature change: Let the tire, reference gauge, and test gauge stabilize in the same environment.
- Reading the wrong units: Confirm whether the display or scale is showing PSI, kPa, bar, or another unit.
Addressing Mechanical Issues
Analog gauges can lose repeatability when internal parts wear, stick, bend, or shift after impact. Pencil gauges may also stick when the sliding piston is dirty or damaged.
Never force a pointer or sliding scale. Replace or service the gauge if it fails to return to zero, binds during use, leaks, or gives a different reading each time under stable conditions.
Ensuring Consistent Readings
Use the same valve stem, pressure source, angle, and sealing technique for every comparison. Repeated readings should remain close enough that they lead to the same pass-or-replace decision.
Bridgestone explains that tire pressure changes by approximately 1 PSI for every 10°F change in ambient temperature. That relationship describes the air pressure in the tire, which is why comparisons should be made under stable conditions and normal tire checks should use cold tires. The tire pressure and temperature guide explains seasonal changes in more detail.
Best Practices for Maintaining Tire Pressure Gauge Accuracy
Protecting the gauge from impact, contamination, moisture, and extreme temperatures helps preserve repeatability.
- Keep the nozzle capped or protected when the design allows it.
- Store the gauge in a case instead of loose in a door pocket or toolbox.
- Do not leave a digital gauge against a hot windshield or dashboard.
- Keep liquids and tire sealant away from the chuck and internal passage.
- Recheck accuracy after a drop, hard impact, leak, battery problem, or unusual reading.
- Use a gauge with a pressure range suited to the tires you normally check.
NHTSA explains that TPMS warnings normally appear only after a tire becomes significantly underinflated. You should still use a handheld gauge for monthly pressure checks.
If you drive a Toyota RAV4 and its warning remains on after correcting tire pressure, see the RAV4 tire pressure light reset guide for model-year-specific checks.
Pro tip: Keep your everyday gauge protected and compare it periodically with a separate reference gauge that is not carried loose in the vehicle.
How Often Should You Check Tire Pressure Gauge Accuracy?

A yearly comparison is a practical rule of thumb, not a federal requirement or a universal manufacturer interval for consumer tire gauges. Follow the gauge maker’s instructions when they specify a different schedule, and check sooner whenever the gauge’s condition or reading gives you a reason to doubt it.
- About once a year: Perform a routine comparison with a qualified reference gauge.
- After a drop or impact: Check immediately, even when the case looks undamaged.
- After moisture or contamination: Stop using the gauge until it has been inspected and verified.
- Before towing, track use, or heavy-load operation: Confirm that the gauge is repeatable and within its stated tolerance.
- After a battery change: Repeat the comparison if the digital gauge previously showed unstable behavior.
- For professional or regulated work: Follow the documented calibration interval required by the employer, procedure, insurer, or governing standard.
Ashcroft recommends annual checks as a general rule of thumb for pressure instruments, with shorter intervals when the application, environment, or process requires them. That industrial guidance supports the yearly habit, but the instructions for your exact tire gauge take priority.
When to Replace Instead of Calibrate
Replace or service your gauge when a qualified comparison shows that its error is clearly outside the manufacturer’s stated accuracy tolerance and no approved user-calibration procedure is available. Recheck a borderline result with a better reference before discarding the gauge.
You should also stop using it when:
- Repeated readings vary under stable conditions.
- The pointer or pencil scale sticks or fails to return to zero.
- The chuck, hose, case, display, or seal is damaged.
- The gauge leaks enough air to prevent a stable reading.
- The display flickers or produces implausible values after a fresh battery.
- No accuracy specification is available and the gauge disagrees materially with two qualified references.
A single disagreement between two ordinary gauges does not identify which one is wrong. Use a third gauge with a known specification or ask a tire shop to perform a reference comparison.
Replace a questionable gauge before using it for towing, heavy loads, motorsports, high-pressure trailer tires, or another situation where a measurement error could affect tire temperature, load capacity, or vehicle control.
Where to Get Reliable Tire Gauge Calibration Help
Start with the manual for your exact gauge model. It should state the measurement range, accuracy tolerance, battery requirements, operating-temperature limits, and whether user adjustment is supported.
A local tire shop may be able to compare your gauge with a shop reference. Ask whether its reference gauge has a known accuracy specification and whether it is checked on a documented schedule.
For motorsports, fleet, aviation, industrial, or regulated work, use a qualified calibration service that can test the gauge at controlled pressure points and provide documented results.
NIST maintains pressure-measurement standards and calibrates specialized pressure instruments. That service is normally beyond what a home driver needs, but it represents the traceability chain used for high-confidence measurements.
Frequently Asked Questions
Can You Calibrate a Digital Tire Pressure Gauge?
You can verify any digital gauge by comparing it with a more accurate reference. You can recalibrate the sensor only when the manufacturer provides an approved calibration mode or service procedure. Many consumer models are not user-adjustable.
How Do You Check an Analog Tire Pressure Gauge?
Confirm that the pointer starts at zero. Take a reference reading, test the analog gauge three times, then take another reference reading. Compare the averages with the analog gauge’s stated tolerance. Adjust it only when the manual identifies a calibration mechanism.
How Do You Know Whether a Tire Pressure Gauge Is Accurate?
Compare it with a reference gauge that has a tighter accuracy specification. Use repeated readings and take reference measurements before and after the test. A gauge should be repeatable and remain within its published tolerance.
Is a Digital or Analog Tire Pressure Gauge More Accurate?
Neither type is automatically more accurate. Compare the published tolerance, working range, repeatability, and calibration record. A high-resolution digital display can still be inaccurate, while a quality analog gauge can remain reliable when protected from impact.
What Should You Do If Your Tire Gauge Is 2 PSI Off?
Repeat the comparison with a stable pressure source and qualified reference. Check whether a 2 PSI error exceeds the gauge’s stated tolerance. Replace or service the gauge when the error is confirmed and outside specification. Do not assume the same 2 PSI correction applies throughout its range.
Can Tire Pressure Gauges Go Bad?
Yes. Impact, worn mechanical parts, contamination, moisture, damaged seals, weak batteries, and electronic faults can reduce accuracy or repeatability. Recheck the gauge after a drop or whenever readings become inconsistent.
Can You Use a TPMS Reading to Calibrate a Tire Pressure Gauge?
A dashboard TPMS reading can be a useful cross-check, but it is not a qualified calibration reference. NHTSA describes TPMS as a warning system and says it does not replace monthly pressure checks with an accurate handheld gauge. Use a reference gauge with a tighter published accuracy specification for the comparison.
Conclusion
Most drivers do not need a laboratory calibration. They need a careful accuracy check that shows whether the gauge is repeatable and close enough to a qualified reference at the pressures they use.
Use the reference-test-reference method, calculate the estimated error, and interpret the correct tolerance format. Keep a gauge that is repeatable and clearly inside tolerance. Recheck borderline results with a better reference, and service or replace a gauge that remains unstable or clearly outside specification. Then use the vehicle placard, not the tire sidewall maximum, when setting cold tire pressure.
References
- Tire Safety Ratings and Awareness: TireWise — National Highway Traffic Safety Administration
- Pressure/Vacuum Calibrations — National Institute of Standards and Technology, updated May 11, 2026
- Proper Tire Inflation and Tire Pressure Information — Bridgestone Americas
- How To Check the Calibration of a Pressure Gauge — Ashcroft, updated February 19, 2025
- Gauge Calibration — WIKA
- What Is the Difference Between Accuracy and Resolution? — JACO Superior Products

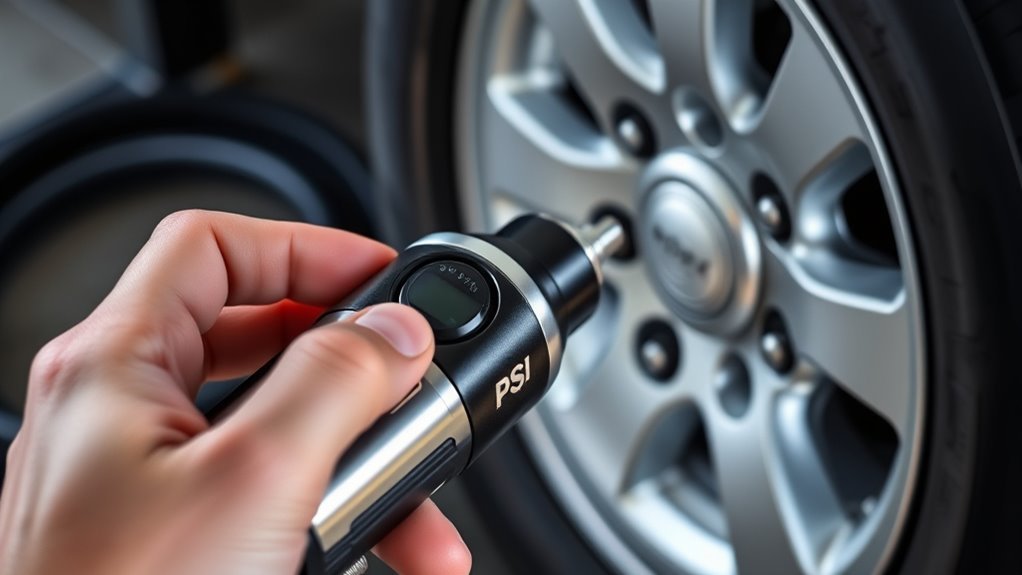


[…] For a deeper explanation of approved adjustment methods and professional verification, see the tire pressure gauge recalibration guide. […]