You should inspect and maintain your Tundra’s battery twice a year or every 6,000 miles to prevent corrosion and charging issues. Check for corrosion, cracked or swollen casing, and secure hold‑downs; disconnect negative first and reconnect last. Clean terminals with rust penetrant and a wire brush, then torque clamps snugly and apply protectors. Measure resting voltage (12.4–12.7 V ideal) and perform a load test; plan replacement at 3–5 years. Continue for step‑by‑step procedures and diagnostics.
How to Safely Disconnect Your Tundra’s Battery
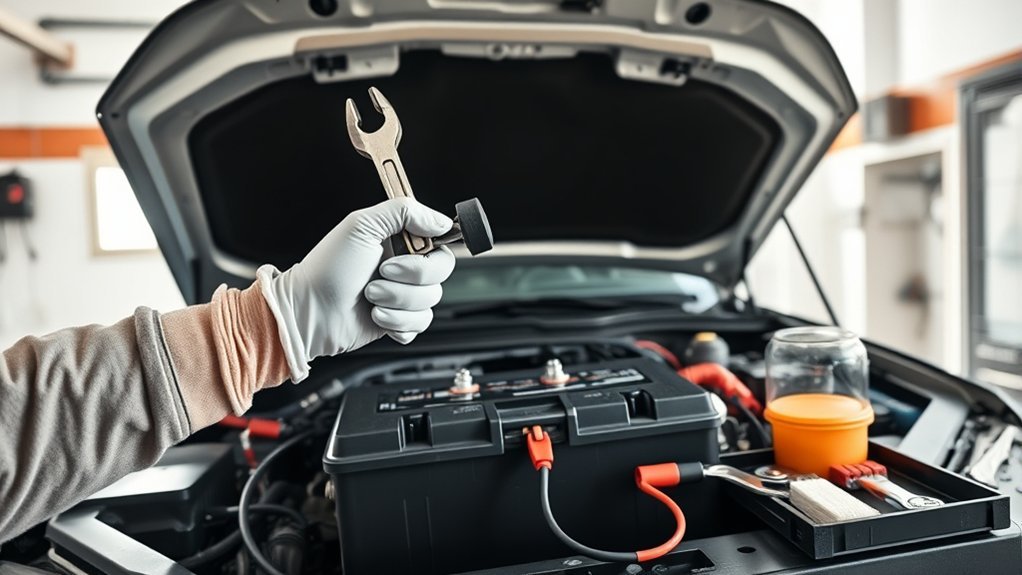
Before you touch anything, disconnect the negative terminal first—use a 10mm wrench and loosen the clamp to cut power and prevent shorts. You’ll then lift the positive terminal protector carefully to access the positive clamp without nicking insulation or damaging plastic. Work deliberately: avoid using an overlong wrench that could ground against chassis parts and create an arc. If the positive clamp binds from corrosion, tap it lightly with a hammer and apply rust penetrant; give the penetrant time to work, then retest the clamp with controlled force. After each terminal is free, stow the cable clear of the battery posts and resecure terminal protectors to block accidental contact and contamination. These steps enforce battery safety and preserve terminal protection so you control risk and maintain independence from roadside failure. Follow them and you’ll disconnect your Tundra’s battery efficiently, minimizing electrical hazard and preserving components for reliable, liberated mobility.
Quick Visual Check: What to Inspect at a Glance
How often should you glance at the battery? Perform a visual check at least twice a year or every 6,000 miles. You’ll quickly assess components that directly affect battery lifespan and corrosion prevention.
Inspect terminals and visible connections for white or bluish deposits and any loose clamps; buildup impedes electrical flow and signals the need for targeted cleaning. Scan the casing for swelling, cracks, or wetness—any deformation or leakage indicates imminent failure and requires immediate replacement. Verify the hold-down bracket is tight; excessive movement causes vibration damage that shortens service life. Note starting behavior: sluggish cranking during cold or hot extremes often precedes open-circuit weakness. Also confirm vent caps are present and seated; missing caps can accelerate degradation.
Record observations and dates in your maintenance log to track trends. These quick, disciplined checks free you from unexpected failure and extend usable battery life through proactive detection.
Clean Corroded Terminals : Tools and Steps
You’ll need a 10mm wrench, wire brush, rag, and rust penetrant to tackle corroded Tundra terminals safely and effectively. Start by disconnecting the negative terminal with the 10mm wrench, then remove the positive terminal before scrubbing heavy corrosion with the wire brush and applying penetrant to stubborn deposits. After wiping away residue with a rag, reinstall the positive terminal first, then the negative, and torque connections securely to prevent future issues.
Tools You’ll Need
While tackling corroded terminals on your Toyota Tundra, gather a 10mm wrench to loosen the negative clamp, a sturdy wire brush for heavy buildup, and gloves to protect your hands from battery acid. You’ll add a few targeted items to control terminal corrosion and secure battery longevity without fuss.
- Rust penetrant to loosen stubborn deposits before brushing.
- Battery terminal sealer to inhibit recurrence and maintain solid contact.
- Rags and a small plastic tray to contain debris and neutralize spills.
You’ll work deliberately: tools are chosen for effectiveness and safety, supporting your autonomy over vehicle care. Each item minimizes risk, speeds the process, and preserves electrical integrity so you can depend on reliable starts and extended service life.
Step-By-Step Cleaning
Now that you’ve gathered your 10mm wrench, wire brush, rust penetrant, rags, tray, gloves, and terminal sealer, start by disconnecting the negative terminal to prevent grounding and short circuits; loosen the clamp with the wrench, lift it off, then spray rust penetrant on heavily corroded areas and let it sit briefly before aggressively scrubbing with the wire brush to restore bare metal contact surfaces. After abrasion, wipe all residue and particulate into the tray and clean terminals and battery top with a rag to remove contaminants that impair battery performance. Reinstall the positive terminal first, torque the clamp snugly, then reconnect the negative. Finish by applying terminal sealer to inhibit future terminal corrosion. You’ll free your system to deliver reliable power.
Reinstall Terminals Correctly to Prevent Problems
Because accidental grounding can fry electronics or prevent your Tundra from starting, always reconnect the positive terminal first, then the negative, and tighten the positive clamp securely with a 10mm wrench; a loose positive connection causes intermittent starts and parasitic drains. You’ll confirm correct terminal orientation, then seat each clamp fully before tightening to specified snugness—no over-torquing. Check connection security after initial tightening and again after a short drive or temperature swing.
- Verify clamps sit flush on posts and wires route free of pinch points.
- Apply terminal protector or sealer to prevent corrosion and preserve contact integrity.
- If corrosion appears, clean with a wire brush, dry, then reseal; repeat inspections monthly.
This is practical, technical work that frees you from roadside dependency. Tight, corrosion-free terminals maintain voltage delivery and minimize parasitic draw. Keep a 10mm wrench and protector in your kit so you can restore reliable power quickly and independently.
Test Your Tundra Battery: Multimeter and Load-Test Guide
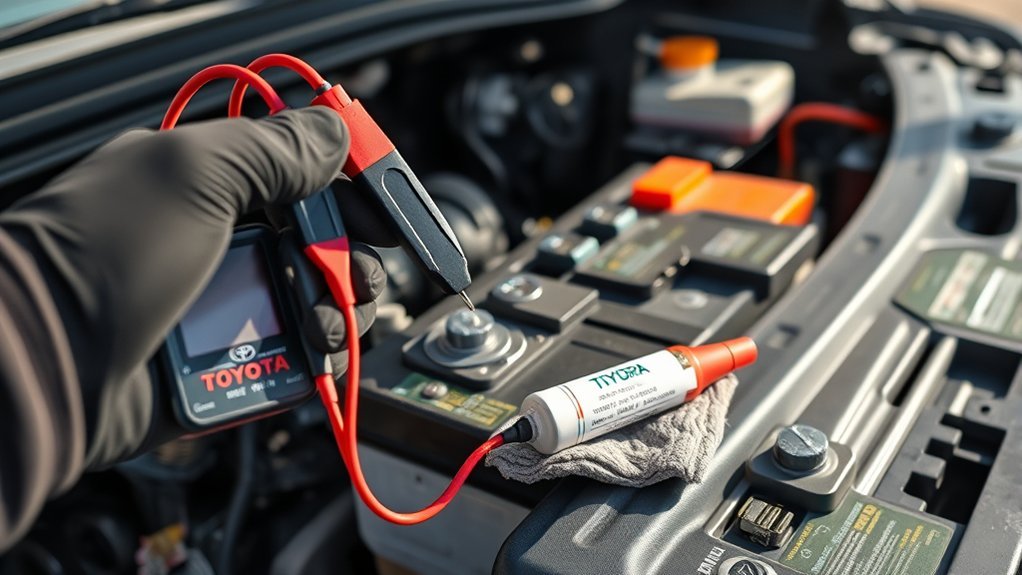
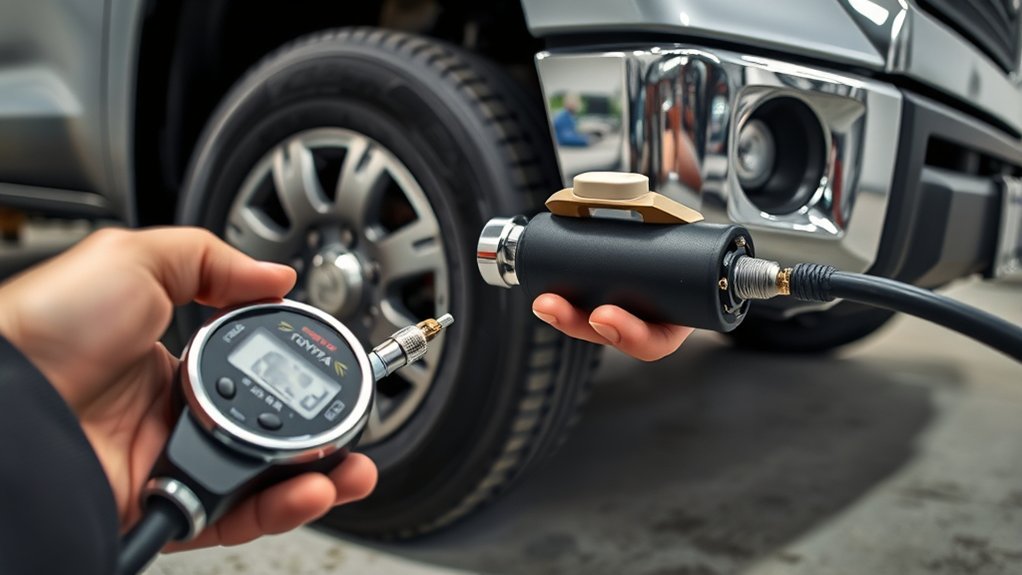
When you’re checking your Tundra’s battery, start by measuring the resting voltage with a multimeter—12.4–12.7 V indicates a healthy charge—then perform a load test to verify the battery can hold at least 9.6 V under load for 15 seconds. Use insulated gloves and goggles, set the meter to DC volts, and connect red to positive, black to negative. Record the resting voltage; anything below 12.4 V signals recharge or further testing. For a load test, attach a quality battery tester or use a known load equivalent, monitor voltage, and ascertain it doesn’t fall below 9.6 V during a 15-second interval. Repeat tests every six months to preserve battery life and maximize voltage stability. If the battery fails the load test, plan replacement rather than repeated jumps. Work outdoors or in a ventilated area, keep metal tools away from terminals, and document results so you control maintenance decisions and avoid dependency on uncertain starts.
Common Symptoms of a Dying Tundra Battery
You’ll first notice a slow engine crank at startup, especially in cold or hot conditions, which indicates reduced battery output. Check the dash for persistent battery or check-engine warning lights, since those flags often accompany charging or cell failures. You may also see electrical accessory failures—dim headlights, fading interior lights, or accessories that cut out—signaling insufficient voltage or poor terminal connections.
Slow Engine Crank
If your Tundra’s starter turns slowly or the engine takes noticeably longer to fire, that’s often the first clear sign the battery is weakening—especially during cold starts or after the truck sits idle. You’ll notice reduced battery capacity in cold weather and a sluggish turnover that compromises mobility and independence. Address it methodically:
- Inspect and clean terminals: corrosion increases resistance, cutting available current to the starter.
- Measure resting and cranking voltages: confirm capacity loss versus charging-system issues.
- Maintain schedule: check every season, replace battery every 3–5 years if capacity drops.
You act to prevent being stranded. If slow crank persists despite clean terminals and healthy charging readings, replace the battery to restore reliable starts and regain control of your vehicle.
Dashboard Warning Lights
Why is that little battery-shaped light coming on and what should you do about it? You’re seeing dashboard indicators that signal charging-system distress: the battery warning light often indicates alternator or charging faults, while the check engine light can illuminate when systems receive insufficient power. If starts become sluggish—especially in cold or heat—treat it as correlated evidence of a failing battery. Dimming headlights or intermittent instrument-cluster behavior are practical signs of deterioration that may produce dashboard alerts. Inspect terminals for corrosion; compromised connections frequently trigger these warnings. Regularly scan the dashboard indicators and act promptly: clean terminals, test state-of-charge with a voltmeter or load tester, and replace the battery before it strands you. Take control; prevent avoidable confinement.
Electrical Accessory Failure
When electrical accessories like power windows, the stereo, or interior lights start acting erratically or responding slowly, it’s often a sign your Tundra’s battery voltage is dropping and can’t reliably supply accessory loads. You’ll notice accessory performance issues: dimming interior and headlights, sluggish infotainment or navigation, and intermittent window or stereo failures. These symptoms point to reduced reserve capacity or failing cells, not just a faulty device.
- Check voltage under load—below ~12.4V at rest or <10V during crank indicates imminent failure.
- Inspect terminals, ground straps, and alternator output to rule out charging faults.
- Replace aged batteries proactively using battery lifespan tips: follow manufacturer intervals and choose a high-CCA, AGM or enhanced flooded battery for reliability.
Stay decisive—don’t let electrical weakness limit your mobility.
When to Replace: Toyota TrueStart vs. Aftermarket Batteries
Although both Toyota TrueStart® and aftermarket batteries can restore your Tundra’s starting power, choosing the right time to replace hinges on performance metrics and expected longevity. You’ll monitor voltage under load, cold-crank amps, and start consistency; drops below spec or sluggish cranks indicate replacement. TrueStart benefits include OEM-spec capacity, temperature-resilient chemistry, and reduced warranty claims—so you replace with confidence near the 3–5 year mark or sooner if metrics degrade. Aftermarket risks are variability in build quality and shorter life; they can be cost-effective but demand stricter monitoring.
| Metric | Recommendation |
|---|---|
| Voltage under load | Replace if below OEM threshold |
| Cold-crank amps | Replace if CCA falls considerably |
| Age/performance | Replace at 3–5 years or on failure |
Choose based on measured performance and liberation from recurring failures: pick TrueStart for assured compatibility, or an aftermarket unit only with verified specs and testing.
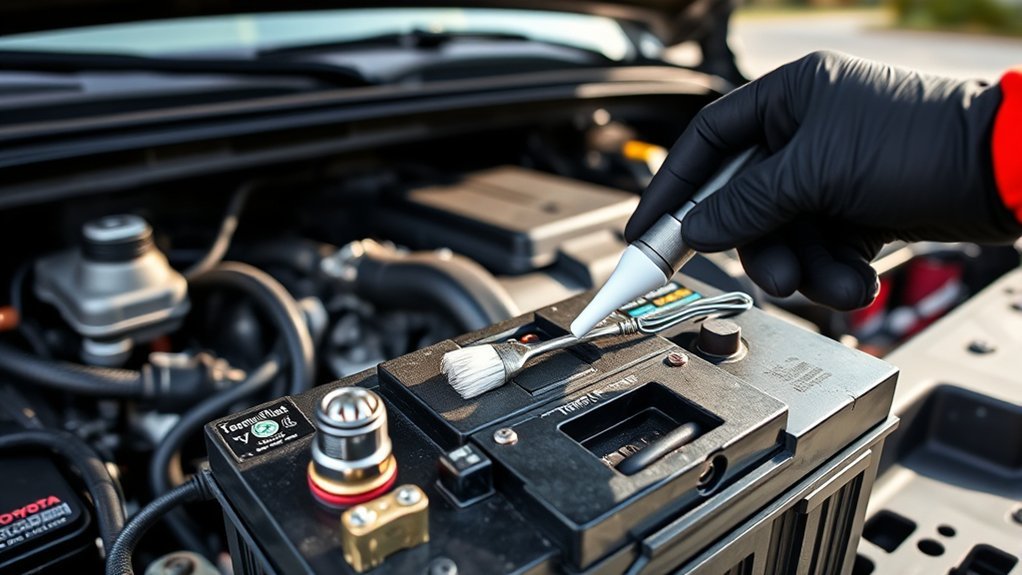
Preventive Upgrades: Sealers, Protectors, and Smart Chargers
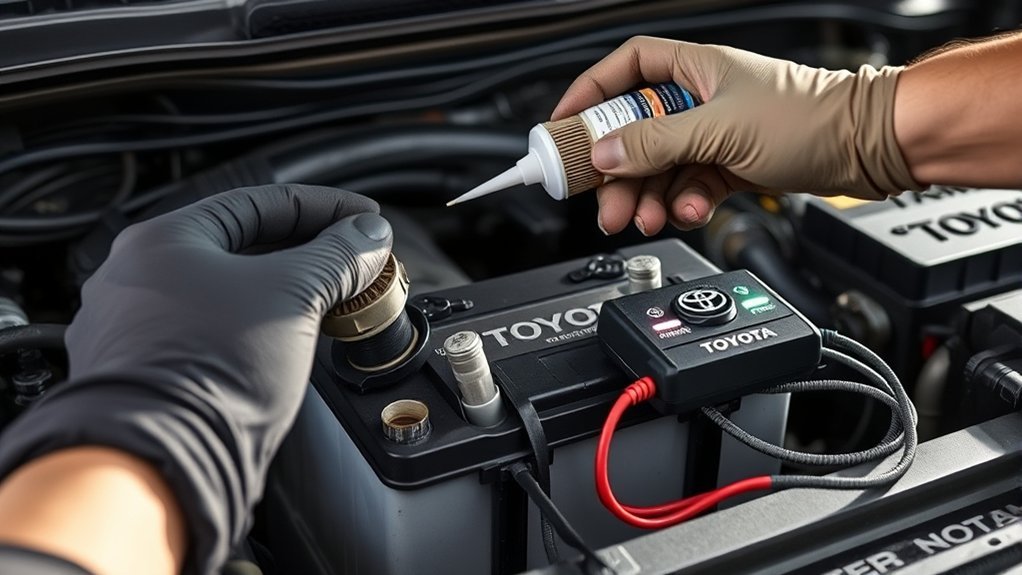
Because moisture, salt, and airborne contaminants steadily attack exposed terminals, you should add targeted preventive upgrades—terminal sealers, corrosion-resistant protectors, and a smart charger—to your Tundra’s battery care routine to preserve conductivity and extend service life. Apply a battery terminal sealer after cleaning to form a moisture barrier; felt washers or corrosion-resistant sprays add secondary protection and reduce electrochemical attack. Install higher-quality insulated cables to cut resistance and improve system efficiency. Use a smart charger with maintenance modes to hold state-of-charge, prevent sulfation, and employ ideal charging techniques that match your battery chemistry.
- Use battery terminal protection (sealer + felt washers) after each deep-clean cycle.
- Fit corrosion-resistant sprays and upgraded insulated cables to lower resistance.
- Connect a multi-stage smart charger and run periodic maintenance cycles.
Inspect terminals regularly, especially after winter or salty roads, and act decisively. These upgrades are practical steps that free you from avoidable failures and extend battery autonomy.
Troubleshoot Charging System Issues Beyond the Battery
When your Tundra shows charging symptoms, start by testing alternator output with a multimeter or load tester to confirm proper voltage and ripple. Inspect the starter, associated wiring and ground points for heat damage, loose connections, or high resistance that can mimic charging faults. Finally, perform a parasitic drain test—measure current draw with the vehicle asleep and isolate circuits to find any excessive draw.
Alternator Output Testing
If your Tundra’s battery keeps draining or warning lights flicker, test the alternator output with a multimeter at the battery terminals while the engine’s running; a healthy alternator should read about 13.8–14.2 volts. You’ll verify alternator performance and detect voltage fluctuations that undermine your freedom from roadside failures. Before measuring, disconnect the negative battery terminal to avoid shorts, then reconnect and start the engine. With the engine running, probe the terminals and note the voltage.
- If readings stay between 13.8–14.2V, charging is normal; monitor for intermittent dips.
- Readings under 13.8V suggest a failing alternator needing inspection or replacement.
- Listen for grinding/whine and inspect connections for corrosion to prevent future failures.
Starter And Wiring Inspection
Start by giving the starter and associated wiring a thorough visual and electrical inspection, since starter faults and poor connections often mimic battery failures and prevent reliable cranking. You’ll inspect the starter motor for wear, damage, and unusual play; a failing unit will stall cranking despite a healthy battery. Listen for clicking that signals starter solenoid issues or insufficient current. Check all terminals, connectors, and the battery ground strap for wiring corrosion effects, frayed conductors, or loose fittings that degrade contact. Use a multimeter to verify alternator output under load (13.8–14.4 V) and measure voltage at the starter while cranking to confirm adequate power delivery. Correct any corroded joints and secure grounds to restore dependable starting.
Parasitic Drain Diagnosis
Although the battery appears healthy, a parasitic drain can quietly sap charge while the truck’s off, so you should measure standby current with a multimeter to confirm normal draw (under ~50 mA). You’ll apply testing techniques by disconnecting the negative terminal and connecting the meter in series to read current. If draw exceeds limits, isolate root causes.
- Check interior lights, aftermarket accessories, and relays that can stay energized.
- Pull fuses one at a time while watching the meter to pinpoint the offending circuit.
- Inspect suspect components and wiring for shorts, stuck contacts, or unintended grounds.
You’ll act methodically: document readings, replace or repair the failed element, then re-test to restore autonomy and prevent future unintended discharge.
Twice‑Yearly Maintenance Checklist (Every 6 Months / 6,000 Miles)
Every six months (or every 6,000 miles), inspect your Tundra’s battery and terminals to catch corrosion, physical damage, or voltage degradation before they cause starting problems. Track battery lifespan and set a clear maintenance frequency: inspect terminals for corrosion or buildup, and clean with a baking-soda-and-water paste, rinse, and dry to restore conductivity. Visually check the case for bulging, cracks, or leaking electrolyte—any of these signs mean plan replacement promptly.
Use a multimeter to measure resting voltage; you should see 12.4–12.7 V with the vehicle off. If voltage is below that range or starts are sluggish after inactivity, schedule a professional assessment. Maintain records of voltage readings, cleanings, and symptoms to free yourself from unexpected failures and extend usable life. This twice-yearly routine is a minimal, liberated discipline that preserves reliability and lets you control when the battery is replaced, not the other way around.
Frequently Asked Questions
How Long Should a Toyota Tundra Battery Last?
You’ll typically get 3–5 years. Battery lifespan factors like temperature, driving patterns, and maintenance matter; choosing among Tundra battery types (standard, AGM, Toyota TrueStart®) and biannual inspections will maximize reliable service and freedom on the road.
How Do I Keep My Battery 100% Healthy?
You keep your battery 100% healthy by practicing strict battery care and optimized charging techniques: inspect and clean terminals, secure connections, avoid deep discharges, use smart chargers, test capacity biannually, and seal terminals to prevent corrosion.
How to Prevent Car Battery From Dying When Not in Use Toyota?
Like tending a quiet flame, you’ll protect charge: perform battery care—disconnect negative, keep 12.4–12.7V, use a maintainer, clean terminals, seal against corrosion; follow storage tips, park sheltered, and liberate yourself from unexpected dead batteries.
Conclusion
Keep your Tundra’s battery in top shape and you’ll avoid most roadside failures—about 40% of vehicle breakdowns trace back to battery or charging issues, so proactive care pays. You’ll want to follow safe disconnect/reconnect steps, clean and seal terminals, test voltage and load, and swap to a quality Toyota TrueStart or equivalent when capacity drops. Do these checks every six months or 6,000 miles and you’ll minimize surprises and extend battery life.