You’ll park on level ground, set the parking brake, chock the opposite wheel, and loosen lug nuts first. Pull the jack and lowering tool from under the rear seat, assemble the pole and attach the tire iron, then insert it into the tailgate access hole and turn counterclockwise to lower the spare. Position the bottle jack at the jacking point, raise the truck until the flat clears, swap wheels, and torque lug nuts in a star pattern to spec — keep going for full step-by-step guidance.
Prep & Safety for Changing a Toyota Tundra Tire

Before you start, park the Tundra on level ground, engage the parking brake, and consult the owner’s manual for any model-specific safety steps. You’ll secure freedom on the road by following clear tire maintenance and safety precautions: place wheel chocks opposite the wheel you’ll work on to stop rolling, and keep the scene organized to move quickly.
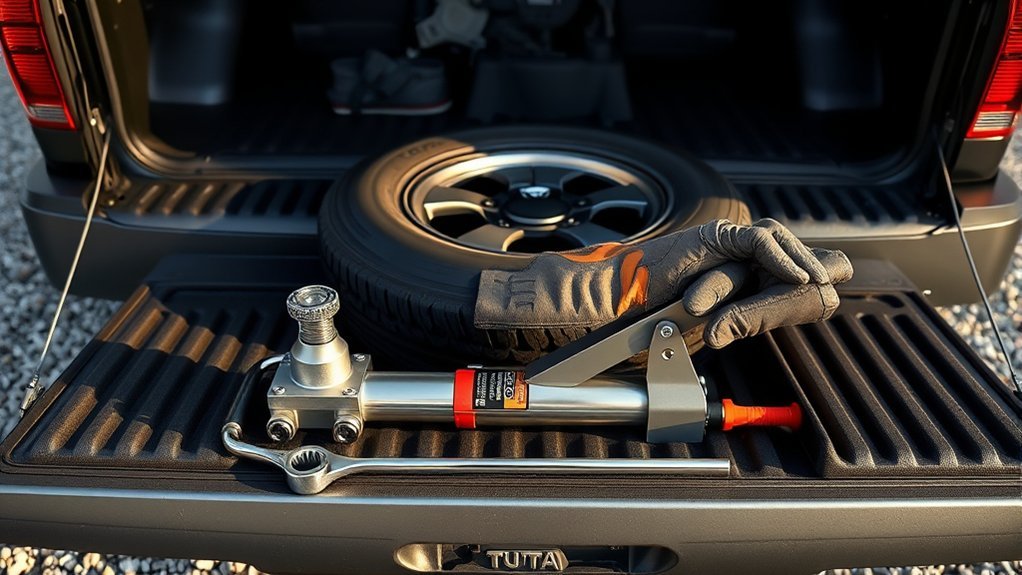
While the tire’s still on the ground, break the lug nuts loose to avoid spinning the wheel when it’s elevated. Retrieve jack and tools from under the rear seat—remove any bungee cords holding the kit—so everything’s ready without delay. Confirm the jack points in the manual and never position yourself under a raised vehicle. Work deliberately: gloves, good light, and a level surface reduce mistakes.
These exacting steps protect you and your crew, speed the change, and preserve your autonomy—so you can get back on the road confident and unbound.
Retrieve and Assemble the Tundra Jack and Lowering Tool
Locate the jack and tool bag under the rear seat and remove the bungee cord securing them. Assemble the lowering pole by connecting the middle pole to the hook end and attaching the tire iron to the pole. Double-check each connection is secure before inserting the assembled poles into the access hole to lower the spare.
Locate Jack And Tools
When you need the jack and lowering tool, lift the rear seat to find the bag tucked under it and remove the bungee cord that secures it so you can pull the kit out. You’ll see the jack and tool kit; learn jack storage locations and basic tool maintenance now. Check bag condition, clean grime, and verify fasteners. Confirm connections fit snugly; loose parts compromise safety. Keep the owner’s manual nearby for model-specific guidance.
| Item | Action |
|---|---|
| Jack storage | Remove bag, inspect mount |
| Tool maintenance | Clean, lubricate, tighten |
| Connection check | Align and secure joints |
| Manual | Follow Toyota safety steps |
Retrieve tools with confidence, secure all fittings, and reclaim control of your roadside situation.
Assemble Lowering Pole
Now that you’ve pulled the jack and tool bag from under the rear seat, lay out the pieces and connect the middle pole to the hook end, making sure the ball ends snap securely into place. You’re doing the lowering pole assembly with purposeful tool handling; stay deliberate and clear.
- Attach the tire iron through the end of the assembled pole to form the full lowering tool.
- Move to the tailgate area and locate the access hole above the spare tire.
- Insert the assembled poles through the cutout below the tailgate until the hook engages the spare.
- Turn the pole counterclockwise to lower the spare until it rests flat on the ground, then remove the extension pole to keep the area clear.
Act confidently—this frees you to finish the job.
Secure Connections Carefully
Start by lifting the rear seat and unhooking the bungee cord to free the jack and tool bag, then lay out each piece so you can confirm all connections are intact before assembling the lowering pole. Inspect every joint for dirt, damage, or play; you want secure connections that won’t fail under load. Connect the middle pole to the hooked end firmly, then thread the tire iron through the pole end so it engages the access hole above the spare. Insert the assembled poles through the tailgate cutout and turn counterclockwise to lower the tire, watching connections as it descends. Once the tire rests, remove the extension pole to avoid obstruction. Regular tool maintenance guarantees freedom from roadside vulnerability—clean, lubricate, and store components properly.
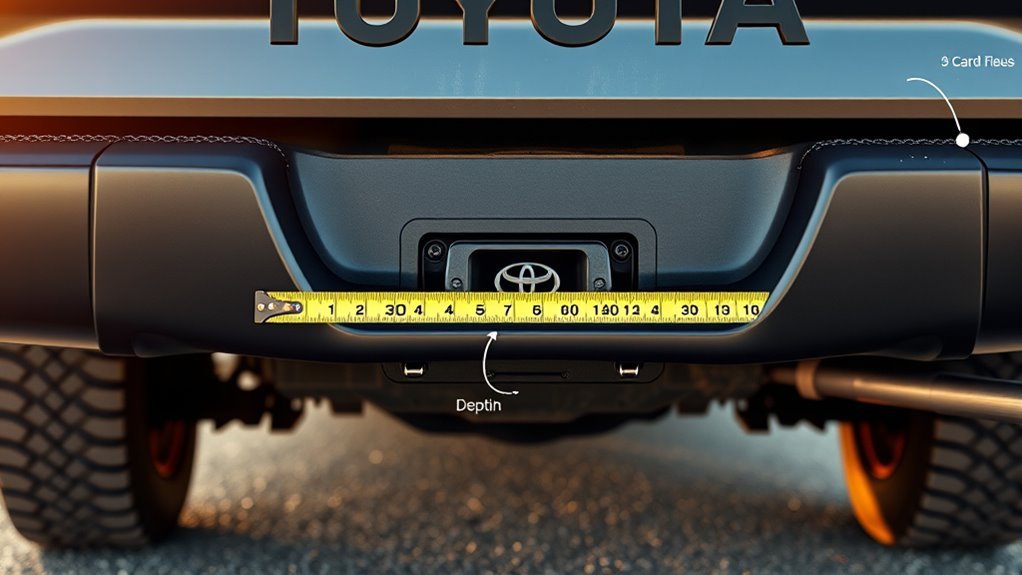
Lower the Spare Tire Safely (Access Hole & Remove Extension Pole)
Before you lower the spare, locate the access hole beneath the tailgate above the tire, assemble the lowering tool by joining the middle pole to the hook end and attaching the tire iron for leverage, then insert the assembly and turn it counterclockwise to lower the tire until it rests on the ground; make sure all connections are secure and remove the extension pole after the tire is down to avoid obstruction. You’ll act deliberately and free yourself from hesitation during tire retrieval.
- Confirm the access hole is clear and positioned above the spare.
- Connect the middle pole to the hook, tighten securely, and add the tire iron for leverage.
- Insert the assembly into the access hole and rotate counterclockwise until the spare rests on the ground.
- Detach and remove the extension pole once the spare is down to prevent obstruction and ease final retrieval.
Stay steady, keep hands clear of pinch points, and trust the tool’s connection. You’re reclaiming mobility—do it with confidence and care.
How to Chock, Jack Up, and Remove the Flat Tire
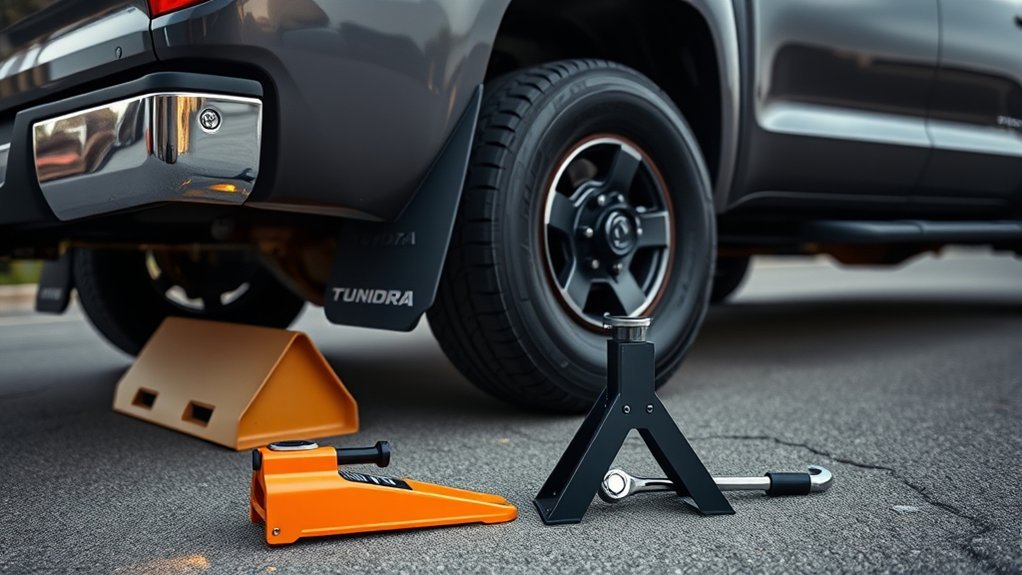
Before you jack the car, engage the parking brake and place wheel chocks in front of the opposite tire to keep the vehicle from rolling. Position the bottle jack centrally on the axle or on the manufacturer’s jacking point so the lift is stable and centered. Break the lug nuts loose while the wheel’s on the ground, then raise the car just enough to remove the flat and take off the lug nuts.
Wheel Chocking Placement
When you change a flat, chock the wheel opposite the flat and engage the parking brake on flat, level ground so the vehicle can’t roll; then position the jack and raise the car just enough for the flat to clear the ground while watching that the chocks stay firmly in place. Choose wheel chock types suited to your drive—rubber for grip, plastic for light duty, metal for heavy loads—and check chock material for wear. Place chocks tight against the tire tread, both front and back if on a slope. Monitor chocks as you lift; don’t let them shift.
- Verify level surface and parking brake.
- Select proper chock material and type.
- Seat chocks firmly against opposite tire.
- Lift slightly; watch chock stability and proceed.
Proper Jack Positioning
With the opposite wheel chocked and the parking brake set, position the bottle jack under the axle center so it sits square and stable; use the jack’s pole to extend it while standing clear of the vehicle and raise the car just until the flat tire lifts off the ground, giving you room to remove the lug nuts and take the tire off. Keep chocks firmly placed to prevent roll. Centering the jack on the axle maximizes jack stability and protects suspension. Raise slowly, watching tire alignment so the spare will mount true. Remove lug nuts and the flat, swap the spare, then lower until the wheel just touches the ground to seat the wheel. Tighten lug nuts in a star pattern, fully lower and stow tools—then reclaim the road.
Tundra Lug-Nut Order and Torque Specs (Steel vs. Aluminum)

Although it’s tempting to tighten lug nuts by feel, you should follow the correct star (crisscross) sequence and torque values for your Tundra to verify even clamping and safe wheel seating. You’ll use a lug nut sequence (star pattern) to draw the wheel evenly against the hub; skipping this risks warped rotors or loose wheels. Follow torque specs exactly: steel wheels 147–150 ft·lb, aluminum wheels 97 ft·lb, unless your owner’s manual states otherwise.
- Confirm acorn-shaped lug nuts match the wheel before installation.
- Finger-tighten all nuts in the star pattern, then use a wrench to snug in the same order.
- Use a calibrated torque wrench to final-torque each nut to the specified ft·lb value.
- Recheck torque after 50–100 miles to verify retention and safety.
You’re reclaiming control of your vehicle’s safety—adhere to sequence and torque specs for reliable, liberated driving.
Final Checks, Storing Tools, and When to Visit a Tire Shop
Before you drive away, double-check everything: confirm lug nuts are torqued to 147–150 ft·lb for steel or 97 ft·lb for aluminum, make certain the jack is secured with the bungee, and stow all tools in the bag so nothing shifts in transit. Chalk the wheels and recheck vehicle stability before lowering. Perform torque verification with a calibrated wrench after a short drive, and again at 50–100 miles.
Place the wrench, lug key, jack handle, and spare neatly in designated pockets; organized tool storage prevents damage and saves time. Inspect the spare’s pressure and tread, and check the jack and tools for wear or rust. If lug nuts won’t reach specified torque, if you feel vibration or pulling while driving, or if any tool is damaged, stop and visit a tire shop. Professional service protects you and your vehicle’s freedom — don’t gamble with uncertain torque or compromised equipment. Keep gear maintained so you’re ready to move on your own terms.
Frequently Asked Questions
How to Get the Spare Tire on a Toyota Tundra?
You lower the spare tire by assembling and inserting the pole assembly, turning to release the spare tire removal cable, then use jack operation to lift the truck as needed; grab the tire and remove it for replacement.
Conclusion
You’ve now got the steps to safely lower the spare, remove the flat, and reinstall a wheel on your Tundra. Stay deliberate: chock wheels, use the jack points, and follow the lug-nut pattern and torque specs. Treat the spare system like a lifeline—inspect and store tools after use so they’re ready next time. If anything feels wrong or studs or hub damage appear, visit a tire shop for professional repair or replacement.