
Tundra Won’t Start? Battery, Starter, Spark, Fuel, and Recall Checks
How this guide was checked: The diagnostic order was reviewed against Toyota repair-information principles, Toyota and NHTSA recall records, Toyota campaign instructions, and Toyota bulletin T-SB-0166-19 Rev1. This article does not claim hands-on testing on every Tundra model year or powertrain.
If your Tundra won’t start, first separate a no-crank problem from a crank-no-start problem. If the engine does not rotate, test the 12-volt battery, terminals, grounds, start authorization, starter-control circuit, and starter. If the engine rotates at normal speed but will not run, scan all relevant modules and prove whether spark, injector command, fuel pressure, compression, or correct mechanical timing is missing. Check the VIN early when a non-hybrid 2022–2024 truck had knocking, rough running, stalling, or a no-start. Do not replace a starter, crank sensor, ECM, or fuel pump until a failed test points to that part.
Quick Answer
No crank: test battery capacity and loaded cable voltage drop, confirm Park or Neutral and the required brake or clutch input, then verify starter command and loaded starter-circuit voltage. Cranks but will not start: read stored and pending faults, watch live engine RPM and crank/cam synchronization, then test spark, injector command, fuel pressure, compression, and mechanical timing. Check the VIN through Toyota and NHTSA because certain 2018–2020 trucks had a low-pressure fuel-pump campaign, and certain 2022–2024 non-hybrid trucks have engine-debris recalls that can involve knocking, rough running, no-start, or stalling.
Stop repeated start attempts and arrange professional diagnosis if the truck has heavy knocking, grinding, raw-fuel odor, a visible fuel leak, a hot or smoking cable, a hybrid-system warning, or an engine-recall match with abnormal mechanical noise.
|
Symptom |
Start Here |
Fast Check |
|---|---|---|
|
No crank, no click |
Battery connection, main power feed, Park/Neutral or brake input, key recognition, starter relay control |
Check battery condition, warning messages, Park and Neutral, and whether the starter relay receives a command. |
|
Rapid clicks |
Low available battery current or high resistance at a cable connection |
Charge and test the battery; inspect both terminals and voltage-drop test the cables. |
|
One heavy click |
Starter solenoid, starter motor, cable resistance, ground fault, or mechanical binding |
Measure voltage at the starter under load and confirm the engine can rotate before condemning the starter. |
|
Cranks normally but will not run |
ECM data, crank/cam synchronization, spark, injector pulse, fuel pressure, compression, and timing |
Watch live RPM while cranking, then prove which essential input or output is missing. |
|
Long crank or hard start |
Fuel-pressure retention, injector leakage, sensor data, intake leaks, or applicable Toyota bulletin |
Check stored and pending codes before clearing data; compare fuel pressure and sensor readings with exact service information. |
|
Knocking, rough running, then no-start on a 2022–2024 non-hybrid truck |
Stop repeated start attempts and check the VIN for current engine recalls |
Contact a Toyota dealer if the VIN is involved or the engine shows abnormal mechanical noise. |
Diagnostic Rules That Prevent Wrong-Part Replacement
- Separate no-crank, slow-crank, long-crank, and crank-no-start symptoms before testing parts.
- Open-circuit battery voltage shows charge level, not full battery health; use a proper conductance or load test.
- Use live scan data even when no trouble codes appear, and check stored, pending, and module-specific faults before clearing anything.
- Zero live engine RPM while cranking is more useful than dashboard tachometer movement when checking the crank signal.
- Prove spark, injector operation, fuel pressure, and mechanical condition before blaming the fuel pump or crank sensor.
- Do not treat silence at key-on as proof of a failed pump; pump control strategy and active-test support vary by model year.
- Check the VIN for both the older fuel-pump campaign and newer engine-related recalls before authorizing major repairs.
What’s in This Article
- Before You Begin
- Step-by-Step No-Start Diagnostic Order
- Tundra Won’t Start? Quick Battery, Starter, and Ground Checklist
- What No Codes Mean: Confirm ECM Communication and Live Data
- Can a Crankshaft Position Sensor Cause a Tundra No-Start?
- Can You Diagnose the Fuel Pump by Sound?
- How to Separate Fuel, Spark, and Mechanical Faults
- Test Fuel Pump Fuses and Relay Step by Step
- Diagnose the Pump Module, Harness, Power, and Ground at the Tank
- When Is Fuel-Pump Replacement Justified?
- Post-Repair First Start and Leak Checks
- Quick Troubleshooting Flowchart
- Which Tundra No-Start Recalls Should You Check?
- Frequently Asked Questions
[Products Worth Considering]

The TOPDON BT100 helps you quickly check the health and charge status of 12V lead-acid batteries with clear analytical results, including state of health, state of charge, voltage, and cranking performance. It supports a wide range of battery types and vehicles, making it a practical tool for diagnosing starting and charging issues at home or in the shop. Compact and easy to use, it provides fast, reliable testing without needing to charge the device first.

The ANCEL BA101 helps diagnose 12V batteries quickly with clear readings for battery health, charge level, voltage, CCA, cranking, and charging system performance. Designed for a wide range of vehicles and battery types, it offers easy-to-read results, reliable clamp connections, and built-in protection to make testing safer and more convenient.

The FOXWELL NT301 is a plug-and-play OBD2 code reader designed to help drivers and home mechanics diagnose check engine light issues with ease. It reads fault codes, clears emissions-related warnings, displays live sensor data in graph form, and shows I/M readiness so you can quickly check vehicle status before an emissions test. With broad compatibility across many OBD2 vehicles and a clear color screen, it offers a practical, user-friendly way to monitor and troubleshoot engine performance.
Before You Begin
Use the diagnostic path that matches your exact model year, engine, and powertrain. Conventional starter-circuit tests may not apply in the same way to an i-FORCE MAX hybrid. Do not probe, disconnect, or service orange high-voltage cables or hybrid components without the required training and equipment.
Work on a cool truck in a well-ventilated area. Keep sparks, cigarettes, hot tools, and open flames away from the battery and fuel system. Stop if you smell raw fuel, see a leak, find a hot cable, hear grinding or heavy mechanical knocking, or see a hybrid-system warning.
- Digital multimeter and a battery conductance or load tester
- Known-good scan tool that can read all relevant modules and display live data
- Basic socket set, insulated hand tools where required, gloves, and eye protection
- Fuel-pressure equipment and adapters approved for the exact fuel system
- Toyota repair information and wiring diagrams for the exact VIN, model year, engine, and powertrain
Warning: Fuel can be released under pressure. Follow the exact depressurization procedure, support the truck only at approved lift points with rated equipment, and stop immediately if you smell fuel or see a leak.
Step-by-Step No-Start Diagnostic Order
- Classify the symptom. Decide whether you have no crank, slow crank, normal-speed crank with no start, long crank, or start-and-stall.
- Confirm model and powertrain. Identify the model year, engine, conventional gasoline or i-FORCE MAX hybrid system, and any warning messages.
- Check recall status by VIN. Do this early when the truck has rough running, knocking, stalling, or a no-start that may match a Toyota safety campaign.
- Test the 12-volt battery and connections. Measure resting voltage, perform a proper battery test, and voltage-drop test the positive and ground paths under load.
- Verify start authorization. Confirm Park or Neutral, brake or clutch input where applicable, key recognition, immobilizer status, and starter-relay command.
- Test the starter circuit. Check control voltage, loaded voltage at the starter, cable drop, current draw when service data supports the test, and possible mechanical binding.
- Scan before clearing anything. Read stored, pending, permanent, and module-specific faults; then review live engine speed and synchronization while cranking.
- Prove the missing essential. Test spark, injector pulse or command, fuel pressure or volume, compression, and mechanical timing in a safe order.
- Test the fuel-pump circuit only when evidence points there. Use the exact active test or cranking condition specified for the model, then verify power and ground under load.
|
System |
Evidence That Supports a Fault |
What Does Not Prove Failure |
|---|---|---|
|
Battery or cables |
Battery test fails, voltage collapses under load, or excessive positive- or ground-side voltage drop is measured. |
Headlights turn on or the battery shows an acceptable unloaded voltage. |
|
Starter |
Correct command, loaded power, and ground reach the starter, the engine is free to rotate, and the starter still fails its specified test. |
A click by itself. |
|
Crank sensor circuit |
Live RPM or the specified waveform is missing or erratic while the engine physically cranks, and the circuit fails Toyota’s test. |
No dashboard tachometer movement or no stored code. |
|
Fuel pump |
Correct loaded power and ground are present when commanded, but pump output is missing or below the specified pressure or volume. |
No audible hum at key-on. |
|
Mechanical engine fault |
Abnormal relative compression, failed compression or leak-down results, incorrect crank/cam relationship, binding, or abnormal internal noise. |
Fuel and spark are present. |
[Products Worth Considering]

The Autel MaxiCOM MK900BT is a professional bidirectional diagnostic scan tool built for modern vehicles with advanced system coverage and fast, accurate troubleshooting. It supports 3000+ active tests, 40+ service functions, all-system diagnostics, Auto VIN, pre/post scan reports, and newer vehicle protocols for broad compatibility. Designed for technicians and serious DIY users, it delivers efficient maintenance, smarter diagnostics, and expanded service capabilities across a wide range of makes and models.

This automotive test light combines a bright LED voltage display with quick polarity indication for fast, accurate circuit checks in a wide range of vehicle systems. It helps diagnose battery, charging, lighting, and fuse issues with a sharp stainless probe, long spring wire, and easy-to-use alligator clip for efficient troubleshooting.

The TOPDON VeriDiag X800 BT is a wireless bidirectional automotive diagnostic scanner designed for full-system troubleshooting, active testing, and advanced service resets. It supports broad vehicle coverage, live data viewing, AutoVIN identification, and lifetime free updates to help DIYers and professionals diagnose issues faster and with greater confidence.
Tundra Won’t Start? Quick Battery, Starter, and Ground Checklist
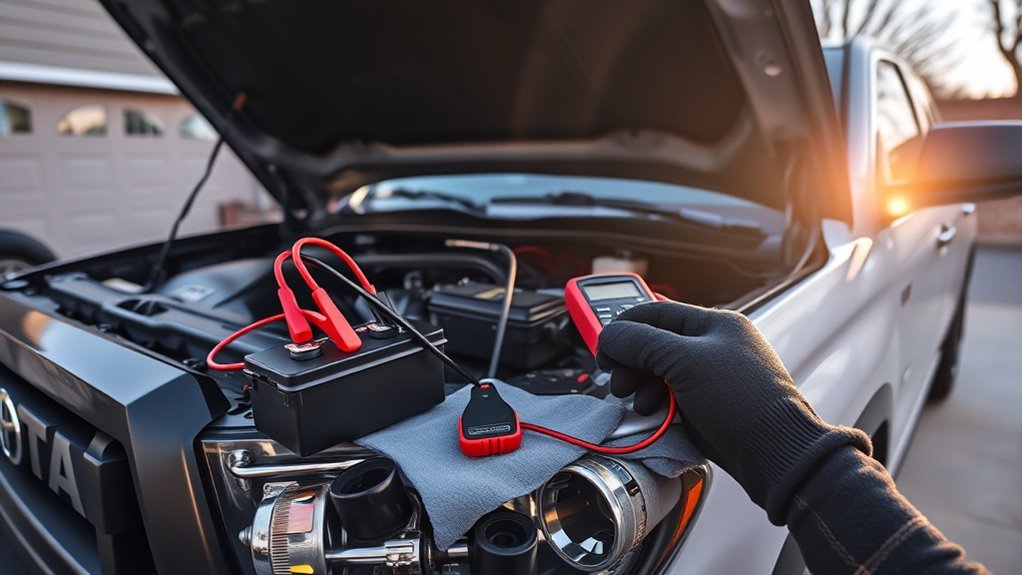
If your Tundra does not crank, begin with the 12-volt system. Check battery condition, inspect the terminals for corrosion or looseness, and confirm the negative cable has a sound connection to the body and engine.
A fully charged conventional 12-volt lead-acid battery commonly rests near 12.6 volts, although battery type, temperature, surface charge, and test conditions can change the reading. A lower reading suggests the battery may be partly discharged, but open-circuit voltage does not prove it can supply cranking current. Charge it as needed, then use the battery test specified for the installed battery before approving or rejecting it.
Clean and tighten the terminals, then measure voltage drop while the circuit is loaded. A connection can look clean and still develop enough resistance to stop the starter. For preventive care, see the Tundra battery maintenance guide.
Listen to the pattern. Rapid clicks commonly fit low available current or a high-resistance connection. One heavy click can involve the solenoid, starter motor, cables, ground path, or a mechanically bound engine. No sound can involve start authorization, relay control, wiring, or the starter circuit.
Do not condemn the starter from a click alone. Confirm the truck recognizes Park or Neutral, verify the starter command, measure loaded voltage at the starter, and check both positive- and ground-side voltage drop. If the circuit tests pass but the engine still will not rotate, stop repeated attempts and check for mechanical binding. A separate Tundra slow-crank guide covers rotation-speed faults in more detail. If the display reports that the key is not detected, use the Tundra dead-key-fob guide and the owner’s manual for the exact model year.
What No Codes Mean: Confirm ECM Communication and Live Data
After the basic 12-volt and starter checks, confirm that the engine control module (ECM/PCM, often called the ECU) powers up and communicates. The check-engine lamp at key-on is only a clue. A successful scan connection to the correct modules, stable battery voltage, and believable live data provide stronger evidence.
Do not stop at “zero codes.” Check stored, pending, permanent, history, and module-specific faults before disconnecting the battery or clearing data. Review immobilizer or start-authorization status when the scan tool exposes it. A network, power, ground, or input fault can prevent starting without leaving the simple generic code a basic reader expects.
Watch live engine RPM while cranking. Zero RPM can point to a missing crank signal, wiring fault, sensor power or ground problem, or an ECM input issue. Dashboard tachometer movement by itself is not a reliable pass/fail test.
- Verify ECM power and grounds under the conditions specified in the wiring diagram.
- Use a known-good scan tool and confirm live RPM, crank/cam synchronization when available, and plausible temperature and throttle readings.
- Inspect connectors for loose pins, corrosion, oil intrusion, chafing, or prior repairs before replacing a module or sensor.
- Record codes and freeze-frame data before clearing anything; the Tundra OBD2 code guide explains the basic code types.
No codes do not prove the crank sensor, fuel system, ignition system, immobilizer, or mechanical engine is healthy. They only mean the modules did not store a fault that your tool retrieved. Record the tool used and the modules it could access, because a generic reader may not report body, immobilizer, network, or manufacturer-specific faults.
Can a Crankshaft Position Sensor Cause a Tundra No-Start?
Yes. A missing crankshaft position sensor (CKP) signal can prevent the ECM from controlling ignition and injection correctly. However, a Tundra that cranks but will not start should not be diagnosed from the CKP sensor alone. First confirm whether live engine RPM is present and whether spark, injector command, fuel pressure, and compression are missing or available.
A CKP-related fault may be intermittent and may not set a code immediately. The stronger clue is zero or erratic live engine speed while the engine is physically cranking, especially when the sensor circuit also fails the Toyota repair-manual test.
Crank Sensor Symptoms
- Engine cranks but does not start and live engine RPM remains at zero.
- Intermittent stalling or a start-and-die condition with a related crank/cam correlation or sensor code.
- Sensor power, ground, wiring integrity, or waveform does not meet the specification for the exact engine.
A dead dashboard tachometer alone is not enough to identify the CKP sensor. Use scan data and the correct circuit test.
Testing and Replacement
Start with a visual inspection. Check the connector for corrosion, damaged or spread pins, loose retention, oil contamination, heat damage, and rubbed wiring.
Follow Toyota’s test method for the exact model year and engine. Sensor design and acceptable readings can differ, so do not apply a universal resistance value. A scope or scan-data test may be more useful than a static resistance check on some systems.
Replace the sensor only after the circuit and signal fail the applicable test. After repair, clear codes only after recording them, then verify live engine speed and starting operation.
Can You Diagnose the Fuel Pump by Sound?
A brief hum from the tank can show that the pump ran, but silence at key-on does not prove the pump failed. Fuel-pump command strategy and scan-tool active-test support vary by Tundra model year and engine. Test the pump under the exact key-on, cranking, or active-test condition listed in Toyota service information.
If the engine cranks but will not start, confirm fuel level and scan data first. Then test pump command, fuse and relay operation where applicable, and voltage and ground at the correct connector under load. Do not replace the pump because you could not hear it from the driver’s seat.
Listen During the Specified Test Condition
- Use the owner’s or repair manual to identify whether the pump should run at key-on, during cranking, or only during a commanded active test.
- Check the correct fuel-pump fuse, relay, control module, and circuit for the exact wiring configuration.
- Inspect connectors for corrosion, damage, loose terminals, or overheated plastic.
- Test power and ground under load when the pump is commanded, not only with the connector unplugged.
These checks separate a failed pump from a control, wiring, or ground problem.
Activate With a Compatible Scan Tool
When Toyota service information provides an active test, use a compatible scan tool to command the fuel pump. Confirm that the command changes, then check the relay or control output and measure voltage at the pump circuit while it is loaded.
Not every generic scan tool supports Toyota bidirectional tests. If the active test is unavailable, follow the exact cranking or circuit test in the repair manual rather than bypassing control modules or applying power to an unidentified terminal.
If correct voltage and ground reach the pump under command but the pump does not run or produce the specified pressure or volume, the pump module becomes a stronger suspect. If voltage collapses under load, repair the power or ground path first.
How to Separate Fuel, Spark, and Mechanical Faults
Start by confirming the truck has the correct fuel and a believable fuel-level reading. Inspect visible lines and connectors for leaks, impact damage, kinks, or loose fittings. Do not open a pressurized line simply to “see whether fuel comes out.”
A crank-no-start diagnosis is complete only after you identify which essential is missing: usable battery voltage, engine-speed and timing data, spark, injector operation, fuel pressure or volume, compression, or correct mechanical timing.
- Fuel: Measure pressure or volume with the approved adapter and compare the result with service data for the exact engine.
- Spark: Use an approved spark test method and confirm the ECM is receiving the inputs needed to command ignition.
- Injection: Check injector command or pulse with suitable equipment; do not assume pump operation means the injectors are delivering fuel.
- Mechanical condition: If fuel and ignition are present, test compression, relative compression, and crank/cam synchronization as appropriate.
If the truck has an extended crank rather than a complete no-start, check pressure retention, injector leakage, sensor plausibility, and intake leaks. Toyota bulletin T-SB-0166-19 Rev1 applies to specified 2009–2019 Tundras with the 3UR-FBE flex-fuel engine when a hard-start condition and/or listed codes are present and Toyota’s fuel-trim or alcohol-density criteria are met. It is not a blanket diagnosis for every 2009–2019 Tundra.
Test Fuel Pump Fuses and Relay Step by Step
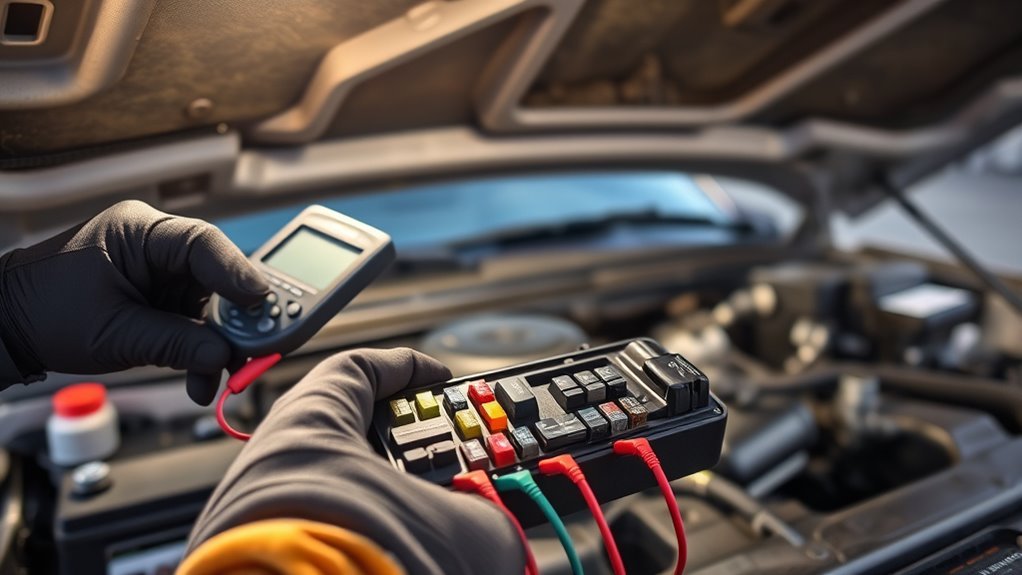
After fuel level and scan data point toward a delivery problem, test the fuel-pump fuse, relay, and control circuit before accessing the tank.
Identify the correct fuse from the lid diagram and the exact wiring information. Test it with the circuit commanded, because continuity on a removed fuse does not prove that power reaches both sides under operating conditions.
When the circuit calls for pump power, check for the expected voltage on both sides of the fuse. If the feed side is dead, trace the upstream power supply. If the output side drops under load, inspect the fuse contacts and downstream circuit.
Confirm the relay terminal layout before testing or swapping it. Relays that look alike may have different internal arrangements or control functions.
Measure the relay or control-module output while the pump is commanded. If command is present but output is absent, diagnose the relay or controller. If output leaves the relay but does not reach the pump, trace the harness and connectors.
[Products Worth Considering]

This automotive circuit tester checks low-voltage DC systems from 3-65V, making it useful for diagnosing headlights, taillights, fuses, sockets, and other vehicle wiring issues. The digital backlit display provides clear voltage readings with fine accuracy, while the bidirectional polarity indicator helps you test from either ground or positive. Built with a durable probe, insulated tip, and extra-long spring wire, it is designed for dependable everyday use in automotive and household electrical work.

This portable jumper cable adapter is designed for seamless compatibility with Milwaukee M18 batteries, helping you jump-start a dead or weak vehicle battery quickly and conveniently. Built with 8 AWG cables and simple clamp connections, it supports a range of vehicles including cars, SUVs, and trucks. It offers a practical, tool-battery-powered solution for emergency starting, with clear usage steps and safety guidance for dependable operation.

The S ZEVZO ET03 is a powerful 12V jump starter designed to revive gas and diesel vehicles quickly, including cars, trucks, motorcycles, lawnmowers, and boats. It also doubles as a portable power bank with USB charging ports, a bright LED flashlight, and an LCD display for added convenience during roadside emergencies. Built with multiple safety protections and included carrying case, it offers dependable backup power whenever you need it.
Diagnose the Pump Module, Harness, Power, and Ground at the Tank
The tank-side connector can separate a failed pump from a wiring problem, but access and circuit identification vary by model year. Support the truck safely and use the exact connector view and terminal numbers from Toyota service information.
- Inspect the harness for chafing, crushed sections, water intrusion, overheated terminals, and poor prior repairs.
- Back-probe approved test points and measure power and ground under load while the pump is commanded.
- Use a voltage-drop test rather than relying only on unloaded voltage.
- If pressure or volume is low despite correct electrical supply, inspect the module, pickup, filter arrangement, pressure control, and tank contamination as the repair manual directs.
If the pump has correct loaded power and ground but will not run or meet the required output, replacement may be justified. If supply voltage or ground integrity fails, repair that circuit first.
When Is Fuel-Pump Replacement Justified?
Fuel-pump replacement is justified only after the truck’s exact test procedure shows that pump output is missing or below specification while the module receives the correct command, power, and ground. A recall match is a separate path: an authorized Toyota dealer should perform the campaign remedy according to the recall instructions.
Toyota’s 20TA02 technical instructions list 2018 and 2019 Tundras with the 1UR-FE 4.6-liter and 3UR-FE 5.7-liter engines in the model-specific pump procedure. The broader low-pressure fuel-pump campaign included certain 2018–2020 Tundras, so VIN eligibility—not the model year alone—controls coverage.
Do not use a generic tank-drop sequence across all Tundras. Tank, fuel-tube, module, gasket, line, and connector procedures vary by model year, engine, bed or tank configuration, and campaign. Follow the Toyota Repair Manual or recall instructions from start to finish.
After any fuel-system repair, reconnect every hose and connector exactly, confirm routing and retention, check for diagnostic trouble codes, and inspect for leaks before returning the truck to service.
Note: The 20TA02 recall instructions direct technicians to use the applicable Repair Manual and to complete post-repair checks. Recall work should be verified by VIN and completed by an authorized dealer.
Post-Repair First Start and Leak Checks
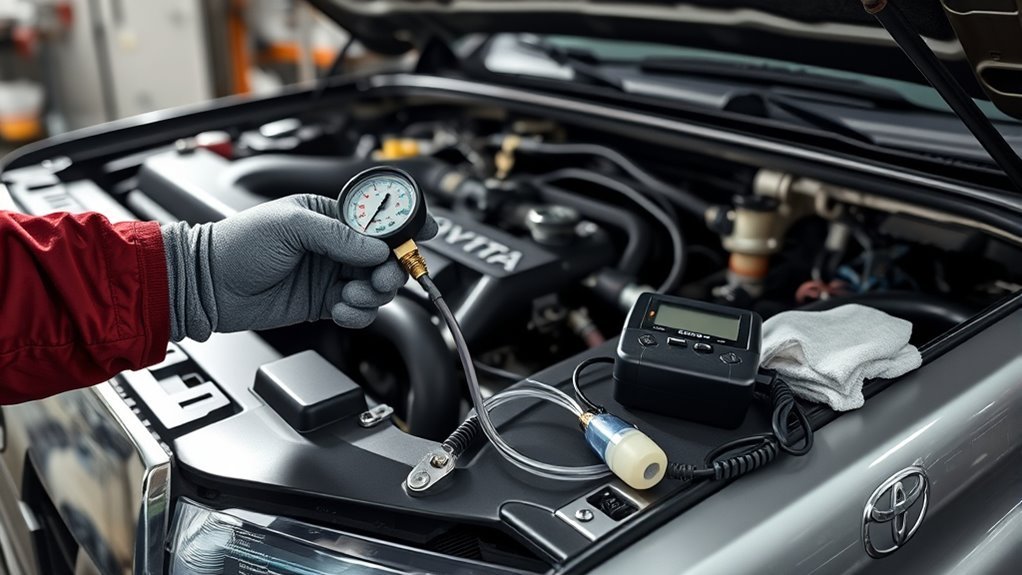
After pump, line, injector, or fuel-rail work, follow the exact Toyota procedure for priming and first start. Do not assume that repeated key cycling is the approved method for every Tundra, because pump-control strategy varies.
Before cranking, verify that all connectors, lines, seals, retainers, and shields are installed. Keep a fire extinguisher rated for flammable liquids available, maintain ventilation, and watch the repair area for seepage.
Use only the crank duration and starter-cooling interval allowed by the repair information. Stop if battery voltage falls, the starter or cable overheats, the engine makes abnormal mechanical noise, or fuel odor appears.
Prime the Fuel System as Toyota Specifies
- Use the repair-manual or recall procedure for the exact model and engine.
- Command the pump with the specified scan-tool function when the procedure requires it.
- Watch fuel pressure with approved equipment when a pressure check is part of the procedure.
- Inspect every opened joint for leakage before and after the engine starts.
If pressure does not build, stop and recheck command, electrical supply, connector seating, line routing, seals, and the installed part.
What to Do if It Still Cranks Too Long
Do not continue repeated long crank attempts. Recheck battery state, fuel pressure or retention, pump command, injector operation, connector seating, and scan data. A new pump does not correct a wiring fault, incorrect installation, blocked line, leaking injector, missing crank signal, or mechanical engine problem.
If fuel pressure falls quickly, use the exact diagnostic tree to separate an external leak, internal leakage, pressure-control fault, injector leak, or pump-module problem. If the engine starts rough, monitor codes, misfire data, fuel trims, pressure, and leaks rather than assuming trapped air is the only cause.
Quick Troubleshooting Flowchart: Causes, Tests, and Next Actions
- No crank, no click: Test battery and connections; verify Park/Neutral or brake input, key recognition, start authorization, relay command, and starter control.
- Rapid clicks: Charge and test the battery; inspect terminals; measure cable and ground voltage drop under load.
- One heavy click: Check loaded voltage, cable drop, starter operation, and possible engine binding.
- Cranks normally but will not start: Scan all relevant modules; check live RPM and synchronization; prove spark, injector operation, fuel pressure, compression, and timing.
- Pump seems silent: Confirm when the pump should be commanded; then test fuse, relay or controller, command, loaded power, ground, and pump output.
- Pump runs but pressure is low: Verify fuel level and test setup; inspect pressure control, pickup or filter arrangement, leaks, restrictions, and pump output.
- Knocking or rough running before no-start: Stop repeated attempts, check the VIN, and contact Toyota when symptoms may match an engine recall.
Write down every result, including voltage, scan data, pressure, and the exact test condition. A repair decision should follow a failed test, not a symptom guess.
Which Tundra No-Start Recalls Should You Check?
Check your 17-character VIN through Toyota’s recall lookup and the NHTSA recall lookup. Model year alone does not prove that a truck is included. Recall scope, repair phase, and remedy availability can change, so use the VIN result and dealer confirmation for the current decision.
|
Campaign |
Tundra Scope |
No-Start Relevance |
|---|---|---|
|
Toyota 20TA02; NHTSA 20V-012 and expansion 20V-682 |
Certain 2018–2020 Tundras; VIN eligibility required |
The low-pressure fuel pump may stop, causing rough running, stalling, or an inability to restart. The dealer remedy replaces the affected pump at no charge. |
|
NHTSA 24V-381 |
Certain 2022–2023 non-hybrid Tundras with a specified V35A engine configuration; VIN eligibility required |
Machining debris may contribute to main-bearing failure, with possible knocking, rough running, no-start, or stalling. Toyota later reported that owners in this campaign had been notified of the remedy. |
|
NHTSA 25V-767 |
Certain 2022–2024 non-hybrid Tundras with specified V35A engines; VIN eligibility required |
A similar engine-debris condition may cause knocking, rough running, no-start, or loss of motive power. Check the VIN and dealer for the current repair phase. |
|
NHTSA 26V-320 |
Certain 2024 non-hybrid Tundras with a specified V35A configuration; VIN eligibility required |
Toyota reported the same type of potential engine symptoms, including no-start. The campaign expands the earlier engine-debris recalls; owners should verify the current remedy phase by VIN and with a dealer. |
The older fuel-pump campaign and the newer engine campaigns are different faults. A truck can have no open recall and still need diagnosis, while a VIN match can redirect the repair to a dealer remedy. Use Toyota or NHTSA for the final VIN decision and current remedy status.
If a 2022–2024 non-hybrid Tundra shows knocking, rough running, repeated stalling, or a no-start after abnormal engine noise, stop repeated starting attempts and contact a Toyota dealer. If the VIN is not involved, continue with evidence-based electrical, fuel, ignition, and mechanical testing.
Frequently Asked Questions
What Would Cause a Toyota Tundra Not to Start?
A Tundra may not start because of a weak or discharged 12-volt battery, loose or high-resistance connections, start-authorization or Park/Neutral input faults, starter failure, missing crank or cam signal, ignition or injector faults, low fuel pressure, lost compression, incorrect mechanical timing, an immobilizer issue, or an applicable recall condition. Identify no-crank versus crank-no-start first.
Why Does My Tundra Crank but Not Start?
The starter can rotate the engine even when the engine lacks spark, injector operation, fuel pressure, compression, correct timing, or usable crank/cam data. Scan all relevant modules, watch live RPM while cranking, then prove which essential is missing.
Can a Bad Crankshaft Position Sensor Cause No Codes?
Yes. A sensor or wiring fault may cause a no-start before a code stores. Zero live engine RPM while the engine is physically cranking is a stronger clue than dashboard tachometer movement, but the circuit must still be tested before replacing the sensor.
Should I Replace the Fuel Pump if I Cannot Hear It?
No. Pump-command strategy varies, so silence at key-on is not a universal failure test. Confirm when the pump should run, then test the fuse, relay or controller, command, loaded power, ground, and actual pressure or volume.
How Do I Know if My Tundra Fuel-Pump Recall Is Open?
Enter the 17-character VIN on Toyota’s recall lookup and NHTSA’s recall page. Certain 2018–2020 Tundras were included in the 20TA02 low-pressure fuel-pump campaign, but only the VIN lookup confirms whether a specific truck has an open repair.
Why Does My Tundra Click but Not Start?
Rapid clicking usually sends you first to the battery and high-resistance cable connections. One heavy click can involve the solenoid, starter, cables, ground path, or a mechanically bound engine. Test battery capacity and loaded voltage drop before replacing the starter.
Why Does My Tundra Have Lights but Not Crank?
Lights require far less current than a starter, so they do not prove the battery or cables are healthy. Also check Park or Neutral recognition, brake-pedal input on push-button models, key or immobilizer status, starter-relay command, and starter-circuit voltage.
Can a 2022–2024 Tundra No-Start Be Recall-Related?
Yes, for certain non-hybrid trucks. NHTSA recalls 24V-381, 25V-767, and 26V-320 cover specified Tundras with an engine machining-debris condition that may lead to knocking, rough running, no-start, or stalling. Check the VIN because not every truck in those model years is included.
Why Does My Tundra Start in Neutral but Not Park?
If the truck starts in Neutral but not Park, the shift-position input, adjustment, switch, wiring, or start-authorization logic may not be recognizing Park correctly. Do not assume the starter is bad. Confirm the displayed gear position and test the Park/Neutral input with the wiring diagram and scan data for the exact model.
Can a Bad Alternator Cause a Tundra Not to Start?
A failed charging system can leave the 12-volt battery too discharged to crank the engine, but the alternator is not proved bad just because the truck will not start. Charge and test the battery first. After the engine runs, test charging-system voltage and current using the procedure for the exact model.
Can I Jump-Start a Toyota Tundra?
Follow the jump-start procedure in the owner’s manual for the exact model year and powertrain. Connection points and precautions can differ, especially on i-FORCE MAX hybrid trucks. Do not jump a frozen, leaking, swollen, or visibly damaged battery, and stop if cables overheat or spark excessively.
Safety Disclaimer: This article provides general information only and does not replace Toyota repair information or professional vehicle diagnosis. Use the procedure for the exact VIN and powertrain. Work with a qualified technician if you lack the correct tools, safe lift equipment, fuel-system training, hybrid-system training, or service data.
Conclusion
A Tundra no-start becomes easier to diagnose when you classify the symptom before touching parts. For no crank, test the battery, cables, grounds, start authorization, and starter circuit. For crank-no-start, use scan data and prove spark, injector operation, fuel pressure, compression, and timing.
Do not use pump noise, dashboard tach movement, or a lack of codes as a stand-alone diagnosis. Test the circuit under the correct conditions and compare every result with Toyota information for the exact model year and powertrain.
Record each test result and check the VIN before approving a major repair. Stop and contact a dealer or qualified shop when the truck has abnormal mechanical noise, a recall match, fuel leakage, overheated wiring, grinding, or hybrid-system warnings.
References
- Safety Recall and Service Campaign Lookup, Toyota Owners, accessed July 31, 2026
- Vehicle Recall Lookup, National Highway Traffic Safety Administration, accessed July 31, 2026
- Toyota Recalls Certain 2024 Toyota Tundra Vehicles, Toyota USA Newsroom, May 20, 2026
- Toyota Recalls Certain Toyota Tundra and Lexus GX and LX Vehicles, Toyota USA Newsroom, November 6, 2025
- Part 573 Safety Recall Report 24V-381, Toyota via NHTSA, 2024
- Part 573 Safety Recall Report 25V-767, Toyota via NHTSA, 2025
- Part 573 Safety Recall Report 26V-320, Toyota via NHTSA, 2026
- Safety Recall 20TA02 Dealer Notice, Toyota Motor Sales USA via NHTSA, 2020
- Safety Recall 20TA02 Technical Instructions, Toyota Motor Sales USA via NHTSA, 2020
- T-SB-0166-19 Rev1: Extended Crank and/or MIL ON, Flex-Fuel, Toyota Motor Sales USA via NHTSA, 2020
- Key Indicators of a Healthy Battery Test, Midtronics, 2025

[…] the starter does not rotate the engine at all, use this separate Tundra no-start troubleshooting checklist. This page is focused on slow rotation and normal-speed long cranking, not a complete no-crank […]
[…] On a 2007 Toyota Tundra 5.7L, the starter sits on the passenger side of the 3UR-FE V8 behind the right exhaust manifold and a three-bolt starter cover. The factory-style repair is an advanced access job: confirm a no-crank fault first, isolate the battery, remove the required intake, accessory, and exhaust components, then remove the cover and two-bolt starter. Plan a full day for a first-time DIY repair, and stop if exhaust hardware begins to seize or break. For broader electrical diagnosis, use this Tundra no-start checklist. […]
[…] next test before replacing parts. If the truck will not crank or start at all, use the dedicated Tundra no-start troubleshooting checklist so battery maintenance does not turn into […]