If your RAV4 is losing coolant, start by checking the reservoir, radiator, hoses, water pump and cap for visible leaks, wet spots or pressure build-up; use a pressure tester, UV dye and a block-tester to find hidden seepage or combustion gases. Watch for white smoke, milky oil or overheating that suggest a head gasket issue. You can do temporary sealant or hose clamping, but plan for proper repairs and diagnostics — keep going to get detailed steps and costs.
Quick Checks: Is Your RAV4 Losing Coolant?
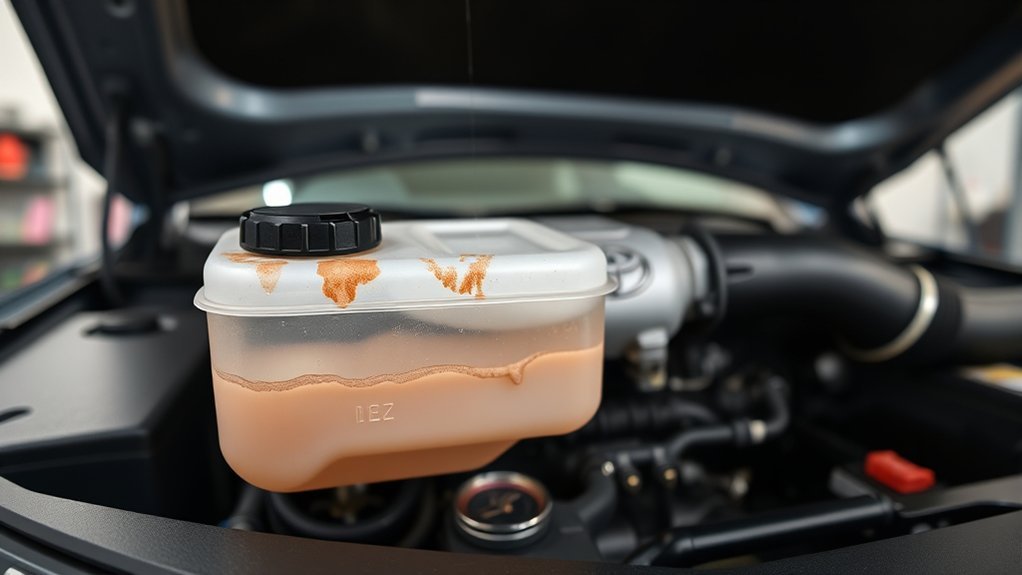
Wondering if your RAV4 is losing coolant? Start by checking reservoir levels regularly; a steady drop signals you to act. You’ll perform basic coolant maintenance: with the engine cool, note the min/max marks and record changes over days. Inspect the reservoir for overflow stains or persistent air bubbles—these point to a faulty radiator cap or head gasket concern. Look under the parked vehicle for wet patches, focusing near the radiator and hose routes to aid leak identification without dismantling systems. If you open the coolant bottle after cooling and encounter excessive pressure, don’t ignore it; that’s a diagnostic clue for combustion gases entering the coolant. Use a cooling-system pressure tester to pressurize the system and reveal hidden leaks or trapped air pockets methodically. You’ll document findings, then decide whether you can address hose clamps and caps yourself or need professional intervention to reclaim control of your vehicle’s thermal integrity.
RAV4 Coolant Loss: Common Leak Sources
Now that you’ve learned the basic checks—reservoir level monitoring, pressure testing, and visual inspections—you’ll want to focus on where leaks most often originate on a RAV4. Be systematic: prioritize components that commonly fail and sap your freedom on the road. The water pump can develop weeps or shaft-seal leaks, especially on older 2008-era units. Radiator cracks or joint failures often dump coolant under the vehicle with little under‑hood evidence. Upper and lower hose leaks may be slits or pinholes that appear only under pressure. The head gasket, particularly on the 2AD-FHV engine, can fail internally and obscure symptoms. Finally, a faulty coolant cap will prevent the system from holding pressure and will vent to overflow.
- Water pump: external seepage, bearing wear
- Radiator cracks: seams and core failures
- Hose leaks: aging, clamps, pinholes
- Head gasket & coolant cap: internal breaches and pressure loss
Inspect methodically, document findings, replace failing parts to reclaim control.
Find Hidden Leaks: Pressure, Dye & Block‑Tester Methods
Start by pressurizing the cooling system with a radiator tester to hold it at operating pressure and watch for drops that point to hose, radiator, or gasket leaks. If pressure testing is inconclusive, add a UV-reactive dye to the coolant, run the engine, then scan joints and components with a UV lamp to reveal hidden seepage. Use a block tester to sample coolant for combustion gases—any color change indicates possible head gasket or cylinder-leak issues.
Pressure Testing Procedure
While you pressurize the cooling system, you’ll use three complementary techniques—pressure testing, fluorescent dye inspection, and block testing—to pinpoint hidden leaks and distinguish coolant loss from combustion contamination. Attach a radiator pressure tester and a calibrated pressure gauge, then pump to the system standard (about 15 psi). Watch the gauge: any steady drop signals a leak. Inspect radiator integrity, hoses, clamps, and fittings methodically; small pinholes matter.
- Monitor the pressure gauge for at least 10–15 minutes to detect slow leaks.
- Visually scan seams and hose junctions while under pressure.
- Note any coolant seepage or wet trails indicating loss points.
- If pressure holds, proceed to combustion checks to rule out head gasket failure.
You’ll act with precision to reclaim control of your vehicle.
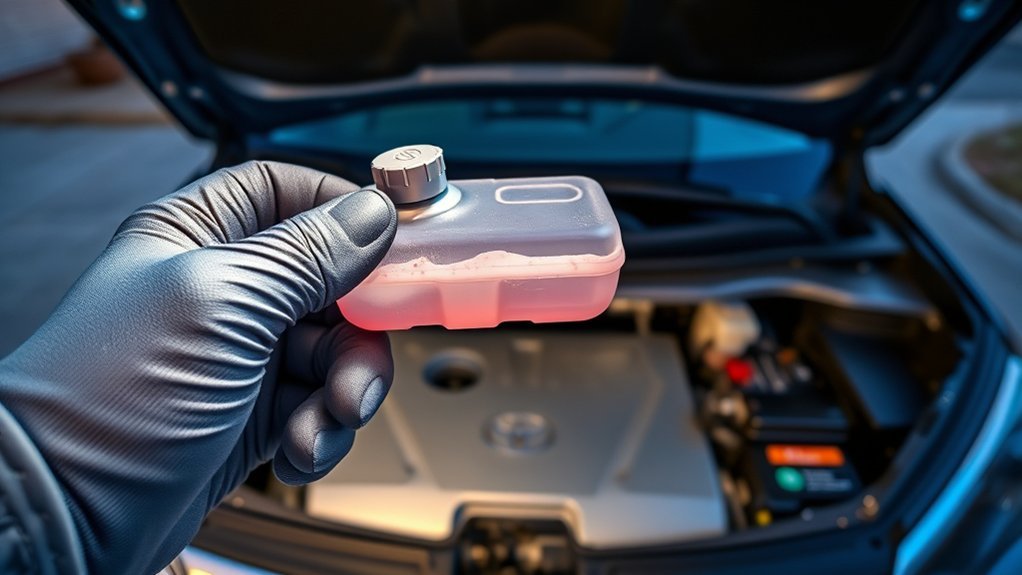
UV Dye And Block‑Tester
Because small leaks and combustion contamination can masquerade as intermittent coolant loss, you’ll combine UV dye inspection with a block-tester to pinpoint the source quickly and accurately. Add a manufacturer‑approved UV dye to the coolant, run the engine to operating temperature, then scan joints, hoses, radiator, and heater core with a UV lamp; fluorescence reveals escape points otherwise invisible. Follow with a block tester to sample coolant for combustion gases—presence of hydrocarbons implicates head gasket or cracked block. Use a radiator pressure tester during or after these steps to raise system pressure and provoke marginal leaks. This triangulated method gives you definitive evidence, lets you reject assumptions, and frees you to choose targeted repairs rather than disruptive, unnecessary disassembly.
Is It the Head Gasket? Signs & Quick Tests
How can you tell if a RAV4’s coolant loss stems from a blown head gasket? You’ll watch for clear head gasket symptoms: persistent overheating, white exhaust smoke, oil that looks milky, or coolant disappearing without external leaks. Be methodical and act to reclaim control.
Do these quick tests to confirm:
- Use compression testing across cylinders to spot a weak or leaking cylinder that signals gasket breach.
- Perform a chemical block tester to detect combustion gases in the coolant; it’s definitive and fast.
- Observe the coolant reservoir for air bubbling while the engine runs; bubbling implies combustion gases entering the cooling system.
- Pressure test the cooling system to reveal internal leaks when you don’t find external ones.
Monitor coolant level and inspect oil routinely; early detection keeps repair options open. If tests indicate a failure, plan for professional repair—head gasket replacement isn’t a temporary DIY workaround.
Temporary DIY Fixes (When They’re Safe)
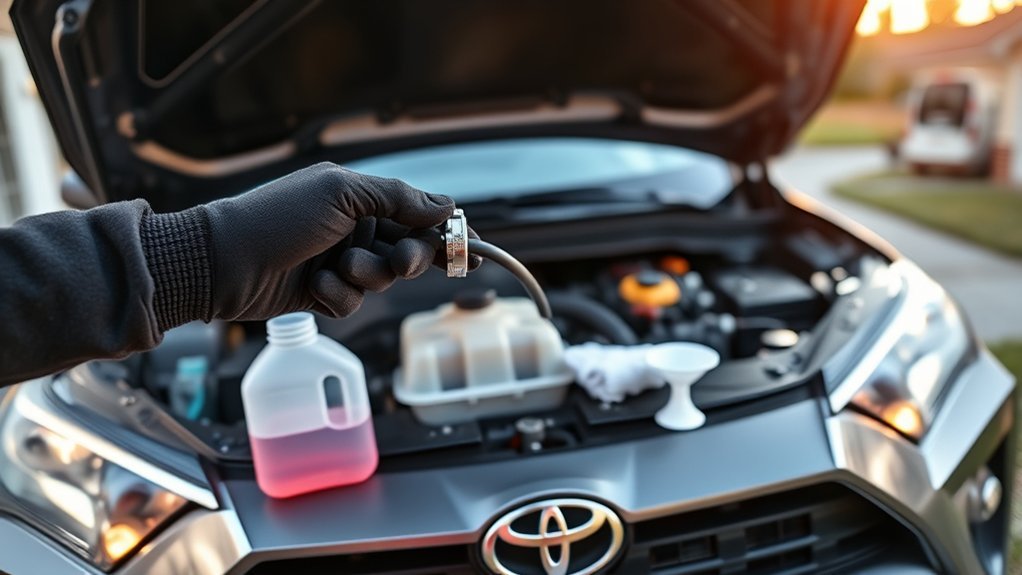
If you spot a small, external coolant leak and need to reach a shop, a temporary sealant can buy you time but don’t treat it as a repair—use it only for minor radiator or housing leaks and follow product instructions. For short hauls, you can wrap a cracked hose with duct tape or a hose clamp as a stopgap and top up with a 50/50 coolant mix, but plan to replace the hose and flush the system promptly. Always verify the issue with a pressure test and monitor the temperature gauge while driving to avoid masking a serious failure.
When To Use Sealants
When you spot a small, well-contained coolant leak and can’t get professional service immediately, a commercial sealant can buy you time by temporarily sealing pinholes in hoses or the radiator; inspect and clean the area thoroughly, follow the product instructions exactly, and monitor coolant level and temperature closely afterward. Use sealants only for minor, visible leaks with no signs of overheating or major mechanical failure. Choose appropriate sealant types and follow application tips to avoid system clogging. Treat this as a controlled, temporary measure and plan a professional inspection ASAP.
- Clean surface thoroughly for adhesion.
- Use manufacturer-recommended sealant formulations.
- Apply with engine cool; follow cure times.
- Monitor coolant level and cabin/exhaust temperature continuously.
Temporary Radiator Repairs
Although temporary radiator repairs can buy you short-term mileage, they’re strictly stopgap measures and should be applied only to small, accessible leaks after the engine has fully cooled. You’ll use epoxy applications or commercial sealants like Radweld for pinpoint radiator matrix leaks; follow product instructions, cure times, and pressure-test before driving. For hose failures, deploy hose clamps or heavy-duty tape as immediate containment, then monitor pressure and coolant level frequently. Never work on a hot system — burns and pressurized spray are hazards. These tactics free you from immediate stranding but don’t restore system integrity. Schedule a professional inspection and permanent repair promptly to avoid head gasket or engine damage. Track repair longevity and replace temporary fixes at the first sign of deterioration.
Safe Coolant Top‑Ups
After using short-term radiator patches, you’ll often need to top up the cooling system to maintain safe operating temperatures until a permanent repair. You’ll work cold, check the reservoir and radiator cap, and follow specific topping techniques for consistent results. Use a 50/50 mix of coolant types and distilled water for ideal freeze/boil protection. In emergencies, distilled water alone will suffice temporarily but replace it with proper coolant promptly. Don’t overfill — allow room for thermal expansion — and inspect for fresh leaks that suggest deeper failures like a head gasket.
- Only add fluid when the engine is cold to avoid burns and false readings.
- Prepare a 50/50 coolant/distilled water blend.
- Avoid overfilling the reservoir.
- Monitor levels and inspect for leaks.
What a Mechanic Will Diagnose : Costs & Expectations
A mechanic will start with a visual inspection and a pressure test to pinpoint leaks and evaluate the cooling system’s integrity; expect the pressure test to run about $50–$100 depending on shop rates. You’ll get focused diagnostic fees and clear repair expectations: hoses, radiator, clamps and overflow lines are checked first. If combustion gases enter the coolant, they’ll run a chemical or compression test — diagnostics can reach $200+. A suspected head gasket raises costs substantially; replacement typically runs $1,000–$2,500 depending on parts and labor. You’ll be told whether targeted repairs or a full gasket job is liberating value.
| Procedure | Typical Cost |
|---|---|
| Pressure test | $50–$100 |
| Visual inspection | Often included |
| Chemical/compression test | $100–$200+ |
| Coolant flush | $100–$150 |
| Head gasket replacement | $1,000–$2,500 |
Expect transparent steps, itemized quotes, and timelines so you can decide confidently.
Preventing RAV4 Coolant Loss: Maintenance Checklist
When you want to avoid slow coolant loss and costly repairs, follow a focused maintenance checklist that keeps levels between the COLD and FULL marks, verifies the radiator cap‘s sealing and pressure function, and replaces contaminated fluid every 30,000–50,000 miles. You’ll empower yourself with routine checks that prevent escalation: monitor temperature, watch for small drops in the reservoir, and catch hose degradation early. Use reservoir inspection techniques each month and after long trips.
- Perform visual reservoir inspection techniques: confirm level, color, and absence of oil or debris.
- Test and replace the radiator cap if it fails to hold pressure or shows corrosion.
- Inspect hoses, clamps, and connections for cracks, soft spots, or seepage; replace aging parts.
- Schedule coolant system flushes every 30,000–50,000 miles and record service dates.
These coolant maintenance tips let you act decisively, reduce dependence on shops, and maintain system integrity for reliable, liberated driving.
Frequently Asked Questions
What Is the Toyota Class Action Lawsuit Coolant?
The Toyota class action alleges vehicles suffer coolant leaks causing engine overheating, faulty gaskets and cooling systems; you’re seeking compensation for repairs and avoided failure, and you’ll demand recalls, extended warranties, or financial restitution.
Conclusion
You’ve now got a clear, methodical path: check obvious reservoirs and hoses first, then pressure-test and dye-scan hidden areas, and use a block-tester before assuming head-gasket failure. If you must limp home, use only approved stop-leak and proper coolant as a temporary measure. A mechanic will confirm with compression and leak-down tests and give cost options. Keep scheduled flushes and hose inspections—think of it like tuning a pocketwatch to keep your RAV4 running cool.