What’s in This Article
Quick Answer
Your Camry’s CV axles typically last 70,000 to 150,000 miles (about 7 to 10 years). Harsh roads, torn boots, and contamination shorten that span. Listen for clicking during turns, clunks under acceleration or braking, grease on the wheel hub, and vibration at speed. Catch a torn boot early and you can avoid a full axle replacement.
Key Takeaways
- CV axles on your Camry give you 70,000 to 150,000 miles, but torn boots cut that lifespan short fast.
- Catch trouble early: clicking in turns, grease splatter, vibration, or clunks mean you need an inspection now.
- Replace a torn boot immediately — once grit enters the joint, full axle failure follows quickly.
- Swap a single axle only if the other side passes inspection; replace both when mileage climbs past 70,000 and boots show wear.
- OEM parts fit best and last longest, but quality aftermarket brands work if you check the specs carefully.
A clicking noise on a sharp turn is often your first warning that a CV axle is starting to go. Most drivers don’t catch it until the joint fails completely, leaving them stranded. Pay attention early and you can turn a simple boot replacement into a much smaller repair bill.
Your Camry’s CV axles typically last 70,000 to 150,000 miles (roughly 7 to 10 years) under normal driving. That range shrinks when you drive rough roads, make frequent sharp turns, or live where road salt attacks rubber. Plan inspections around your driving style, not a generic number, and you’ll avoid being stranded by a broken axle.
Signs Your Camry’s CV Axle Is Failing
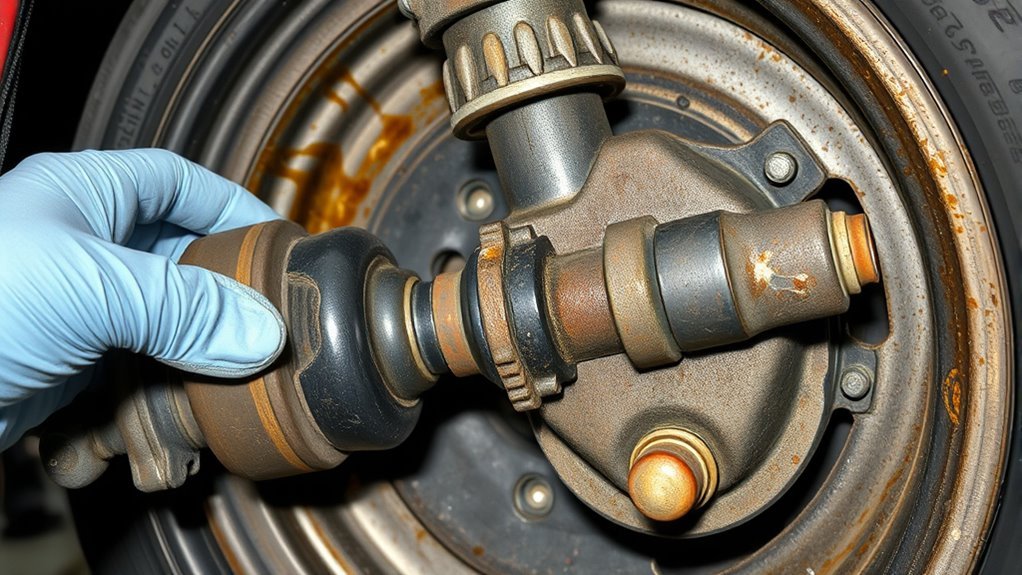
Spot failure early and you stop a small problem from turning into a dangerous breakdown. Listen for a distinct clicking noise while turning — that signals outer CV joint wear. Look for grease splattered on the wheel or around the hub; a torn boot lets grease escape and invites dirt inside.
Feel for clunking when you accelerate or decelerate, which points to inner joint play. Notice excessive vibration at highway speeds; that often means an imbalance or a joint coming apart. Don’t ignore any of these warning signs.
| Symptom | What you see or hear |
|---|---|
| Clicking noise | Rhythmic clicks from the front wheel during turns |
| Grease splatter | Torn boot with thick grease on hub or rim |
| Clunking or vibration | Axle play or shudder under load |
If you notice any combination of these symptoms, have a trained technician inspect the axle immediately. Early diagnosis frees you from roadside failure and expensive cascading repairs.
Why Camry CV Axles Fail
Most CV axle failures start with a torn protective boot. When the boot ruptures, grease leaks out and water, sand, and road grit get in. That contamination scores the polished bearing races fast.
Mechanical overload takes a toll too. Hard launches, aggressive cornering, and constant heavy steering magnify stress cycles inside the joints. Environment plays a role: road salt, puddles, and debris harden and crack the rubber, while moisture corrodes the metal.
If you’ve modified your Camry with a lift kit, lowering springs, or oversized wheels, the altered CV angles force the joints to articulate beyond their design. That creates edge loading and excess heat. Pinpoint the cause by matching your symptoms to your driving habits and local conditions, then stop the damage by replacing torn boots immediately and checking suspension geometry after any modification.
DIY: Inspect CV Boots and Joints: Quick Checklist
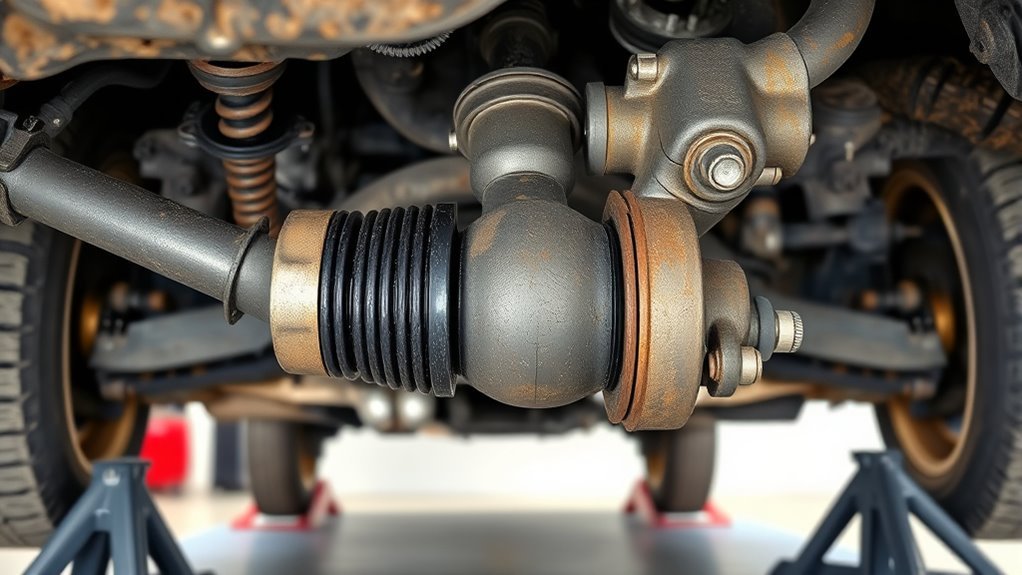
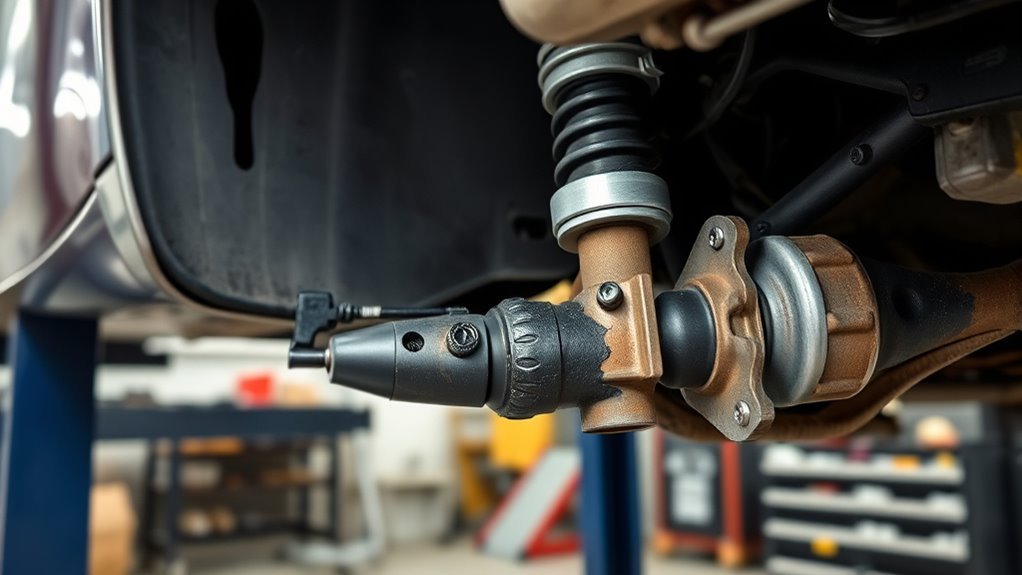
Start your inspection at the outer CV boot. Look closely for cracks, tears, bulges, or stiff, hardened rubber. Turn the steering wheel to full lock and peer inside the wheel well; you want to see dry, intact boots with zero grease splatter.
Next, drive at low speed in a tight circle and listen for rhythmic clicking. Then accelerate gently and feel for any shudder or vibration through the steering wheel or floor. Finally, with the car safely raised, grip the axle and try to move it up, down, and side to side — any play or binding means the joint is failing.
Pro tip: Tie your CV boot inspection to every tire rotation (typically every 5,000 to 7,500 miles) so you catch cracks before they grow into full tears.
- Visually inspect the rubber boot for cracks, tears, bulges, or hardening.
- Scan the wheel, hub, and inner fender for grease spray.
- Drive in a tight circle at low speed and listen for clicking (outer joint).
- Feel for vibration or shudder under acceleration (inner joint).
- Manually check the joint for play, binding, or rough movement.
Warning: If you find a torn boot, stop aggressive driving immediately and schedule a repair — every additional mile pumps grit into the joint and turns a minor fix into a full axle replacement.
If any check fails, document what you found and schedule a professional diagnosis or repair. You reclaim control by acting while the problem is still small.
Repair vs. Replace: Costs, When to Swap One or Both, OEM vs. Aftermarket
You can repair just the damaged joint and keep the original axle, but that only works when the boot failure is brand new and no contamination has reached the bearings. If the joint already clicks or feels rough, replacing the whole axle is the smarter call.
Replace a single CV axle if the failed side is isolated and the opposite side passes a thorough inspection — no grease leaks, no play, no noise.
Replace both axles when your Camry has passed 70,000 miles, both boots show cracks or grease, or you notice vibration and clicking on both sides. Doing both at once saves labor cost and restores balanced handling.
Pro tip: If one axle fails past the 70,000-mile mark, budget for both sides — the second is likely close behind, and paired replacement saves you a second labor charge.
For parts, OEM axles from Toyota fit precisely and use the correct grease, heat treatment, and boot material. Quality aftermarket brands (Cardone, GSP, TrakMotive) can work if you match the exact specs, but cheap no-name units wear out fast. Choosing OEM frees you from guesswork and repeat failures. Choose aftermarket only when you verify reviews and warranty coverage.
Frequently Asked Questions
Can a Worn CV Axle Affect My Camry’s Fuel Economy?
Yes — a failing CV joint creates drag and vibration that rob engine efficiency. You may notice a rough idle, shudder during acceleration, and a drop in miles per gallon. Replacing the axle restores smooth power delivery and normal fuel consumption.
Are Front and Rear CV Axles Different on AWD Camry Models?
Yes. Front axles include the outer constant-velocity joints that steer and articulate; rear axles focus on length, torque handling, and camber changes. Never swap a front axle to the rear — they’re engineered for different movement patterns and loads.
How Long After a Boot Tear Can I Still Drive Safely?
You may have days to a couple of weeks before the joint fails, depending on how much contamination got in. Don’t push your luck — replace the boot and repack the joint immediately. Every mile with an open boot pumps in more grit, turning a $30 boot job into a full axle replacement.
Can a Bad CV Axle Cause a Check Engine Light?
It can, indirectly. Excessive vibration may rattle ABS sensors or trigger misfire codes. If you see a check engine light along with clicking or shudder, scan the codes first, but don’t ignore the physical symptoms.
Do Extended Warranties Cover CV Axle Failure?
It depends on your contract. Some comprehensive warranties include axles as part of the drivetrain, while others exclude boots as a wear item. Read your terms carefully, document the failure, and push for coverage if the joint failed due to a factory defect rather than neglect.
Keep Your Camry Rolling: Final Advice
Your Camry’s CV axle is the quiet workhorse that keeps power flowing smoothly to the wheels. When it starts to fail, you hear it, feel it, and see it — if you pay attention. The best strategy catches torn boots before contamination eats the joint.
Inspect regularly, replace a destroyed boot without delay, and swap axles at the first sign of clicking or play. Choose quality parts, and when one side passes the 70,000-mile mark, replace both to keep your car balanced and reliable. A small maintenance task stays small — unless you wait too long.
Automotive Disclaimer: This article is for informational purposes only and does not replace professional diagnosis or repair. Always consult a certified mechanic for safety-related vehicle issues.


[…] Is My Toyota Camry Vibrating at Highway […]