Tacoma Backup Camera Not Working? Start Here
Last updated: July 31, 2026
If your Tacoma’s backup camera is not working, first note exactly what the display does when you shift into reverse. A screen that never changes points toward the reverse request, display, fuse, or an aftermarket interface. A screen that switches to camera mode but stays black points more toward the camera feed, camera power, connector, harness, or camera unit. A flickering image that changes when the tailgate moves usually makes the tailgate connector and harness the first places to inspect.
Do not replace the camera or head unit until you identify your Tacoma’s exact system. Depending on year and equipment, the image may appear in the rearview mirror, the center multimedia screen, or a multi-camera parking display. Use the wiring diagram and fuse chart for your exact year, trim, and factory or aftermarket setup.
Quick Answer
Park safely, set the parking brake, and check the symptom before touching wiring. Clean the lens, fully latch the tailgate, confirm the reverse lights operate, restart the multimedia system, and inspect the camera connector near the tailgate. Then use your exact Tacoma owner’s manual to identify related fuses. If the display enters camera mode but shows no image, inspect camera power, ground, and the video or data path with model-specific service information. If a replacement fuse blows again, stop and trace the short circuit.
Key Takeaways
- Diagnose the screen behavior first because “no switch,” “black screen,” and “flicker” point to different parts of the system.
- Use the fuse chart and wiring diagram for your exact Tacoma; fuse names, camera voltage, and display architecture vary.
- Tailgate connectors, moving harness sections, corrosion, water intrusion, and aftermarket adapters are common inspection points.
- Test continuity only on a de-energized circuit, and never apply 12 volts directly to a factory camera unless service information confirms it.
- Check Toyota’s recall and service-campaign lookup by VIN before paying for major camera or display repairs.
Safety: A rear camera is a visual aid, not a substitute for mirrors, shoulder checks, and checking the area behind the truck. Do not stand behind the Tacoma while another person shifts into reverse.
Match the Symptom to the First Check
| What the Display Does | Most Likely Area to Check First | First Test |
|---|---|---|
| Screen never switches when you select reverse | Reverse request, related fuse, head unit setting, interface, or display | Check reverse lights, display operation, and model-specific fuse chart |
| Screen switches, but the camera view is black | Camera power, ground, connector, harness, signal path, or camera | Inspect the tailgate connector and test the circuit from the wiring diagram |
| Black image with guide lines still visible | Camera feed or camera circuit more than the display’s reverse request | Check camera connector, power, ground, and signal path |
| Image flickers, rolls, or cuts out | Loose terminal, damaged harness, weak ground, moisture, or adapter | Move the tailgate and harness gently while watching the display |
| Image is blurry, foggy, or washed out | Dirty lens, condensation, impact, or camera housing damage | Clean the lens correctly and inspect inside the housing for moisture |
| Radio, menus, and camera display are all dead | Display power, head unit, or shared electrical supply | Check display operation and the exact multimedia fuse information |
Quick Fixes to Try Before Visiting the Dealer

Start with the truck on level ground. Set the parking brake, keep your foot on the brake, and shift into reverse while watching the display. Note whether the screen stays on the radio, changes to a black camera screen, shows guide lines, or displays an error. That observation determines the next test.
Clean the camera lens gently. Toyota owner guidance advises rinsing away dirt or foreign material and wiping the lens with a soft, wet cloth rather than rubbing it hard. Check for mud, water droplets, ice, road salt, wax, or damage around the camera. A dirty lens can make the image unusable, but it normally does not explain a screen that never enters camera mode.
Fully latch the tailgate and inspect the detachable tailgate connector if your Tacoma has one. A connector can be left loose after tailgate removal, body work, a bed-cap installation, or other rear-body service. Look for bent pins, moisture, green corrosion, damaged seals, or a plug that does not click into place.
Check the reverse lights. If they also fail, the fault may involve the reverse-position input, reverse-light circuit, related fuse, switch, or wiring. Working reverse lights do not prove that every camera circuit is good, but they help separate a reverse-detection problem from a camera-feed problem.
Restart the truck and multimedia system. A restart can clear a temporary display or software fault. Do not make battery disconnection your first reset step because it can erase saved settings and may not fix a recurring circuit or module problem.
Use the fuse diagram in the owner’s manual for your exact Tacoma. There may not be one universal fuse labeled “backup camera,” and the camera can share power or control with the multimedia, parking-assist, reverse-light, or accessory circuits. Replace a blown fuse only with the same amperage. If it blows again, stop and trace the short.
Before buying parts, check Toyota’s recall and service-campaign lookup with the VIN. Campaign eligibility is vehicle-specific.
[Products Worth Considering]
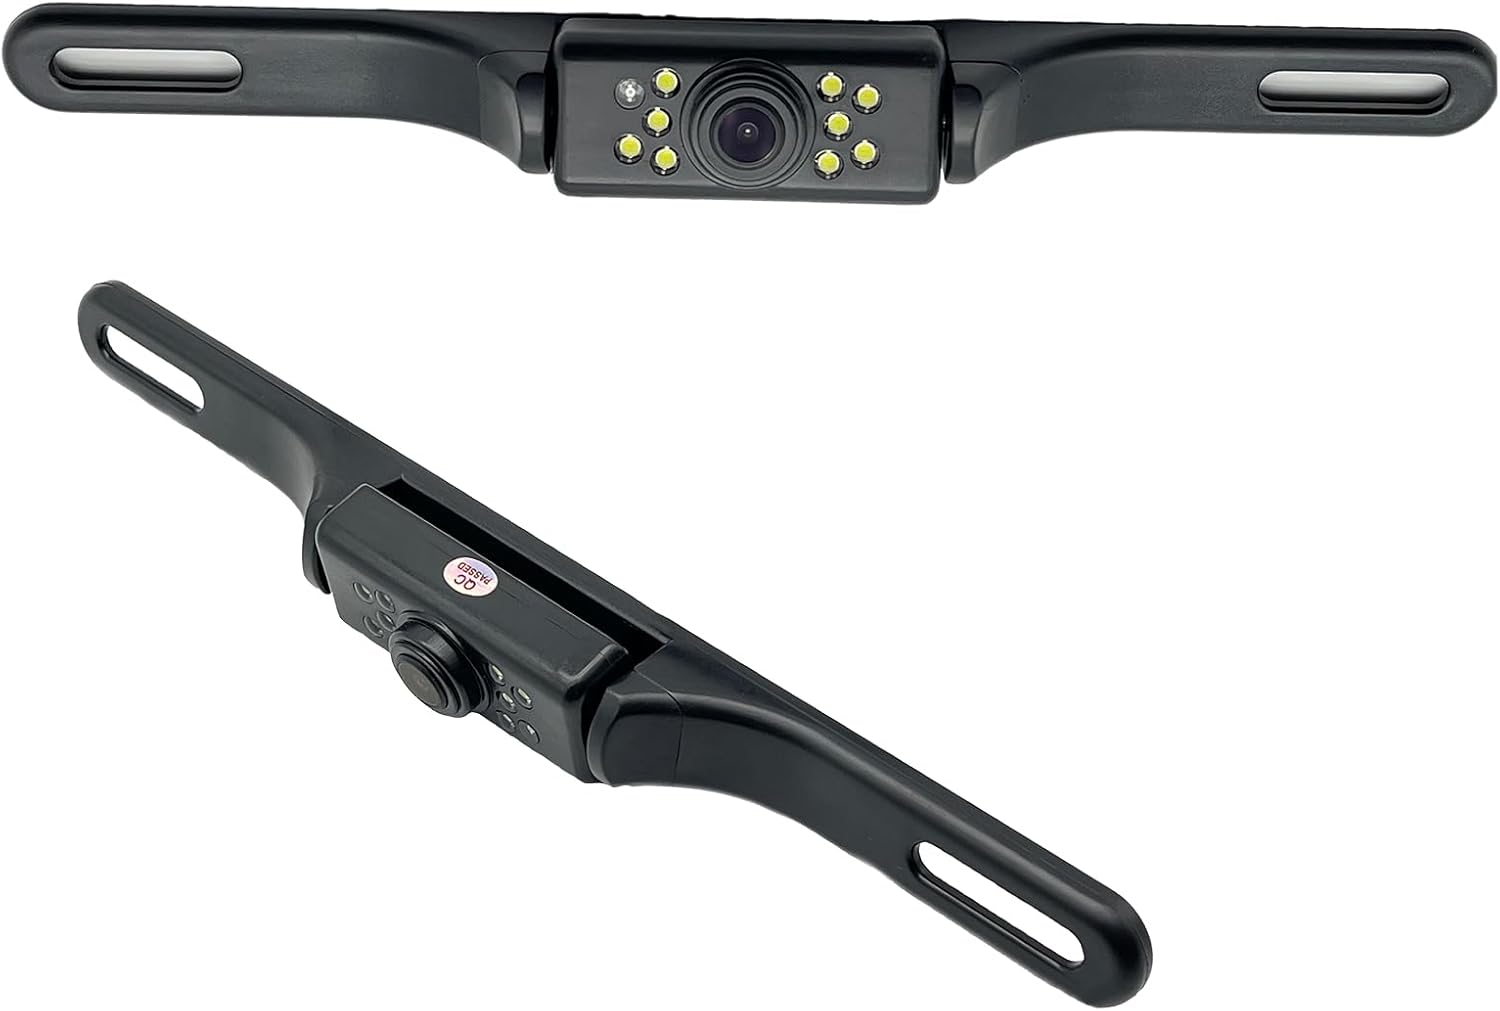
This YIMU license plate backup camera helps improve rear visibility with a wide 150° viewing angle, clear HD imaging, and full-color night vision powered by 7 LED lights. It supports CVBS and AHD switching for compatible screens, includes a long RCA video cable for flexible installation, and is built for reliable use in a variety of vehicles with waterproof and shockproof protection.

This wired backup camera system makes reversing easier with a quick plug-and-play setup, stable real-time video, and a wide-angle HD view to help reduce blind spots. The adjustable parking lines, brightness, contrast, and image flip options let you customize the display for safer parking in cars, trucks, RVs, vans, SUVs, trailers, and campers.

AUTO-VOX Solar Wireless Backup Camera makes reversing easier with a clear 1080P display, wireless digital signal, and a solar-assisted battery system that reduces maintenance. Designed for fast DIY setup, it mounts cleanly on a license plate and delivers dependable visibility for parking, towing, and blind-spot monitoring in a wide range of vehicles.
Identify Your Tacoma Camera System Before Testing
Tacoma backup-camera systems are not identical. Before checking voltage or buying a replacement, identify which of these setups you have:
- Factory mirror display: The rear image appears inside the rearview mirror rather than on the radio screen.
- Factory center display: The multimedia screen switches to the rear camera when reverse is selected.
- Factory multi-camera or panoramic system: The rear camera works with other cameras and a parking-assist controller.
- Aftermarket head unit or camera adapter: A reverse-trigger wire, interface module, voltage adapter, RCA lead, or retained factory-camera harness may sit between the truck and display.
This distinction changes the diagnosis. A factory camera may not use the same supply voltage or signal format as a universal aftermarket camera. An aftermarket radio may switch to reverse correctly but still show a black screen because an interface is not powering or translating the factory camera signal.
Best practice: Open the Toyota manuals page and select the exact year and model before testing fuses, settings, or camera functions.
[Products Worth Considering]
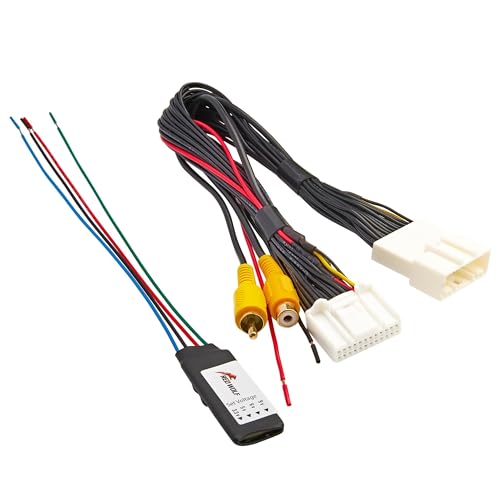
Note: This product features a 24-pin connector; Please be sure to check the compatibility of the connection plug on your vehicle before purchasing to avoid any mistakes; Note: Check reverse gear for 12V prior to installation. If no power, ensure the 24-PIN plug is fully seated and the reverse trigger wire is properly connected to the reverse light positive or matched trigger input
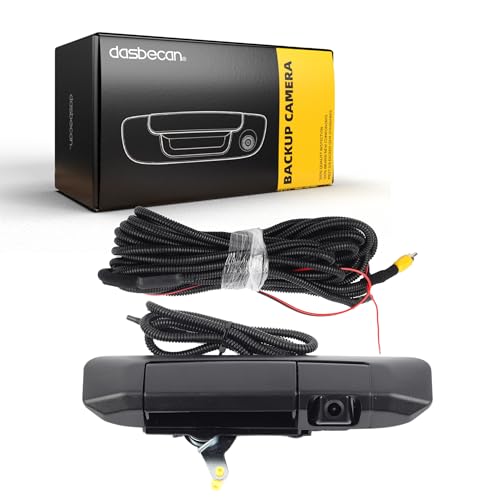
Compatible with: 2005 2006 2007 2008 2009 2010 2011 2012 2013 2014 2015 Toyota Tacoma
Common Causes of Tacoma Backup Camera Failures
A Tacoma backup camera can fail because the display never receives a reverse request, the camera loses power or ground, the image signal is interrupted, the camera housing fills with moisture, or the multimedia system has a software or hardware fault. Work from the symptom table rather than replacing the most expensive part first.
Wiring Issues
Wiring problems often cause a black, flickering, or intermittent camera image. Inspect the harness near the tailgate connector, inside the tailgate, around the bumper, and anywhere it bends or was disturbed during previous work. Look for cut, pinched, rubbed, stretched, or poorly repaired wires.
Loose or corroded terminals can interrupt power, ground, or the image signal. Turn the truck off before unplugging a connector. Check for green corrosion, bent or pushed-back pins, water, damaged seals, or dirt. Do not force a connector that does not align.
Pay extra attention after tailgate removal, collision repair, a bed-cap installation, trailer wiring work, or an aftermarket radio installation. The timing of the failure is useful evidence: when the problem starts immediately after work in one area, inspect that area before replacing the camera.
Software or Display Problems
A software or display fault can stop the screen from switching, freeze the previous image, show an error, or produce a black display even when the rear camera hardware is intact. Restarting the truck may restore a temporary fault, but repeated failures need diagnosis rather than repeated resets.
Check whether the display still operates for audio, menus, phone functions, and other camera views. If the whole display is dead, begin with multimedia power and fuse information. If only one camera view fails on a multi-camera system, the rear camera, its circuit, or the parking-assist system becomes more likely.
Ask a technician to scan the relevant multimedia, body, and parking-assist modules when warning messages or repeated failures remain. A basic engine-code reader may not access those modules.
Camera Malfunction
The camera unit can fail from impact, water intrusion, damaged seals, age, or an internal electrical fault. Common signs include a black image after the screen switches into camera mode, color distortion, lines, a rolling image, intermittent dropout, or moisture visible behind the lens.
Do not condemn the camera until its connector, supply, ground, and signal path have been checked against service information. A damaged connector can make a good camera appear dead. A known-good matching camera can help isolate the problem, but it must match the original system’s connector, voltage, and signal type.
Aftermarket Radio or Camera Adapter Problems
If the problem began after installing a radio, anytime-camera kit, trailer camera, or adapter, inspect that installation first. A disconnected reverse-trigger wire can prevent the radio from entering camera mode. A failed adapter, poor ground, pinched video lead, incorrect camera setting, or missing factory-camera power supply can produce a black screen after the radio switches.
Confirm the head unit’s camera input setting and the adapter manufacturer’s wiring instructions. Do not assume a factory Tacoma camera can be connected directly to a universal 12-volt camera input.
Diagnosing Short Circuits and Blown Fuses
Check fuses early when the display, reverse lights, or camera stopped working suddenly. Use the owner’s manual or a model-specific wiring diagram because the relevant fuse name and location can vary by year, trim, and display system.
Start with a visual inspection around the tailgate hinge, bumper, detachable connector, trailer wiring, radio harness, and any recently installed accessory. Look for rubbed insulation, melted spots, exposed copper, pinched wires, water intrusion, or a screw driven into a harness.
Remove and inspect only the fuse identified for the affected circuit. Replace a blown fuse with the same type and amperage, then test again. Do not install a larger fuse to keep it from blowing.
Warning: A higher-rated fuse can allow wiring to overheat. If the correct replacement fuse fails again, stop replacing it and locate the short circuit.
For a short-to-ground test, disconnect power and follow the service procedure for the exact circuit. Do not perform continuity or resistance testing on a powered circuit. If the harness enters a module or multi-camera controller, professional diagnosis is safer than probing unknown terminals.
Inspecting and Fixing Wiring Connections
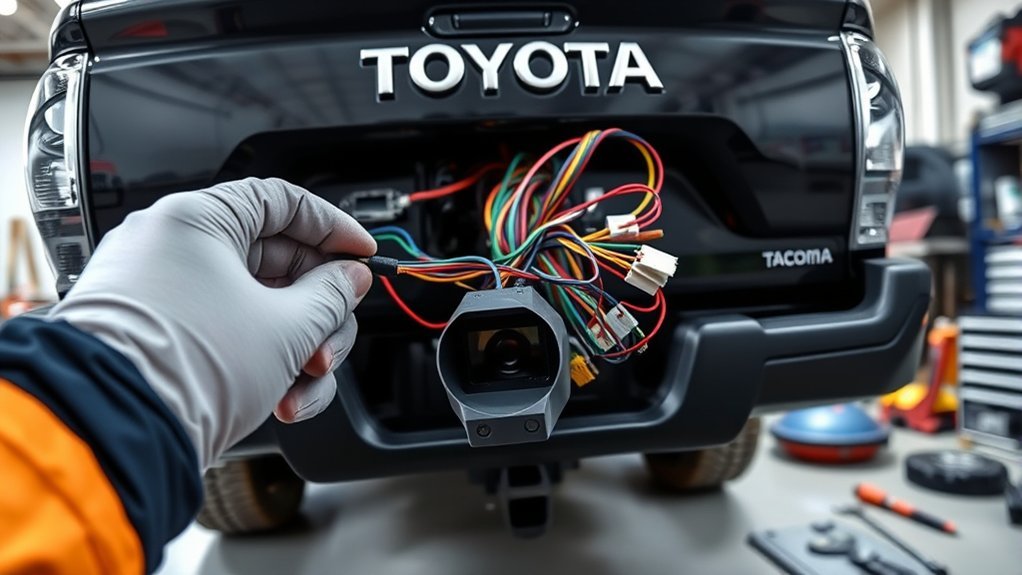
Inspect the rear camera harness methodically. Start at the camera, follow the harness through the tailgate and detachable connector, then continue toward the frame or cab. Photograph connectors before unplugging them so each lock and seal returns to its original position.
Use this checklist during your inspection:
| Inspection Area | Action |
|---|---|
| Camera Housing and Lens | Check for impact, cracks, condensation, and water behind the lens |
| Tailgate Connector | Confirm the plug is fully seated, locked, clean, and dry |
| Wiring Harness | Check for cuts, frays, pinches, stretching, and corrosion |
| Moving Wiring Path | Inspect areas that flex when the tailgate opens or closes |
| Aftermarket Interfaces | Check grounds, adapters, reverse triggers, and video connections |
| Related Fuse | Use the exact model-year diagram and match the original rating |
| Circuit Measurements | Use the correct pinout to test supply, ground, and continuity safely |
If you find corrosion, use electrical contact cleaner that is suitable for automotive connectors and allow the connector to dry fully. Repair broken wires with sealed automotive splices and proper strain relief. Tape alone is not a durable repair for a wire that flexes or sits outside the cab.
Pro tip: If the image changes when you move one connector or one harness section, mark that exact point. A repeatable movement-related failure is stronger evidence than a random parts swap.
Testing Your Backup Camera Safely
Basic camera testing should answer three questions: Does the display receive the reverse request? Does the camera circuit receive the correct supply and ground? Does the image or data signal reach the display or controller? The exact test points depend on the system.
Check Wiring Connections
Turn the truck off and inspect both ends of each accessible connector. Reseat only connectors you can identify. If a plug has a secondary lock, release it correctly instead of pulling on the wires.
For an intermittent fault, have a helper watch the display from the driver’s seat while you gently move the tailgate and accessible harness. Keep the parking brake set and remain beside the truck, never behind it. If the image cuts in and out at one point, inspect that connector or wire section closely.
Test Power, Ground, and Continuity
Use a high-impedance digital multimeter and the wiring diagram for the exact Tacoma. Back-probe only when the connector design and service procedure allow it. Do not pierce weather-sealed wires unless the repair procedure specifies how the puncture will be sealed.
- Supply test: Measure the specified camera supply at the correct terminal under the specified operating condition.
- Ground test: Use a voltage-drop test when possible; a ground can show continuity but still fail under load.
- Continuity test: De-energize the circuit and disconnect the relevant components before measuring resistance through a wire.
- Short test: Follow the service procedure before checking a wire for an unintended connection to ground or another circuit.
Do not apply external 12-volt power to a factory camera or signal wire unless the exact wiring information confirms that voltage and pin function.
Inspect Camera Functionality
Clean the lens and inspect the housing for cracks, impact marks, or moisture. If the image is foggy only in wet or cold conditions, internal condensation or a failed seal is more likely than a fuse.
A known-good camera can isolate the fault only when it matches the same Tacoma system. If the matching replacement produces a normal image, the original camera is a strong suspect. If the replacement behaves the same way, continue with the harness, interface, controller, display input, and reverse-request diagnosis.
What to Check If the Screen Does Not Switch to the Camera
If the radio or menu stays on-screen after you select reverse, first confirm the display itself works. Then check whether the reverse lights operate and whether the truck shows any reverse-position or transmission warning. A failed reverse input can prevent the display from being told to show the camera.
On an aftermarket head unit, inspect the reverse-trigger connection and camera-input settings. On a factory system, use the model-specific fuse chart and scan the body, multimedia, or parking-assist modules if basic checks pass.
If your Tacoma displays the camera in the rearview mirror, do not diagnose the center radio as though it controls the image. Identify the actual display and trace that system.
What to Check If the Screen Is Black
A black screen after the display switches into camera mode means the system may recognize reverse but not receive a usable rear image. Check whether guide lines or warning overlays remain visible. Overlays suggest that part of the display system is operating, although they do not prove the camera circuit is good.
Inspect the tailgate connector and camera housing first. Then verify the specified camera supply and ground with the correct diagram. If those pass, test the signal path, adapter, or controller before replacing the head unit.
If the display is black for radio, menus, and camera functions, begin with the display’s power supply and multimedia diagnosis instead of the rear camera.
What to Check If the Image Flickers or Looks Distorted
A flickering, rolling, discolored, or distorted image usually points to an unstable connection, weak ground, damaged signal path, moisture, internal camera failure, or an aftermarket adapter problem. Clean and reseat the accessible rear connector, then inspect the harness for rubbed or stretched sections.
If the image changes when the tailgate opens, closes, or moves slightly, focus on the flexible harness and detachable connector. Repair damaged wires with sealed automotive methods and restore strain relief so the repair does not flex at the splice.
Moisture behind the lens can create a foggy, wavy, or washed-out image. Cleaning the outside will not fix water inside the sealed housing. Replace or professionally repair the camera when the housing or seal has failed.
Backup Camera Versus RCTA or Parking Sensors
The rear camera, Rear Cross-Traffic Alert, and parking sensors are related driver aids, but they do not all use the same hardware. A Tacoma can have a clear camera image while a radar-based alert is unavailable, or the camera can fail while another warning system still operates. Diagnose the exact symptom rather than treating every rear-assistance warning as a camera fault.
For sensor-specific warnings, see the site’s Toyota Tacoma Blind Spot Monitor and RCTA guide.
When to Seek Professional Help for Camera Problems
Seek professional help when the correct fuse blows repeatedly, the harness has collision or water damage, an error message remains, the system uses multiple cameras, or you do not have the wiring diagram and safe test points. A technician with Toyota-capable scan equipment can read multimedia, parking-assist, body, and camera-related faults that a basic engine-code reader may miss.
Warranty coverage is another reason to avoid unnecessary disassembly. If the truck is still covered, document the symptom with a photo or video, note whether it changes with temperature or tailgate movement, and ask the dealer to record the concern on the repair order.
Use this quick guide to decide your next step:
| Issue Type | Symptoms | Recommended Action |
|---|---|---|
| No Camera Mode | Display never changes after reverse is selected | Check reverse request, display operation, settings, and model-specific fuses |
| Black Camera View | Screen switches but no rear image appears | Test camera supply, ground, connector, harness, and signal path |
| Erroneous Image | Distorted, rolling, frozen, foggy, or incorrect image | Inspect the connector, ground, housing, adapter, and camera unit |
| Repeated Fuse Failure | Correct replacement fuse blows again | Stop replacing fuses and trace the short circuit |
| Multi-Camera Error | One or more views fail or a parking-assist warning appears | Scan the camera and parking-assist modules with compatible equipment |
| Aftermarket Conflict | Failure began after radio, adapter, trailer, or camera work | Recheck the installation instructions, grounds, trigger, and interface |
Frequently Asked Questions
Why Did My Backup Camera Stop Working All of a Sudden?
A sudden failure can come from a loose tailgate connector, blown related fuse, damaged wire, failed camera, display fault, reverse-request problem, or temporary software issue. First note whether the display switches into camera mode, then check the lens, tailgate connector, reverse lights, display operation, and exact fuse chart.
Where Is the Tacoma Backup Camera Fuse?
There is no single fuse location or label that applies to every Tacoma. The camera may share a circuit with the multimedia display, parking-assist system, reverse-light input, or another accessory circuit. Use the owner’s manual and fuse-box diagram for the exact model year and trim.
How Do I Reset a Toyota Tacoma Backup Camera?
Turn the truck fully off, restart it, and restart the multimedia system using the procedure in the model-specific manual. A reset may clear a temporary software fault, but it will not repair a blown fuse, loose connector, damaged harness, failed camera, or bad ground. Avoid repeated battery disconnections as a substitute for diagnosis.
Why Is the Screen Black but the Guide Lines Still Show?
Visible guide lines with no rear image often mean the display has entered camera mode but is not receiving a usable camera feed. Check the camera connector, specified camera supply, ground, harness, signal path, and any aftermarket adapter before replacing the display.
Can a Reverse-Light Problem Stop the Camera?
It can, depending on the system. If the reverse lights and camera fail together, investigate the reverse-position input, related fuse, switch, and wiring. Working reverse lights are only a clue; they do not prove that the camera’s power, ground, signal, and display circuits are good.
Why Does My Tacoma Backup Camera Work Only Sometimes?
An intermittent camera often points to a loose connector, damaged flexible harness, weak ground, moisture, internal camera fault, or aftermarket adapter problem. Gently move the tailgate and accessible harness while a helper watches the display. A repeatable dropout helps locate the fault.
Should I Replace the Camera or the Head Unit First?
Replace neither part until testing points to it. Confirm the display’s reverse behavior, inspect the connector and harness, verify the correct camera supply and ground, and check the signal path. A matching known-good camera can isolate the fault, but only when it is compatible with the exact system.
Is It Safe to Drive With a Broken Backup Camera?
A broken camera reduces rear visibility, so repair it promptly. Until it is fixed, use mirrors, direct shoulder checks, and a spotter when visibility is limited. Never rely on a camera alone, even when it works.
Conclusion
A Tacoma backup camera problem is easiest to solve when you begin with the symptom. If the display never switches, focus on the reverse request, display, settings, and related fuses. If it switches to a black view, focus on the camera connector, supply, ground, harness, and signal path. If the image flickers when the tailgate moves, inspect the flexible rear harness first.
Use the exact Tacoma manual and wiring information, check recall or service-campaign status by VIN, and avoid applying power to unknown camera terminals. When the correct fuse blows again, a multi-camera warning remains, or the test points are unclear, stop guessing and get a Toyota-capable electrical diagnosis.
Sources