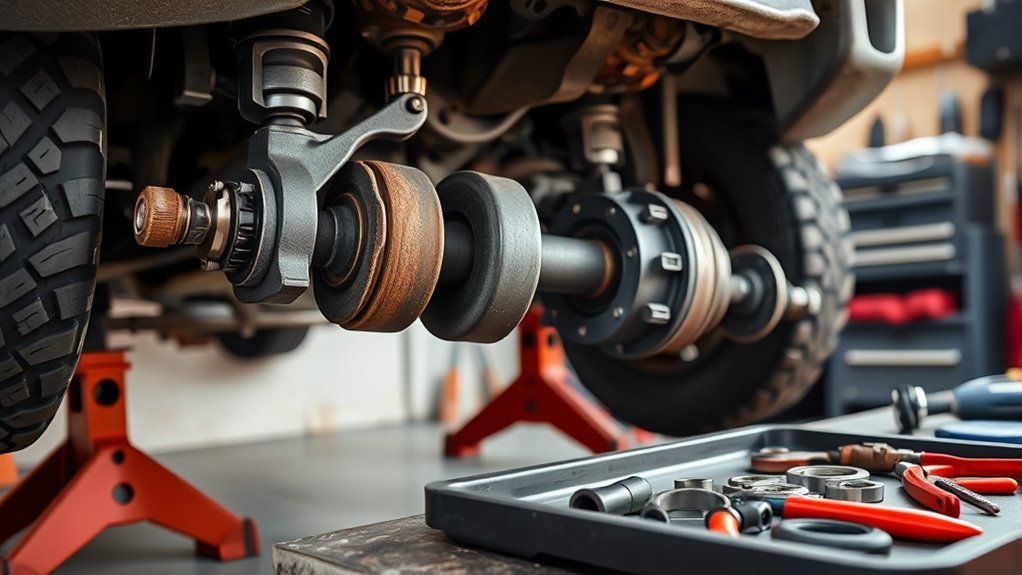
Replacing torn CV boots on a Toyota 4Runner protects the front axle joints before dirt, water, and lost grease turn a boot job into a full axle replacement. This guide focuses on the front 4WD CV axle style used on many 4Runner models, especially the 5th-generation layout, but torque values, clips, grease amounts, and fasteners can vary by model year, trim, lift setup, and previous repairs. Use your VIN and the factory procedure in Toyota’s Technical Information System or your Toyota owner’s manual before final tightening.
Quick Answer
To replace both CV boots on a 4Runner, safely lift the vehicle, remove the wheel-side hardware, free the axle from the hub and differential, mark and disassemble the joint, clean out old grease, install matched inner and outer boots, repack with the correct grease, clamp the boots, then reinstall and torque all fasteners to the correct model-year specs.
Key Takeaways
- A torn CV boot should be repaired quickly because the boot keeps grease in and keeps dirt, water, and road grit out of the joint.
- Replace both inner and outer boots on the axle you are servicing when the kit includes both or when the second boot is aged, cracked, or contaminated.
- Mark the tripod, rollers, and shaft orientation before disassembly so the joint goes back together the same way it came apart.
- Use the grease supplied with the boot kit, keep inner and outer grease packets separate if the kit provides different types, and do not overtighten the boot clamps.
- If the joint clicks, binds, vibrates, has blue heat marks, or has heavy pitting, replace the axle instead of only replacing the boots.
At a Glance
| Time Required | 3–5 hours per front axle for an experienced DIYer; plan extra time for a first attempt |
| Difficulty | Advanced DIY; not ideal for a first suspension or driveline job |
| Tools Needed | Floor jack, jack stands, wheel chocks, socket set, breaker bar, torque wrench, pry bar, rubber mallet, snap-ring pliers, clamp pliers, rags, solvent, and safety gear |
| Cost | Varies by OEM or aftermarket boot kit, grease, clamps, clips, and whether you replace the axle |
Warning: Never work under a vehicle supported only by a jack. Use rated jack stands on a firm, level surface, chock the wheels, and follow the safe lifting points in the owner’s manual. OSHA’s jack standard also requires a raised load to be blocked or otherwise secured before work continues.
What CV Boots Do and Why Replace Both Inner and Outer
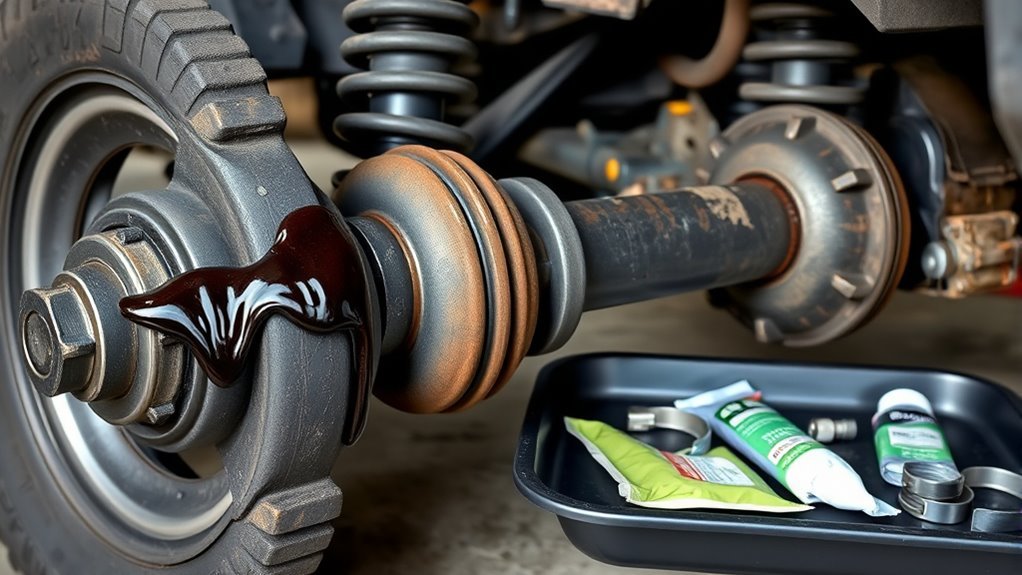
A CV boot seals the constant-velocity joint so the joint stays packed with grease while dirt, moisture, and road grit stay out. GKN Automotive, a major driveline manufacturer, notes that the CV joint sealing system plays a major role in driveline life because the boot is the part most exposed to flexing, heat, road debris, and age.
When a boot tears, grease can fling out onto the control arm, skid plate, shock, wheel well, or inside of the wheel. At the same time, contamination can enter the joint. If you catch the tear early and the joint is still quiet and smooth, boot replacement can save the axle. If the joint has been driven dry or dirty for too long, the better repair is usually a complete CV axle replacement.
Replacing both the inner and outer boots on the same axle is often smart because the axle is already out, the old grease is already being cleaned, and many matched kits include both boots, clamps, clips, and grease. That does not always mean you must replace the left and right axles at the same time. It means the axle you have removed should get a complete inspection, and the second boot on that axle should be replaced if it is old, cracked, hardened, leaking, or included in the kit.
Note: A split “quick boot” can help in a temporary emergency, but it is not the best long-term repair for a 4Runner that sees off-road use, lift angles, mud, water, or repeated suspension travel. A full boot replacement with the axle removed gives you a cleaner joint and a better clamp seal.
Parts, Tools and Safety Checklist for CV Boot Replacement
Start with a matched CV boot kit for your exact 4Runner year, side, and driveline. Use your VIN when ordering because Toyota part numbers can supersede over time. Toyota’s official parts site lists genuine front drive shaft in-and-out boot kits, and the correct kit should include the boot or boots, clamps, grease, and related clips for that application.
Gather these parts and supplies before the 4Runner is on stands:
- Matched inner and outer CV boots for the axle being serviced
- New boot clamps, snap rings, and axle clips included with the kit
- Correct CV grease from the kit or the grease specified by the boot manufacturer
- New cotter pins for the axle nut and tie rod end where applicable
- Brake cleaner or a safe degreasing solvent, lint-free rags, cardboard, and a parts tray
- Optional but wise: new axle seal if the differential seal is already leaking or damaged
For tools, you will typically need a torque wrench, breaker bar, 35mm socket for the axle nut on many 5th-gen-style setups, 19mm socket for lower ball joint or lower control arm fasteners, 21mm socket for many OEM wheel lugs, 10mm and 12mm sockets for brake line and ABS brackets, pry bar, rubber mallet, snap-ring pliers, CV boot clamp pliers, floor jack, rated jack stands, wheel chocks, eye protection, and nitrile gloves.
Pro Tip: Before loosening suspension hardware, mark the axle orientation, tripod orientation, roller positions, and any alignment-related cams you disturb. Paint marks make reassembly faster and help preserve the original wear pattern.
[Products Worth Considering]

Camco Trailer Aid Plus provides a 5 1/2-inch lift to make tandem tire changes on trailers and RVs easier and faster. Its strong polymer construction is lightweight, waterproof, rustproof, and built for dependable outdoor use, while the high weight capacity supports a wide range of trailer maintenance needs. Designed for convenient portability, it helps you change a flat without unloading cargo or horses.

This heavy-duty car ramp set provides a stable, reliable lift for routine maintenance like oil changes, tire rotations, brake work, and undercarriage inspections. Built from high-impact poly with a non-skid tread and rubber feet, it helps keep vehicles secure while offering a lightweight, corrosion-resistant alternative to steel ramps. The wide, gradual design supports a broad range of vehicles, from compact cars to trucks, SUVs, and vans.

This foldable dog car ramp is designed to help pets enter and exit vehicles more safely and comfortably, reducing strain on joints and paws. Built with a sturdy aluminum frame, anti-slip walking surface, and a gentle longer incline, it supports everyday use for small to large dogs. Its four-fold design and built-in carry handle make it easy to store, transport, and use at home or on the go.
Before You Remove the Axle, Inspect the Damage
Do a quick inspection before tearing into the axle. Look for grease spray, cracks around the boot folds, loose clamps, hardened rubber, torn ribs, and grease leaking from the small or large end of each boot. Rotate the axle by hand and feel for roughness, clunks, or excessive play. Then check for noise during a slow parking-lot turn before disassembly if the vehicle is still safe to move.
Replace the boot if the tear is fresh, the joint is still packed with grease, and the axle turns smoothly. Replace the whole axle if you find clicking on turns, vibration under acceleration, heavy rust inside the joint, pitted bearing tracks, missing rollers, a cracked cage, blue heat marks, damaged splines, or free play that feels loose instead of smooth.
A boot is cheap compared with a failed CV joint. The repair decision comes down to timing: clean, quiet joint equals boot service; noisy, gritty, or loose joint equals axle replacement.
Removal: Wheel, Hub, Brackets, and Pulling the CV Axle
Park on level ground, set the parking brake, chock the rear wheels, loosen the front lug nuts, raise the 4Runner at the correct lift point, and support it securely on rated jack stands. Remove the wheel and keep the hardware organized.
Unbolt the brake line bracket and ABS sensor wire brackets with the correct sockets, usually 10mm and 12mm on many 4Runner setups. Do not open the hydraulic brake line unless your factory procedure requires it. The goal is to create slack so the hub assembly can move without pulling on the brake hose or ABS wiring.
- Disconnect the tie rod end if needed, remove the cotter pin, and keep the nut and pin location noted.
- Remove the axle dust cover or cap if equipped.
- Break the axle nut loose with the correct socket and a breaker bar.
- Remove the lower ball joint-to-lower control arm fasteners or other factory-specified fasteners needed to swing the hub out of the way.
- Support the hub assembly with a stand, bucket, or strap so it does not hang from the brake hose or ABS wire.
- Tap the axle end with a rubber mallet or dead-blow hammer until the axle frees from the hub splines. Do not mushroom the axle threads.
- Pull the hub outward just enough to clear the axle from the splines.
- Use a pry bar at the inner CV housing to pop the axle from the differential, then control the axle as it comes out.
- Place a clean towel or suitable plug near the opening to reduce fluid drips, but never leave anything inside the differential housing.
Warning: Do not let the hub, knuckle, or brake assembly hang by the brake hose. A stretched hose or ABS wire can create a safety problem that is more serious than the torn CV boot you started with.
[Products Worth Considering]

This low profile hydraulic floor jack is designed for cars, coupes, hatchbacks, and sedans with limited ground clearance, making it a practical choice for garages and home maintenance. It lifts smoothly up to a useful height range with a single piston quick-lift pump, while the steel construction, rotating saddle, and overload protection help improve stability and safety during use.

This 9-piece torque wrench set gives DIYers and professionals a versatile way to tighten fasteners with confidence across bikes, motorcycles, cars, trucks, and industrial equipment. It includes three click torque wrenches, multiple adapters, dual-scale measurement, and clear audible feedback to help prevent overtightening. Built with durable materials and stored in a portable case, it is designed for precise, organized, and reliable use.
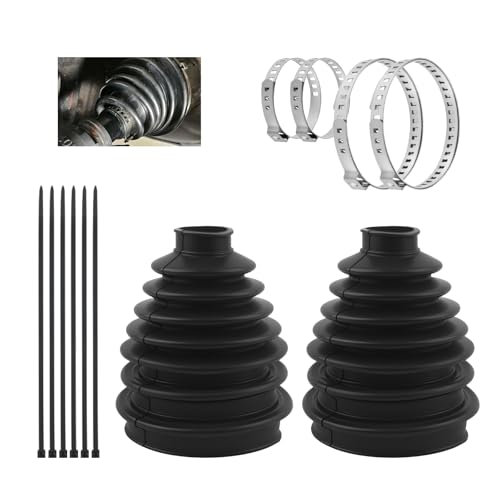
Dust and Leak Protection: This axle boot precisely covers the CV joint part, effectively blocking dust, sand, and other debris from entering the interior. It also provides a tight seal to avoid internal lubricant leakage, thereby avoiding abnormal wear that could cause gaps
Servicing the CV Joint: Disassemble, Clean, Mark, Replace Boots, Repack Grease
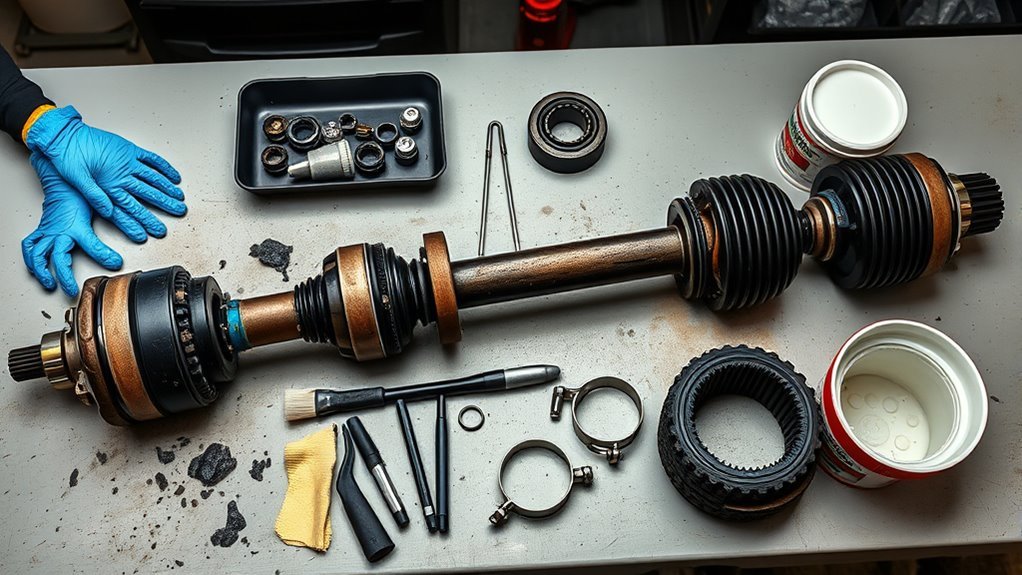
Set the axle on cardboard or a clean bench. Wear eye protection and gloves because the grease is messy and the clamps can spring loose. Before removing the joint, use a paint marker to mark the tripod, rollers, shaft, and housing so the parts go back together in the same orientation.
Cut or release the old boot clamps. Slide the torn boot away and remove the snap ring or retaining clip with snap-ring pliers or a small flathead screwdriver, depending on your axle style. Separate the joint gently. Do not hammer on the roller surfaces, bearing cage, or polished tracks. If a vise is needed, clamp lightly with soft jaws or aluminum plates so the shaft is not scarred.
Clean the joint with rags first, then use solvent-dampened rags to remove the old grease. You do not need to polish every surface until it looks new, but you do need to remove grit, metal flakes, water-contaminated grease, and heavy deposits. Avoid high-pressure blasting into the bearings because it can drive debris deeper into the joint.
Slide the new boots onto the shaft in the correct order before the joint is fully reassembled. If the boot must pass over splines, wrap the splines with vinyl tape to protect the boot lip, then remove the tape once the boot is in place. Keep the inner and outer boots oriented correctly; the small end seals to the shaft and the large end seals to the joint housing.
Pack the joint and boot with the grease supplied for that specific joint. If the kit includes different grease packets for the inner and outer joints, do not mix them. Work the grease into the bearing areas, but avoid overpacking so much that the boot balloons when the axle compresses. Seat the boot ribs in their grooves, set the axle at a normal operating length, then tighten the clamps with the proper clamp pliers.
Pro Tip: Clamp tension matters. A loose clamp leaks grease; an overtightened clamp can cut the boot or distort the seal. Use CV boot clamp pliers instead of side cutters whenever possible.
[Products Worth Considering]

Specifications: Axle boot is 4.72 inch in length and small port inside diameter is 0.78 inch, and contains three different calibers: 2.55 inch/65 mm, 3.14 inch/80 mm and 3.54 inch/90 mm. Please check the size data you need before purchase
Reassembly, Torque Specs, and Final Checks
Clean the axle splines, hub bore, and differential mating area before reassembly. Light corrosion can be cleaned carefully, but damaged splines, a torn axle seal, or a bent dust shield should be corrected before the axle goes back in. Seat the inboard end into the differential with the clip aligned correctly; on many Toyota-style axles, the C-clip opening faces down so it can compress and engage cleanly.
Use controlled mallet taps only when the splines are aligned. If the axle will not seat, stop and check the clip, seal, and spline alignment. Forcing it can damage the differential seal or clip. Once the inner axle is seated, guide the outer axle splines into the hub, reinstall the lower ball joint or control arm fasteners, reconnect the tie rod end, reinstall the axle nut, and reattach the brake line and ABS brackets.
For the 5th-generation-style 4Runner process commonly used with this repair, the frequently used torque values are:
| Fastener | Common Torque Value | Important Note |
|---|---|---|
| Lower ball joint / lower control arm bolts | 118 lb-ft | Verify for your exact year and hardware |
| Front axle nut | 174 lb-ft | Use a new cotter pin where equipped |
| Tie rod end nut | 67 lb-ft | Confirm cotter pin alignment after tightening |
| OEM wheel lug nuts | Use your owner’s manual specification | Wheel type and model year can change the spec |
Do not treat those numbers as universal for every 4Runner generation. If you removed alignment cams instead of only the ball joint-to-arm fasteners, match your paint marks and schedule an alignment check. If your truck has KDSS, aftermarket suspension, long travel, high-angle CVs, or limit straps, cycle the suspension and steering carefully to confirm the boot does not rub the lower control arm, shock, coilover, skid plate, or sway bar.
Before the road test, spin the axle by hand, turn the steering from lock to lock, inspect the boot folds, and check both clamps for a clean seal. After a short, gentle test drive, inspect again for fresh grease spray, clamp movement, clicking, vibration, or differential fluid leaks.
Troubleshooting After CV Boot Replacement
If something feels wrong after reassembly, use the symptom to narrow the cause:
- Grease spraying after the first drive: The boot may be overpacked, the clamp may be loose, the boot may not be seated in its groove, or trapped air may be pushing grease past the lip.
- Clicking while turning: The joint may already be worn from running with a torn boot. Replacing the axle is usually smarter than reclamping the boot again.
- Vibration under acceleration: Check axle seating, tripod orientation, roller placement, inner joint plunge, and whether the axle is binding at the current suspension angle.
- Differential leak: Inspect the axle seal and confirm the inner axle is fully seated. A damaged seal should be replaced.
- Boot tears again quickly: Look for excessive droop, lift-related CV angle, contact with the lower control arm, poor clamp placement, or a low-quality boot material.
Frequently Asked Questions
Can I still drive with a broken CV boot?
You can usually move the vehicle a short distance if the axle is not clicking, binding, or wobbling, but you should not keep driving it. A torn boot lets grease escape and contamination enter, which can turn a simple boot repair into a complete CV axle replacement.
Should I replace both CV boots or only the torn one?
Replace both boots on the axle you removed if the kit includes both, the other boot is old, or you had to disturb it during service. If the other boot is nearly new and untouched, inspection may be enough, but replacing both while the axle is out often saves repeat labor.
Is it better to replace the CV boot or the whole axle?
Replace the boot if the tear is fresh and the joint is clean, quiet, and smooth. Replace the axle if the joint clicks, vibrates, has heavy play, shows rust or pitting, or has been driven for a long time with dirt and water inside the boot.
Do lifted 4Runners tear CV boots more often?
They can. Extra ride height and added droop can increase CV angle and may let the boot contact nearby suspension parts. If your 4Runner is lifted or has long-travel suspension, check boot clearance at full droop, compression, and steering lock.
Can I reuse the old CV boot clamps?
No. Use new clamps from the boot kit. Old clamps can lose tension, deform during removal, or fail to reseal the boot. New clamps are cheap insurance against grease leaks and repeat disassembly.
Conclusion
Replacing both CV boots on a 4Runner is messy, but the logic is simple: keep the joint clean, keep the grease where it belongs, and put every fastener back the way Toyota intended. Work slowly, mark the joint parts, use the right boot kit, clamp the boots without cutting them, and torque the axle, suspension, steering, and wheel hardware to the correct spec for your model year.
After reassembly, spin the axle, road-test gently, and inspect again for quiet rotation, clean clamps, dry seals, and no grease sling. If the joint stays smooth and silent, you have bought more life from the axle. If it clicks, binds, or vibrates, do not keep chasing boots; replace the CV axle and get dependable control back under the truck.
Sources
- Toyota Technical Information System — official Toyota repair information source for model-year-specific procedures, service data, and torque specifications.
- Toyota Owner Manuals and Warranty Guides — owner manual source for safe lifting points, wheel service information, and vehicle-specific owner guidance.
- Toyota Genuine Parts — official Toyota parts catalog source for VIN-based boot kit fitment and genuine driveline components.
- GKN Automotive Driveshaft Boots — driveline manufacturer reference explaining the role of CV joint sealing systems and boot material selection.
- OSHA Standard 1926.305: Jacks — safety reference for securing raised loads after lifting with jacks.