Last updated: August 31, 2026
Affiliate disclosure: AutoReviewNest may earn a commission from qualifying purchases made through links on this page, at no extra cost to you.
To read Toyota RAV4 diesel fault codes, first match the diagnostic method to the vehicle’s model year, engine code, and country where it was sold new. On a confirmed OBD-II/EOBD model, scan the DLC3 and save every stored and pending code, plus permanent codes if supported, along with freeze-frame data before clearing anything. If a generic scanner will not communicate, move to Toyota-capable diagnostics. Use warning-light blink output only when service information for that exact RAV4 engine and market confirms the terminals and flash pattern.
Editorial note: This guide is based on diagnostic standards and service-document research. It does not claim hands-on testing across every diesel RAV4 engine or market.
August 31, 2026 update: EU diesel OBD phase-in dates were rechecked against the European legislation, permanent-DTC guidance was clarified, scanner no-communication advice was tightened, and the FAQ section was expanded.
Quick Answer
Find the DLC3 diagnostic connector under the driver-side lower dash and use a scanner confirmed for your RAV4’s year, diesel engine, and original market. EU rules required OBD on most qualifying M1 diesel cars from 2004, although some exempt or heavier categories phased in later; separately, OBDLink classifies 2004–2006 EU diesels as having limited generic-tool support and 2007+ as full support. If a reader will not connect, check power, ground, fuses, protocol support, and Toyota enhanced coverage before assuming the ECU has failed.
Key Takeaways
- A 16-pin connector does not by itself prove full OBD-II/EOBD compatibility, especially on older European and Asian-market diesels.
- EU rules required OBD on most qualifying M1 diesel passenger cars from 2004, while OBDLink’s generic-tool chart labels 2004–2006 EU diesels as limited support and 2007+ as full support.
- Some Toyota systems use TC and CG for warning-light code output, but the diesel RAV4 engine procedure must be confirmed in service information for the exact engine and market before you bridge terminals.
- Record stored and pending codes, permanent codes when supported, and freeze-frame data before clearing anything. A DTC identifies a system or circuit, not automatically the part that should be replaced.
- Use a Toyota-capable scan tool for ABS, SRS, transmission, body, immobilizer, and diesel-specific live data that a basic generic scanner may miss.
At a Glance
| Time Required | Varies by compatibility, code count, and whether communication faults must be diagnosed |
| Difficulty | Easy for OBD scanning; moderate for confirmed blink-code diagnosis |
| Tools Needed | OBD-II/EOBD scanner, flashlight, notepad or phone, and model-specific service information |
| Main Risk | Clearing evidence too early or bridging unconfirmed diagnostic terminals |
How Do You Tell If Your RAV4 Uses OBD-II, EOBD, or Toyota-Specific Diagnostics?

Start with the model year, country of original sale, and exact engine code. Diesel RAV4s were sold mainly outside the U.S., so U.S. OBD-II dates do not automatically apply to an imported vehicle. The European OBD rules required most qualifying M1 compression-ignition cars to have an emissions OBD system from January 1, 2004, while exempt and heavier categories phased in later. Separately, OBDLink’s compatibility guide labels 2004–2006 EU diesels as having limited generic OBD support and 2007 onward as full support. It also warns that the country of intended sale, not the factory location, determines compatibility and that a 16-pin connector alone does not prove OBD-II support.
That distinction explains why an early-2000s diesel RAV4 can confuse owners: an OBD-shaped scanner plug may fit even when a particular generic reader cannot communicate with every required system. Toyota also used proprietary or enhanced diagnostic functions alongside regulated emissions OBD. Confirm the engine, original market, and the scan tool maker’s vehicle-coverage list before treating a communication failure as a vehicle fault.
Note: OBD-II, EOBD, JOBD, M-OBD, and Toyota enhanced diagnostics are not interchangeable terms. A basic scanner may read regulated engine-emissions codes while still missing Toyota-specific modules or diesel live data.
| Vehicle situation | Best first approach | What to watch for |
|---|---|---|
| U.S.-market gasoline RAV4, 1996+ | Use a standard OBD-II scanner | This rule does not automatically apply to imported diesel models |
| EU-market diesel RAV4, 2004–2006 | Try EOBD, then Toyota-capable diagnostics if generic access is incomplete | Most qualifying M1 diesels were subject to EU OBD requirements, but generic-tool coverage can still vary |
| EU-market diesel RAV4, 2007+ | Start with an EOBD/OBD-II scanner confirmed for the vehicle | Toyota enhanced coverage is still needed for many non-emissions modules |
| Pre-2004 or non-EOBD diesel RAV4 | Use RAV4-specific service information and Toyota-capable diagnostics | Use warning-light output only when the exact manual confirms the procedure |
| Any RAV4 with ABS/SRS/transmission/body faults | Use Toyota Techstream or another tool with confirmed Toyota enhanced coverage | A generic reader may expose only regulated engine-emissions information |
Where Is the RAV4 OBD-II / Diagnostic Port?
Look for the RAV4 diagnostic connector under the driver-side lower dash, near the steering column, hood release, kick panel, or lower finish panel. Most later vehicles use a 16-pin DLC3-style connector. Because connector wiring can vary by year, engine, and market, identify terminals from the correct RAV4 wiring diagram rather than from connector shape alone. For year-by-year location detail and photos, see the RAV4 OBD-II port location guide.
Under-Dash Location
Slide the driver’s seat back, use a flashlight, and look beneath the lower dash trim. The connector is rectangular or trapezoidal with two rows of pins. On some models it is exposed; on others it may sit behind a small cover or be tucked slightly above the knee area.
| Item | Action |
|---|---|
| Location | Driver-side lower dash / lower finish panel |
| Shape | 16-pin DLC3-style connector on applicable models |
| Scanner power | Normally supplied through the DLC on compatible vehicles; follow the model wiring diagram for electrical testing |
| Before plugging in | Check for bent pins, corrosion, broken plastic, or aftermarket wiring |
Engine Bay Connector
Some older Toyota vehicles, including some earlier-market configurations, also use an engine-bay diagnostic box often marked “DIAGNOSIS.” Do not assume your diesel RAV4 uses that connector or copy the pins from another Toyota model. If you find an under-hood diagnostic box, use it only with service information for the exact year, engine, and market.
- Confirm the connector label and terminal names before bridging anything.
- Do not copy a pin-jump method from another Toyota engine simply because the connector looks similar.
- If the under-dash DLC3 is present, check the RAV4-specific diagram for its named terminals and supported protocol.
- Never force a scanner plug into a damaged connector.
- Stop if you see melted plastic, loose pins, water damage, or non-factory wiring.
Warning: Bridging the wrong diagnostic terminals can damage wiring or a control module. Do not use a pin-jump diagram from another Toyota model, engine, or control system. Verify the connector, terminal names, and procedure in service information for your exact RAV4.
What Does Your Scanner Symptom Tell You?
When a scanner fails, separate a power problem from a communication or coverage problem. The plug fitting the socket proves very little by itself.
| Scanner symptom | What it suggests | Next check |
|---|---|---|
| Scanner stays completely dark | Tool power, DLC power, fuse, wiring, or tool failure | Inspect the connector and use the exact wiring/fuse information for the vehicle |
| Scanner powers on but will not communicate | Ignition state, protocol mismatch, vehicle compatibility, wiring, or unsupported Toyota diagnostics | Confirm original market and tool coverage, then try a known-compatible Toyota-capable tool |
| Scanner reads engine but not ABS/SRS/body systems | The reader probably has generic emissions coverage only | Use a tool with confirmed Toyota enhanced module coverage |
| Older diesel does not support the generic reader | The vehicle may require Toyota-specific communication or a documented warning-light procedure | Use exact RAV4 service information; do not guess terminal positions |
Which Scanner Should I Buy: OBD-II or Toyota-Capable?
If your diesel RAV4 is OBD-II/EOBD compliant, a basic scanner can usually read regulated engine-emissions DTCs, freeze-frame information, and supported live data. That can be enough for simple check-engine-light diagnosis, but it is not the same as complete Toyota diagnostics.
For an older diesel or deeper troubleshooting, choose a scanner that clearly lists Toyota enhanced coverage for your year, engine code, market, and the modules you need. A suitable Toyota-capable platform may expose diesel rail pressure, EGR data, ABS, SRS, transmission, immobilizer, or body-control information that a basic emissions reader cannot access. Confirm those functions in the current tool maker’s coverage list before buying.
- Verify the vehicle year, engine code, and country of original sale before buying a tool.
- Choose EOBD/OBD-II plus Toyota enhanced diagnostics if you need more than regulated engine-emissions codes.
- Look for live data, freeze-frame data, pending codes, supported permanent DTCs, and readiness-monitor information.
- For older non-EOBD diesels, research whether the tool supports the Toyota diagnostic protocol used by your exact vehicle.
- Avoid adapters with vague “works on all cars” claims but no model-year or module coverage list.
Pro Tip: Before buying a scanner, search the tool maker’s coverage list for your exact RAV4 engine and market. “Toyota supported” is weaker evidence than a coverage entry naming the RAV4, engine or model range, and required modules.
[Products Worth Considering]

This steering clock spring is designed to restore reliable steering wheel controls across a wide range of Toyota models. It supports audio, cruise control, and other multifunction commands while matching OEM part numbers for confident replacement fitment. Built for dependable signal transfer and straightforward installation, it is an effective solution for repairing steering column control issues.

FOXWELL NT201 is an easy-to-use OBD2 scanner designed to help drivers quickly read and clear check engine codes, view live engine data, and check emissions readiness. Its color screen, one-key I/M readiness test, and broad compatibility with most gasoline vehicles since 1996 make it a practical tool for everyday diagnostics and maintenance. With plug-and-play operation and lifetime free updates, it offers a simple way to understand vehicle issues without expensive shop visits.

The ZMOON ZM201 is a plug-and-play OBD2 code reader designed to quickly diagnose check engine issues on compatible vehicles after 1996. It reads and clears engine fault codes, displays live data and freeze frame information, checks I/M readiness, and helps you identify problems before visiting a repair shop. With a color screen, intuitive controls, and built-in DTC database, it offers an easy-to-use solution for DIY drivers and car owners who want reliable engine diagnostics.
How Do You Run a Basic RAV4 Diesel Code Scan?

Once you know the vehicle should support the scanner you are using, run a basic scan before touching parts. The goal is to capture the fault information exactly as the control module stored it.
[Products Worth Considering]

The OBDMATE OM901 is a handheld car diagnostic scanner designed to read and clear fault codes across ABS, SRS, engine, and transmission systems. It also offers full OBD2 functions like live data, freeze frame, I/M readiness, VIN retrieval, O2 sensor testing, EVAP testing, and onboard monitoring, making it useful for quick troubleshooting and emissions checks. With a large screen, battery voltage monitoring, DLC pin testing, and a protective carrying case, it is a practical tool for DIY drivers and professionals alike.

This Yuirote universal car motor diagnostic tool helps drivers quickly detect engine fault codes and identify system issues for routine inspections and maintenance. It also supports electronic parking brake reset and emergency release functions, making it useful for handling EPB-related problems without a repair shop visit. Its compact, ergonomic design and broad vehicle compatibility make it a practical choice for car owners and DIY repair enthusiasts.

This enhanced OBD2 scanner helps drivers quickly diagnose check engine light issues, read and clear trouble codes, and check emissions readiness before a smog test. It also adds EVAP and O2 sensor testing, live data, freeze frame capture, and a one-click battery health check in a simple plug-and-play tool with a bright color screen.
1. Identify Vehicle Year and Market
Check the registration, VIN plate, emissions information, or owner/service documents. Confirm whether the RAV4 was sold new in the EU, Japan, Australia, the U.S., or another market. The original market and engine determine which regulated or Toyota-specific diagnostic system is relevant.
2. Locate the Diagnostic Port
Find the DLC3 on applicable models under the driver-side lower dash and inspect it before plugging in. If the connector lacks proper power or ground, a scanner may stay dark or fail to communicate even when the vehicle otherwise supports the protocol.
3. Read and Record Codes
With the ignition OFF, plug in the scanner. Then follow the scanner manufacturer’s ignition instructions; this commonly means switching the ignition ON without starting the engine for the initial scan. Record every stored and pending DTC, plus permanent DTCs if the vehicle supports them. Save available freeze-frame information such as engine temperature, rpm, vehicle speed, load, and other captured values. Do not clear anything yet.
- Write down the full code exactly as displayed, including any suffix or information code the tool provides.
- Record whether each DTC is stored, pending, current, history, or permanent when those statuses are supported.
- Save freeze-frame or failure-record data before disconnecting the scanner.
- Check readiness monitors if the vehicle recently had codes cleared or the battery disconnected.
- After repairs, scan again and follow the relevant confirmation procedure or monitor cycle.
A diagnostic trouble code is a starting point. It tells you which system detected a problem; testing identifies the failed part, wiring fault, hose leak, sensor issue, or operating condition that caused it.
Can You Read Flash Codes on an Older Diesel RAV4?
An older diesel RAV4 may support warning-light code output, but you must confirm that procedure for the exact engine, model year, original market, and control system. Failure of a generic scanner does not by itself prove that a blink-code method is available.
The Toyota 15B-FTE diagnostic-connector supplement shows a Toyota implementation in which TC and CG are used for check-engine warning-light output and lists SST 09843-18040. However, that document is not a RAV4 diesel-engine repair manual. RAV4 service information for other systems also demonstrates that TC/CG procedures can be system-specific. [VERIFY: confirm the diesel RAV4 engine-control repair manual, connector view, and blink-code procedure for the exact year and market before bridging any terminals.]
Blink-Code Steps
- Park safely, set the parking brake, and switch off accessories.
- Open the repair manual for your exact RAV4 year, diesel engine code, and market.
- Confirm that the engine-control section authorizes warning-light DTC output and identify the named terminals from its connector view.
- Turn the ignition OFF before connecting the service jumper or SST specified by that manual.
- Follow the manual’s connection and ignition sequence exactly.
- Watch the specified warning light and record the complete flash sequence.
- Turn the ignition OFF before removing the service jumper or tool unless the exact manual specifies another sequence.
- Decode the flashes only with the DTC table for that exact control system.
Toyota warning-light patterns can vary by system and generation. Some systems use grouped flashes for two-digit DTCs, but pause timing, the normal-code pattern, display order, and clearing procedure must come from the correct repair manual. Do not decode a diesel RAV4 sequence with a chart copied from an unrelated Toyota engine or module.
Warning: Do not improvise a blink-code procedure on an airbag/SRS circuit. SRS diagnostics require exact service information and special handling; probing or shorting the wrong circuit can be dangerous.
How Do You Interpret Toyota RAV4 Diesel Fault Codes (P0xxx/P1xxx)?
SAE J2012, revised September 2025, defines standardized DTCs and ranges reserved for manufacturer-specific use. The first character identifies the broad diagnostic family: P for powertrain, C for chassis, B for body, and U for network communication. In common OBD use, P0xxx includes standardized powertrain DTCs, while P1xxx commonly includes manufacturer-specific powertrain definitions that must be checked against Toyota service information.
This article focuses on accessing and reading diesel RAV4 diagnostics rather than duplicating a large code catalog. For a broader RAV4 DTC reference, see the Toyota RAV4 OBD-II codes and meanings guide.
- P0xxx: Standardized powertrain codes can cover areas such as emissions controls, sensors, EGR, glow systems, fuel metering, or related circuits.
- P1xxx: Manufacturer-specific powertrain codes may require Toyota service data for the exact engine and model year.
- C-codes: Chassis faults can involve ABS, stability control, braking, steering, or other chassis functions.
- B-codes: Body-system faults can involve HVAC, locks, lighting, restraints, and other body electronics.
- U-codes: Network codes relate to communication between control modules.
If you see a code such as P0400, do not automatically replace an EGR valve because a short scanner description mentions EGR. Inspect the related circuit, hoses or passages where applicable, wiring, control devices, sensor feedback, and supported live data according to the engine-specific diagnostic procedure. If the scanner returns a Toyota-specific DTC, use Toyota service information rather than relying on an incomplete generic definition.
On vehicles that support permanent DTCs, those codes behave differently from ordinary clearable DTCs. The California Bureau of Automotive Repair OBD reference explains that a permanent DTC cannot be erased with a scan-tool clear command or by disconnecting the battery; the OBD system clears it after verifying that the original fault is no longer present.
| Code type | What it means | Best next step |
|---|---|---|
| Stored / confirmed code | The control module detected a fault and stored the DTC under its applicable criteria | Record the code and available freeze-frame data, then diagnose before clearing |
| Pending code | A monitored fault has been detected but may not yet meet the criteria for a confirmed DTC | Preserve the data and follow the engine-specific diagnostic or confirmation procedure |
| Permanent code, if supported | A non-volatile emissions-related DTC that cannot simply be erased by a normal clear command | Repair the cause and let the applicable OBD monitor verify the repair so the vehicle can clear it |
| Blink / warning-light code | A DTC represented through a warning-light pattern on a system that explicitly supports that method | Decode it only with the service-manual table for that exact system |
Why Won’t My RAV4 Scanner Connect?
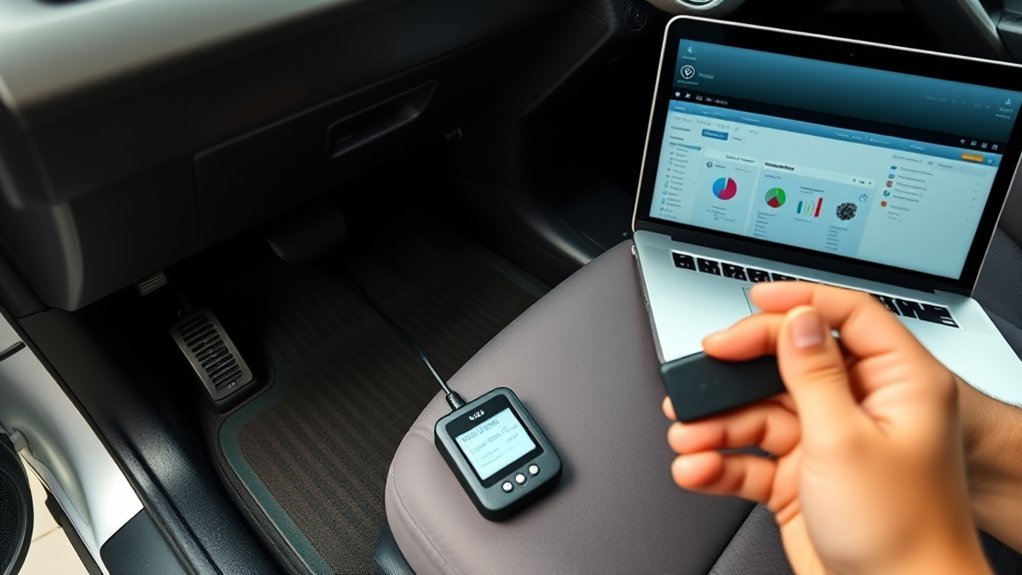
If your scanner powers on but will not link to the RAV4, do not assume the ECU is dead. Start by separating vehicle compatibility from connector power, wiring, tool, and protocol problems. Older imported diesels are especially important to identify by original market and engine before judging a generic scanner result.
[Products Worth Considering]

This WEJOWE OBD2 scanner helps drivers quickly identify check engine causes, read and clear trouble codes, and view live vehicle data with built-in DTC lookup. It also includes battery voltage testing, I/M readiness checks, freeze frame retrieval, and support for printing diagnostic reports to help simplify repairs and maintenance. Designed for most OBDII vehicles since 1996, it offers an easy-to-use solution for DIY car diagnostics.

TOPDON ONE Plus is a professional-grade diagnostic scan tool built for advanced ECU programming, coding, bidirectional control, and OE-level vehicle diagnostics. It supports topology mapping, 50+ reset services, and modern communication protocols to help repair shops diagnose faster and complete more jobs in-house. The large touchscreen, wireless VCI, and AI-assisted repair guidance make it a powerful all-in-one solution for modern automotive service.

The TOPDON VeriDiag X800 BT is a wireless bidirectional automotive diagnostic scanner designed for full-system troubleshooting, active testing, and advanced service resets. It supports broad vehicle coverage, live data viewing, AutoVIN identification, and lifetime free updates to help DIYers and professionals diagnose issues faster and with greater confidence.
Scanner Powers On but Shows “No Communication”
- Confirm that the ignition state matches the scanner’s instructions and that the 12-volt battery is healthy.
- Check whether the vehicle is actually compatible with the generic OBD/EOBD functions your reader uses.
- Confirm that the scanner supports the RAV4’s year, engine, original market, and required Toyota protocol or enhanced functions.
- Inspect the DLC3 for spread terminals, corrosion, pushed-back contacts, water damage, or non-factory wiring.
- Use the exact model-year wiring and fuse information before testing or replacing a fuse.
- Try a second known-compatible scanner where possible to separate a tool problem from a vehicle-side problem.
Scanner Does Not Power Up
- Inspect the connector and scanner plug for physical damage first.
- Check the DLC power and ground circuits only with the correct wiring diagram and if you are comfortable using a multimeter safely.
- Inspect the exact fuses specified for that model rather than copying a fuse name from another RAV4 year.
- Try the scanner on another known-good compatible vehicle if available.
- If a replacement fuse blows again, stop and diagnose the circuit instead of fitting another fuse.
Scanner Reads Engine but Not ABS, SRS, or Transmission
This often points to scan-tool coverage rather than a bad DLC. A basic generic reader is primarily intended for regulated OBD emissions information. ABS, airbags, transmission, immobilizer, diesel injector data, body electronics, and other Toyota systems may require Toyota enhanced coverage for the exact vehicle.
Note: Clearing ordinary DTCs can erase useful diagnostic evidence and reset readiness information. Save the code list and available freeze-frame data first, especially when the fault is intermittent or another technician will diagnose the vehicle.
When Should You Use a RAV4 Forum or Call a Mechanic?
RAV4-specific communities can be useful for connector photos, imported-diesel details, and reports about which scanners communicate with a particular year or engine. Treat a forum report as a clue rather than a substitute for the correct wiring diagram or repair procedure.
Minimum information to share
Model year · engine code · country of original sale · transmission · scanner make and model · exact DTC and status · freeze-frame values · warning lights · symptoms · recent repairs or battery disconnection
DIY RAV4 communities can help you compare symptoms and tool compatibility, but high-pressure diesel fuel faults, wiring faults, immobilizer problems, SRS work, programming, and intermittent control-module issues can require professional equipment and service information.
- Post the exact DTCs rather than only saying “check engine light.”
- State that the RAV4 is diesel and include the engine code and original market.
- Share scanner screenshots and freeze-frame or live-data values where useful.
- Test in a controlled order rather than replacing parts from a short scanner description.
- Call a qualified technician if the work involves high-pressure diesel fuel, airbags, ECU programming, immobilizer work, unsafe electrical probing, or unsafe under-vehicle access.
Frequently Asked Questions
How do I read a Toyota RAV4 diesel fault code?
Confirm the RAV4’s year, diesel engine, and original market, then use an OBD-II/EOBD or Toyota-capable scanner that supports that vehicle. Connect through the correct diagnostic port, follow the tool’s ignition instructions, and save stored and pending DTCs, supported permanent DTCs, and freeze-frame data before clearing anything.
How do I interpret OBD2 codes?
Read the entire DTC exactly as displayed. P identifies powertrain, C chassis, B body, and U network communication. Standardized and Toyota-specific definitions can differ, so use the definition and diagnostic procedure for your exact RAV4 engine, year, and control system rather than replacing the first part named in a short scanner description.
How do I read my Toyota engine fault code without a scanner?
Some Toyota systems support warning-light DTC output, but there is no safe universal pin-jump procedure for every diesel RAV4. Use the repair manual for your exact year, engine code, market, and control system. Do not bridge terminals until that manual confirms the connector, terminal names, sequence, and flash pattern.
Why does my scanner fit the port but fail to connect?
A 16-pin connector does not guarantee that a generic reader supports every diagnostic function on the vehicle. Other causes include the wrong ignition state, low battery voltage, damaged DLC wiring, a fuse or power problem, poor ground, unsupported protocol, or a scan tool without the required Toyota diesel coverage.
Should I clear the code after reading it?
Not immediately. Save the complete code list and available freeze-frame information first. Clearing ordinary codes can remove useful evidence and reset readiness information. Diagnose and repair the cause, then clear supported clearable DTCs and follow the appropriate confirmation procedure.
Does a 16-pin diagnostic port mean my diesel RAV4 is OBD-II compliant?
No. Some European and Asian vehicles used a 16-pin connector before full generic OBD-II/EOBD compatibility. Check the RAV4’s original market, model year, engine, emissions or service information, and the scanner maker’s coverage list instead of relying on connector shape alone.
Do I need Toyota Techstream to read RAV4 fault codes?
Not for every fault. A compatible generic OBD-II/EOBD scanner can read regulated engine-emissions information on supported vehicles. Techstream or another scanner with confirmed Toyota enhanced coverage becomes more important when you need Toyota-specific diesel data or access to ABS, SRS, transmission, immobilizer, body, and other non-generic modules.
Can I clear a permanent diagnostic trouble code with a scanner?
A supported permanent DTC cannot be erased simply by using the normal scan-tool clear command or disconnecting the battery. Repair the underlying fault and allow the relevant OBD monitor to run again. The vehicle clears the permanent DTC after its diagnostic system verifies that the problem is no longer present.
Conclusion
Read Toyota RAV4 diesel fault codes by matching the diagnostic method to the vehicle’s year, diesel engine, and original market. Use standard OBD-II/EOBD on confirmed compatible vehicles and Toyota-capable diagnostics when generic communication or module coverage is insufficient. Save DTCs and freeze-frame evidence before clearing anything. If the scanner will not communicate, diagnose power, ground, compatibility, and tool coverage before replacing parts or attempting a terminal jumper. Use warning-light output only when service information for the exact RAV4 system confirms the complete procedure.
Sources
- EUR-Lex — Directive 70/220/EEC consolidated text — supports the European OBD phase-in for qualifying compression-ignition M1 vehicles and later exempt/heavier categories.
- OBDLink vehicle compatibility guide — supports market-based compatibility checks, its 2004–2006 limited / 2007+ full EU-diesel generic-support classification, and the warning that a 16-pin connector alone does not prove OBD-II compliance.
- SAE J2012 Diagnostic Trouble Code Definitions — defines standardized DTCs and manufacturer-specific code ranges; revised September 2025.
- California Bureau of Automotive Repair OBD Test Reference — supports permanent-DTC behavior, including that supported permanent DTCs cannot be erased by a normal scan-tool clear command or battery disconnect.
- U.S. EPA On-Board Diagnostic Regulations and Requirements — provides background on regulated OBD operation, malfunction monitoring, and diagnostic information.
- Toyota Diagnostic Connector (DLC3) Circuit, 15B-FTE engine supplement — documents one Toyota TC/CG warning-light implementation and SST 09843-18040. It is not a diesel RAV4 engine manual and must not be treated as a universal RAV4 terminal map.