What’s in This Article
If your RAV4 blower quits, don’t replace parts at random. Start with the easy checks: inspect the heater or blower fuse listed on your fuse cover, test the blower relay, and check the resistor or blower control module under the passenger dash for burns or loose pins.
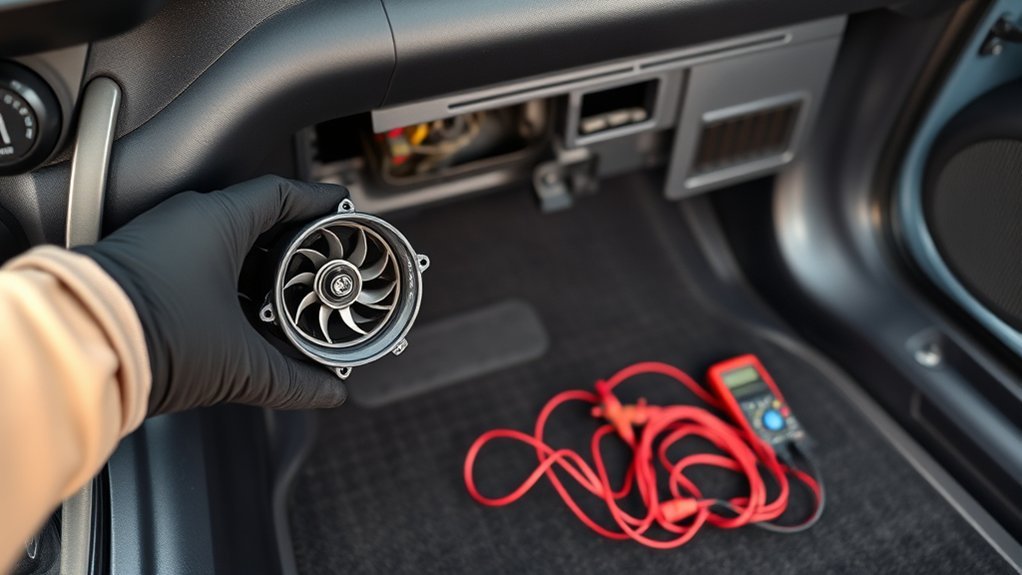
Measure voltage at the blower plug with the fan on. Use a fused 12V jumper only at the disconnected motor, not through the vehicle harness, to confirm whether the motor runs. Check grounds, harness connectors, and wire chafing before you buy parts.
Quick Answer
- No airflow on any speed often points to a blown fuse, bad relay, poor ground, failed control module, or dead blower motor.
- Airflow only on some speeds usually points to a failed blower resistor or blower control module.
- Check the heater or blower fuse by label, not by fuse number alone, because RAV4 fuse layouts vary by year and trim.
- A fused direct-power test at the disconnected motor helps you confirm whether the motor itself can run.
Key Takeaways
- Use your owner’s manual or fuse-box cover to identify the correct heater or blower fuse.
- Test power and ground before you replace the blower motor.
- Suspect the resistor or control module when only certain fan speeds work.
- Disconnect the motor before any direct 12V bench test.
- Record photos, fault codes, and meter readings before you visit a shop.
RAV4 Blower Resistor and Motor: Quick Causes and the First Thing to Check
Start with the blower resistor or blower control module because it often causes fan-speed problems. The resistor or control module controls blower motor speed. When it fails, you may notice classic symptoms: airflow only on certain speeds, weak airflow changes, or no airflow from the vents.
The blower assembly sits under the passenger-side dash on many RAV4 models. First, look at the resistor or control module connector and wiring for corrosion or loose pins. Poor connections can copy the same symptoms as a bad resistor.
Clean the contacts, reseat the harness, and test again before you order parts. If only one or two speeds fail, the resistor or control module deserves your first test. If no speed works, test the fuse, relay, power feed, ground, and motor.
Keep the cabin air filter and intake path clean. Restricted airflow can make the blower work harder and add heat around the control parts.
Before You Start: Safety, Tools, and Model-Year Checks
Use basic tools before you remove the blower assembly. You need a multimeter, a trim tool, a small socket set or screwdriver, a scan tool if available, and a fused jumper lead for bench testing.
Turn the ignition off before you unplug connectors. On RAV4 Hybrid or Prime models, stay away from orange high-voltage cables and battery components. You only need the 12V HVAC blower circuit for these checks.
Warning: Do not jump battery power into the vehicle harness, because you can damage control modules or wiring.
Do not rely on a single fuse number across all RAV4 years. Check the fuse-box cover or Toyota owner’s manual and look for labels such as HTR, HTR-IG, A/C, or blower-related circuit names.
Test Fuses, Relay, and Blower Power Safely (Step-by-Step)
Check power delivery to the blower system in order. First, test the heater or blower fuse listed for your exact RAV4 year and trim. Then test the blower relay if your model uses one.
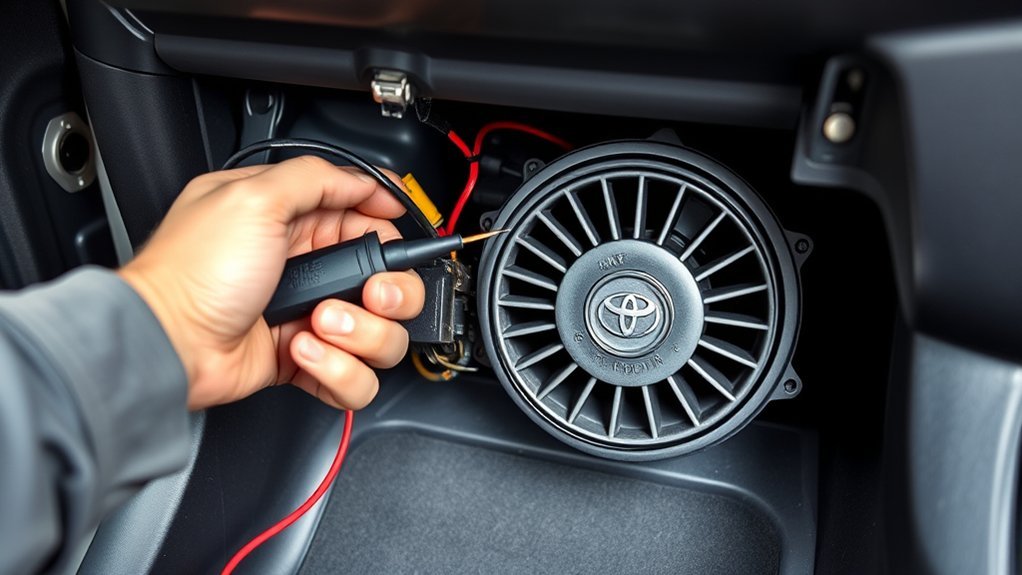
Finally, measure voltage at the blower motor connector with the vehicle on and the fan switch set to a running speed. If you have battery voltage and a good ground but the motor does not run, disconnect the motor and test it with a fused 12V jumper.
Work through each component in this order:
- Fuse: Remove the correct heater or blower fuse, probe both terminals with the meter, and replace it with the same amperage if it’s open.
- Relay: Bench-test the relay by energizing the coil and checking that the contacts close. Swap it with a matching known-good relay if you’re not sure.
- Blower connector: Look for battery voltage and a solid ground when the fan switch runs. No voltage means you need to trace the upstream circuit.
- Motor bench test: Disconnect the motor, use a fused jumper, and confirm that the fan spins smoothly without noise or drag.
Repair or replace any damaged wiring and connectors before you move to the next test.
Is It the Resistor or the Motor? 3 Quick DIY Tests to Tell
Three simple checks can help you separate a blower motor fault from a resistor or control module fault.
First, put a voltmeter at the blower motor plug. If you see battery voltage and a good ground with the fan switch on, the main power path likely works. Second, inspect the resistor or control module for burnt spots, heat marks, or melted connector plastic.
Third, run a basic motor test after you disconnect it from the harness. Smooth operation during a fused 12V bench test usually means the motor can run. No movement, heavy noise, or rough spinning points toward motor wear.
If the fan works only on certain speeds, suspect the blower resistor or control module first. Measure resistance or follow the factory diagnostic steps for your model. Readings outside spec confirm you need a replacement part.
Write down every reading. A few notes can stop you from replacing the wrong part.
Fix or Replace the Blower Motor: Lubrication, Brushes, and Armature Tips
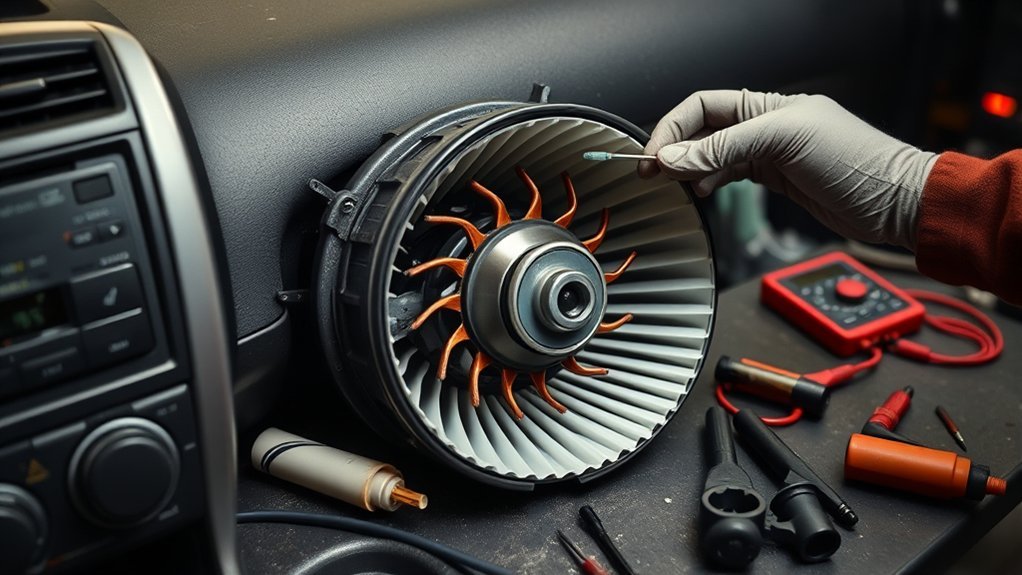
Before you buy a replacement motor, inspect it carefully. Debris in the fan cage, dry bearings, worn brushes, or a damaged connector can make a good motor look bad.
Pull the motor only after you disconnect the battery or turn the vehicle fully off. Clean dust, leaves, and lint from the fan cage. If the motor design allows service, apply a small amount of light electric motor oil to the bearing area.
Do not soak the motor with oil. Keep oil away from the commutator, brushes, and electrical connector. Many newer blower motors use sealed parts, so replacement may make more sense than rebuilding.
Check the brushes for uneven wear or weak spring tension if you can access them. Spin the fan by hand and feel for rough spots. Grinding, wobble, or dead spots usually means you should replace the motor.
Pro tip: Replace a dirty cabin air filter while the blower area sits open, because airflow restriction can stress the motor.
Track Down Intermittent Faults: Grounds, Wiring Shorts, and Error Codes
Intermittent blower operation often traces back to the electrical path, not the motor alone. Start by checking ground connections for corrosion, loose bolts, or paint under the terminal. A bad ground adds resistance and can mimic motor failure.
Next, inspect the wiring harness and connectors by hand. Feel for chafed spots, melted insulation, loose terminals, or bent pins. Confirm wiring integrity before you blame the blower motor.
Put a voltmeter at the blower plug with the system running. Look for steady battery voltage and note any dropouts under load. Move the harness gently while you watch the meter.
Pull any diagnostic trouble codes from the heating, ventilation, and air conditioning (HVAC) system if your scan tool can read body modules. HVAC body codes, blower control codes, or network codes can help you narrow the fault. A generic code such as U0126 does not prove a blower failure by itself, so match every code to the symptom before you replace parts.
You can also check for any related TSBs on the NHTSA database using your VIN, which may surface known wiring or control module issues for your specific RAV4 build.