RAV4 Hybrid 12V Battery Location (2016–2025)
Merrick Vaughn · Reviewed against Toyota owner-manual guidance · Last updated: July 31, 2026
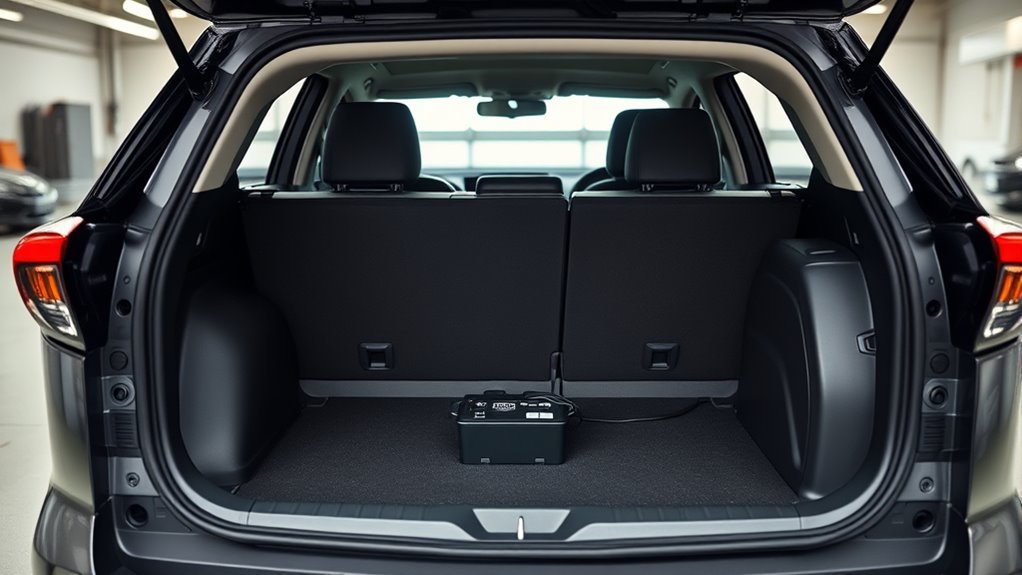
On U.S.-market 2016–2025 Toyota RAV4 Hybrid models, the auxiliary 12-volt battery is in the rear luggage compartment, not under the hood. The exact side changed by generation: 2016–2018 models place it on the left-hand side, while 2019–2025 models place it on the right-hand side. Lift the rear deck board and remove only the model-specific side cover required to reach it. For a jump-start, use Toyota’s designated positive terminal and specified metallic ground point under the hood.
Model-year scope: This guide covers U.S.-market 2016–2025 RAV4 Hybrid models. Toyota introduced an all-new sixth-generation RAV4 for 2026, so do not assume its battery location, panels, or jump points match the earlier generations. Use the 2026 owner’s manual for that vehicle.
Quick Answer
2016–2018: look beneath the rear cargo deck on the left side. 2019–2025: look beneath the rear cargo deck on the right side. Use the under-hood exclusive jump-start terminal for emergency starting; do not remove rear trim just to connect jumper cables.
What’s in This Article
- Where the RAV4 Hybrid’s 12V Battery Is
- Battery Location by Model Year
- Which Battery Access Point Should You Use?
- What You’ll Need Before Accessing the 12V Battery
- Remove Covers and Trim
- Identify the 12V Battery and Connections
- Inspection and Corrosion Care
- How to Jump-Start a RAV4 Hybrid
- When to Replace the Battery or Call a Pro
- Frequently Asked Questions
Key Takeaways
- 2016–2018 RAV4 Hybrid: the 12V battery is on the left-hand side of the luggage compartment.
- 2019–2025 RAV4 Hybrid: the 12V battery is on the right-hand side of the luggage compartment.
- The designated under-hood terminal and specified ground point are used for a jump-start.
- Start with the rear deck board and model-specific side cover; do not force unrelated fixed trim.
- Match the replacement battery’s specification, terminals, hold-down design, and vent connection.
- Do not touch orange high-voltage cables, connectors, or hybrid-system components.
Where Is the RAV4 Hybrid 12V Battery by Model Year?
The physical battery stays in the rear luggage area across the 2016–2025 range, but Toyota moved it from the left side to the right side when the fifth-generation RAV4 arrived for 2019. Use this split before removing any side cover.
| Model Years | Battery Side | Initial Access Path |
|---|---|---|
| 2016–2018 RAV4 Hybrid | Left-hand side of luggage compartment | Remove the rear deck board, then the applicable left-side deck cover and battery cover |
| 2019–2025 RAV4 Hybrid | Right-hand side of luggage compartment | Lift the rear deck board, then remove the applicable right-side protective cover |
| 2026 RAV4 Hybrid | Model-year specific | Use the redesigned model’s owner’s manual before removing panels |
Which Battery Access Point Should You Use?
The correct access point depends on the task. Use the rear luggage compartment to inspect, disconnect, test, or replace the physical battery. Use the under-hood exclusive jump-start terminal and the manual’s specified metallic ground point when the 12V battery is discharged.
| Your Goal | Access Point | What to Do |
|---|---|---|
| Locate or inspect the battery | Rear cargo area | Lift the cargo deck and follow the left-side or right-side path for your model year |
| Jump-start the vehicle | Under the hood | Use the exclusive positive jump terminal and the specified metallic ground point |
| Disconnect or replace the battery | Rear cargo area | Follow the model-year manual and preserve any vent connection |
| Work on a 2026 RAV4 Hybrid | Model-year specific | Confirm the redesigned model’s procedure before removing panels |
The auxiliary battery is separate from the larger traction battery. The 12V battery powers locks, computers, lights, control modules, and the systems needed to place the vehicle in READY mode. The high-voltage traction battery supplies the electric drive system. Do not treat the two batteries as interchangeable service points.
What You’ll Need Before Accessing the 12V Battery
Clear the cargo area before lifting the deck panel. For a basic visual inspection, you may need gloves, eye protection, a flashlight, a plastic trim tool, and a tray for removable clips or fasteners. A socket or wrench should be used only when the manual identifies the correct fastener and size.
Park on level ground, apply the parking brake, select Park, turn the vehicle off, and move the electronic key away from the cabin. Keep the rear hatch fully supported and make sure loose cargo cannot fall into the battery compartment.
Check the Toyota RAV4 Hybrid manual library and select the exact model year and production version before disconnecting a terminal. Battery disconnection can clear stored electronic information, and some systems may require initialization afterward.
Warning: Never touch, probe, disconnect, or place tools near orange high-voltage hybrid cables or connectors. Stop and contact a qualified hybrid technician if the service area is damaged, wet, overheated, or difficult to identify.
[Products Worth Considering]

The Masoll M13 Tire Pressure Monitoring System helps monitor tire pressure for sedans, SUVs, pickup trucks, RVs, and travel trailers with four tires. It features automatic reference pressure calibration, alerting you when pressure changes fall outside the set range, while solar charging and auto wake-up support convenient everyday use. With precise pressure detection, an easy-to-read color LCD, and adaptive backlighting, it is designed to improve driving safety and help protect tire life.

This automatic 12V charger and maintainer delivers a full charge before switching to float mode to help keep powersports batteries ready for storage and regular use. Its four-step charging program is designed for lead-acid, flooded, AGM, and gel cell batteries, helping prevent overcharging while supporting longer battery life. Compact and easy to use, it includes both ring terminal and alligator clip connections plus smart safety features for dependable charging.

The NOCO GENIUS5 is an all-in-one battery charging and maintenance solution for 6V and 12V lead-acid and lithium batteries. It features temperature compensation, dead-battery recovery, desulfation, and safe long-term maintenance to help extend battery life and performance. Compact and versatile, it works with a wide range of vehicles and comes with mounting accessories and a warranty.
Remove Covers and Trim: Step-by-Step Access Procedure
Panel arrangement varies by generation, production version, spare-tire configuration, and cargo equipment. First identify whether your RAV4 Hybrid is a 2016–2018 left-side layout or a 2019–2025 right-side layout. Begin with the deck board and removable storage pieces instead of prying a fixed side panel.
[Products Worth Considering]
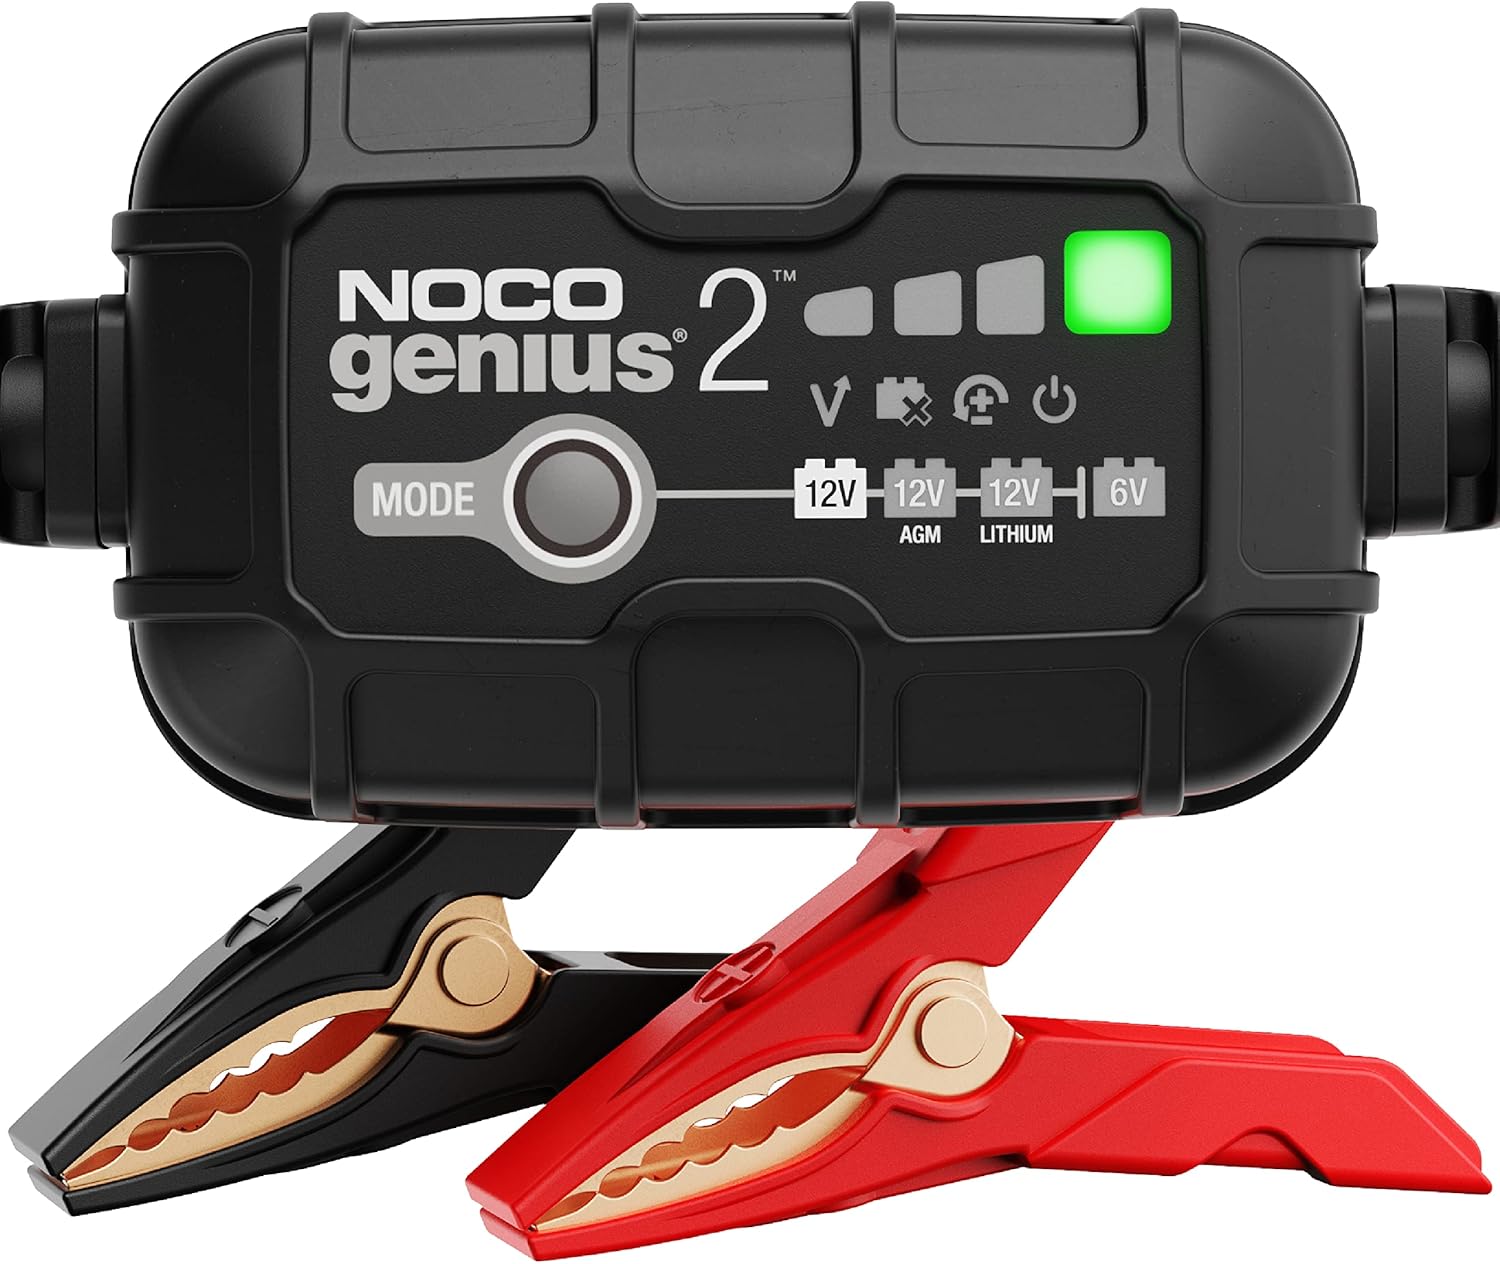
The NOCO GENIUS2 is a compact, all-in-one smart charger that automatically charges, maintains, and restores 6V and 12V lead-acid and lithium batteries. It features temperature compensation, overcharge protection, pulse desulfation, and Force Mode for reviving deeply discharged batteries, making it ideal for long-term battery care across many vehicle types. Designed for safe indefinite connection, it helps extend battery life and keep batteries ready to go.

The NOCO GENIUS1 is an all-in-one smart charger, maintainer, trickle charger, and desulfator designed to help restore and keep batteries ready for use. It supports 6V and 12V lead-acid and lithium batteries, uses temperature compensation for safer charging, and can recover deeply discharged batteries with advanced charging modes. Compact and easy to leave connected, it is built for cars, motorcycles, ATVs, boats, and other vehicles that need reliable battery care.
Lift the Cargo Floor Panel
Open the rear hatch and remove cargo, mats, organizers, and loose storage pieces. Lift the cargo floor panel using its handle or exposed edge. Set the panel flat in a clean area so it does not bend, crack, or collect grit.
- Remove loose cargo before lifting the deck panel.
- Keep the hatch opening and latch area clear.
- Set deck boards and trays in the order you remove them.
- Check the lower cargo compartments for another removable tray or cover.
Follow the Correct Left- or Right-Side Access Path
For 2016–2018 models: remove the rear deck board, then work toward the left-side deck cover and the battery cover shown in the owner’s manual. Vehicles with a full-size spare tire may use deck-board locking clips, so check the manual before turning or releasing them.
For 2019–2025 models: lift the rear deck board and work toward the right-hand side of the luggage compartment. Remove only the protective cover or trim piece identified for battery access in the exact manual.
Stop if a panel resists. Do not force a fixed side panel, pry near wiring, or assume every visible clip must be released. Check for another deck piece, tray, claw, or fastener before applying more pressure.
Access the Battery Compartment
- Confirm the model-year group: 2016–2018 left side or 2019–2025 right side.
- Lift the rear cargo deck panel and remove only the loose lower storage pieces that block the correct side.
- Locate the side deck cover or protective battery cover shown in the exact model-year manual.
- Release only the specified cover, claws, clips, or fasteners needed to expose the battery.
- Identify the battery case, terminals, hold-down bracket, cables, and vent connection if fitted.
- Reinstall every cover and cargo-floor component in the reverse removal order.
Do not disconnect a cable merely to inspect the battery. A visual check can usually be completed without disturbing the terminals, hold-down bracket, or vent tube. For broader routine service, see the Toyota RAV4 maintenance schedule.
Identify the 12V Battery and Connections
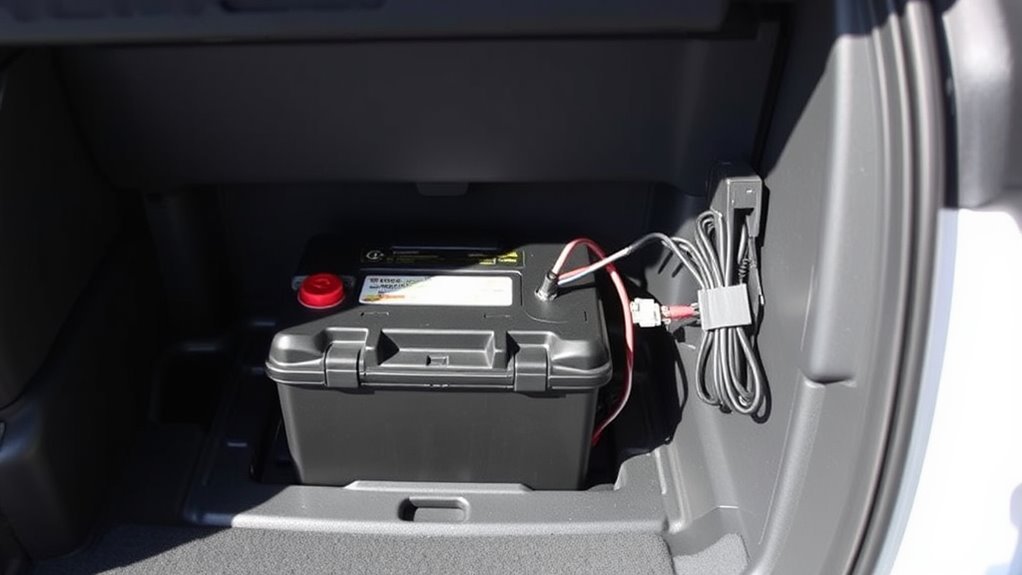
The auxiliary battery is a rectangular low-voltage battery with a specification label and marked positive and negative terminals. The positive terminal normally has a protective cover or plus symbol. The negative cable connects the battery to the vehicle’s ground circuit.
Do not confuse the auxiliary battery with the high-voltage traction battery or nearby hybrid components. Orange cables identify high-voltage circuits and must not be touched during 12V battery inspection.
What Should You Check on the Battery?
Inspect the battery under good lighting without leaning tools across the terminals. The battery should sit firmly in its tray, and the hold-down hardware should prevent movement.
- Battery case: Look for cracks, swelling, deformation, stains, leakage, or heat damage.
- Terminals: Look for loose clamps, damaged covers, white or colored residue, and heat marks.
- Hold-down: Confirm that the battery cannot slide, tip, or contact nearby components.
- Cables: Check for damaged insulation, broken strands, pinching, or loose routing.
- Vent connection: If a vent tube is fitted, confirm that it remains attached, undamaged, and correctly routed.
How Do You Identify the Connections?
The main connections use battery clamps or bolted cable ends. Keep the positive terminal cover closed unless testing or service requires access. Do not place a wrench, test lead, or metal object where it could bridge the positive terminal to the vehicle body.
If you plan to disconnect the battery, follow the exact sequence in the model-year manual. Do not guess the terminal order, tightening torque, or reset procedure. Use professional service when terminal hardware is corroded, distorted, overheated, or difficult to remove.
Which Signs Require Immediate Attention?
- Swelling or cracks: Do not attempt to charge or jump-start a visibly damaged battery.
- Liquid or strong odor: Keep away from the area and arrange professional service.
- Rapidly returning corrosion: Have the battery and charging system tested.
- Loose battery movement: Correct the hold-down or battery fit before driving.
- Damaged venting: Replace or reconnect the specified vent parts before completing installation.
- Persistent warning messages: Schedule a diagnostic instead of repeatedly clearing or jump-starting the vehicle.
A weak 12V battery can contribute to no-start behavior, lock or keyless-entry problems, dim lighting, and multiple warning messages. Those symptoms do not prove the battery is the only fault. If a warning remains after the low-voltage system is tested, use the RAV4 Hybrid System Malfunction guide and arrange a Toyota-compatible diagnostic scan.
Quick Maintenance: Inspection, Cleaning, and Corrosion Prevention
Inspect the battery when electrical symptoms appear, before a long trip, or during routine service. Check the case, hold-down, terminals, cables, and vent connection without disturbing parts unnecessarily.
| Task | Tool | Outcome |
|---|---|---|
| Visual inspection | Gloves, eye protection, flashlight | Find damage, movement, leakage, or corrosion |
| Terminal cleaning | Battery-terminal brush and approved cleaner | Remove controlled surface corrosion |
| Connection check | Correct hand tool and service information | Confirm secure, undamaged connections |
| Battery test | Suitable tester or professional service | Check charge, capacity, and battery condition |
Do not pour or spray a homemade cleaning mixture inside the cargo compartment. When light corrosion requires cleaning, isolate the battery as directed by the owner’s manual and apply a controlled amount of battery-terminal cleaner with a small brush. Keep cleaner and residue away from wiring, connectors, storage cavities, and interior materials.
Do not clean a leaking, swollen, cracked, hot, or strongly odorous battery. Arrange professional removal and inspection instead. Cleaning the terminals will not restore a battery that fails a proper condition or load test.
How to Jump-Start a RAV4 Hybrid Safely
The rear battery is the physical service location, but the under-hood terminal is the normal emergency connection point. This lets you restore 12-volt power without removing cargo panels. The exclusive jump-start terminal is an input point for emergency charging; Toyota says it must not be used to jump-start another vehicle.
Read the jump-start section of the exact model-year owner’s manual before connecting a booster battery, jump pack, or support vehicle. Toyota’s 2024 RAV4 Hybrid jump-start instructions show the terminal cover, cable order, specified metallic ground point, and READY-mode check. For a different model year, use that year’s manual.
- Apply the parking brake, select Park, and turn off lights, climate controls, and other accessories.
- Open the hood and locate the designated positive jump terminal and approved ground point shown in the owner’s manual.
- Connect the first positive clamp to the RAV4 Hybrid’s positive jump terminal.
- Connect the other positive clamp to the support battery’s positive terminal.
- Connect the negative clamp to the support battery’s negative terminal.
- Connect the final negative clamp to the designated solid, stationary, unpainted ground point on the RAV4 Hybrid.
- With a support vehicle, start its engine, raise the engine speed slightly, and maintain it for about 5 minutes as Toyota directs. With a jump pack, follow the pack manufacturer’s instructions.
- Maintain support power, press the brake pedal, and operate the RAV4 power switch. Confirm that the READY indicator turns on.
- Remove the clamps in the exact reverse connection order without allowing them to touch.
- Close the exclusive jump-start terminal cover and reinstall the fuse-box cover.
Do not connect a clamp to orange hybrid components, moving parts, painted brackets, or an unidentified metal point. Never reverse the positive and negative connections. Stop if the battery is swollen, frozen, leaking, physically damaged, or producing a strong odor.
If the READY indicator does not turn on, warning lights remain, or the vehicle repeatedly needs a jump-start, stop repeating the procedure and have the 12-volt system tested.
For model-specific mistakes, troubleshooting, and jump-pack guidance, see how to jump-start a Toyota RAV4 safely.
[Products Worth Considering]
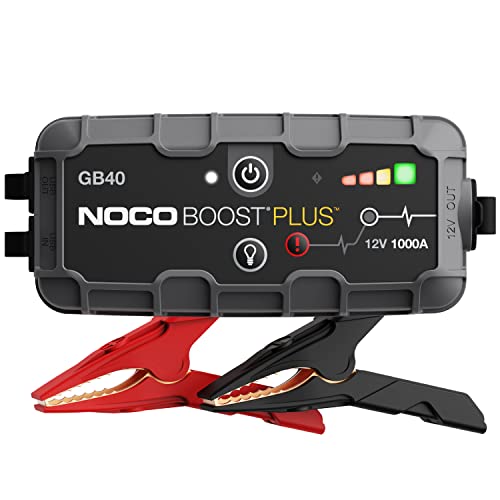
START DEAD BATTERIES — Instantly start dead batteries with 1000 amps of peak lithium power. Up to 20 starts per charge on engines up to 6.0L gas and 3.0L diesel.

7000A Peak Current & Broad Compatibility – Equipped with a high-rate lithium battery, this portable jump starter delivers 7000A peak current to instantly revive dead batteries. It safely jump-starts All gas and 12.0L diesel engines, including cars, motorcycles, SUVs, pickups, boats, and lawnmowers. A must-have emergency roadside assistant for your garage.

【Powerful Battery Starter】The OXILAM car jump starter delivers a powerful peak current of 6000A, capable of quickly reviving a dead car battery in just seconds—even in extreme temperatures. A single full charge provides up to 60 jumpstarts. 2024 upgraded jumper cables can safely start all gas engines and 12L diesel engines, including 12v vehicles, motorcycles, pickups, RVs, tractors, trucks, vans, ATVs, snowmobiles, yachts, and many more. Say goodbye to being stranded due to a dead battery
When to Replace or Call a Pro for Your Hybrid 12V Battery
Replace the battery when it fails a proper test, cannot retain a charge, or has physical damage. Repeated jump-starts indicate that the battery, charging system, wiring, or an electrical draw needs diagnosis.
- Replace a battery with swelling, cracks, leakage, deformation, or a failed test result.
- Schedule testing when voltage or available capacity drops soon after charging.
- Arrange a diagnostic when hybrid-system warnings remain after the vehicle reaches READY mode.
- Get professional help when terminals, hold-down hardware, wiring, or vent parts are damaged.
- Stop DIY work if orange cables or high-voltage components interfere with safe access.
Verify the replacement by VIN, battery label, and model-year service information. Match the required battery type, case dimensions, terminal positions, electrical rating, hold-down design, and vent connection if equipped. Do not choose a replacement only because it fits inside the tray.
When a manual-approved replacement procedure requires terminal removal, follow its sequence exactly; Toyota’s recent guidance specifies removing the negative terminal first. After installation, confirm that the battery cannot move, the positive terminal cover closes correctly, the cables are routed without strain, and the exhaust hose or vent connection is securely restored when required. Complete any initialization steps listed in the owner’s manual.
Pro tip: Test the 12V battery before long trips or extreme weather instead of waiting for a no-start condition.
Frequently Asked Questions
Where is the auxiliary battery on a Toyota RAV4 Hybrid?
On U.S.-market 2016–2025 RAV4 Hybrid models, the auxiliary 12V battery is in the rear luggage compartment beneath the cargo deck. It is on the left side for 2016–2018 and on the right side for 2019–2025. The redesigned 2026 model is outside this guide’s verified location scope.
Which side is the RAV4 Hybrid 12V battery on?
The side depends on model year. The 2016–2018 RAV4 Hybrid battery is on the left-hand side of the luggage compartment. The 2019–2025 RAV4 Hybrid battery is on the right-hand side.
Does a Toyota hybrid have a 12V battery?
Yes. A Toyota hybrid uses a 12V auxiliary battery for low-voltage electronics, locks, lights, computers, and the systems needed to enter READY mode. It is separate from the high-voltage hybrid system battery that powers the electric drive system.
Is the RAV4 Hybrid 12V battery under the hood?
No. On the 2016–2025 RAV4 Hybrid covered here, the physical 12V battery is in the rear luggage compartment. Under the hood, Toyota provides an exclusive positive jump-start terminal for emergency starting.
Should you jump-start a RAV4 Hybrid from the rear battery?
Use the designated under-hood positive jump terminal and the specified metallic ground point unless the exact model-year manual directs otherwise. The remote terminal avoids unnecessary cargo-panel removal. Do not use the RAV4 Hybrid’s exclusive jump terminal to jump-start another vehicle.
How do you access a RAV4 Hybrid when the 12V battery is dead?
Use the mechanical key procedure described in the owner’s manual to enter the vehicle if the power locks do not respond. For restoring power, use the under-hood jump terminal. Do not force the power liftgate or pry open cargo trim.
How do you know the RAV4 Hybrid 12V battery is weak?
Possible signs include no-start behavior, dim lights, weak locks or keyless entry, warning messages, and repeated jump-starts. These symptoms are not conclusive, so use a suitable battery test or professional diagnostic to confirm the cause.
Should you disconnect the RAV4 Hybrid 12V battery yourself?
Disconnect it only when you understand the model-year procedure, terminal sequence, reset requirements, and vent arrangement. Use a qualified technician when the battery leaks, terminals are damaged, hybrid warnings appear, or high-voltage components affect safe access.
Conclusion
For a 2016–2018 RAV4 Hybrid, look beneath the rear cargo deck on the left side. For a 2019–2025 RAV4 Hybrid, look beneath the rear cargo deck on the right side. Use the rear compartment for inspection or service, but use the under-hood exclusive jump-start terminal and specified ground point for emergency starting.
Check the exact model-year manual before removing side covers, disconnecting terminals, or purchasing a replacement. Stop and arrange professional service when you find leakage, swelling, damaged wiring, loose mounting, persistent warnings, or unidentified high-voltage components.