Programming HomeLink in a Toyota Land Cruiser is usually a short job, but the exact indicator colors and button behavior can vary by model year and mirror type. The reliable approach is to first teach HomeLink the signal from your working garage-door remote, then complete a separate Learn/Smart-button step if the opener uses rolling-code security. Always follow your Land Cruiser owner’s manual when its instructions differ from generic HomeLink guidance.
Quick Answer
Hold a working garage-door remote about 1–3 inches from the Land Cruiser’s HomeLink controls and train the desired button. If the opener uses a rolling code, press its Learn/Smart button, then press and release the programmed HomeLink button as directed by your Toyota manual, typically up to three times.
Key Takeaways
- Use a working handheld remote with a fresh battery and keep it about 1–3 inches from the HomeLink controls during initial training.
- Train HomeLink from the remote before pressing the opener motor’s Learn/Smart button on rolling-code systems.
- Clearing all HomeLink memory and reprogramming one button are different procedures: current systems generally use about 10 seconds to erase all codes and about 20 seconds to enter single-button reprogramming.
- A weak remote battery, RF interference, incompatible LED bulbs, or protocol differences can cause failed programming or poor range.
- Use the instructions for your exact Land Cruiser model year whenever they differ from generic HomeLink instructions.
At a Glance
| Time Required | About 5–15 minutes |
| Difficulty | Easy |
| Tools Needed | Working garage-door remote; fresh remote battery; sturdy stepladder if the opener’s Learn/Smart button is out of reach |
| Cost | Usually $0; only a replacement remote battery or compatibility hardware may be needed |
Quick Answer: Program HomeLink in a Land Cruiser
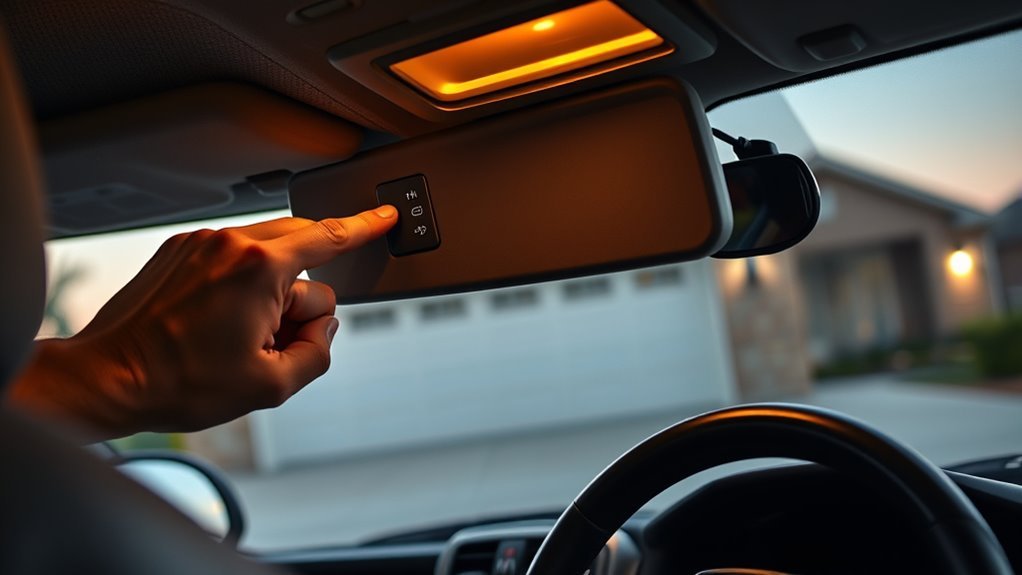
Start with the Land Cruiser parked outside the garage and the garage-door area clear. Put a fresh battery in the handheld transmitter. Hold the remote about 1–3 inches (25–75 mm) from the HomeLink controls and train the desired button until the HomeLink indicator confirms that the remote signal has been learned.
On newer Land Cruisers, the HomeLink controls may be integrated with the rear-view mirror system. Vehicles equipped with a Digital Rear-view Mirror can also provide a built-in HomeLink Training Tutorial. Toyota’s instructions for your exact model year should take priority because indicator colors, timing, and menu steps can vary.
If the garage door works after the initial training, the opener is generally using a fixed-code or otherwise directly learned signal and you are finished. If HomeLink indicates a rolling-code system or the door does not operate after the first stage, complete the opener motor’s Learn/Smart-button procedure described below.
Warning: A garage door, gate, or other programmed device can move during HomeLink training. Keep children, pets, vehicles, and other objects clear of the door. Do not use HomeLink with a garage-door opener that lacks a functioning safety stop-and-reverse system.
Prepare: What You Need (New Remote Battery, Rolling-Code Check)
Preparation prevents most HomeLink programming failures. Start with the original or known-working handheld transmitter and install a fresh battery. HomeLink specifically recommends a new battery because a weak transmitter can produce a signal that is strong enough to operate the garage door but too weak for reliable vehicle programming.
Next, locate the opener motor’s Learn, Smart, Program, or Training button. It is commonly near the hanging antenna wire or beneath a light cover. Do not press it yet. You only need this button after HomeLink has learned the handheld transmitter and you determine that the opener uses a rolling code.
During initial training, hold the handheld transmitter approximately 1–3 inches from the HomeLink controls. HomeLink also recommends trying slightly different distances and angles if the vehicle does not learn the signal.
Note: On current Land Cruiser systems, stored HomeLink codes are not necessarily erased by disconnecting the vehicle’s 12-volt battery. Use the HomeLink clearing procedure if you intentionally want to erase programmed devices.
How to Tell Whether the Opener Uses a Rolling Code
Do not rely only on the age of the garage-door opener. Many openers made after the mid-1990s use rolling-code security, but the indicator behavior in your Land Cruiser is the better clue. On newer Toyota HomeLink systems, a continuously illuminated confirmation can indicate a fixed-code signal, while rapid flashing after initial training can indicate that a rolling-code synchronization step is still required.
You can also check the opener’s manual or manufacturer documentation. If the motor has a Learn, Smart, or Program button used to enroll remotes, it commonly uses rolling-code or another learn-based system.
Program HomeLink (Fixed-Code Openers)
For a compatible fixed-code device, programming is normally completed entirely inside the Land Cruiser. Keep the garage remote approximately 1–3 inches from the HomeLink controls and follow the programming sequence for your model year.
Fixed-Code Pairing Steps
- Park the Land Cruiser outside the garage and make sure the door area is clear.
- Install a fresh battery in the handheld garage-door transmitter.
- Select the HomeLink button you want to program.
- Hold the handheld remote about 1–3 inches from the HomeLink controls.
- Follow your Land Cruiser’s training sequence while keeping the HomeLink indicator visible. Depending on the HomeLink generation, this may involve holding the HomeLink and remote buttons together or following the vehicle’s displayed tutorial.
- When HomeLink indicates that the transmitter signal has been learned, release the buttons.
- Press and release the programmed HomeLink button and check whether the garage door operates.
If the garage door operates, programming is complete. A third HomeLink press is not a standard fixed-code requirement; repeated two-second presses are associated with completing rolling-code synchronization on certain systems.
Pro Tip: Keep the remote’s battery side pointed away from the HomeLink controls when possible. Toyota has included this recommendation in HomeLink programming guidance for multiple Land Cruiser generations.
Troubleshooting Fixed Codes
If the HomeLink indicator never changes to the learned-signal state, first replace the handheld transmitter battery and try again with the remote at slightly different distances or angles. HomeLink also recommends a cycling technique for stubborn transmitters: hold the desired HomeLink button while pressing and releasing the handheld remote button about every two seconds until HomeLink learns the signal.
| Symptom | Likely Cause | What to Try |
|---|---|---|
| Indicator keeps flashing slowly | HomeLink has not learned the transmitter | Fresh battery; change remote distance/angle; use transmitter cycling |
| Signal is learned but door does not operate | Opener may use rolling code | Continue with the Learn/Smart-button procedure below |
| Original remote also has poor range | Garage opener, antenna, battery, or RF interference issue | Fix the original remote/range problem before retraining HomeLink |
Program HomeLink (Rolling-Code Openers With Learn/Training)
Rolling-code programming has two stages. First, HomeLink learns the signal from the handheld transmitter. Second, the garage-door opener motor learns the Land Cruiser’s HomeLink transmitter. Do not reverse those stages unless the opener or HomeLink manufacturer gives model-specific instructions telling you to do so.
Prepare For Rolling Codes
First complete the normal HomeLink transmitter-training procedure. Hold the working remote approximately 1–3 inches from the HomeLink controls and teach the desired HomeLink button. On current Toyota systems, rapid flashing after the signal is learned can indicate that the opener uses rolling-code protection and requires the additional Learn/Smart-button procedure.
- Use a working handheld transmitter with a fresh battery.
- Train the desired HomeLink button from that transmitter first.
- Locate the garage motor’s Learn, Smart, Program, or Training button but do not hold it down.
- Have a second person help if the opener button is far from the vehicle because the next step is time-sensitive.
These steps should complete the first stage on compatible systems. If your Land Cruiser displays its own HomeLink training tutorial, follow that model-specific sequence.
Use The Opener Learn-button
After HomeLink has learned the handheld remote, go to the garage-door opener motor and press and release its Learn/Smart button. Do not hold the Learn button for an extended period because some openers interpret a long hold as a command to erase their stored remotes.
For the current Land Cruiser procedure, return to the vehicle within the opener’s programming window—Toyota’s current instructions specify completing the next step within approximately 30 seconds. Press and hold the programmed HomeLink button for about 2 seconds, then release it. Repeat the press/hold/release sequence up to three times if necessary. Stop when the garage-door opener operates.
Some generic HomeLink instructions or opener manufacturers use a slightly different time window. For that reason, use your Land Cruiser owner’s manual and the opener manufacturer’s instructions when they specify a different sequence.
The key distinction is simple: HomeLink first learns the handheld transmitter; then a rolling-code opener learns HomeLink.
Programming an Entry Gate or Certain Canadian-Market Devices
Some entry gates and certain devices require the handheld transmitter to be cycled instead of held continuously. Hold the selected HomeLink button while pressing and releasing the remote-control button at roughly two-second intervals until the HomeLink indicator shows that the signal has been learned. Then test the device and follow its manufacturer-specific instructions if another synchronization step is required.
If Programming Fails: Reset HomeLink and Reprogram
Do not erase every HomeLink button automatically after one failed attempt. First check the battery, remote position, indicator behavior, and rolling-code procedure. If you need to replace the programming on only one HomeLink button, you can normally reprogram that button without erasing the other two.
Reprogram One HomeLink Button Without Erasing the Others
Press and hold the HomeLink button you want to replace. On current systems, after roughly 20 seconds the indicator enters the reprogramming state. Continue with the normal transmitter-training procedure for that button. The exact light color or behavior depends on the HomeLink generation, so follow the vehicle’s manual if its instructions differ.
Erase All HomeLink Memory
To erase all stored HomeLink codes on current systems, press and hold the two outside HomeLink buttons for about 10 seconds until the indicator changes to the clearing confirmation state, then release them.
Warning: Clearing the two outside buttons erases all programmed HomeLink devices. Do not use this step when you only want to change one garage door.
After clearing the memory, start programming again with a fresh transmitter battery and the remote positioned close to the HomeLink controls. If a rolling-code opener is involved, complete the handheld-transmitter stage first and the opener Learn/Smart stage second.
Erase the stored HomeLink codes before selling, trading, or returning the Land Cruiser so the next owner cannot operate devices that remain programmed to the vehicle.
Troubleshooting: Common Failures and Quick Fixes
If Land Cruiser HomeLink will not program, identify which stage is failing instead of repeatedly clearing everything.
| Problem | What It Usually Means | Next Step |
|---|---|---|
| HomeLink keeps slowly flashing | The vehicle has not learned the handheld transmitter | Install a fresh remote battery and retry at different distances/angles |
| HomeLink learns the remote but door does not move | Rolling-code synchronization may still be required | Use the opener’s Learn/Smart button and complete the vehicle-side sequence |
| HomeLink works only very close to the garage | Weak receiver range or radio-frequency interference | Check opener antenna, bulbs, nearby electronics, and original-remote range |
| Original handheld remote no longer works after programming attempt | The opener’s Learn button may have been held long enough to erase stored transmitters | Re-enroll the handheld remotes using the opener manufacturer’s manual |
| Correct procedure still will not pair | Protocol, frequency, or HomeLink-generation compatibility issue | Check HomeLink and opener-manufacturer compatibility information |
HomeLink also recommends cycling a stubborn handheld transmitter during initial training. Hold the desired HomeLink button and repeatedly press and release the transmitter button about every two seconds until the HomeLink indicator changes to the learned-signal state.
Use the Land Cruiser’s Built-In Training Tutorial
On newer Land Cruisers equipped with the Digital Rear-view Mirror, Toyota provides a HomeLink Training Tutorial through the mirror controls. This is particularly useful because Toyota can specify the indicator colors and timing used by that model-year HomeLink generation.
Two-Way Garage-Door Status on Compatible Systems
Some newer HomeLink-equipped Land Cruisers can receive garage-door status feedback from compatible opener motors. Toyota describes indicators that can show when the door is opening or closing, when movement is complete, or when a feedback signal cannot be received.
This feature depends on the garage-door opener. A HomeLink button can still operate a compatible door even when two-way status feedback is unavailable.
Compatibility Checklist: Original Remotes, LiftMaster, Aftermarket
HomeLink works with many garage doors, gates, and other radio-controlled devices, but compatibility is not universal. Use the original handheld transmitter whenever possible and identify the exact opener model before buying adapters or replacement hardware.
- Original remote: Confirm that it operates the garage door normally before trying to teach HomeLink.
- Frequency/protocol: HomeLink supports many common garage-door radio systems, but the protocol and HomeLink generation also matter.
- Chamberlain/LiftMaster/Craftsman/Raynor: Some older HomeLink versions need a compatibility bridge with particular newer opener systems. HomeLink specifically documents bridge compatibility rather than recommending one for every newer LiftMaster opener.
- Security+ 3.0: HomeLink provides a special manufacturer-specific procedure for these newer encrypted systems. Use the original handheld transmitter and follow the current HomeLink instructions for that opener.
- Aftermarket remotes: If an aftermarket remote will not teach HomeLink, retry using the opener’s original or manufacturer-approved transmitter.
For manufacturer-specific HomeLink guidance, use the official HomeLink Toyota programming page and HomeLink support database.
[Products Worth Considering]

Turn your factory wired CarPlay into a wireless experience with this compact plug-and-play adapter from Enhanlife. It delivers fast auto-connection, stable performance with Bluetooth 5.3 and 5GHz Wi-Fi, and smooth access to navigation, music, calls, and Siri without cable clutter. Designed for broad vehicle compatibility and easy setup, it helps keep your dashboard clean while preserving the convenience of CarPlay.

This 2-in-1 wireless adapter converts factory-wired CarPlay into a cable-free experience for compatible vehicles, helping you enjoy seamless phone integration with less clutter. It supports automatic reconnection, stable Bluetooth and Wi-Fi pairing, and broad compatibility with many factory-installed CarPlay systems. Built with a durable metal and acrylic design, it also includes firmware updates and lifetime technical support for continued convenience.

This replacement flip folding key fob case is designed for compatible Hyundai models, giving your worn or broken remote a fresh outer shell without needing reprogramming. Made for easy transfer of your existing circuit board and chip, it includes a mini screwdriver and sticker for convenient assembly. It is an ideal solution for restoring the look and function of your key fob while keeping your original electronics intact.
What About Very Old Garage-Door Openers?
Do not confuse radio compatibility with garage-door safety. HomeLink says some older openers can technically fall within a compatible radio-frequency range. However, HomeLink warns against using the system with an opener that lacks the required safety stop-and-reverse features.
The U.S. Consumer Product Safety Commission has long recommended replacing unsafe non-reversing garage-door openers. If the door cannot reliably detect an obstruction and stop or reverse, address that safety problem before attempting HomeLink programming.
Improve HomeLink Range and Performance (Antenna, Bulbs, Repeaters)
If HomeLink programs successfully but only works when the Land Cruiser is very close to the garage, compare its range with the original handheld remote. Poor range from both transmitters usually points to the garage-door opener, receiver antenna, or radio-frequency interference rather than HomeLink programming.
| Issue | Quick Check | Recommended Action |
|---|---|---|
| Weak reception | Inspect the opener’s hanging antenna wire | Make sure it is unobstructed and positioned as the opener manufacturer specifies |
| Range dropped after installing LED bulbs | Temporarily remove or switch off the suspect bulbs | Use an LED bulb approved by the opener manufacturer or another recommended bulb type |
| Aftermarket remote fails to train HomeLink | Test the original transmitter | Use the original/manufacturer-approved remote if it programs correctly |
| Older HomeLink and newer opener will not communicate | Check exact opener and HomeLink compatibility | Use a compatibility bridge only when HomeLink or the opener manufacturer specifies one |
| Intermittent operation | Switch off nearby electronics one at a time | Remove or replace the source of radio-frequency interference |
Certain LED bulbs can generate radio-frequency interference that reduces garage-door remote and HomeLink range. Do not assume that all LEDs are unsuitable; HomeLink recommends using bulbs approved by the garage-door opener manufacturer.
If the opener manufacturer offers an antenna extension or other receiver accessory for a documented range problem, follow that manufacturer’s installation instructions rather than improvising an antenna modification.
[Products Worth Considering]

Replace worn or damaged key fob buttons with this rubber keypad insert designed for compatible Hyundai remote key cases. It restores the look and feel of your car key, offering a simple installation and a snug fit for supported Santa Fe and Sonata models. The set includes two replacement pads and a mini screwdriver for convenience.

This LUMITECO tire tread depth gauge set makes it easy to monitor tire wear and maintain safer driving performance. The color-coded scale provides quick, easy-to-read measurements, while the compact pocket-size design and included clip make it convenient to keep in your vehicle or toolbox. Suitable for cars, trucks, motorcycles, and more, it offers a simple reusable way to check tread depth whenever needed.

Feature: Fixed Wall Mount; Thru Hole Mount; Antenna Mounting Screws Diameter: M12 11.76mm-11.95mm;
When to Call a Pro (Or Buy a Compatibility Bridge)
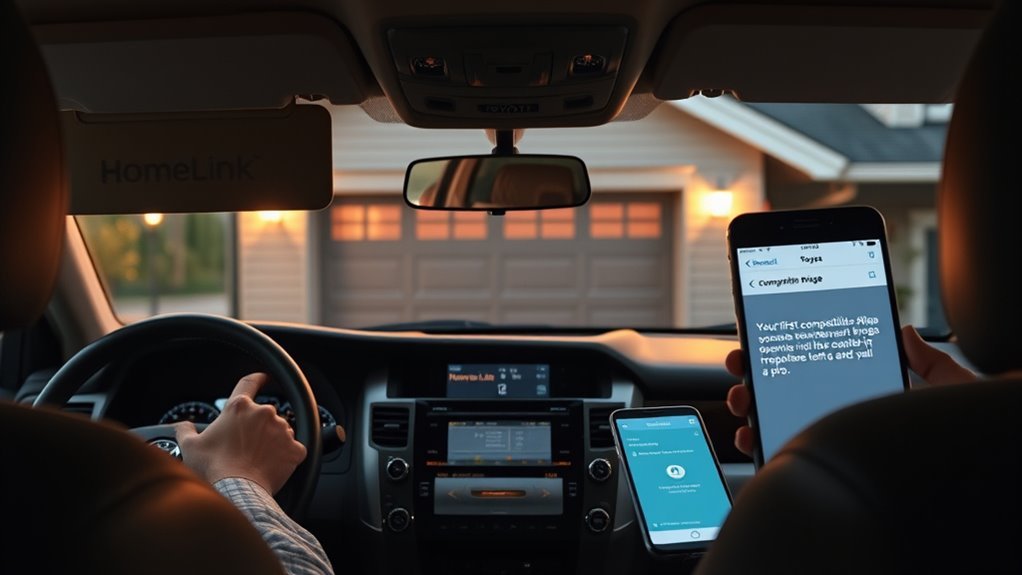
If you have verified the handheld remote, installed a fresh battery, followed the correct fixed- or rolling-code sequence, checked for interference, and confirmed the opener model but HomeLink still will not work, the next step is compatibility research or professional diagnosis.
- Call a garage-door professional if the door’s safety reverse system does not work correctly, the opener itself behaves unpredictably, or the original handheld remotes also have poor range.
- Contact HomeLink support when the original remote works normally but the Land Cruiser will not learn or operate the signal.
- Consider a compatibility bridge only when HomeLink or the opener manufacturer identifies your HomeLink/opener combination as requiring one.
- Replace an unsafe older opener rather than trying to work around missing stop-and-reverse protection.
HomeLink’s current support information is available at HomeLink Support. Toyota also recommends checking the owner’s manual for the exact Land Cruiser model year because vehicle-side programming can change between HomeLink generations.
[Products Worth Considering]
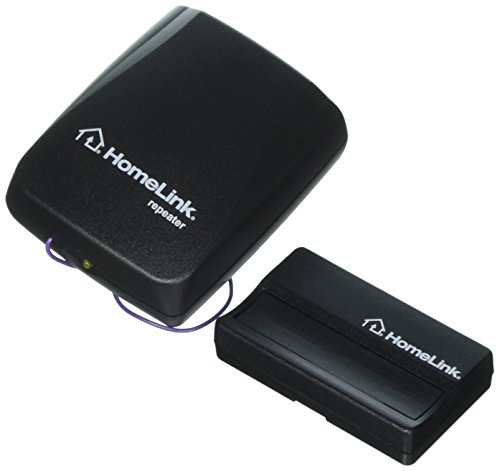
Converts and accepts a non-compatible home link signal into a security+ 2.0 Compatible signal

Convenient Access - TOPENS HLR01 HomeLink Receiver allows for seamless control of the gate opener through the built-in HomeLink system in the vehicle. Advanced security code technology keeps the gate opener system safe. This integration eliminates the hassle of carrying separate remote controls, providing unmatched convenience. Simply press the HomeLink button to enjoy instant access to your property.

Converts and accepts a non-compatible home link signal into a security+ 2.0 Compatible signal
Frequently Asked Questions
How do I program Toyota HomeLink without the original remote?
For normal HomeLink programming, you need a working handheld transmitter or a compatible wireless keypad that can be brought to the vehicle. The garage opener’s Learn/Smart button by itself does not provide the initial transmitter signal HomeLink needs. If the original remote is lost, obtain a compatible replacement remote or check whether your removable wireless keypad can be used.
How do I reset HomeLink in a Toyota Land Cruiser?
To erase all programmed HomeLink codes on current systems, press and hold the two outside HomeLink buttons for about 10 seconds until the indicator confirms that memory has been cleared. This erases all programmed devices, so do not use the full reset when you only want to replace one button.
Can I reprogram one HomeLink button without deleting the others?
Yes. Press and hold the HomeLink button you want to replace until it enters its reprogramming state, which takes about 20 seconds on current systems, then perform the normal transmitter-training procedure. The other programmed HomeLink buttons remain stored.
Why does HomeLink program successfully but the garage door still not open?
The opener may use rolling-code security. After HomeLink learns the handheld transmitter, press and release the opener motor’s Learn/Smart button and complete the Land Cruiser’s rolling-code synchronization procedure. Also verify that the original remote still operates the door normally.
Why is my Land Cruiser HomeLink range suddenly poor?
Check whether the original handheld remote also has reduced range. If it does, inspect the opener antenna and test for radio-frequency interference. Some LED garage-opener bulbs can reduce remote range; use a bulb approved by the garage-door opener manufacturer.
Should I erase HomeLink before selling my Land Cruiser?
Yes. Erasing the stored HomeLink codes prevents the next owner from retaining access to garage doors, gates, or other devices that were programmed to the vehicle.
Sources
- HomeLink — Toyota Owners Programming — Toyota-specific HomeLink programming and manufacturer guidance.
- HomeLink — Generic Training Instructions — transmitter distance, fixed/rolling-code programming, clearing memory, and single-button reprogramming.
- HomeLink Support — troubleshooting, no-remote requirements, compatibility bridges, Security+ 3.0 guidance, and LED interference.
- Toyota 2025 Land Cruiser Owner’s Manual — Digital Rear-view Mirror and built-in HomeLink Training Tutorial information.
- U.S. Consumer Product Safety Commission — Garage Door Opener Safety — entrapment protection and automatic reversing safety requirements.
Conclusion
Programming Land Cruiser HomeLink is straightforward once you separate the two stages: first teach HomeLink the handheld transmitter signal, then complete the Learn/Smart-button step if the garage opener uses rolling-code security. Use a fresh remote battery, keep the transmitter close to the HomeLink controls, and follow your exact Toyota model-year instructions when timing or indicator behavior differs.
If programming fails, do not immediately erase everything. Check the transmitter, rolling-code sequence, interference, and compatibility first. Reprogram a single button when that is all you need, and reserve the two-outside-button reset for clearing all stored codes. Once paired correctly, HomeLink should give you reliable built-in garage-door control without the separate remote.