
Your Hyundai Sonata’s alternator and charging system keep the 12-volt battery charged, power the electronics while the engine is running, and help prevent hard starts, dim lights, warning lights, and unexpected stalling. A quick voltage check with a digital multimeter can tell you whether the battery, alternator, belt, cables, grounds, or charging circuit needs attention.
Quick Answer
A healthy Hyundai Sonata charging system usually reads about 12.4–12.7 volts at the battery with the engine off and roughly 13.5–14.8 volts with the engine running. If the battery light stays on, voltage drops near battery-only voltage, or readings jump above 15 volts, test the battery, alternator belt, cables, grounds, and alternator before replacing parts.
Key Takeaways
- Do not judge the alternator from one reading alone. Test engine-off voltage, idle charging voltage, loaded voltage, cable voltage drop, and warning-light behavior.
- A reading around 10.5 volts while driving is not normal. It often points to a failing battery cell, loose connection, damaged cable, bad ground, slipped belt, or charging-system failure.
- Clean, tight battery terminals and ground connections matter as much as the alternator itself because resistance can mimic a bad alternator.
- High-output alternators only make sense when the car has added electrical loads, such as a large audio system, extra lighting, or other aftermarket equipment.
At a Glance
| Time Required | 10–25 minutes for basic checks; longer if cables or grounds need cleaning |
| Difficulty | Beginner for voltage checks; intermediate for belt, cable, and voltage-drop testing |
| Tools Needed | Digital multimeter, safety glasses, gloves, terminal brush, basic hand tools |
| Cost | Low for testing and cleaning; higher if the battery, alternator, belt, or wiring must be replaced |
Why Your Sonata’s Charging System Matters

Your Sonata’s charging system does more than refill the battery after starting. It also supplies power to the ignition system, fuel system, lights, infotainment, climate control, power steering electronics, sensors, and control modules while the engine is running. When voltage becomes unstable, the car may show unrelated-looking symptoms such as flickering lights, random warning messages, rough idle, poor shifting behavior, or a no-start condition.
The alternator creates electrical current, the voltage regulator controls output, the battery stores energy, and the cables and grounds complete the circuit. If any part of that path has too much resistance, the charging system can test poorly even when the alternator itself is still good.
Hyundai’s owner information explains that a charging-system warning light can indicate a malfunction with the alternator or electrical charging system, and the driver should stop safely, turn the engine off, and check the alternator drive belt for looseness or breakage when applicable. If the belt is not the problem, the vehicle should be inspected by an authorized Hyundai dealer or qualified technician. Hyundai owner’s manual guidance is the best reference for the exact warning-light instructions for your model year.
Normal Hyundai Sonata Battery and Alternator Voltage
Voltage readings vary with temperature, battery condition, engine speed, electrical load, and model year, so use these numbers as a practical diagnostic range rather than a replacement for the factory service manual.
| Test Condition | Typical Reading | What It Usually Means |
|---|---|---|
| Engine off, battery rested | About 12.4–12.7 volts | Battery is partly to fully charged. A fresh surface charge may read slightly higher right after driving. |
| Engine off, below 12.2 volts | Low state of charge | Charge and retest the battery before blaming the alternator. |
| Engine running at idle | About 13.5–14.8 volts | Charging system is generally working if the reading is steady and rises above resting battery voltage. |
| Engine running with headlights, blower, and rear defroster on | Usually still above about 13.2 volts | A small drop is normal; a large drop can point to weak output, belt slip, cable resistance, or a failing alternator. |
| Engine running below 13.0 volts | Possible undercharge | Check belt condition, battery health, alternator output, fuses, cables, and grounds. |
| Engine running above 15.0 volts | Possible overcharge | Stop testing and have the voltage regulator/charging system checked to avoid battery or electronics damage. |
| Voltage drops near 10.5 volts | Serious fault or weak battery cell | Do not ignore it. Test the battery under load and inspect all charging-system connections. |
Note: Some newer vehicles use computer-controlled or “smart” charging strategies that can vary alternator output. If your reading changes slightly while driving, that is not automatically a failure. The concern is sustained undercharging, overcharging, warning lights, or voltage that drops low enough to affect vehicle operation.
Identifying Common Alternator Issues
How can you tell if your Hyundai Sonata’s alternator is struggling? Start with symptoms, then confirm with testing. A weak alternator can look like a bad battery, and a bad battery can make a good alternator look weak.
Common warning signs
- Battery or charging-system warning light: This is the most direct sign that the charging system needs attention.
- Dim or flickering headlights: Lights that brighten when you rev the engine can point to low charging output or poor connections.
- Slow cranking or repeated jump starts: A weak battery, poor terminal contact, parasitic draw, or alternator fault can all cause this.
- Clicking when starting: Often battery-related, but it can happen after the alternator fails to recharge the battery.
- Burning smell or belt noise: A slipping belt, failing pulley, seized accessory, or overheated wiring needs quick inspection.
- Electrical glitches: Random warning lights, resets, or unstable accessories may be caused by voltage instability.
If you notice the voltage dropping from a normal charging range down toward 10.5 volts while driving, treat it as a serious fault. That level can occur with a severely discharged battery, a battery with a weak cell, a loose main connection, a bad ground, a failing alternator, or an open charging circuit.
Warning: Never disconnect a battery cable while the engine is running to “test” the alternator. That old shortcut can create voltage spikes and damage modern vehicle electronics.
Diagnosing Charging System Problems
Diagnosing charging system problems requires a step-by-step approach. Do the easy checks first, then move to voltage testing. This prevents unnecessary alternator replacement when the real issue is a loose terminal, weak battery, poor ground, blown fuse, or worn belt.
Step 1: Inspect the battery and terminals
With the engine off, look for corrosion, loose clamps, cracked terminal ends, swollen battery case, leaking acid, or damaged cables. Clean corrosion with the battery disconnected, and tighten terminals so they cannot rotate by hand. Wear eye protection and gloves when working around the battery because automotive batteries can release explosive hydrogen gas and contain corrosive acid. Hyundai’s jump-starting safety guidance also warns drivers to keep flames, sparks, and smoking materials away from the battery. Hyundai battery safety guidance
Step 2: Check battery voltage with the engine off
- Turn off lights, climate control, and accessories.
- Set your digital multimeter to DC volts.
- Touch the red probe to the positive battery terminal and the black probe to the negative terminal.
- Read the voltage.
A rested battery around 12.6 volts is usually well charged. If it is much lower, charge the battery first and retest. Testing the alternator with a deeply discharged or failing battery can lead to misleading results.
Step 3: Test charging voltage at idle
- Start the engine and let it idle.
- Measure voltage again directly at the battery posts, not just the cable clamps.
- Look for a reading that rises above the engine-off voltage, commonly into the 13.5–14.8 volt range.
If the reading stays close to 12 volts with the engine running, the battery is powering the vehicle by itself. That points to a charging problem, belt problem, fuse/fusible link issue, wiring fault, or alternator failure.
Step 4: Add electrical load
Turn on the headlights, blower motor, rear defroster, and heated seats if equipped. The voltage may dip briefly, but it should not collapse. If it drops steadily or the warning light appears, the alternator may not be keeping up, or the circuit may have excessive resistance.
Step 5: Check the belt and pulley
Inspect the serpentine belt for cracks, glazing, missing ribs, oil contamination, fraying, or looseness. A good alternator cannot charge properly if the belt slips or the pulley is damaged. Belt chirping, squealing, or a burning-rubber smell deserves attention before more testing.
Step 6: Perform a voltage-drop test
Voltage-drop testing finds resistance that a simple voltage check may miss. With the engine running and electrical loads on, measure between the alternator output stud and the battery positive post, then between the alternator case and the battery negative post. A high reading suggests resistance in the positive cable, ground path, terminals, fuse link, or connections.
Pro Tip: Test on the battery posts first, then on the cable clamps. If the readings differ, the terminal connection itself is part of the problem.
What Your Voltage Readings Mean
Use this quick troubleshooting table to decide what to check next.
| Reading or Symptom | Likely Causes | Next Check |
|---|---|---|
| 12.6 volts engine off, 14.2 volts running | Normal basic charging pattern | Load test only if symptoms continue |
| 12.1 volts engine off, 14.1 volts running | Low battery charge, possible aging battery | Fully charge and load-test the battery |
| 12.4 volts engine off, 12.2 volts running | Alternator not charging, belt issue, fuse/fusible link, wiring fault | Inspect belt, charging fuse link, alternator output, and grounds |
| Voltage jumps above 15 volts | Overcharging or regulator/control fault | Stop testing and have the charging system inspected |
| Voltage drops under load but belt is good | Weak alternator, bad cable, poor ground, failing battery | Do voltage-drop test and battery load test |
| Battery drains overnight | Parasitic draw, old battery, module staying awake, light left on | Test for draw after confirming battery health |
| Charging light stays on | Alternator, belt, electrical charging system, wiring, or control issue | Stop safely and follow Hyundai warning-light guidance |
Battery, Alternator, or Parasitic Draw?
A dead Sonata in the morning does not always mean the alternator is bad. Use the pattern of failure to narrow it down.
More likely a weak battery
- The car starts after a jump but struggles again after sitting.
- Engine-off voltage is low even after charging.
- The battery fails a load test.
- The battery is old, swollen, leaking, or has repeated deep discharges.
More likely an alternator or charging-system problem
- The battery light stays on while driving.
- Running voltage does not rise above battery voltage.
- Headlights dim while the engine is running.
- The battery tests good but does not recharge during normal driving.
More likely a parasitic draw
- The battery and alternator both test good.
- The car starts normally after charging but drains after sitting overnight or for several days.
- A glove box light, trunk light, aftermarket alarm, dash cam, audio amplifier, or module may be staying on.
If you are unsure, ask a shop to test the battery, alternator output, starter draw, and parasitic draw together. Replacing only one part without testing the full system can leave the same problem behind.
Benefits of High-Output Alternators
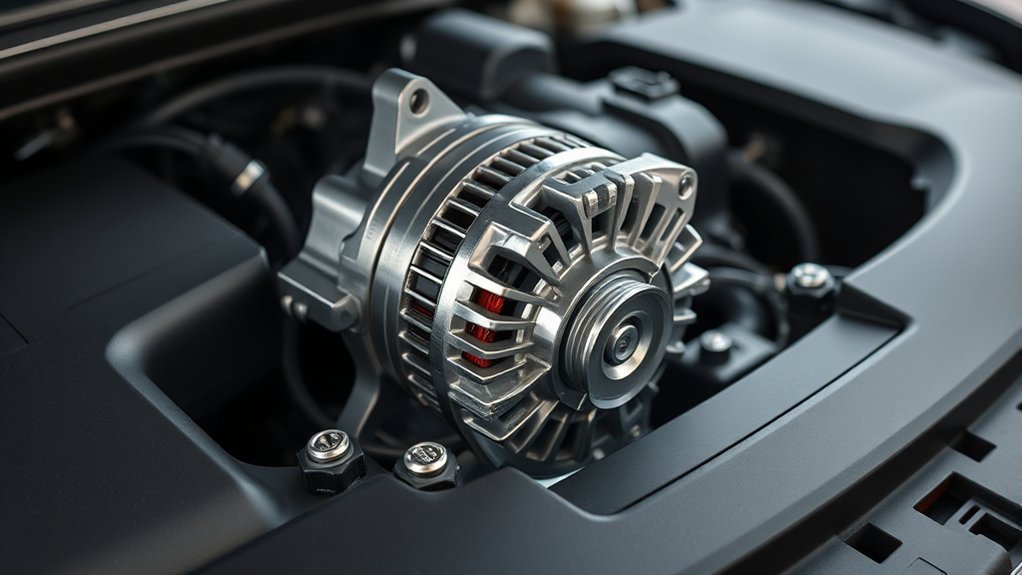
While a standard alternator is designed to support the factory electrical load, a high-output alternator can help if your Sonata has added equipment that draws more current than the original system was built to handle. This may include a large aftermarket audio amplifier, auxiliary lighting, upgraded cooling fans, mobile electronics, or other accessories.
| Feature | High-Output Alternator |
|---|---|
| Amperage Output | Higher current capacity than many standard alternators |
| Electrical Stability | Can reduce voltage sag when properly matched to added loads |
| Battery Support | Helps maintain charge when accessories demand more current |
| Installation Needs | May require upgraded wiring, belt checks, fusing, and fitment verification |
A high-output alternator is not a cure for a weak battery, poor ground, corroded cable, parasitic draw, or loose belt. It should also match the exact Sonata model year, engine, pulley alignment, connector type, and mounting style. If the alternator output is increased significantly, the charging cable and ground path may need upgrades so the extra current can move safely.
A high-output alternator is useful only when the vehicle has a real added electrical load. For a stock Sonata, clean connections and a healthy battery usually matter more than extra amperage.
Essential Maintenance Tips for Your Sonata’s Electrical System
To maintain the reliability and efficiency of your Hyundai Sonata’s electrical system, make these checks part of your routine maintenance.
- Check battery terminals: Keep posts and clamps clean, dry, and tight.
- Inspect ground connections: Look for corrosion, loose bolts, paint under a ground point, broken strands, or damaged straps.
- Watch the serpentine belt: Replace a belt that is cracked, glazed, contaminated, noisy, or stretched beyond the tensioner’s range.
- Test before winter and summer: Heat and cold both expose weak batteries and marginal charging systems.
- Do not ignore warning lights: A battery-shaped light while driving is a charging-system warning, not just a battery reminder.
- Be careful with aftermarket accessories: Poorly installed audio, lighting, alarms, and dash cams can create voltage drops or parasitic drains.
- Use the correct battery type: Match the battery size, rating, and technology recommended for your Sonata’s year and trim.
- Check recalls and campaigns: Use your VIN on Hyundai’s recall page and the NHTSA recall lookup to see whether your vehicle has open safety recalls or service campaigns.
Do not replace oxygen sensors as a charging-system fix unless diagnostic trouble codes and testing specifically point there. Aging O2 sensors can affect engine management and fuel control, but they are not a normal cause of alternator undercharging. If you have engine codes and charging problems at the same time, diagnose both systems separately.
When to Stop Driving and Get Help
If the charging-system warning light stays on while driving, reduce electrical load by turning off nonessential accessories, then drive carefully to a safe location. Do not continue a long trip on battery power alone. Once the battery is depleted, the engine may stall and the vehicle may lose power-assisted functions.
Stop driving and get professional help if you notice smoke, a burning smell, melted wiring, a seized pulley, a broken belt, battery acid leakage, repeated overcharging above 15 volts, or warning lights combined with steering, braking, or drivability changes. You can also check your specific model year in the official Hyundai digital owner’s manual for model-specific emergency instructions.
Frequently Asked Questions
Is the alternator part of the charging system?
Yes. The alternator is one of the main parts of the charging system. It converts engine-driven mechanical energy into electrical energy, while the voltage regulator, battery, cables, fuses, and grounds help control, store, and deliver that power.
What voltage should a Hyundai Sonata alternator put out?
A conventional 12-volt charging system commonly reads about 13.5–14.8 volts at the battery with the engine running. A slightly changing reading can be normal, but sustained voltage below about 13 volts or above 15 volts needs diagnosis.
What does it mean if my Sonata reads 10.5 volts while driving?
A 10.5-volt reading while driving is a serious warning sign. It may indicate a battery with a weak cell, a major charging failure, a loose cable, poor ground, belt problem, or damaged wiring. Stop relying on the car until the battery and charging system are tested.
Can a bad ground make the alternator look bad?
Yes. A corroded or loose ground can create voltage drop, unstable readings, dim lights, warning lights, and charging problems. Always inspect and test the battery terminals, engine grounds, body grounds, and charging cables before replacing the alternator.
Should I replace the battery or alternator first?
Test both before replacing either one. A weak battery can overload a good alternator, and a weak alternator can leave a good battery discharged. The best order is battery test, visual inspection, charging-voltage test, loaded test, and voltage-drop test.
Do Sonata Hybrid models use the same charging-system checks?
Not always. Hybrid models may use different 12-volt battery layouts, reset procedures, and charging strategies. Use the owner’s manual for your exact Sonata Hybrid model year before jump-starting, disconnecting, or testing the 12-volt system.
Conclusion
Your Hyundai Sonata’s electrical system depends on a healthy battery, a steady alternator, clean cables, good grounds, and a belt that can drive the alternator without slipping. Instead of guessing, use a multimeter to compare engine-off voltage, running voltage, loaded voltage, and voltage drop. If the battery light stays on, voltage falls near 10.5 volts, or readings climb above 15 volts, address the issue promptly before it causes a no-start, stalling, or electronics damage.
Sources
- Hyundai Digital Owner’s Manual — model-specific owner information, maintenance guidance, and emergency procedures.
- Hyundai warning and indicator lights guidance — charging-system warning light meaning and recommended driver response.
- Hyundai jump-starting and battery safety guidance — battery safety precautions, spark warnings, and safe handling reminders.
- AutoZone alternator and charging-system testing guide — general multimeter testing process for batteries, alternators, and charging systems.
- Hyundai Safety Recalls and Service Campaigns — official Hyundai VIN lookup for open recalls and service campaigns.
- NHTSA Recalls Lookup — U.S. government recall database for vehicles, tires, car seats, and equipment.