Last updated: July 31, 2026. Reviewed against current NHTSA, eCFR, FuelEconomy.gov, Slime, and VIAIR guidance.
Affiliate disclosure: This article may contain affiliate links. We may earn a commission at no extra cost to you.
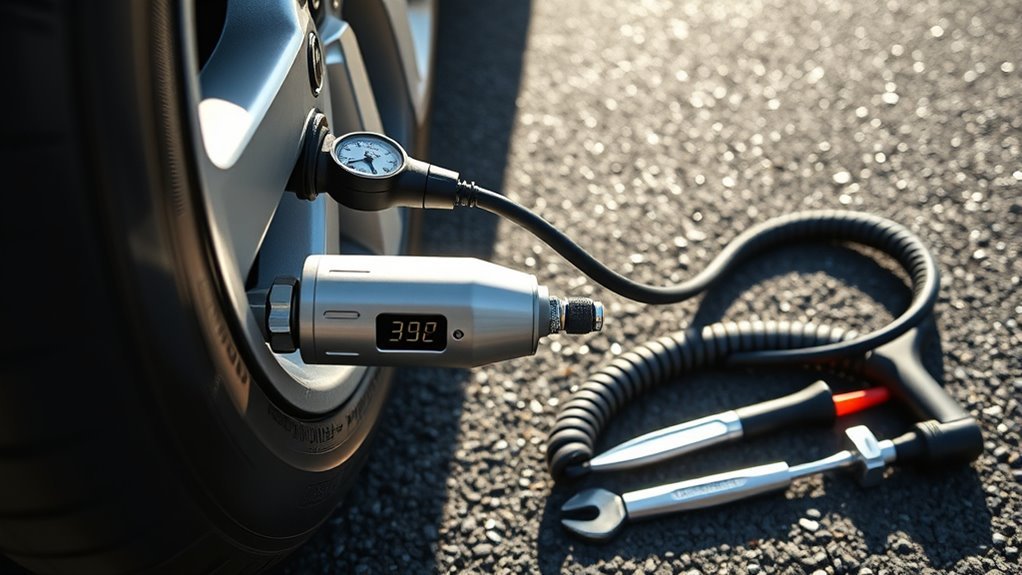
To use a 12V tire inflator with a cigarette lighter or accessory outlet, park safely, read the vehicle’s recommended cold PSI, confirm that the inflator’s maximum amp draw does not exceed the outlet or fuse rating, and attach the hose securely. Follow the exact inflator manual for the ignition or engine setting because manufacturers publish different instructions. Stop if the tire has sidewall damage, exposed cords, a displaced bead, or a fast uncontrolled leak.
Quick Answer
To use a 12V tire inflator with a cigarette lighter or accessory outlet, park safely, check the correct cold PSI on the driver-side tire placard or in the owner’s manual, confirm the inflator is compatible with the outlet, and attach the hose firmly to the valve stem. Plug in the inflator, follow its instructions for the correct ignition or engine setting, inflate while monitoring the gauge, switch the inflator off before disconnecting, confirm the final pressure, and reinstall the valve cap.
Key Takeaways
- Use the pressure on the vehicle placard or in the owner’s manual, not the maximum PSI printed on the tire sidewall.
- Check pressure when the tires are cold whenever possible. NHTSA defines cold tires as tires on a vehicle that has not been driven for at least three hours.
- Check all road tires and the spare at least monthly and before a long trip.
- Match the inflator’s maximum amp draw and power connection to the vehicle outlet and fuse rating.
- Follow your exact inflator manual for engine-on or engine-off operation because manufacturer instructions differ.
- Use a known-good tire pressure gauge to confirm the final PSI if the built-in reading is unstable or appears inaccurate.
- Do not inflate a tire with structural sidewall damage, exposed cords, a separated bead, or a fast uncontrolled leak.
At a Glance
| Time Required | Usually several minutes for one passenger-car tire; larger tires, low-output inflators, and zero-pressure starts can take longer |
| Difficulty | Easy |
| Tools Needed | 12V tire inflator, known-good tire pressure gauge, vehicle owner’s manual or tire placard, valve caps, and any required inflation adapters |
| Consumables | None for a routine pressure top-off; tire-repair materials are separate if the tire has a puncture |
Is It Safe to Use a 12V Tire Inflator?

A 12V tire inflator is safe for routine tire top-offs when the tire is structurally sound and the power connection matches the vehicle circuit. Some models can reinflate an undamaged tire from zero pressure, but only when the bead remains seated and the manual permits that use. Park on a flat surface away from traffic, turn on the hazard lights if you are roadside, and keep the cord and hose away from moving engine parts and hot exhaust components.
Warning: Follow your inflator manual for the required engine or ignition setting. If the instructions require the engine to run, operate the inflator only outdoors or in a fully open area. Never run a vehicle inside a closed garage to power an inflator.
Find the correct pressure on the Tire and Loading Information label, usually on the driver-side door edge or door jamb, or in the owner’s manual. According to NHTSA tire safety guidance, the correct target is the vehicle manufacturer’s recommended cold tire pressure, not the maximum pressure printed on the tire sidewall.
Inspect the tire before adding air. Do not use a portable inflator on a tire with a sidewall bulge, deep cut, exposed cords, shredded rubber, or a bead that has separated from the wheel. A portable inflator adds air; it does not repair a puncture. Use a tire mobility kit only when the vehicle and kit manuals allow it, and never treat sealant as a repair for sidewall damage or a blowout.
If the tire is fully deflated but the bead remains seated and no damage is visible, check whether the inflator manual explicitly permits a zero-pressure start for that tire size. Stop if the tire will not build pressure, the bead appears displaced, or the sidewall looks crushed or distorted.
Which Power Connection Should You Use?
Use a 12V accessory outlet only when the inflator’s maximum draw fits the outlet and fuse rating. Current VIAIR portable inflator specifications include 10-amp and 15-amp accessory-outlet models, while higher-draw models use direct battery clamps. Check the inflator label and your vehicle manual instead of assuming every 12V compressor can use the cigarette-lighter socket.
| Power Type | Best Use | Main Check | Avoid |
|---|---|---|---|
| 12V accessory outlet | Routine passenger-car tire top-offs and roadside use | Inflator maximum amps must not exceed the outlet or circuit rating | Using a higher-draw compressor or replacing the fuse with a larger one |
| Direct battery clamps | Higher-draw compressors, larger tires, and models designed for battery power | Follow the exact clamp order, polarity, and engine instructions in the manual | Improvised wiring, reversed clamps, or using clamps near fuel vapors |
| Cordless battery | Vehicles without an accessible 12V outlet and smaller inflation tasks | Charge level, supported tire size, and maximum continuous run time | Storing it uncharged and assuming it can handle large truck or RV tires |
For a deeper comparison of power sources, see the 12V versus 120V tire inflator guide.
How Do You Use a 12V Tire Inflator With a Cigarette Lighter?
Once the tire, power source, and inflator look safe, use a controlled process. The goal is to reach the correct PSI without overloading the outlet, overheating the inflator, or over-inflating the tire.
[Products Worth Considering]
These aluminum alloy tire valve stem caps provide durable, corrosion-resistant protection for your vehicle’s valve stems while helping maintain stable tire pressure. The rubber seal design helps block dust, moisture, and debris, reducing the risk of air leakage and valve damage. Easy to install and styled for a clean look, they fit a range of cars, SUVs, trucks, and motorcycles.
Add a touch of sparkle while helping protect your tire valves from dust, water, and sand with these handmade rhinestone valve stem caps. Designed for easy hand installation and a universal fit for many cars, trucks, motorcycles, and bicycles, they combine decorative style with practical sealing performance. The durable ABS construction with rubber seals helps support a tighter fit and helps reduce the risk of air leakage.
Add a clean, patriotic finishing touch to your wheels with these DECURCAR tire valve stem caps. The aluminum outer shell with plastic liner helps resist corrosion and supports a reliable seal, while the easy hand-tightened design makes installation simple. Built for wide compatibility with standard Schrader valves, this set is a practical upgrade for cars, trucks, motorcycles, bikes, and more.
Step 1: Find the Correct Target Pressure
Read the vehicle’s tire placard or owner’s manual before turning on the inflator. Front and rear tires may have different recommended pressures, so check the exact tire you are inflating. NHTSA defines a cold reading as one taken when the vehicle has not been driven for at least three hours.
If the tire is warm from driving and needs air for safe travel, inflate it to the recommended cold pressure as a temporary correction. Do not release air from a warm tire merely because its pressure reads above the placard value. Recheck and adjust it after the vehicle has been parked long enough for a cold reading.
Step 2: Prepare the Inflator and Power Source
Uncoil the power cord and air hose fully so they do not pull on the valve stem. Confirm that the outlet, fuse, and inflator amp ratings are compatible before inserting the plug. Follow any model-specific connection order in the inflator manual.
Do not use a universal rule for the engine setting. Slime recommends engine-off operation for its tire inflators, while VIAIR recommends running the engine before powering its compressors. Follow the instructions supplied with your exact inflator and vehicle. Some vehicles also require the ignition to be in accessory or on mode before the outlet receives power.
| Step | Action |
|---|---|
| 1 | Park safely, inspect the tire for structural damage, and find the correct cold PSI. |
| 2 | Confirm the power connection and amp rating, then follow the inflator manual for the correct ignition or engine setting. |
| 3 | Remove the valve cap and attach the air hose firmly to the tire valve stem. |
| 4 | Set the target pressure if your inflator has a preset function. |
| 5 | Turn the inflator on, monitor the gauge, stop at the target PSI, and confirm the result with a known-good gauge when needed. |
Step 3: Attach the Nozzle to the Valve Stem
Remove the valve cap and keep it in your pocket or cup holder so it does not roll away. Press, clip, or screw the inflator connector onto the valve stem until it seals. A brief hiss is normal while attaching the hose, but continuous hissing usually means the connector is crooked, loose, or not fully locked.
Pro Tip: Check the starting pressure before turning on the inflator. If the tire is only a few PSI low, use short inflation checks and pause the compressor to get a steadier reading.
Step 4: Set the Pressure If Your Inflator Has Auto Shutoff
Some digital 12V inflators let you set a target PSI and stop automatically. For example, Slime’s 12V Digital Tire Inflator lists a digital display and automatic shutoff when the selected pressure is reached. This is an example of the feature, not a recommendation for every vehicle or tire size.
If your inflator is analog or does not have auto shutoff, stay beside it and turn it off manually at the correct pressure. Even with auto shutoff, remain close enough to stop the unit if the hose leaks, the plug becomes hot, or the compressor sounds abnormal. If the preset stops early or will not stop, use the tire inflator automatic-shutoff troubleshooting guide.
Step 5: Inflate and Monitor the Pressure
Turn the inflator on and watch the gauge. Some readings fluctuate while the compressor is moving air, so pause the inflator briefly if the display or needle will not stabilize. Stop when the pressure reaches the vehicle manufacturer’s target. Switch the inflator off before removing the hose.
Built-in gauge accuracy varies by model. Use a handheld gauge that gives repeatable readings and has been compared with a reliable reference if the inflator display appears unstable or differs from another gauge. For a deeper accuracy check, see the tire pressure gauge calibration guide.
If the pressure is too high, release air slowly by using the inflator’s bleed control or gently pressing the center pin in the valve stem. Recheck after each small release.
Step 6: Disconnect and Finish Up
Remove the hose straight from the valve stem to reduce air loss, then reinstall the valve cap. Unplug the inflator from the 12V outlet, inspect the plug and socket for unusual heat, and let the compressor cool before storing it. Repeat the process for any other low tires while following the inflator’s duty-cycle limit.
Why Won’t My 12V Tire Inflator Work?
If your tire inflator does not work as expected, the cause is usually the power source, hose seal, compressor temperature, pressure-gauge behavior, or the tire itself. Use the table below to narrow down the problem.
| Problem | Likely Cause | Fix |
|---|---|---|
| Inflator will not turn on | Outlet has no power, ignition setting is wrong, plug is loose, fuse is blown, or inflator has overheated | Follow the manual’s ignition instructions, reseat the plug, let the unit cool, check the vehicle fuse and any user-serviceable plug fuse identified in the inflator manual, and verify the outlet rating. |
| Fuse blows repeatedly | Inflator draw exceeds the circuit rating, or the plug, cord, socket, or compressor has a fault | Stop using the inflator. Confirm its maximum amp draw and inspect for heat or damage. Use a correctly matched inflator or have the equipment checked. |
| Air leaks at the valve | Connector is crooked, loose, worn, or not fully locked | Turn the inflator off, remove the connector, inspect the seal, and reattach it squarely and firmly. |
| Pressure rises very slowly | Large tire, low-output inflator, weak power supply, hot compressor, air leak, or very low starting pressure | Check the hose seal, verify the power source, confirm the tire-size rating, and pause according to the duty-cycle instructions. |
| Inflator gets hot | Normal compressor heat or an exceeded duty cycle | Turn it off and let it cool for the period stated in the manual. Stop using it after smoke, melting, sparks, or a burning smell. |
| Gauge jumps while running | Pressure pulses while air moves through the hose | Pause the compressor and let the reading stabilize before deciding whether more air is needed. |
| Tire loses pressure again soon | Puncture, leaking valve, bead leak, cracked wheel, or tire damage | Stop repeatedly topping it off. Have the tire, valve, bead, and wheel inspected and repaired or replaced. |
[Products Worth Considering]
These universal valve stem caps help protect tire valves from water, dust, and sand while supporting a tighter seal to reduce air leakage. Made from durable aluminum alloy, they are easy to install by hand and fit a wide range of vehicles, including cars, SUVs, trucks, motorcycles, and bicycles. The sleek black finish adds a clean look and makes them a practical accessory for everyday vehicle maintenance.
This 28-piece car accessory set helps refresh your vehicle with matching vent trim strips, cup coasters, and tire valve stem caps. The flexible vent strips are easy to trim and install, while the silicone coasters help keep cup holders clean and stable. Durable materials and a bright blue finish make it a practical way to add style and protection to SUVs, trucks, and other cars.
These metal tire valve stem caps are designed to protect tire valves from dust, moisture, corrosion, and air leakage while adding a clean, stylish look to your wheels. Made from durable aluminum alloy with rubber sealing rings, they are easy to install without tools and help support stable tire pressure for safer driving.
Why Does the Inflator Keep Blowing the Fuse?
The accessory outlet, plug, fuse, wiring, and compressor all have to be compatible. If the inflator does not start, confirm that the outlet is powered, the plug is fully seated, and the ignition setting matches the vehicle and inflator instructions. If it starts and then stops without blowing the fuse, the compressor may have reached its thermal limit.
Do not replace a blown fuse with a higher-amp fuse to run a stronger inflator. The original fuse protects the vehicle wiring. Replace the vehicle fuse only with the type and rating specified by the vehicle manufacturer. If the inflator manual identifies a user-serviceable fuse inside the 12V plug, replace that fuse only with the exact specified type and rating.
If a correctly rated replacement fuse blows again, stop using the inflator. Check its maximum amp draw and inspect the plug, cord, socket, and housing for heat, discoloration, looseness, or damage. A repeated failure may indicate a mismatched compressor or an electrical fault.
Which PSI Should You Use?
Always use the vehicle manufacturer’s recommended cold pressure as the normal target. FuelEconomy.gov states that the correct pressure is generally listed on the driver-side door-jamb label or in the owner’s manual and warns against using the tire sidewall maximum as the vehicle’s target pressure.
Note: TPMS is a warning system, not a precision gauge. Under federal requirements, the warning must generally illuminate no later than when one or more tires reach 25% below the manufacturer’s recommended cold pressure, or the alternative minimum pressure in the standard, whichever is higher. Use a gauge for routine pressure checks.
For more detail about hoses, chucks, motors, and gauge behavior, see the tire inflator parts guide.
How Do You Maintain a Portable Tire Inflator?
Maintaining your portable tire inflator helps it work when you need it most. Protect the power cord, plug, air hose, connector, pressure gauge, and adapters from damage and moisture.
| Task | Frequency | Action |
|---|---|---|
| Inspect power cord and plug | Before each use | Look for cracks, heat damage, loose plug parts, discoloration, or exposed wire. |
| Check air hose and connector | Before each use | Make sure the hose is not split and the connector seals securely on the valve stem. |
| Test functionality | Every few months | Run it briefly and confirm that it powers on, displays pressure, and stops normally. |
| Compare pressure readings | A few times per year | Compare the inflator reading with a known-good handheld tire pressure gauge. |
| Charge a cordless model | At the interval in its manual | Maintain the battery without leaving the inflator continuously connected unless the manufacturer permits it. |
| Store dry and protected | After each use | Keep it in its case or a protected vehicle compartment with the adapters included and within the storage-temperature limits in the manual. |
Avoid wrapping the cord tightly around the housing if that strains the plug or bends the hose sharply. Let the inflator cool and dry before closing its case. Store the inflation tips together so they do not become lost or contaminate the hose connection.
What Should You Do After Inflating the Tire?
Double-check the pressure with a reliable gauge, reinstall the valve cap, unplug the inflator, and let it cool before storage. If the tire was unusually low, check it again after a few hours or the next morning. A continuing pressure loss can indicate a puncture, leaking valve, bead leak, cracked wheel, or structural tire damage.
For long trips, check all four road tires and any spare before leaving. NHTSA recommends checking all tires, including the spare, and using the vehicle manufacturer’s pressure.
Proper inflation can also reduce fuel use. FuelEconomy.gov currently reports an estimated gas-mileage improvement of 0.6% on average and up to 3% in some cases, while noting that the supporting estimate was revised in 2016.
What Else Can a 12V Tire Inflator Inflate?

Many 12V tire inflators include adapters for sports balls, compatible bicycle valves, small pool toys, and other inflatables. Use an adapter only when the inflator manual approves that application, and follow the pressure limit printed on the item being inflated.
| Application | Items to Inflate | Safety Tip |
|---|---|---|
| Sports Equipment | Basketballs, soccer balls, and footballs | Use the needle adapter and inflate in short bursts because small items fill quickly. |
| Bike Tires | Bicycle tires with compatible valves or adapters | Confirm valve compatibility and use the bicycle tire’s stated pressure range. |
| Outdoor Gear | Small air mattresses and pool toys approved by the inflator manufacturer | Large-volume items can overheat a small tire inflator, so follow the duty cycle. |
| Decorations | Small inflatable decorations with compatible valves | Do not leave the inflator running unattended. |
Note: Tire inflators are generally high-pressure, lower-volume tools. A dedicated high-volume pump is usually better for large rafts, paddleboards, oversized air mattresses, and similar gear.
What Should You Look for in a 12V Tire Inflator?
Choose an inflator that matches the tires and power source you will actually use. Maximum PSI alone does not show how quickly a compressor fills a tire. Airflow, supported tire size, duty cycle, amp draw, hose length, and power connection are more useful decision factors. The tire inflator CFM guide explains how airflow ratings relate to fill speed.
Look for a power cord and hose that can reach every tire without pulling on the valve stem. A readable gauge, published amp rating, secure air chuck, and clear duty-cycle instructions are more important than decorative features. Automatic shutoff can make pressure control easier, while an LED light and organized adapter storage are useful for roadside use.
For a passenger car, a correctly matched accessory-outlet inflator may be sufficient. Larger truck, RV, trailer, and off-road tires often need more airflow and a longer duty cycle, which may require a direct battery-clamp compressor.
[Products Worth Considering]
These universal tire valve stem caps are designed to help protect tire valves from moisture and debris while adding a clean, customized look to your vehicle. Suitable for cars, trucks, motorcycles, SUVs, and bikes, they offer easy push-on installation and durable everyday use. Their personalized design makes them a simple accessory for enhancing both style and tire protection.
These aluminum alloy tire stem valve caps provide a stylish, protective upgrade for your vehicle’s valve stems while helping keep out dirt, dust, and road debris. Designed for easy hand installation, they fit most cars, SUVs, trucks, motorcycles, and bicycles, making them a practical accessory for everyday maintenance and a thoughtful gift for drivers.
This all-in-one car emergency kit helps drivers stay prepared for roadside breakdowns, flat tires, and dead batteries with essential tools in one compact package. It includes a portable air compressor, heavy-duty jumper cables, a first aid kit, and other safety items designed for year-round peace of mind. Compact enough for easy trunk storage, it makes a practical safety solution and thoughtful gift for drivers of all ages.
Frequently Asked Questions
How do you use a cigarette lighter tire inflator?
Park safely, find the correct cold PSI on the vehicle placard or in the owner’s manual, confirm that the inflator is compatible with the 12V outlet, and attach the hose to the valve stem. Follow the inflator manual for the correct ignition or engine setting, turn it on, stop at the target pressure, switch it off before disconnecting, confirm the reading, and reinstall the valve cap.
Does the car need to be running to use a 12V tire inflator?
Not always. Manufacturer instructions differ. Slime recommends engine-off operation for its tire inflators, while VIAIR recommends running the engine before powering its compressors. Follow the manuals for your exact inflator and vehicle. If the engine must run, use the inflator only outdoors or in a fully open area.
Can I plug a tire inflator into any 12V outlet?
No. Compare the inflator’s maximum amp or watt draw with the outlet and fuse rating in the vehicle owner’s manual. Use an accessory-outlet inflator only when the circuit can support it. Higher-draw compressors may require direct battery clamps or another manufacturer-approved connection.
How many amps does a 12V tire inflator use?
Amp draw depends on the model. Current VIAIR examples include accessory-outlet inflators rated at 10 or 15 amps, while several higher-draw compressors use direct battery clamps. Check the inflator label and compare its maximum draw with the outlet and fuse rating in your vehicle manual.
Can a tire inflator blow a car fuse?
Yes. The fuse can blow if the inflator draws more current than the outlet circuit allows or if the plug, cord, socket, or compressor has a fault. Do not install a larger fuse. Use the fuse rating specified by the vehicle manufacturer and stop troubleshooting if the correct replacement fuse blows again.
Should I inflate tires to the PSI on the tire sidewall?
No. The sidewall number is a tire limit, not the vehicle’s recommended operating pressure. Use the cold pressure listed on the driver-side tire placard or in the owner’s manual unless the vehicle manufacturer provides different instructions for a specific load condition.
How long can you run a portable tire inflator?
Follow the model’s duty-cycle rating. Some compact inflators require a cooling break after several minutes, while heavier compressors can run longer. Turn the inflator off if it becomes unusually hot, slows down, smells like burning, or shuts itself off.
Can a 12V inflator fill a completely flat tire?
It may be able to if the tire is undamaged, the bead remains seated on the wheel, and the inflator is rated for the tire size and starting pressure. Do not attempt inflation if the bead has separated, the sidewall is crushed or damaged, or the tire will not begin building pressure.
What should I do if the tire keeps losing air after inflation?
Recheck it with a gauge after a few hours or the next morning. If the pressure drops again, the tire may have a puncture, leaking valve, bead leak, cracked wheel, or structural damage. Have it inspected instead of repeatedly topping it off.
Conclusion
Using a 12V tire inflator with a cigarette lighter or accessory outlet is straightforward when you follow the correct order. Park safely, inspect the tire, use the vehicle’s recommended cold pressure, verify power compatibility, follow the inflator’s engine or ignition instructions, attach the hose securely, and monitor the gauge.
Confirm the final pressure, replace the valve cap, and check the tire again if it was unusually low. A tire that continues losing pressure needs inspection rather than repeated inflation.
Sources
- NHTSA TireWise: Tire Safety Ratings and Awareness: correct tire pressure, cold-tire definition, tire placard guidance, spare-tire checks, and TPMS limitations
- FuelEconomy.gov: Keeping Your Vehicle in Shape: proper tire pressure, fuel-economy estimates, and the warning against using sidewall maximum PSI as the normal target
- eCFR 49 CFR 571.138: Tire Pressure Monitoring Systems: TPMS purpose and warning-threshold requirements
- Slime 12V Digital Tire Inflator: example of a 12V accessory-powered inflator with a digital display and automatic shutoff
- Slime: Engine Operation Guidance: engine-off instructions for Slime tire inflators
- VIAIR Portable Tire Inflator Specifications: amp draw, duty cycle, supported tire size, and power-source differences
- VIAIR FAQ: engine-running guidance for VIAIR compressors


[…] a handy 12V tire inflator that works with your cigarette lighter. Check out this helpful guide on how to use a 12V tire inflator with cigarette lighter safely for tips on doing it right. Hook up the hose or nozzle and add air until the gauge hits the right […]