Turning on a Supra’s headlights is simple, but adjusting them correctly depends on the Supra generation and headlight assembly you have. The 2020+ GR Supra uses Toyota’s modern light switch and turn-signal stalk controls, while older MK3/MK4-style assemblies may have manual rear adjusters that can often be reached from the engine bay. Use the steps below to switch the lights properly, make a safe wall-check, and adjust only the hardware your specific Supra actually has.
Quick Answer
Turn the Supra’s low beams on with the light switch or automatic headlight setting, then use the left stalk for high beams and flash-to-pass. To aim older manually adjustable headlights, park 25 feet from a flat wall, mark the beam height, and make small vertical/horizontal adjustments. For 2020+ GR Supra LED headlights, collision repairs, or unclear adjusters, use a professional headlight aimer.
Key Takeaways
- Low beams and high beams are controlled from the light switch and left stalk; automatic high beam operation varies by model year and equipment.
- Do not assume every Supra uses the same 8mm headlight adjusters. Confirm your generation and assembly before turning any screw.
- A 25-foot wall check is useful for finding obvious misalignment, but legal aim standards and inspection rules vary by state or country.
- Suspension lowering, front-end repairs, aftermarket bulbs, bumper changes, or imported headlamps can all change the beam pattern.
- If the beam cutoff is scattered, too high, or blinding other drivers, stop adjusting and have the lights aimed with professional equipment.
At a Glance
| Time Required | 15–30 minutes for a basic wall check; longer if trim or covers block access |
| Difficulty | Easy for switching lights; moderate for manual aiming |
| Tools Needed | Owner’s manual, tape measure, painter’s tape, flat wall, level ground, and an 8mm wrench/socket only if your assembly uses 8mm adjusters |
| Cost | Usually free for a check; shop aiming commonly costs a small labor charge |
Turn On Supra Headlights and Switch Low/High Beams

Start by finding the light switch. On the 2020+ Toyota GR Supra, the light controls are grouped near the steering wheel, and the owner’s manual identifies settings for lights off, daytime running lights, parking lights, automatic headlight control, low beams, and automatic high beam. Turn the switch to the low-beam position, or use automatic headlight control when conditions allow.
To use high beams, operate the left stalk. Toyota’s GR Supra manual describes the high-beam and headlight-flasher function on the turn-signal lever: high beams work when the low beams are already on, and the blue high-beam indicator appears in the instrument cluster. Pulling the stalk back returns the lights to low beam or flashes the lights, depending on the stalk position and model year.
Warning: Do not drive with high beams aimed at nearby traffic. Many state driver handbooks require dimming high beams when approaching oncoming vehicles or following another vehicle, and local distances vary. Use low beams when another driver could be dazzled.
Identify Your Supra Generation Before Adjusting
Before you touch any adjuster, identify the car and headlight type. A 1993–1998 MK4 Supra, a 1986–1992 MK3 Supra, and a 2020+ GR Supra do not share the same front lighting layout. Aftermarket headlight housings can also move, hide, or reverse the adjusters.
| Supra Type | What to Check First | Best Aiming Approach |
|---|---|---|
| 2020+ GR Supra | LED lighting, automatic high-beam equipment, and repair history | Use the wall check for symptoms; have precise aiming done professionally |
| 1993–1998 MK4 Supra | Rear adjusters, factory versus aftermarket housings, and whether the car has been lowered | Small manual adjustments after confirming adjuster direction |
| 1986–1992 MK3 Supra | Pop-up headlight mechanism, linkage condition, and sealed-beam or conversion setup | Inspect the mechanism first, then aim with the correct service procedure |
| Aftermarket or imported headlights | Beam cutoff, left-hand-drive/right-hand-drive pattern, and bulb seating | Do not rely on screw turns alone; correct the beam pattern before aiming |
Find Adjustment Points Without Guessing
On many older Supra headlight assemblies, the adjustment points are found behind the headlight housing. Some use 8mm rear adjustment screws or bolts for vertical and horizontal movement. A top or rear adjuster commonly changes vertical aim, while a side adjuster commonly changes horizontal aim. However, the exact position and turn direction can vary by generation, market, and aftermarket housing.
If your Supra has separate fog or driving lights, inspect the trim and mounting brackets before turning anything. Some fog light assemblies have their own lower screw or bracket adjuster, while others depend on the bumper or trim fitment. Adjust fog lights separately from the main low beams so you do not correct one light by misaligning another.
Note: Mark the original screw position with a paint pen or a photo before adjusting. If the beam gets worse, you can return to the starting point.
Tools & Prep Before Aiming
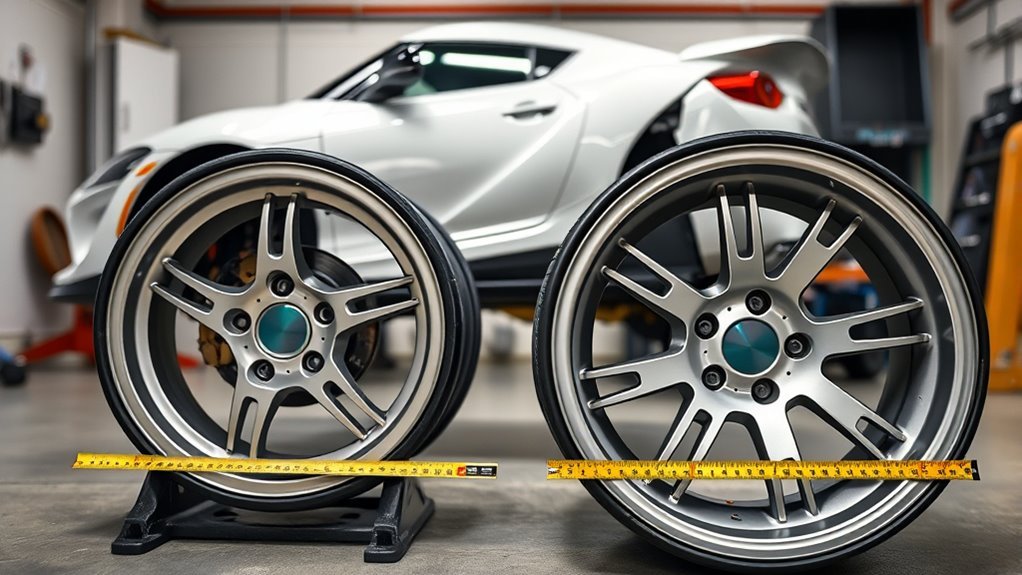
Good headlight aim starts with the car sitting the way it sits on the road. Park on a flat, level surface facing a plain wall or garage door. The common wall-check distance is 25 feet from the headlight lenses to the wall, which is also used in many inspection and aiming-screen setups.
Before measuring, inflate the tires to the correct pressure, remove unusual cargo, fill the fuel tank to a normal driving level, and make sure the suspension is settled. Clean the lenses because dirt can scatter light and make the cutoff look higher or blurrier than it really is.
- Tape measure: measures headlight height and 25-foot distance.
- Painter’s tape: marks the wall without damaging paint.
- 8mm wrench or socket: useful only if your headlight assembly actually uses 8mm adjusters.
- Small flashlight: helps identify adjusters behind the housing.
- Owner’s manual or service data: confirms the correct controls and adjustment points for your model year.
Aim Low Beams Step by Step
Use this as a safe checking and adjustment method, not as a substitute for your factory service manual. If your Supra has sealed LED units, accident damage, warning lights, or automatic leveling faults, have the aim checked by a shop with a calibrated headlight aimer.
Set Up the Wall Marks
- Park close to the wall and mark the vertical centerline of each headlight on the wall with tape.
- Measure from the ground to the center of each low-beam projector or reflector.
- Place a horizontal tape line on the wall at that measured height.
- Back straight up until the headlight lenses are 25 feet from the wall.
- Turn on the low beams and let the beam pattern settle.
For many low-beam patterns, the brightest cutoff should sit slightly below the headlight-center height at 25 feet. Do not aim the cutoff above the headlight centerline. A beam that is too high can glare into oncoming traffic even if it feels brighter from the driver’s seat.
Locate the Correct Rear Adjuster
Open the hood and inspect the rear of the headlight assembly. If you see a long grey or metal 8mm adjuster, confirm whether it controls vertical or horizontal aim before making a large change. Turn the adjuster only a small amount at a time, then check the wall again.
Pro Tip: Count quarter-turns out loud or write them down. “Driver side: 2 quarter-turns clockwise” is much easier to undo than “turned it until it looked better.”
Make Small Adjustments and Match Both Sides
On many older assemblies, turning one adjuster raises or lowers the beam while another shifts it left or right. Some adjusters raise the beam clockwise, but not every housing follows the same direction. Watch the beam move on the wall rather than trusting a universal rule.
Adjust the low beams first. Match the driver and passenger beams so the cutoff is even and the hot spots are not aimed into opposing traffic. After every adjustment, step back and look at the full beam pattern. If the cutoff is fuzzy, angled the wrong way, or scattered, the problem may be bulb seating, a damaged reflector, the wrong bulb type, or an incompatible aftermarket housing rather than aim.
Aim Fog and Driving Lights

Fog lights should sit low and wide. They are not meant to throw light far down the road like high beams. Aim them so the beam stays below the low-beam cutoff and does not shine into other drivers’ mirrors.
If your Supra has adjustable fog or driving lights, find the dedicated trim-ring, bracket, or lower mounting adjuster. Make changes in small increments and keep both sides even. Do not use fog lights to compensate for poorly aimed low beams; fix the main headlight aim first.
- Fog lights: keep the beam low and close to the road surface.
- Driving lights: aim only where legal and safe for road use.
- Aftermarket bumper or trim: recheck aim because the mounting angle may change.
- Loose brackets: repair the mounting before aiming, or the beam will move again.
How Lowering Your Supra Changes Headlight Aim
Lowering a Supra can change the beam angle, especially if the front and rear ride heights do not drop evenly. A nose-down stance can make the beam fall short, while a rear-low stance can push the beam upward and create glare. Even small ride-height changes are worth checking because the light is projected far down the road.
| Change | Possible Result | What to Do |
|---|---|---|
| Front lowered more than rear | Low beams may point too low | Recheck wall marks and raise only if the cutoff is below spec |
| Rear lowered more than front | Low beams may point too high | Lower the beam or get professional aiming before night driving |
| Coilovers installed | Aim may change again after settling | Check immediately and again after the suspension settles |
| Front bumper removed | Fog/driving light brackets may shift | Retighten brackets and re-aim fog lights separately |
Quick Checks to Verify Supra Headlight Aim
After aiming, do a short nighttime check on a quiet, flat road. The low beams should light the lane ahead without shooting into tree branches, road signs, or the rear window of the car in front. The beam cutoff should look stable and even, not jumpy or crooked.
- Both beams turn on: confirm low beams, high beams, and indicators work.
- Cutoff is even: the left and right low-beam cutoffs should be close in height.
- No glare complaints: repeated flashing from oncoming drivers is a sign to recheck aim.
- No loose hardware: shake or vibration means the bracket or housing may be loose.
- Recheck after changes: suspension work, collision repair, bulb swaps, and bumper work all call for another aim check.
Good headlight aim is not just about seeing farther. It is about putting light on the road without putting glare in another driver’s eyes.
Troubleshooting: Uneven Beams, Stiff Screws, and HID Issues
If one beam is higher than the other, first check the basics. Make sure both bulbs are seated correctly, both housings are fully mounted, and the tires are evenly inflated. A crooked bulb or loose housing can mimic a bad aim setting.
Uneven Beams
Uneven beams usually come from one of four problems: incorrect adjustment, damaged brackets, mismatched bulbs, or a housing that is not seated squarely. Fix physical damage before trying to aim around it. If the driver-side beam is intentionally lower by design, do not raise it until it glares into oncoming traffic.
Stiff or Frozen Adjustment Screws
If an adjuster is stiff, stop before you strip it. Use the correct socket or wrench, apply gentle pressure, and inspect the threads. Old plastic adjusters can crack, and forcing them can turn a simple aim correction into a headlight repair.
HID, LED, and Aftermarket Bulb Problems
Aftermarket HID or LED bulbs can change the beam pattern, especially if they are installed in housings not designed for them. If the cutoff becomes scattered or glare increases, re-aiming alone may not solve it. Use lighting parts designed for your housing and follow local road-use rules.
Warning: Never aim lights by simply raising them until the road looks brighter. Too-high low beams can blind oncoming drivers and may fail inspection.
When to Use a Professional Headlight Aimer
A wall check is helpful, but a shop aimer is better when accuracy matters. Use a professional alignment tool if your Supra has modern LED headlights, adaptive or automatic high-beam features, repaired front-end damage, imported headlamps, aftermarket projector conversions, or a beam pattern that does not show a clean cutoff.
Professional aiming is also the safest choice after major suspension changes. If your coilover setup changes ride height or rake, a shop can measure aim more precisely than a garage-door method.
Frequently Asked Questions
Do aftermarket bulbs affect headlight aim or require re-aiming?
Yes. Aftermarket bulbs can change the hot spot, cutoff shape, and glare level. If the bulb sits at a different depth or angle than the original bulb, the headlight may need re-aiming. If the beam pattern is scattered, use the correct bulb or housing instead of trying to aim around the problem.
Can I aim headlights without a level surface or wall?
Not reliably. You need a level surface and a flat reference point to see whether the cutoff is too high, too low, or uneven. Without that setup, use a professional headlight aimer rather than guessing.
How often should I recheck my headlight alignment?
Check aim every 6–12 months, after replacing bulbs or housings, after suspension changes, after front bumper removal, and after any front-end impact. Also recheck if other drivers flash their lights at you or your low beams suddenly seem too short.
Are there legal beam height specs for my model-year Supra?
Yes, but the applicable rules depend on the country, state, inspection program, and headlamp type. In the United States, lighting equipment is regulated under FMVSS No. 108, while state inspection rules may define the local aiming method. Use your owner’s manual, service manual, and local inspection rules for your specific model year.
Will fog light aim differ with different bumper or trim modifications?
Yes. Bumper, lip, grille, or fog-trim changes can shift the fog light mounting angle. After any front trim change, confirm that the fog lights are still low, even, and not aimed into oncoming traffic.
Should I adjust 2020+ GR Supra headlights myself?
You can check the beam pattern, but precise adjustment is best left to a dealer or qualified shop, especially on LED headlights or cars with automatic high-beam features. Do not force hidden adjusters or remove sealed components unless you have the correct service procedure.
Conclusion
You can turn on a Supra’s headlights with the light switch and left stalk, then verify aim with a level 25-foot wall check. For older manually adjustable headlights, make small changes at the correct vertical and horizontal adjusters and match both sides carefully. For 2020+ GR Supra LED headlights, aftermarket conversions, suspension changes, or any beam pattern that looks wrong, use professional aiming equipment. The goal is simple: a clear road ahead without glare for everyone else.
Sources
- Toyota 2026 Supra Owner’s Manual: Cockpit — backs up the GR Supra light switch and lighting control locations.
- Toyota 2026 Supra Owner’s Manual: High beams and headlight flasher — backs up stalk operation for high beams and flash-to-pass.
- 49 CFR § 571.108, FMVSS No. 108 — federal U.S. lighting standard covering lamps, reflective devices, and associated equipment.
- 49 CFR § 393.24 — confirms that headlamps and auxiliary driving/fog lamps must be mounted and aimable under applicable federal commercial-vehicle rules.
- California DMV Driver Handbook: Introduction to Driving — backs up safe high-beam use and dimming guidance.
- North Carolina State Highway Patrol Headlight Wall Chart Requirements — backs up the 25-foot wall/screen reference used in inspection-style aiming setups.