

Last updated: September 16, 2026.
The correct Toyota 4Runner tire rotation pattern is the pattern shown in the owner’s manual for your exact model year and tire/spare configuration. Do not choose a rearward-cross, forward-cross, or five-tire sequence from drivetrain alone. Toyota says tire-rotation frequency and pattern are vehicle-specific, so confirm the diagram first, then check tire direction, front/rear sizing, spare compatibility, lift points, cold tire pressure, and wheel-nut torque in your Toyota owner’s manual.
Quick Answer
Use the tire-rotation diagram in the Toyota owner’s manual for your exact 4Runner model year and tire setup. Generic RWD or 4WD charts may show a rearward-cross pattern, but they should not override Toyota’s vehicle-specific instructions. Directional tires normally stay on the same side, staggered setups can restrict rotation, and a full-size spare should enter the cycle only when the applicable Toyota and tire guidance allows it.
Key Takeaways
- Use your exact model-year Toyota rotation diagram first. Do not select a pattern from drivetrain alone.
- NHTSA gives a general 5,000–8,000-mile rotation range when the vehicle manufacturer recommends rotation, but your Toyota maintenance schedule takes priority.
- Directional tires normally stay on the same side and move front-to-rear. Staggered or mismatched tires can restrict normal rotation.
- Never work under a 4Runner supported only by a jack. Use rated jack stands on firm, level ground.
- Use the exact wheel-nut torque and cold tire pressure for your vehicle, then complete any TPWS/TPMS tire-position registration required by your model-year manual.
At a Glance
| Time Required | Varies by experience and lifting setup; do not rush safe support or final torque |
| Difficulty | Moderate; safe lifting and accurate torque are required |
| Tools Needed | Floor jack, rated jack stands, wheel chocks, lug wrench or breaker bar, torque wrench, tire-pressure gauge, gloves, eye protection, and owner’s manual |
| Cost | Depends on the tools you already own and local shop pricing |
Quick 4Runner Tire Rotation Summary

Start with the rotation diagram for your exact 4Runner model year. Then confirm whether all four road tires match in size, load rating, tread design, and direction, and whether the spare is approved for the rotation cycle. A rearward-cross pattern is common generic guidance for many RWD applications, but use it on a 4Runner only when the applicable Toyota manual or tire guidance permits it. Directional tires normally move front-to-rear on the same side.
Work on a flat surface, set the parking brake, chock the wheels, and loosen the lug nuts slightly before lifting. Raise the 4Runner only at approved lift points, then support it with rated jack stands before removing a wheel. After each wheel is repositioned, hand-start every lug nut, snug the nuts evenly in a star or crisscross sequence, lower the tire enough to prevent spinning, and tighten each lug nut to the exact specification for your vehicle and wheel setup.
“Check your owner’s manual for information on how frequently the tires on your vehicle should be rotated and the best pattern for rotation.” — NHTSA TireWise
How Often Should You Rotate Toyota 4Runner Tires?
Use your Toyota maintenance schedule as the first rule. For general tire-care guidance, NHTSA TireWise says that, when the vehicle manufacturer recommends rotation, tires can generally be rotated every 5,000–8,000 miles or sooner if uneven wear appears. Michelin gives a general recommendation of 5,000–7,000 miles but also tells drivers to follow the vehicle manufacturer’s guidance. For pressure-specific guidance, see how to set tire pressure using the 4Runner door placard.
| Routine use | Follow the maintenance schedule for your exact Toyota model year. |
| Uneven wear | Inspect sooner, then check pressure, alignment, balance, tire condition, and suspension condition before assuming rotation alone will fix it. |
| Severe use | Off-road driving, towing, heavy loads, and rough roads justify more frequent tire inspections; follow Toyota’s applicable severe-use maintenance guidance. |
| New vibration or pull | Inspect before rotating. A pull or vibration can signal pressure differences, alignment, balance, tire damage, wheel problems, or suspension trouble. |
Check tire pressure and tread at least monthly. NHTSA says tire pressure should be checked when the tires are cold, including the spare, and that the correct pressure is listed on the driver-side tire label or in the owner’s manual. Tires are not safe and should be replaced when tread is worn to 2/32 inch.
Tools and Safety Gear You Need
You need a floor jack rated for the 4Runner’s weight, rated jack stands appropriate for your lifting method, wheel chocks, a lug wrench or breaker bar, a calibrated torque wrench, a tire-pressure gauge, gloves, and eye protection. Keep the wheel-lock key nearby if your 4Runner has locking lug nuts.
Warning: Never put any part of your body under a 4Runner supported only by a jack. A jack lifts the vehicle; rated stands provide support. If you cannot identify the correct lift and support points for your model year, stop and use a qualified shop.
[Products Worth Considering]

This EL-50448 TPMS relearn tool helps quickly activate and reset tire pressure sensors so your vehicle’s monitoring system stays accurate after tire rotations, sensor replacement, or seasonal tire changes. Designed for many GM-related vehicles and compatible with common 315 and 433 MHz TPMS systems, it offers simple one-button operation and reliable performance for clearing warning lights and relearning sensor positions.

This GM TPMS relearn tool helps reset tire sensors, clear warning lights, and match tire positions after rotation quickly at home. Designed for Chevrolet, GMC, Cadillac, and Buick vehicles, it offers one-button operation, fast activation, and broad compatibility with many GM models. It is best suited for OE/OEM sensors and includes paper instructions plus video guidance for easier DIY use.

This TPMS sensor training tool is designed for Ford, Lincoln, and Mercury vehicles with compatible tire pressure sensors, helping activate sensors after tire rotations or sensor replacement. It supports relearning and warning light reset workflows with a simple one-button operation, making tire pressure maintenance easier and faster. Built for reliable use and broad vehicle compatibility, it is a practical accessory for TPMS service and sensor activation.
Floor Jack and Jack Stands
Use the manufacturer-approved lift and support points listed in your owner’s manual. Place the jack on firm, level ground, raise the vehicle slowly, and lower it securely onto rated jack stands before removing a wheel. Confirm that the vehicle is fully seated and stable from a safe position before working around the wheels.
| Floor jack | Rated for the SUV and used only at approved lift points. |
| Jack stands | Rated for the load and placed at approved, stable support points. |
| Wheel chocks | Used on wheels that stay on the ground before lifting. |
| PPE | Gloves and eye protection reduce injury risk while handling wheels and tools. |
Lug Wrench and Torque Wrench
Use a lug wrench or breaker bar to loosen lug nuts before lifting. An impact wrench can speed removal, but do not use it as your final tightening method. Final tightening should be done with a calibrated torque wrench set to the exact wheel-nut torque in your Toyota manual or the instructions for your aftermarket wheels and hardware.
Hand-start every lug nut to avoid cross-threading. Then snug the nuts in a star or crisscross pattern so the wheel seats evenly against the hub. Apply the final torque evenly rather than relying on an impact wrench to determine clamping force.
Prepare Your 4Runner Before Rotation
Before you move any tire, inspect all four road tires and the spare. Look for cuts, bulges, exposed cords, embedded objects, uneven shoulder wear, cupping, cracks, and tread near the wear bars. Do not rotate a tire with visible structural damage merely to change its position. Replace it or have a qualified tire professional inspect it first.
- Check cold pressure using the driver-door tire label or owner’s manual.
- Measure tread depth at the center and both shoulders of each tire.
- Confirm that all road tires match the required size, load rating, construction, and approved fitment.
- Check for directional arrows on each sidewall.
- Check whether your wheel/tire setup is staggered or aftermarket.
- Confirm whether the spare is intended to enter the rotation cycle.
- Record mileage and current tire positions before you start.
- Confirm TPMS/TPWS status before rotation so you know whether a warning existed beforehand.
Note: TPMS/TPWS helps warn you about significant underinflation, but it does not replace monthly pressure checks. Set pressure from the vehicle label or exact Toyota guidance, not the maximum pressure molded into the tire sidewall.
What Tire Rotation Pattern Should a Toyota 4Runner Use?
The correct pattern comes from your exact model-year Toyota guidance first. Toyota’s own Tire Rotation Guide says both rotation frequency and pattern are vehicle-specific and that manufacturer recommendations should be followed even when they differ from generic guidance. Tire direction, front/rear sizing, spare configuration, and aftermarket equipment can further restrict the available pattern.
| Tire setup | Pattern rule |
| Matching, non-directional road tires | Start with the exact model-year Toyota rotation diagram. Use a generic rearward-cross or forward-cross pattern only when the applicable vehicle and tire guidance supports it. |
| Directional tires | Normally move front-to-rear on the same side so the approved rolling direction is preserved, unless the tire is professionally dismounted/remounted and the tire maker permits it. |
| Staggered or mismatched sizes | Do not assume front-to-rear rotation is allowed. Check the tire sidewalls, wheel specifications, tire guidance, and exact Toyota manual. |
| Matching full-size spare | Include it only when it is compatible and the applicable Toyota/tire guidance allows a five-tire rotation. Follow the exact five-tire diagram rather than substituting a generic sequence. |
Toyota publishes dedicated owner and maintenance documentation for current 4Runners, including the 2026 model. That is why an older-generation or generic RWD/4WD diagram should not be treated as a universal 4Runner answer. If your exact Toyota manual gives a different pattern from a general tire-company chart, use the Toyota vehicle-specific instructions.
Current-generation note: Owners of 2025–2026 4Runners should use the rotation diagram and tire-position registration instructions in the manual for that generation instead of copying a pattern written for an older 4Runner.
[Products Worth Considering]

The VXDAS 2-in-1 TPMS relearn tool is designed to activate and reset tire pressure sensors on compatible GM and Ford vehicles with an easy model switch button for quick use. It helps complete TPMS relearning after tire rotation, sensor replacement, or warning light resets, making it a practical tool for drivers and technicians who want a fast, cost-effective solution.

Armor All Extreme Wheel and Tire Cleaner is a powerful spray designed to cut through stubborn dirt, grease, tar, and brake dust on wheels and tires. It is safe for use on factory and aftermarket finishes, including alloy, steel, chrome, and plastic wheel trims, while its fast-acting formula works in just seconds. The deep-cleansing action helps reach hard-to-clean areas and leaves wheels looking clean and shiny.
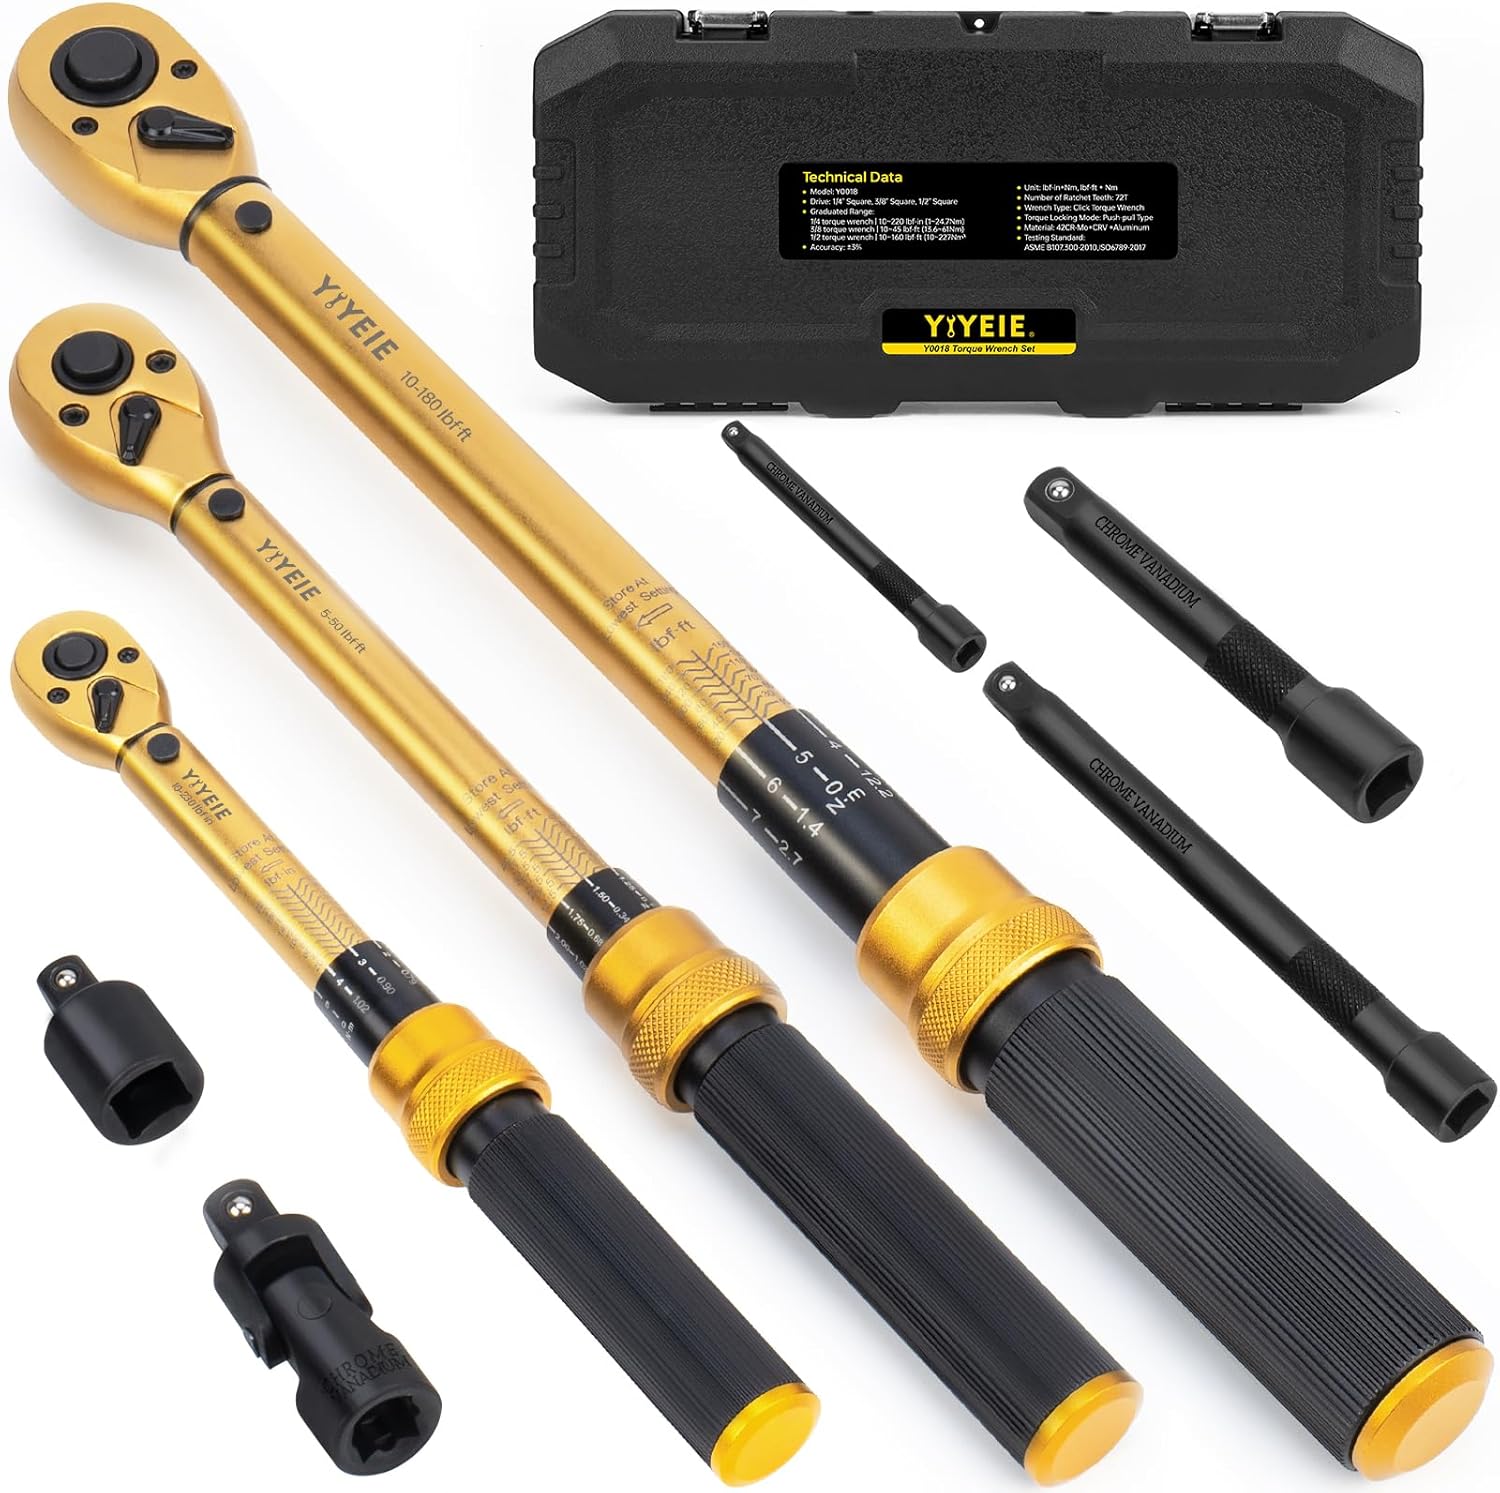
This 8-piece torque wrench set covers multiple drive sizes and torque ranges to handle bicycle, motorcycle, car, and truck maintenance with confidence. Dual-scale readouts, quick-release heads, reversible ratchets, and included adapters make it versatile and easy to use, while ±3% accuracy and a calibration certificate help ensure dependable results. Built with durable materials and stored in a sturdy case, it is designed for organized transport and long-lasting performance.
Rearward-Cross Rotation: When Your Manual or Tire Guidance Allows It

Use the steps below only after confirming that your exact vehicle/tire guidance permits a rearward-cross pattern and that the four road tires are compatible, same-size, and non-directional. If Toyota’s model-year diagram shows another sequence, follow Toyota’s diagram instead.
- Park on level ground, shift into Park, set the parking brake, and chock the wheels as required for your lifting method.
- Use your lug wrench or breaker bar to loosen each lug nut slightly while the tires are still on the ground.
- Lift the 4Runner only at approved lift points and place it securely on rated jack stands.
- Remove the lug nuts and wheels, keeping hardware clean and away from dirt.
- For an approved rearward-cross pattern, move the left rear tire to the left front and the right rear tire to the right front.
- Move the left front tire to the right rear and the right front tire to the left rear.
- Mount each wheel, hand-start the lug nuts, and snug them evenly in a star or crisscross pattern.
- Lower the vehicle until the tires lightly contact the ground and cannot spin.
- Torque each lug nut to the exact specification for your vehicle, wheels, and hardware.
- Lower the vehicle fully, check cold tire pressure, and complete any TPWS/TPMS registration or verification required by your model-year manual.
Pro Tip: Mark the old tire positions with chalk or painter’s tape before removing the wheels. Use labels like LF, RF, LR, and RR so you can follow the approved diagram without losing track of the starting positions.
Why Rearward Cross Appears in Generic RWD Guidance
Rearward-cross is a common generic pattern for compatible non-directional tires on many rear-wheel-drive applications because it moves tires between front and rear axle duties while also changing sides. That can help distribute position-related wear. It is useful background information, but it is not a reason to override a different pattern shown in your Toyota owner’s manual.
Directional and Staggered Tires: Safe Methods

Some tires cannot follow the normal pattern shown for a stock same-size tire set. Directional tires have arrows on the sidewall showing their approved rolling direction. Crossing one to the opposite side without correctly remounting it can reverse that intended direction.
- Directional tires: Normally move the front tire straight back on the same side and the rear tire straight forward on the same side, subject to the vehicle and tire instructions.
- Staggered tires: If front and rear sizes differ, do not rotate front-to-rear unless the vehicle and tire guidance specifically permits it. Some non-directional staggered setups may allow side-to-side movement.
- Aftermarket wheels: Check wheel width, offset, lug-seat style, tire fitment, and wheel-maker torque instructions before rotating.
- Large tread-depth differences: Ask a qualified tire professional before moving substantially different tires among positions, especially on 4WD/full-time-4WD configurations.
- Damaged tires: Do not rotate tires with bulges, exposed cords, serious sidewall cuts, or unsafe tread depth.
Should You Include the Full-Size Spare in a 5-Tire Rotation?
Include the spare only if it is a roadworthy full-size tire and wheel compatible with the road-tire set and if the applicable Toyota and tire guidance allows it to enter the rotation cycle. Do not include a temporary spare, an incompatible wheel/tire, or a spare whose size, construction, condition, or tread depth makes it unsuitable for normal road use.
Do not substitute a generic five-tire sequence for Toyota’s model-year diagram. Record all five starting positions, follow the arrows or position sequence in the correct manual, then verify tire pressure and any required tire-position registration after the rotation.
Full-Size Spare Checklist
- Confirm the spare is the correct size, load rating, construction, and approved fitment.
- Confirm the tread design and directional requirements are compatible with the intended position.
- Confirm your Toyota/tire guidance permits the spare to enter the rotation cycle.
- Check the spare’s cold pressure before installing it.
- Inspect the sidewall, valve stem, tread, and wheel for damage.
- Compare tread depth with the road tires before putting the spare into service.
- Complete any TPWS/TPMS wheel-position registration required after the rotation.
If your spare has seen far less use than the road tires, its tread depth can be substantially different. A large difference can affect handling or driveline behavior on some configurations. If compatibility is uncertain, keep the spare for emergency use until a qualified tire professional or the applicable Toyota/tire guidance confirms the correct rotation strategy.
How Should You Torque 4Runner Lug Nuts After Rotation?
Wheel-nut torque is a safety-critical specification. Do not rely on one broad internet number for every 4Runner. Use the exact value from your Toyota owner’s manual for your model year and wheel type. If you use aftermarket wheels, lug nuts, spacers, or other wheel hardware, follow the applicable manufacturer’s installation and torque instructions.
- Make sure the wheel and hub mounting surfaces are correctly seated and free of interfering debris.
- Do not lubricate studs unless the applicable manufacturer procedure specifically instructs you to do so.
- Hand-start every lug nut to reduce the risk of cross-threading.
- Snug the lug nuts in a star or opposite-side crisscross sequence.
- Apply final torque evenly with a calibrated torque wrench.
- Stop and inspect if you feel vibration, hear clicking, or notice a loose-wheel symptom after service.
A five-lug wheel normally uses a star-style tightening sequence, while a six-lug wheel uses an opposite-side crisscross sequence. The goal is even seating and clamping across the wheel mounting face.
[Products Worth Considering]

This set of four pre-programmed TPMS sensors is designed as a direct-fit replacement for compatible Toyota, Lexus, and Scion vehicles. It helps restore accurate tire pressure monitoring without sensor programming, and each unit is factory-tested for dependable performance. Built for long service life, these sensors offer a convenient solution for replacing worn or failed tire pressure monitors.

The LEXIVON 1/2-inch drive click torque wrench delivers accurate, dependable tightening for automotive and mechanical jobs with pre-calibrated precision. Its dual-range scale, reversible ratchet head, and ergonomic knurled handle make it easy to set, read, and use comfortably in a variety of applications. Built with hardened chrome vanadium steel and a corrosion-resistant finish, it is designed for lasting performance and reliability.

This click torque wrench delivers accurate, repeatable tightening for automotive and home repair tasks, helping prevent over-tightening and fastener damage. Its dual-range scale, knurled non-slip grip, and durable ratchet head make it easy to use, while the included extension bar and storage case add extra convenience.
What Should You Check After Rotating 4Runner Tires?
After the 4Runner is back on the ground, check cold tire pressure against the driver-door Tire and Loading Information label or the exact owner’s manual guidance. NHTSA recommends checking all tires, including the spare, at least once a month when cold. Do not use the maximum pressure molded into the tire sidewall as the normal vehicle target. For a detailed walkthrough, see the 4Runner door-placard tire-pressure guide.
Next, start the vehicle and check its tire-pressure display or warning light. If the vehicle identifies individual wheel positions, follow the exact model-year Toyota TPWS/TPMS registration or reset procedure after rotation. Do not assume position mapping updates automatically. For the difference between initialization, reset, sensor registration, and relearn, see TPMS reset vs relearn.
If the tire-pressure warning flashes and then remains illuminated, treat it as a possible system malfunction rather than repeatedly adding air or resetting the system. Verify actual pressure with a gauge and follow the diagnostic guidance in your owner’s manual.
Why Does a 4Runner Pull, Vibrate, or Make Noise After Tire Rotation?
If the 4Runner pulls, vibrates, or feels worse after rotation, do not assume the rotation itself is the only cause. Moving tire positions can make an existing pressure, wear, balance, wheel, alignment, or suspension problem more noticeable. For the difference between these services, see tire rotation vs wheel alignment.
| Symptom | Likely checks |
| Pulling left or right | Check tire pressure, tread-depth differences, tire condition/conicity, wheel alignment, and suspension condition. |
| Steering wheel vibration | Check wheel balance, wheel damage, uneven tread, debris at the mounting face, and proper wheel seating. |
| New road noise | Inspect cupping, feathering, tire damage, tread direction, and whether a previously rear-mounted worn tire is now easier to hear at the front. |
| TPMS/TPWS warning | Recheck all cold pressures, then confirm any required wheel-position registration and inspect for a sensor/system malfunction if the warning persists. |
| Uneven shoulder wear | Check inflation, alignment, suspension components, tire condition, and vehicle loading. |
See a professional if you find structurally damaged tires, stripped studs, damaged lug nuts, a wheel that will not seat flat, persistent vibration, repeated TPMS/TPWS warnings, or uneven wear that returns quickly after rotation.
Post-Rotation Checklist
- Verify that every tire was moved according to the correct model-year/configuration diagram.
- Verify all lug nuts are tightened to the exact Toyota or wheel/hardware-manufacturer specification.
- Confirm each tire is inflated to the correct cold pressure.
- Check that directional arrows, if present, face the correct rolling direction.
- Confirm TPMS/TPWS readings, wheel-position registration, and warning status.
- Take a short, slow road test before normal highway driving.
- Listen and feel for clicking, rubbing, vibration, pulling, or abnormal road noise.
- Recheck visually for proper wheel seating and any interference after the road test.
- Record the mileage, date, pattern used, tire positions, and any wear notes.
Frequently Asked Questions
What is the tire rotation pattern for a Toyota 4Runner?
Use the tire-rotation diagram in the Toyota owner’s manual for your exact model year and tire/spare configuration. Toyota says rotation patterns are vehicle-specific, so do not treat one generic RWD, 4WD, rearward-cross, or forward-cross chart as universal for every 4Runner.
How often should I rotate the tires on my 4Runner?
Follow the maintenance schedule for your exact 4Runner model year first. NHTSA gives a general range of 5,000–8,000 miles when rotation is recommended by the vehicle manufacturer, with earlier inspection when uneven wear appears.
Can I use a forward-cross or rearward-cross pattern on a 4Runner?
Use either cross pattern only when it matches the applicable Toyota and tire guidance for your setup. Drivetrain alone is not enough to choose the pattern because Toyota’s instructions can vary by model year, tire configuration, and spare use.
What is the proper way to rotate tires on a 4×4 truck?
Start with the vehicle manufacturer’s exact rotation diagram. Generic tire-industry guidance may recommend a rearward-cross pattern for many compatible 4WD or RWD setups, but directional tires, staggered sizes, spare-tire use, and vehicle-specific instructions can require a different sequence.
Should I include the spare in my 4Runner tire rotation?
Include the spare only when it is a compatible, roadworthy full-size tire and wheel and the applicable Toyota and tire guidance permits a five-tire rotation. Follow the exact five-tire diagram for your setup instead of substituting a generic sequence.
Do I need to reset TPMS after rotating 4Runner tires?
Follow the TPWS/TPMS instructions for your exact model year after rotation. If the vehicle tracks individual wheel positions, it may require tire-position registration or another model-specific procedure. Do not assume that wheel-position mapping updates automatically.
Conclusion
A safe Toyota 4Runner tire rotation starts with the vehicle-specific diagram, not a generic drivetrain chart. Check the manual for your exact model year, then confirm tire direction, tire sizes, spare eligibility, pressure, lift points, torque, and any required TPWS/TPMS registration before you begin.
If your verified instructions call for a rearward-cross pattern, follow the conditional procedure above. If Toyota shows a different sequence, use Toyota’s diagram. Stop and get professional help if you find tire damage, major tread-depth differences, stripped hardware, an unstable lifting setup, persistent vibration, or a tire/wheel configuration whose compatibility you cannot confirm.
Sources
- Toyota Owners Manuals and Warranties — model-year owner’s manuals, maintenance documentation, lift/torque references, tire guidance, and TPWS/TPMS procedures.
- Toyota Tire Rotation Guide — supports the rule that tire-rotation frequency and pattern are vehicle-specific and manufacturer instructions take priority.
- NHTSA TireWise — supports tire pressure, tread depth, rotation intervals, owner-manual pattern guidance, and general tire-safety recommendations.
- Michelin Tire Rotation Guide — supports general rotation intervals and generic drivetrain-pattern guidance while deferring to vehicle-manufacturer instructions.
- 49 CFR § 571.138, Tire Pressure Monitoring Systems — federal TPMS requirements.




[…] and tighten the lug nuts to the specification for the vehicle and wheel setup. The related guide to reinstalling and torquing the 4Runner’s wheels provides additional wheel-service context. Perform a controlled low-speed brake test in a safe area […]