You’ll bleed your 5th‑Gen 4Runner by keeping the DOT‑3 reservoir topped and working wheels in sequence to avoid air: start front passenger, then front driver, then rear passenger, then rear driver. Attach clear tubing to each bleeder, have an assistant pump and hold the pedal or use a pressure/vacuum tool, open the valve until clear fluid appears, close before pedal release, and monitor reservoir level. Finish with leak checks and pedal feel; continue for full procedure and troubleshooting.
Bleed Brakes on a 5th‑Gen 4Runner: Step‑By‑Step
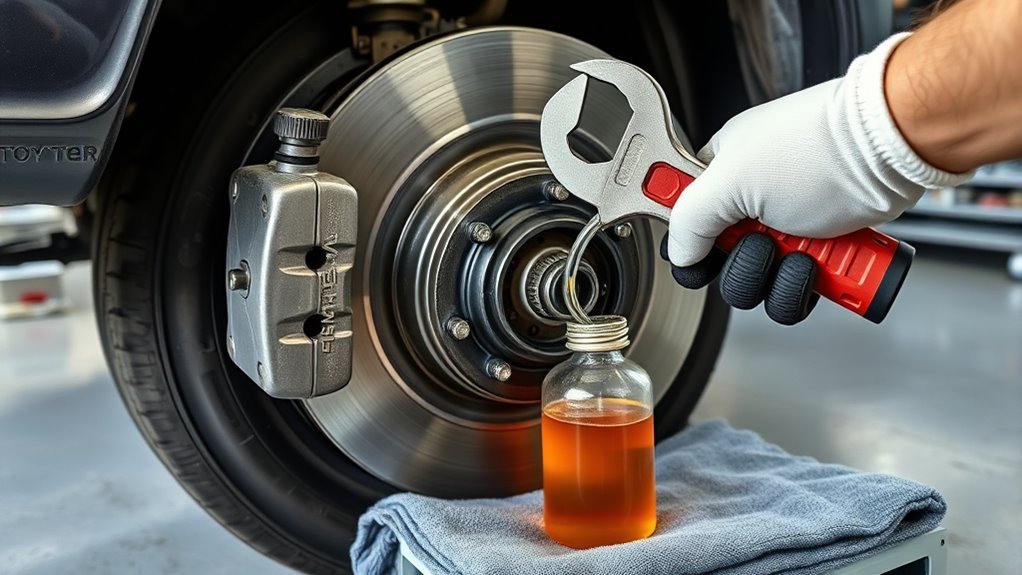
Prepare to bleed the brakes on a 5th‑Gen 4Runner by removing and cleaning the brake fluid reservoir cover, attaching clear tubing to the bleeder valve with a catch bottle, and keeping the reservoir topped off; start at the rear passenger caliper, use a steady weight or helper to press the pedal while opening the bleeder to expel fluid and air, then follow the sequence rear driver, front passenger, front driver, monitoring fluid color and bubbles and checking for leaks before confirming a firm pedal and proper reservoir level between MIN and MAX. You’ll work methodically: attach tubing, crack the bleeder, allow flow until clear fluid with no bubbles appears, then close the valve before the pedal returns. Keep the reservoir filled to prevent reintroduction of air. Inspect bleeder threads and hoses for leaks. Avoid common mistakes like letting the reservoir run low or pumping the pedal with an open bleeder. A correct, leak‑free job restores brake performance and your control.
What You’ll Need (Tools, Fluid, PPE)
You’ll need DOT-3 brake fluid—plan on about 64 oz. for a complete job—plus a wrench sized for the bleeder valves, clear tubing, and a collection container. Wear disposable gloves and keep shop towels handy, and use brake cleaner to remove contaminants around the valves. To hold steady pedal pressure consider weights (for example a filled ammo can) or a pedal press tool.
Required Brake Fluids
1 key item is the correct brake fluid: use DOT-3 and have at least 64 oz. on hand to complete a full bleed on a Toyota 4Runner. You’ll respect brake fluid types and fluid capacity—DOT-3 meets Toyota specifications and 64 oz. covers reservoir top-ups and system purge. Keep a sealed spare bottle; don’t mix types.
Prepare two ~48 oz. plastic bottles to collect old fluid, clear tubing sized to the bleeder, and a wrench for the bleeder valve. Monitor reservoir level constantly so it stays between MIN and MAX; topping up prevents air ingress. Wear disposable gloves and use shop towels to catch spills and protect surfaces. This focused setup frees you to execute a clean, efficient bleed with control and safety.
Essential Hand Tools
Before you start, gather DOT-3 brake fluid (about 64 oz.), a properly sized wrench for each bleeder valve, clear tubing that fits snugly over the bleeder, and two sturdy containers to catch old fluid. You’ll also want shop towels, disposable gloves, and a pry bar or weight to hold the pedal if you’re solo. Use a hand-held vacuum bleeder or a simple syringe kit for faster, cleaner evacuation.
Organize tools so each wheel’s bleeder wrench and tubing are ready; label containers if you’ll inspect fluid color. These brake maintenance tips prevent delays and contamination. Avoid common mistakes: reusing contaminated fluid, loose fittings, or insufficient fluid supply. Prepare deliberately so you retain control and free yourself from dependency on shops.
Safety Gear And PPE
Although bleeding brakes is a routine task, you must suit up to protect yourself and the vehicle: wear disposable gloves and safety goggles, keep shop towels and brake cleaner within reach, and have a sealed container ready for old fluid. You’ll confront brake fluid hazards—corrosive skin contact, eye injury, and paint or plastic damage—so treat PPE as mandatory gear. Don disposable nitrile gloves, safety goggles with side shields, and closed-toe shoes. Position shop towels to catch drips and use brake cleaner to decontaminate parts immediately. Collect expelled fluid in a sealed container to avoid environmental contamination and legal disposal issues. These protective measures keep you safe, preserve the 4Runner’s finish, and let you control the bleed procedure confidently and independently.
Prepare the Master Cylinder, Reservoir, and Vehicle
Start by cleaning the brake fluid reservoir cover and surrounding area, then remove the cover to access the fluid; use only DOT‑3 fluid and top the reservoir slightly above the maximum mark so it never runs low during bleeding. Wipe the fill area to enforce fluid contamination prevention and follow basic brake maintenance tips to keep contaminants out.
Park the 4Runner on level ground and raise it with the jack; secure it on jack stands before you work. Assemble a wrench sized for the bleeder valves and clear tubing plus a catch bottle; position the bottle to collect expelled fluid without spills. Monitor the master cylinder level constantly during bleeding — never let it drop to empty, or you’ll introduce air into the lines and undo progress. Confirm all four wheels are accessible and that you can reach each bleeder valve safely. This preparation keeps the system sealed, efficient, and under your control as you proceed to bleed each brake.
Front Brake Bleeding : Passenger Then Driver (Step‑By‑Step)
1. Remove the reservoir cover and clean the area to prevent contamination. Keep the cap off during bleeding and monitor the reservoir so fluid never drops below the minimum mark.
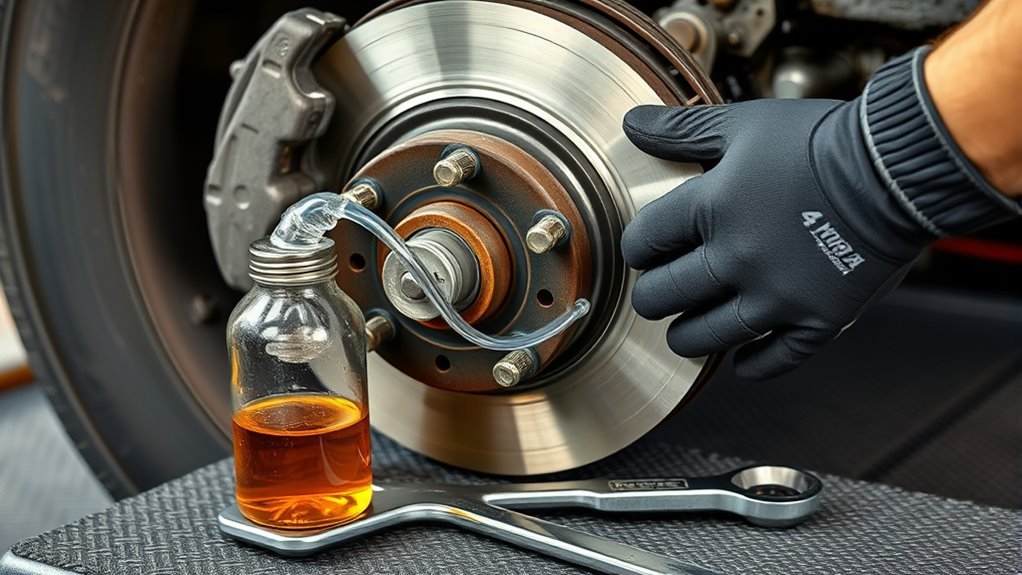
Begin with the front passenger wheel. Locate the bleeder valve, attach clear tubing, and submerge the other end in a catch bottle. Have an assistant pump the brake pedal several times and hold it down. Open the bleeder valve; you’ll see fluid flow and air bubbles. Watch for continuous clear fluid without bubbles. Close the valve before the assistant releases the brake pedal to prevent air ingress.
Repeat the same sequence on the front driver side. Maintain reservoir level throughout; top with fresh DOT‑specified fluid as needed. Confirm the brake pedal feels firm and consistent after both sides. Dispose of contaminated fluid responsibly. This procedure liberates you from dependence on shops by giving you control over brake system integrity and safety.
Rear Brake Bleeding and Bleeding With ABS (4Runner Specifics)
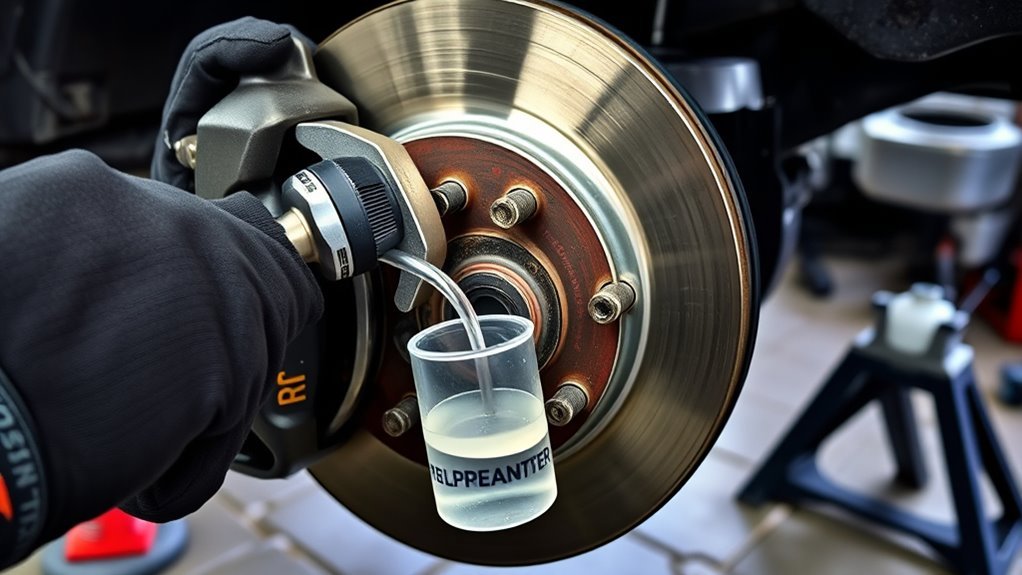
When you move to the rear brakes, begin with the passenger side: fit clear tubing to the bleeder valve with a slight upward arc into a catch bottle, keep the master cylinder level topped with fresh DOT‑specified fluid, and use a pedal‑pressing weight while the ignition is set to ON (engine off) to activate the ABS for proper purge; open the valve, let fluid and air exit until you see continuous clear fluid, then close the valve before releasing pressure and repeat the same procedure on the rear driver side. You’ll monitor fluid color and bubbles, maintain fluid level to prevent air ingestion, and watch for ABS system codes after bleeding. If codes appear, reference the Toyota service manual for ABS‑specific purge or diagnostic steps. Work methodically: one wheel, one valve, one confirmation. Keep tools clean, avoid contaminating pads, and dispose of waste fluid responsibly. This process frees you from dependency on shops and keeps your 4Runner’s braking honest.
Start with the passenger rear: clear-tubed bleeder, pedal weight with IGN ON, keep master topped, bleed until clear.
- Clear tubing sloping upward to a bottle
- Weight on pedal with ignition ON
- Master cylinder topped and level
- Bleeder open until clear fluid flows
- Note ABS codes, consult manual
Solo Bleeding: Pressure Bleeders, Vacuum Tools, and Pedal‑Hold Methods
Set up a pressure bleeder by securely sealing the reservoir cap and pressurizing the bottle to the manufacturer’s spec so fluid flows consistently through the system. If you don’t have a pressure bleeder, use a hand vacuum pump at each bleed nipple or prop the pedal with a 2×4 or strap to hold pressure between valve openings. Monitor reservoir level constantly and follow the proper wheel sequence (driver front, passenger front, passenger rear, driver rear) to prevent air re-entry.
Pressure Bleeder Setup
Prepare your pressure bleeder, vacuum tool, or pedal‑hold setup so you can bleed the 4Runner’s brakes solo and maintain control of reservoir fluid level and system pressure. You’ll set the pressure bleeder cap, purge initial lines, and use strict pressure monitoring to keep the master cylinder fed; bleeder maintenance before and after use prevents contamination. With a vacuum tool, attach securely and watch reservoir level so it never runs dry. For pedal‑hold, position a weight and verify valve sequencing. Stay steady, deliberate, and free from dependency.
- A sealed Motive-style tank pressurized to spec, cap locked
- Clear tubing routed to each caliper or wheel cylinder
- Reservoir sight-glass or marked line for fluid level checks
- Handheld vacuum pump with gauge and tight fitting hose
- Heavy object or strap to hold pedal at fixed travel
Pedal Hold Alternatives
Although you can bleed a 4Runner solo with several approaches, choosing between a pressure bleeder, a handheld vacuum tool, or a pedal‑hold rig depends on available tools, experience, and how strictly you’ll control reservoir level and wheel‑by‑wheel sequencing. You’ll pick pedal alternatives to maximize brake efficiency and safety.
| Method | Key action |
|---|---|
| Pressure bleeder | Pressurize reservoir, open valves in sequence |
| Vacuum pump | Draw fluid from bleeder, monitor reservoir |
| 2×4 pedal hold | Prop pedal, open valve, close before releasing |
| Hybrid | Use vacuum/pressure plus pedal hold for stubborn air |
Keep reservoir topped. Follow sequence from nearest wheel to master cylinder. Use measured strokes or steady pressure; avoid reintroducing air. Choose the method that frees you to work accurately and confidently.
Final Checks, Reservoir Level, and Troubleshooting Soft‑Pedal Issues
When you’ve finished bleeding the system, inspect every caliper, line, and fitting for leaks and make sure no air bubbles remain in the fluid; any visible bubble or seepage means you should re-bleed that circuit immediately. Perform final brake adjustments and a fluid quality inspection: set the reservoir between “MIN” and “MAX,” wipe the cap and sensor area, and top with fresh DOT-specified fluid only. Pump the pedal—firm travel equals liberation from trapped air; a soft pedal demands action.
If softness persists, isolate cause and act decisively:
- Visualize a wet caliper or dribble at a bleeder valve indicating an open leak.
- Picture foamy fluid in a clear hose showing trapped air moving.
- Imagine dark, contaminated fluid contrasting with new amber fluid.
- Envision the reservoir low at “MIN,” admitting air when you squeeze.
- See repeated, measured pedal strokes during a full-system flush removing microbubbles.
If leaks or discoloration remain, re-bleed that circuit or perform a full system flush.
Frequently Asked Questions
How Often Should I Bleed the Brakes on My 4runner?
You should bleed your brakes every two years or about 60,000 miles to guarantee reliable brake maintenance and timely fluid replacement; bleed immediately after installing parts or if the pedal feels soft to remove trapped air and moisture.
How to Bleed Toyota ABS Brakes Without a Scan Tool?
Want control over your brakes? You’ll fill the brake fluid reservoir, bleed wheels in sequence, pump and hold the pedal, open/close bleeders to purge air, repeat until ABS system’s clear, freeing yourself from reliance on tools.
How to Bleed Brakes on 2018 4runner?
Start at rear passenger, then rear driver, front passenger, front driver; use pressure bleeding or vacuum kit, keep reservoir topped with DOT‑3 brake fluid, purge until clear no‑bubble flow, check for leaks, adjust fluid, test pedal firmness.
Conclusion
Bleeding your 5th‑Gen 4Runner’s brakes restores firm pedal feel and safe stopping—think of it as reviving the hydraulic heart. Follow the prep steps, keep the reservoir topped, and bleed front (passenger then driver) before rear, paying attention to ABS procedures. Use a pressure bleeder or one‑person method for solo work. Finish with level checks and test drives; if the pedal stays soft, recheck for air, leaks, or a faulty master cylinder.