You’ll safely lift and support the Tacoma, remove the wheel, apply penetrating oil, and count exposed inner-thread turns as you unthread the old outer tie rod; fit the new outer to the same thread count, bottom the castle nut, torque it to 67 ft·lb, align and install a cotter pin, then lock the jam nut. Reinstall the wheel, torque lug nuts to 83 ft·lb in a crisscross pattern, check steering play, and proceed for full step‑by‑step guidance.
Quick Steps & Key Specs for Tacoma Tie‑Rod Replacement
Start by safely raising the Tacoma and removing the wheel so you can access the jam nut; spray penetrant and break the nut free. You’ll count the threads as you unthread the outer tie rod end so you can restore the original length and steering alignment. Remove the outer end, apply copper never‑seize to the inner tie rod’s threads, then install the new outer end matching the thread count you recorded. Torque the castle nut to 67 ft·lb, align the cotter pin with the nut slot, and secure it to prevent loosening. Reinstall the wheel and torque the lug nuts to 83 ft·lb in a crisscross pattern for even clamping. This sequence keeps tie rod maintenance efficient, measurable, and safe; it preserves steering geometry and reduces repeat adjustments. Execute each step deliberately, verify thread counts, and lock fasteners to maintain freedom from roadside failures and regain confident control.
Tools, Parts, and PPE for Tacoma Tie‑Rod Work
One set of reliable tools and PPE will make Tacoma tie‑rod replacement quicker and safer: you’ll want a quality socket set and torque wrench, penetrating oil, a tie‑rod end puller, cotter‑pin pliers, and a jack with rated jack stands; carry replacement outer tie‑rod ends, jam nuts, and cotter pins, plus a small notebook or thread‑count guide to record the original thread position, and wear safety glasses and gloves throughout.
Keep a quality socket set, torque wrench, penetrating oil, tie‑rod puller, replacement outer ends, jam nuts, cotter pins, and PPE.
You’ll gather gear with intent: the socket set and torque wrench manage fastener torque; penetrating oil frees seized joints; the puller reduces stud damage; cotter‑pin pliers speed removal. Jam nuts and correct-spec outer tie rod ends guarantee secure threads; record thread count to restore toe settings before final alignment. PPE protects you from debris and sharp edges while you work efficiently.
- Essential hand and torque tools
- Tie‑rod end puller and penetrating oil
- Replacement parts: outer ends, jam nuts, cotter pins
- PPE, jack and rated jack stands
Follow tie rod maintenance discipline and alignment tips when reassembling.
[Products Worth Considering]

Protect your vehicle's door handles and bowls with high-quality, reflective, self‑adhesive stickers that resist scratches, water, heat and fading. The subtle reflective glow improves night‑time visibility, enhancing safety while adding a sleek, luxurious look. Easy to install and durable, they fit most cars, trucks, SUVs and RVs.
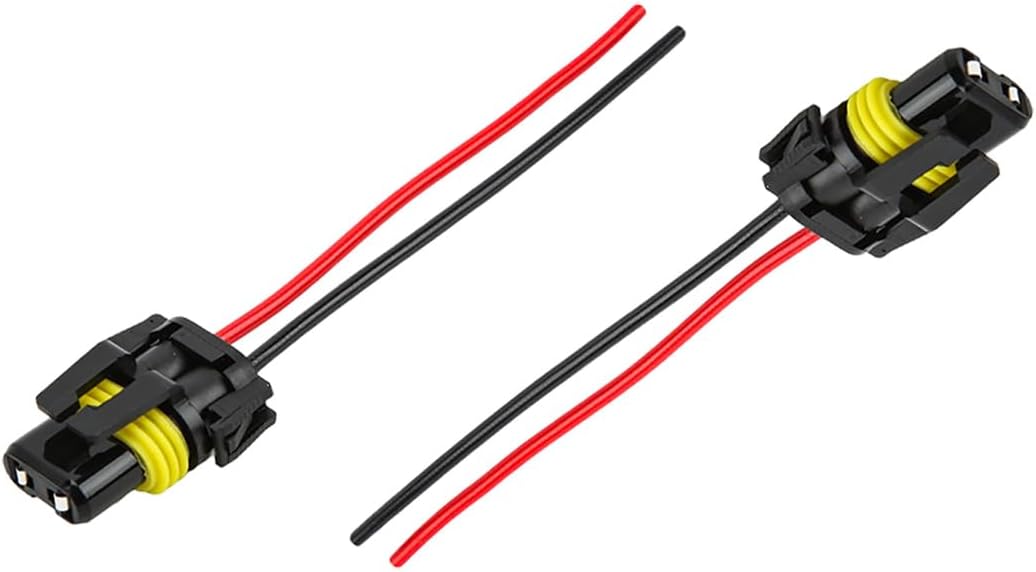
This plug‑and‑play wiring harness kit provides reliable power to headlights and fog lights on 12‑24V vehicles. Made from strong, corrosion‑resistant nylon and high‑capacity copper, it ensures stable illumination and safety. The compact, waterproof design fits multiple bulb types and offers long‑lasting durability for easy installation and maintenance.
The KUST Black Dashboard Cover Mat offers a custom, eco‑friendly fit for Toyota RAV4 models from 2019 to 2025, protecting the dash from UV damage, scratches, and glare. Made from post‑consumer recycled polyester with a silicone anti‑slip underside, it stays soft, breathable, and odorless while securely adhering to the surface. Installation is quick and reversible, and the foldable design allows easy storage when not in use.
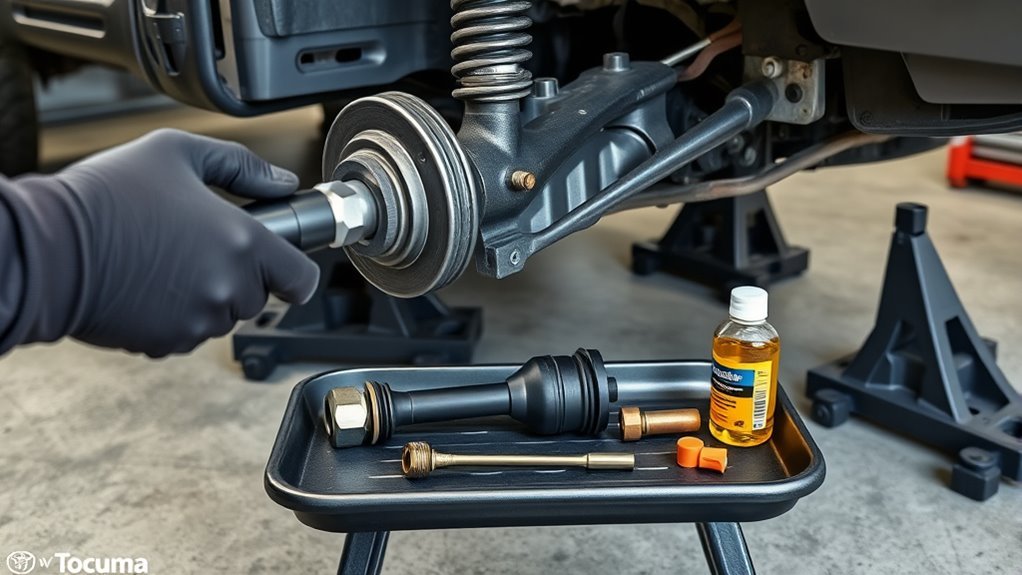
Lift the Tacoma and Remove the Wheel Safely
Position the Tacoma on a flat, level surface, then raise the vehicle with a jack and secure it on appropriately rated jack stands under the frame and control arm points. Use a lug wrench to remove all six lug nuts and set them aside, then carefully pull the wheel off to expose the hub and tie rod area. Before you continue, inspect the wheel hub and surrounding components for visible damage or excessive wear.
[Products Worth Considering]

Upgrade your RAV4 roof rack with these heavy‑duty aluminum crossbars featuring an anti‑theft lock and tie‑down loops for secure cargo transport. The matte‑powder‑coated bars resist corrosion and reduce wind noise, while easy installation fits existing rails without drilling. Ideal for bike mounts, roof boxes, kayaks and more.

These valve stem caps feature a durable die‑cast construction with an electroplated finish that resists rust and wear, providing a sleek look for your wheels. The built‑in rubber O‑ring ensures a tight seal to prevent air loss, while the tool‑free design lets anyone install or remove them in seconds. Ideal for a wide range of Toyota models, they combine style, safety, and easy maintenance.
Raise And Support
Before lifting the Tacoma, park on a level surface and set the parking brake; then jack the front end and place sturdy jack stands under the recommended lift points to fully support the vehicle. You’ll prioritize safety precautions and vehicle stability: confirm jack stands rest on solid contact points and give the truck a firm shake to verify support before working beneath it. Use rated equipment, follow manufacturer lift diagrams, and never rely on the jack alone.
- Position wheel chocks behind rear tires.
- Center jack under specified front lift point; raise to desired height.
- Install jack stands at factory support locations; lower jack until weight transfers.
- Re-check stability and verify tools and workspace are clear.
Proceed only when you control risk and claim autonomy in the repair.
Remove Wheel Safely
Raise the Tacoma on your jack and secure it with jack stands rated for the vehicle’s weight, then remove the wheel to access the tie rod jam nut. Loosen and remove all six lug nuts with a lug wrench, keep them together for reinstallation, and carefully lift the wheel off the hub. Perform a focused wheel inspection: check rim, tire bead, and adjacent suspension components for cracks, corrosion, or abnormal wear that could affect alignment or safety.
Follow safety precautions at all times: wear safety glasses and gloves, work on a level surface, and never rely on the jack alone. With the wheel removed and the area inspected, you’ll have unobstructed access to the tie rod jam nut for removal and replacement.
Remove the Outer Tie‑Rod End (Step‑by‑Step)
With the truck safely supported and the wheel removed after taking off all six lug nuts, you’ll have clear access to the outer tie‑rod end. Apply penetrant, run the nut onto the threads to catch the stud, then spin off the tie‑rod end while counting exposed threads for accurate reassembly. Repeat the procedure on the opposite side and prep the inner tie rod area with copper never‑seize before installing the new outer tie‑rod end.
Wheel Removal Essentials
Start by safely jacking the car and removing the wheel—take off all six lug nuts so you have clear access to the outer tie‑rod end. You’re freeing the steering components for service; maintain control and note wheel alignment status before disassembly. Spray penetrant on the jam nut to ease breaking it free. Thread a nut onto the outer tie rod end for safety, then unspin it while counting threads for precise reinstallation. Apply copper never seize to the inner tie rod threads prior to fitting the new outer end, matching original thread count. Torque the castle nut to 67 ft‑lb and secure the cotter pin, aligning it with the nut slot.
- Remove wheel and note alignment
- Penetrant on jam nut
- Safety nut and thread count
- Copper seize, torque, cotter pin
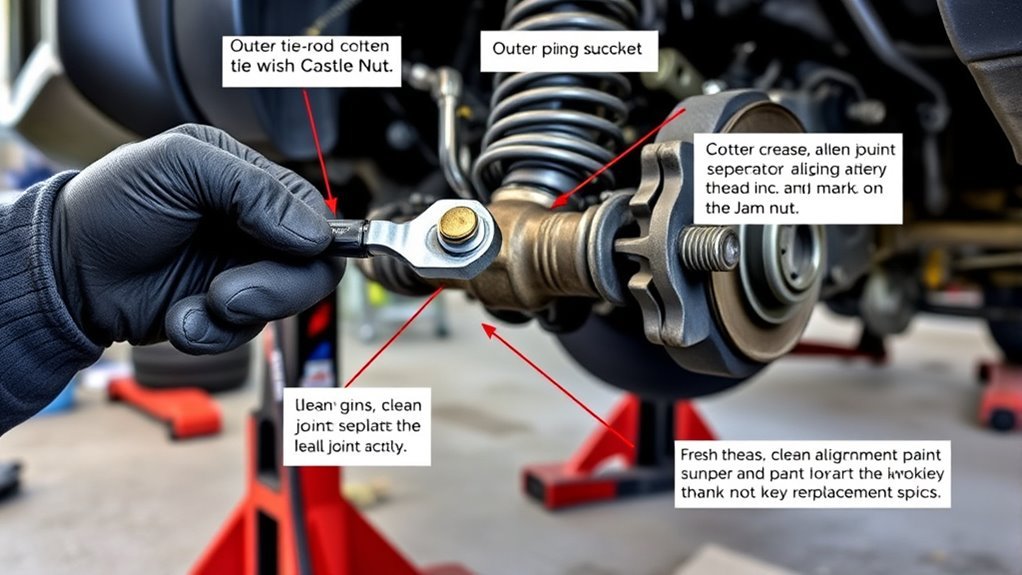
Outer Tie‑Rod Detachment
Once the wheel’s off and you’ve sprayed penetrant, thread a regular nut onto the outer tie‑rod stud to catch it, then unspin the tie‑rod end while counting the turns so you can match the thread engagement on reassembly; repeat the procedure on the opposite side and keep the removed parts organized for inspection. Raise the truck safely, remove all six lug nuts, then access the outer tie rod. Loosen and remove the castle nut, preserving the cotter pin. Spin the tie rod end off the steering knuckle stud while counting threads; this lets you restore factory steering alignment. Inspect the inner tie rod, clean mating surfaces, and apply copper never‑seize. Install the new outer tie rod to the recorded thread count, torque the castle nut to 67 ft‑lb, and fit a cotter pin.
Install the New Outer Tie‑Rod and Match Thread Count
Slide the new outer tie‑rod onto the inner tie‑rod, matching the thread count you recorded during removal so the steering geometry stays consistent. Use copper never‑siezed on the inner threads first to ease future removal and guarantee clean thread alignment. Hand‑run the outer until it seats against the inner, counting turns to match the original setting; this preserves toe specifications and reduces need for major adjustment.
Slide the new outer onto the inner, hand‑run to the original turn count with copper never‑siezed for precise toe alignment
- Confirm thread alignment and count against your notes before tightening.
- Apply copper never‑siezed to the inner shaft for corrosion control and serviceability.
- Thread the outer tie‑rod on by hand, matching the recorded turns for precise installation.
- Start the castle nut onto the stud and bottom it out before final torque operations.
Follow these installation tips with methodical pace. You’re restoring control and freedom of movement to the vehicle; accurate, repeatable placement liberates you from premature wear and repeat repairs.
Torque the Castle Nut, Fit the Cotter Pin, and Tighten the Jam Nut
Tighten the castle nut to 67 ft·lb with a calibrated torque wrench, then check the nut’s slot alignment with the hole in the stud for the cotter pin; if the slot doesn’t line up, incrementally tighten the nut until it does, insert the cotter pin through the hole and bend its ends firmly, and finish by locking the jam nut against the outer tie‑rod to prevent any rotation. You’ll secure the tie rod with required clamping force and a mechanical lock. Use steady, controlled torque and verify torque after bending the cotter pin.
| Task | Action |
|---|---|
| Torque | 67 ft·lb to castle nut |
| Align | Match slot to stud hole |
| Secure | Insert cotter pin, bend ends |
Insert the cotter pin fully, splay the legs around the nut, and hammer the bends flush. Finally, tighten the jam nut against the tie rod to lock the adjustment. This sequence preserves alignment and grants you control over safety.
Reinstall the Wheel and Torque Tacoma Lug Nuts to Spec
After seating the wheel on the hub with the rotor aligned, start all lug nuts by hand and bottom them out to confirm proper fit; then tighten them in a crisscross pattern to 83 ft·lb with a calibrated torque wrench to prevent uneven clamping and rotor warp. You’ll work methodically: verify the wheel alignment with the rotor remains correct, hand-thread every lug nut, then apply torque in the prescribed sequence. This protects the rotor and maintains predictable clamping forces that support safe steering and liberation from uncertainty.
- Verify rotor alignment and seat wheel fully on hub.
- Thread each lug nut by hand until fully bottomed to avoid cross-threading.
- Use a calibrated torque wrench; tighten lug nuts in a crisscross/star pattern to 83 ft·lb.
- Recheck each lug nut after lowering; repeat process on opposite side for consistency.
Keep records of torque settings and sequence. Accurate lug nut torque and consistent procedure preserve safety and make future wheel alignment checks more reliable.
Check the Repair, Troubleshoot Steering Play, and When to Get an Alignment
With the wheel reinstalled and lug nuts torqued, verify the repair by checking for steering play: sit in the driver’s seat, have an assistant hold the front wheels steady while you gently move the steering wheel left and right, and observe the tie rod end joints for any excess movement or lash. If you see movement at the joints or feel looseness at the wheel, stop and re-inspect fasteners, cotter pins, and castle nuts; increased steering play signals worn parts or improper installation that you’ll need to address before driving.
Use systematic steering diagnostics: repeat checks at static and slow-drive conditions, note any off-center steering or binding, and inspect tires for uneven wear patterns. Alignment importance is clear after tie rod replacement — get a professional wheel alignment to restore steering geometry, prevent premature tire wear, and reclaim precise handling. Schedule alignment promptly and perform regular inspections to maintain safe, liberated control of your Tacoma.
Frequently Asked Questions
How Much Does It Cost to Replace a Tie Rod on a Toyota Tacoma?
You’ll typically pay $100–$300 per side for tie rod pricing; labor costs run $75–$150/hour (1–2 hours), plus possible $75–$100 alignment. Shop around, insist on fair quotes, and reclaim control over expenses.
Can I Replace Tie Rod Ends Myself?
Yes — you can replace tie rod ends yourself. Use DIY tips, Tools needed: jack, lug wrench, torque wrench, penetrant, copper never-seize. Follow methodical steps, count threads, torque specs, reinstall cotter pins, and reclaim control of your vehicle.
Conclusion
You’ve swapped the worn tie‑rod end, tightening the last nut like fastening a steering compass to true north. With proper thread count, torque, cotter pin and wheel torques checked, the Tacoma’s steering should track straight and feel decisive. Treat the alignment like aligning sights—essential final calibration. If play or pull remains, get a professional alignment and re‑inspect connections. Drive briefly and recheck fasteners; a small tweak now prevents big failures later.