Last updated: July 31, 2026 — fourth-generation scope, Toyota coolant references, current repair-cost data, transmission-fluid warnings, disposal guidance, and schema were reviewed.
How this guide was prepared: This guide synthesizes Toyota owner information, Toyota service-resource references, current repair-cost data, and EPA antifreeze-disposal guidance. It does not claim hands-on testing across every Tacoma model year, engine, transmission, or cooling-system configuration.
A Toyota Tacoma radiator replacement is a moderate DIY job on many conventional 1995–2023 trucks, but it is not one universal procedure. Before draining anything, confirm the VIN-specific radiator, coolant specification, fan or shroud sequence, automatic-transmission cooler connections, torque values, and bleeding method. Treat 2024–2026 fourth-generation trucks as planning-only unless you have the exact Toyota repair procedure for the vehicle.
Quick Answer
You may be able to replace a Tacoma radiator at home if the engine is fully cold, the replacement part is confirmed by VIN, the hoses and fittings are serviceable, and you have the model-specific refill procedure. The general sequence is to diagnose the leak, drain the coolant, disconnect the hoses and required fan or shroud parts, cap automatic-transmission cooler connections if equipped, remove the radiator, install the replacement, refill with the specified coolant, and complete cold and warm leak checks. Do not use this as a step-by-step removal procedure for a 2024–2026 Tacoma or an i-FORCE MAX model without Toyota service information.
What’s in This Article
- Can You Replace a Toyota Tacoma Radiator Yourself? (Time, Difficulty, Cost)
- Which Tacoma Model Years Does This Guide Cover?
- Tools & Parts Checklist for Tacoma Radiator Replacement (By Model Year)
- Before You Begin: Safety and Coolant Rules
- Confirm the Radiator Is the Problem
- Drain, Remove Hoses, and Pull the Fan Shroud Safely
- Remove the Radiator and Handle Automatic Trans Cooler Lines
- Install the New Radiator and Reassemble the Fan/Shroud
- Fill, Bleed, Test for Leaks, and Troubleshoot Common Issues
- Post-Repair Pass/Fail Check
- Common Mistakes That Cause Leaks or Overheating
- Frequently Asked Questions
- Sources and Verification Notes
This guide explains the general radiator-replacement workflow and the checks that determine whether the truck is safe to drive. It does not replace the Toyota repair procedure or torque specifications for your exact model year, engine, transmission, drivetrain, and cooling package.
Key Takeaways
- Match the radiator to the Tacoma’s VIN, model year, engine, transmission, drivetrain, and factory cooling equipment.
- Use the detailed workflow only as general planning guidance for conventional 1995–2023 configurations.
- Treat 2024–2026 turbo, intercooler, and i-FORCE MAX configurations as VIN-specific repairs.
- Work only on a fully cold engine and collect all coolant for proper recycling or disposal.
- If automatic-transmission fluid is lost, verify its level with the correct model-specific procedure before driving.
- Pressure-test the cold system, complete a controlled warm-up, and recheck all fluid levels after full cool-down.
| At a Glance | What to Know |
|---|---|
| Difficulty | Moderate on a conventional layout; higher with corrosion, restricted access, unfamiliar cooling circuits, or damaged cooler lines. |
| Planning time | Toyota does not publish one universal time. Reserve at least half a day for a first attempt, including diagnosis, refill, warm-up, cool-down, and inspection. |
| Procedural scope | General planning guidance for conventional 1995–2023 trucks. Use VIN-specific Toyota repair information for every configuration. |
| 2024–2026 scope | Planning overview only. Do not apply the removal sequence without the exact fourth-generation Toyota procedure. |
| Critical verification | VIN, engine, transmission, radiator ports, fan or shroud sequence, coolant specification, torque values, and bleeding method. |
| Do not drive if | The temperature rises, coolant leaks, steam appears, cabin heat disappears, transmission fluid leaks, or a fluid level cannot be verified. |
Can You Replace a Toyota Tacoma Radiator Yourself? (Time, Difficulty, Cost)
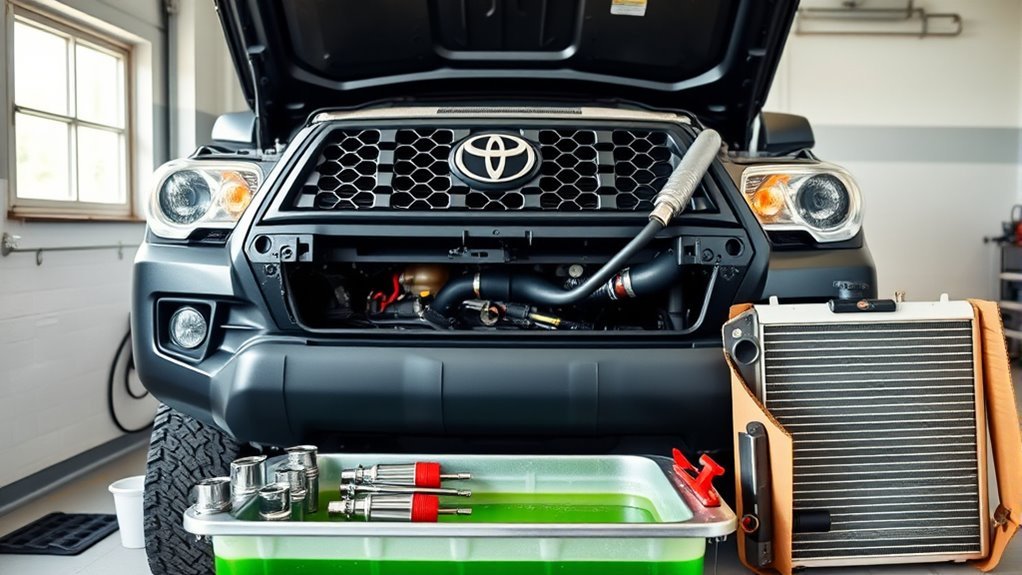
You may be able to replace a Toyota Tacoma radiator yourself when the truck has a conventional cooling-system layout, the fasteners and cooler lines are not badly corroded, and you can obtain the exact service information for the vehicle. Treat the job as moderate rather than simple.
Toyota does not publish one universal replacement time for every Tacoma. Reserve at least half a day for a first DIY attempt on a conventional 1995–2023 layout. That window should include confirming the leak, identifying fittings, removing stuck hoses, transferring bushings, refilling the system, pressure testing, warming the engine, and rechecking the level after full cool-down.
DIY cost depends on the VIN-specific radiator, coolant, hoses, clamps, bushings, cap, disposal fees, tools, and any transmission fluid needed. Price those items first, then compare the total with a written local repair estimate.
As a dated national benchmark, RepairPal’s estimate updated June 18, 2026 lists average Toyota Tacoma radiator replacement at $825–$938. The estimate excludes taxes and fees, does not account for every location, and may not include related repairs. Treat it as a comparison point rather than a quote. See the current RepairPal Tacoma radiator estimate.
| DIY May Be Reasonable When | Use a Professional When |
|---|---|
|
|
Use the Toyota Manuals and Warranties portal for owner information. Model-specific repair procedures and torque values may require Toyota’s Technical Information System.
[Products Worth Considering]

This spill-proof radiator coolant filling funnel kit helps you refill cooling systems cleanly while reducing trapped air pockets that can affect heater and engine performance. It includes a 5-inch extension bar and 45-degree elbow for easier access under shrouds or at awkward angles. Color-matched caps for dedicated adapters make setup simpler and more organized.

This 4-pack of waterproof inline fuse holders provides reliable circuit protection for automotive, marine, and other 12V electrical systems. Built with 12AWG heavy-duty wire and tin-plated copper conductors, it supports stable current flow while helping guard against overloads. The sealed double-slot cover design adds dust, moisture, and water resistance for dependable performance in demanding environments.

CHAPIN’s low-profile oil drain pan is designed to slide under low-clearance vehicles and equipment, making fluid changes easier in tight spaces. The large splash-free target area helps reduce mess while the molded carry handles support easier lifting, pouring, and storage. Built for draining oil, coolant, and other automotive fluids, it offers a practical high-capacity solution for routine maintenance.
Which Tacoma Model Years Does This Guide Cover?
The general sequence of cold draining, hose and shroud access, radiator removal, installation, refill, and testing applies to many 1995–2023 Tacoma configurations. The parts and exact removal steps do not remain the same across generations. For 2024–2026 trucks, use this article only to understand the planning and safety questions that must be resolved before service.
| Model-Year Range | Use of This Guide | Required Next Check |
|---|---|---|
| 1995–2004 | Use the general workflow as planning guidance for a conventional layout. | Verify engine-specific hose routing, mounts, cooler ports, coolant specification, fan-shroud access, and torque values. |
| 2005–2015 | Many trucks use a conventional radiator and mechanical-fan arrangement, but this is not a substitute for the repair manual. | Confirm the 2.7-liter or 4.0-liter engine, manual or automatic transmission, cooler connections, shroud sequence, and required transferred parts. |
| 2016–2023 | Use the workflow for planning, not as a universal fastener-by-fastener procedure. | Confirm the fan and shroud sequence, cooler-hose retainers, reservoir arrangement, seals, deflectors, supports, and bleeding procedure. |
| 2024–2026 | Planning overview only. Do not apply the detailed removal sequence without VIN-specific Toyota service information. | Identify the i-FORCE or i-FORCE MAX powertrain and obtain the correct turbo, intercooler, hybrid, coolant, fan, support, and bleeding procedure. |
Toyota’s fourth-generation Tacoma began with the 2024 redesign and uses a turbocharged 2.4-liter powertrain. Toyota’s 2024 owner specifications list gasoline-engine/intercooler cooling-system data as a reference quantity and advise contacting a Toyota dealer if replacement is necessary. That owner-level information is not a substitute for the radiator-removal and bleeding procedure.
Review the official 2024 Tacoma maintenance specifications and the Toyota fourth-generation Tacoma overview for the powertrain boundary, then use VIN-specific repair information before opening the system.
Hybrid and high-voltage warning: This guide does not cover radiator or cooling-component removal on i-FORCE MAX models. Do not touch orange high-voltage cables, connectors, or protected components. Use Toyota’s vehicle-specific service information or contact a qualified hybrid technician.
Tools & Parts Checklist for Tacoma Radiator Replacement (By Model Year)
Start by matching the radiator and related parts to the Tacoma’s VIN, model year, engine, transmission, drivetrain, and factory cooling equipment. Do not rely on a listing that says only “fits Toyota Tacoma.” Compare the replacement with the original before draining the truck.
Pre-Drain Fitment Gate
- Upper and lower hose-neck position, diameter, and angle
- Overall core and tank dimensions
- Upper brackets, lower locating pins, and mounting tabs
- Drain-petcock position and accessibility
- Automatic-transmission cooler-port type and location, if equipped
- Sensor, air-seal, deflector, bushing, cushion, and bracket provisions
Do not drain the truck until all six points match or the manufacturer’s fitment information explains the difference.
Collect these basic tools before you start:
- Metric socket set, extensions, and ratchet
- Torque wrench covering the specified fastener range
- Pliers for spring clamps
- Small trim clip tool
- Large drain pan or bucket
- Clean funnel or spill-free funnel kit
- Cooling-system pressure tester with the correct cap adapter
- Shop towels, safety glasses, and chemical-resistant gloves
- Clean line caps for automatic-transmission cooler hoses, if equipped
- Vehicle-specific repair procedure and torque specifications
Prepare the parts you may need before opening the system. These may include the correct new radiator, fresh coolant, hose clamps, mounting bushings, a radiator cap, and replacement hoses. Replace a hose if it is cracked, swollen, brittle, oil-soaked, internally damaged, or unable to grip its fitting securely.
Use the exact coolant specification in the vehicle-specific Toyota manual. Do not select coolant by color alone. Toyota owner information commonly identifies U.S. Toyota Super Long Life Coolant as a 50/50 premix, but products and markets can differ. Read the exact bottle and manual before adding water. See the official Toyota cooling-system specification and this site’s Tacoma coolant type guide for additional context.
A published cooling-system capacity is not a guaranteed radiator-replacement refill amount. A radiator drain can leave coolant in the engine, heater core, hoses, and other passages. Refill according to the procedure and level marks rather than forcing the full published capacity into the system.
Lay out tools and parts in the order you will use them. Confirm clamp positions, bushing locations, fastener access, and transmission-cooler fittings before lifting the old radiator out.
[Products Worth Considering]
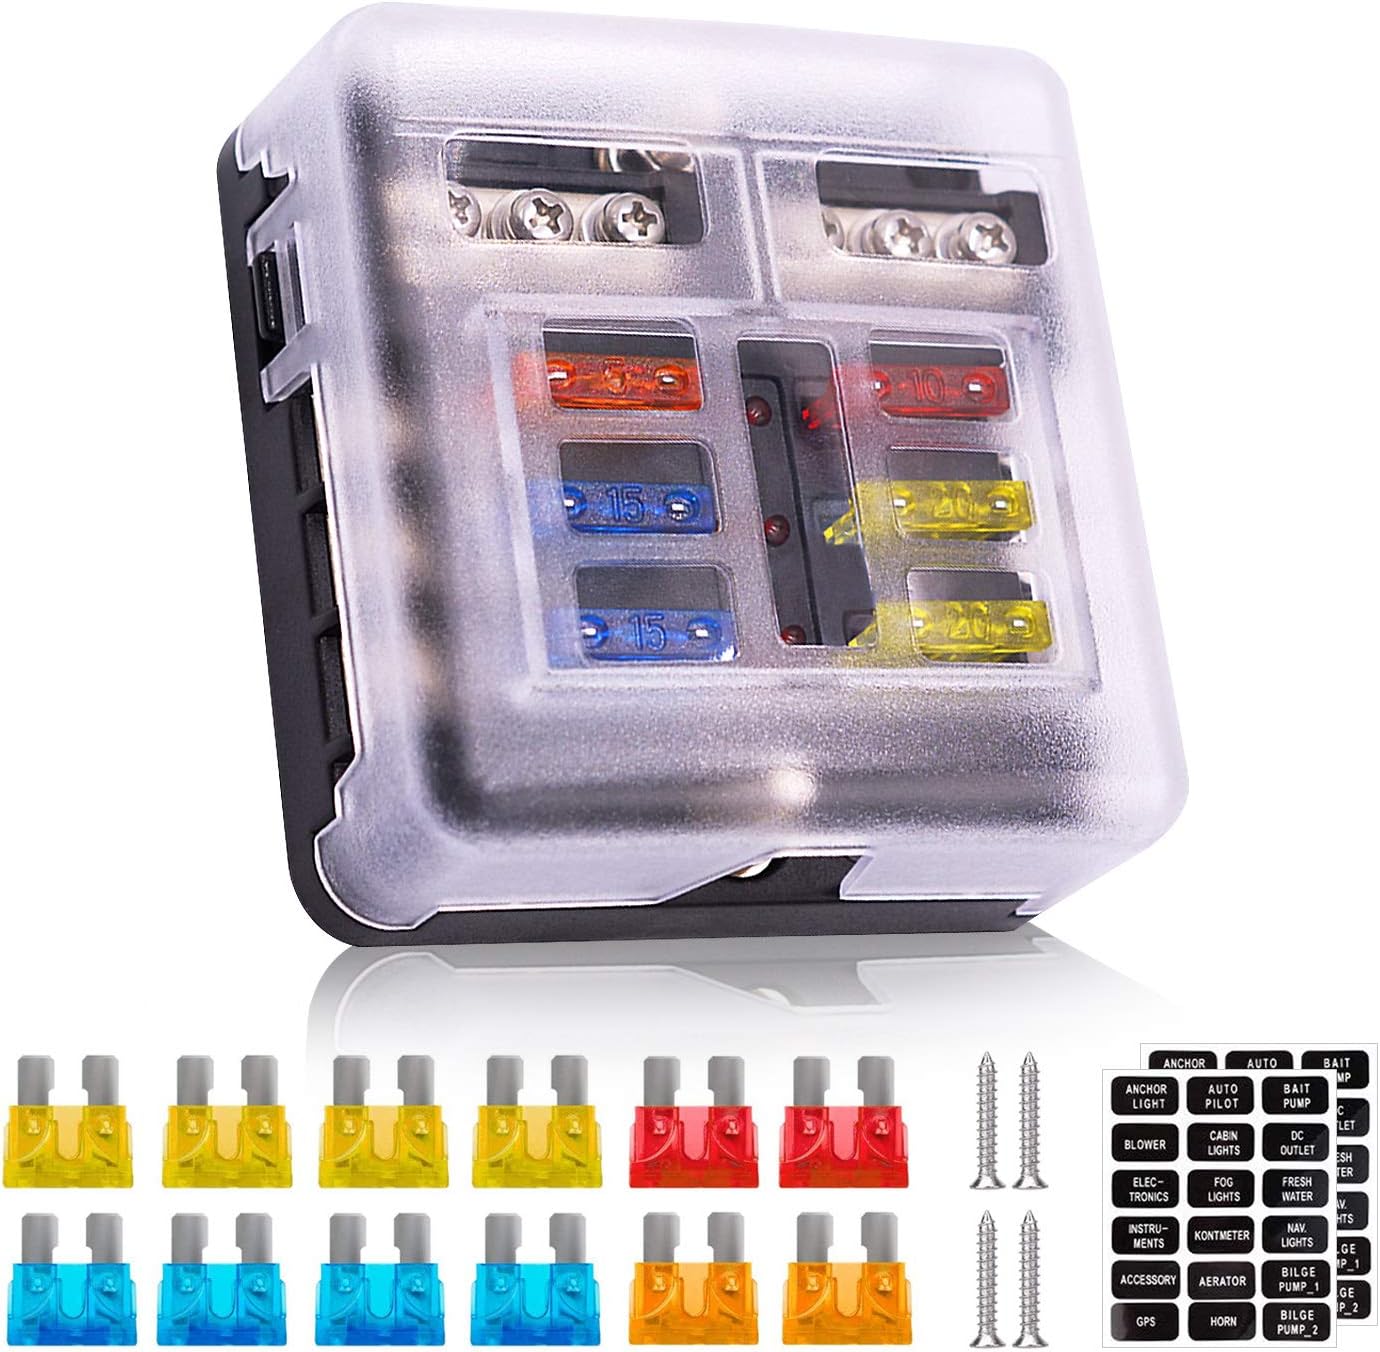
This 6-way fuse block provides organized circuit protection for marine, automotive, boat, truck, and other 12V or 24V electrical systems. Built with a fire-resistant housing and a ground bus, it helps keep wiring neat while the LED indicators quickly show when a fuse has blown for fast troubleshooting. It includes assorted blade fuses, labels, and mounting screws for an easier installation.

The NOCO GENIUS5 is an all-in-one battery charging and maintenance solution for 6V and 12V lead-acid and lithium batteries. It features temperature compensation, dead-battery recovery, desulfation, and safe long-term maintenance to help extend battery life and performance. Compact and versatile, it works with a wide range of vehicles and comes with mounting accessories and a warranty.

【Premium Material】: Constructed from 304 stainless steel, these clamps are robust and resistant to corrosion, allowing for long-term durability. The material is sufficiently thick to withstand stress and pressure, meaning they won't easily deform or fail under typical operating conditions.Note: Use an appropriate tightening tool and apply the recommended torque. Over-tightening may damage the hose or clamp.
Before You Begin: Safety and Coolant Rules
Work only on a fully cold engine. Hot cooling systems remain pressurized and can release steam or coolant forcefully. Park on level ground, set the parking brake, secure the truck against movement, and keep your hands, clothing, and tools away from fans and belts.
Warning: Never loosen a radiator, pressurized reservoir, or coolant cap while the engine or cooling system is hot. Wait until the system is fully cool before opening it.
Keep used coolant away from children, pets, drains, soil, and stormwater. Catch it in a clean pan, transfer it to a sealed and labeled container, and use an approved local recycling or household hazardous-waste program.
EPA antifreeze guidance says not to pour used antifreeze into sewers, floor drains, or onto the ground. It also advises keeping antifreeze separate from other waste. Review the EPA’s used-antifreeze disposal fact sheet and follow stricter local requirements where applicable.
Do not mix used coolant with engine oil, brake fluid, solvent, transmission fluid, or other waste. Mixed fluid may be harder or more expensive to recycle and may require different disposal.
If your Tacoma has radiator-connected automatic-transmission cooler lines, prepare clean caps or plugs before removal. Wipe the fittings first so dirt cannot enter the circuit. If more than a trace of transmission fluid escapes, plan to verify the fluid level with the correct Toyota procedure before driving.
[Products Worth Considering]
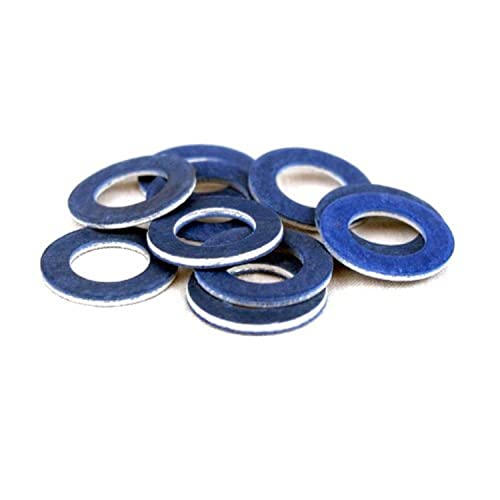
Genuine Toyota - Oil Drain Plug Gaskets (QTY10)
Confirm the Radiator Is the Problem
Do not replace the radiator until you have identified a radiator leak, damaged tank, restricted core, broken neck, failed seam, or another confirmed radiator fault. Coolant can travel across covers and supports, making a hose, water pump, thermostat housing, cap, or reservoir leak look like a radiator failure.
With the engine cold, inspect the radiator seams, plastic tanks, drain petcock, cap neck, hose ends, water-pump area, thermostat housing, and coolant reservoir. Look for wetness, dried coolant residue, split plastic, bent fins, damaged mounts, or contaminated fluid.
| What You Find | Most Useful Next Check |
|---|---|
| Wetness or dried residue at a plastic tank seam, cracked neck, or radiator core | Clean the area and perform a cold pressure test to confirm the radiator as the source. |
| Wet hose end or residue concentrated around a clamp | Inspect the hose, fitting bead, clamp position, and neck for damage before condemning the radiator. |
| Residue or dripping near the water-pump area | Trace the leak from the highest wet point and inspect the pump and nearby hoses. |
| Overheating with no visible external leak | Check coolant level, fan operation, airflow, thermostat behavior, cap condition, belt condition, and circulation. |
| Pressure drops with no visible external leak | Stop and investigate hidden leakage or an internal engine fault before installing a radiator. |
| Oil, transmission fluid, sludge, or combustion residue in the coolant | Do not continue with a simple radiator swap. Diagnose the contamination source first. |
A cold pressure test can help locate a small leak. Use the correct adapter and do not exceed the pressure specified in the Toyota service information. If pressure drops but no external leak appears, or if the coolant contains oil or combustion residue, stop and diagnose the engine before installing a radiator.
If overheating is the only symptom, also check fan operation, airflow through the radiator and condenser, coolant level, thermostat operation, belt condition, and water-pump circulation. A new radiator will not correct an unrelated fan, thermostat, pump, cap, or engine problem. See the related Tacoma thermostat replacement guide when thermostat diagnosis points in that direction.
Drain, Remove Hoses, and Pull the Fan Shroud Safely
For a conventional 1995–2023 configuration, radiator access generally begins by draining the cold cooling system, disconnecting the radiator and overflow hoses, and following the model-specific fan or shroud removal sequence. Some layouts allow the shroud to be separated and supported inside the engine bay. Others require the fan and shroud to come out together. Do not apply these steps to a 2024–2026 truck without the Toyota procedure.
Drain Coolant First
Place a drain pan beneath the radiator drain and confirm the engine is fully cold. Slowly loosen the cap only when it is safe to do so, then open the radiator drain petcock. Control the flow so coolant stays in the pan rather than running across the frame, skid plates, belts, or electrical connectors.
| Step | Action |
|---|---|
| 1 | Confirm the engine is cold and position a large drain pan below the radiator. |
| 2 | Slowly remove the cap, then open the drain petcock without applying excessive force. |
| 3 | Let the coolant drain until the flow slows, then close the petcock gently. |
| 4 | Transfer used coolant to a sealed container for approved recycling or disposal. |
Keep the drain pan in place when disconnecting hoses because coolant remains in the lower hose, radiator tanks, and nearby passages. Do not overtighten the plastic petcock when closing it.
Disconnect Hoses Carefully
To disconnect a radiator hose, compress its spring clamp and slide the clamp away from the raised bead on the fitting. Twist the hose gently to break the seal, then pull it straight off. Avoid prying against a plastic radiator neck with a screwdriver or sharp tool.
Repeat the process for the upper hose, lower hose, and overflow or reserve-tank hose used by your configuration. Keep the drain pan under each connection. Protect belts, pulleys, and electrical connectors from coolant.
Inspect each hose end as it comes off. Replace the hose if it splits, feels unusually soft, has hardened cracks, is swollen by oil, or no longer clamps securely. Review the related Tacoma coolant-level guide before the final refill and post-repair recheck.
Remove Fan Shroud
To remove the fan shroud, first determine whether the Toyota procedure calls for removing the shroud alone, separating and supporting it temporarily, or removing the fan and shroud together. Remove any upper radiator cover or support clips required for access, then disconnect the reserve-tank or overflow hose and release any cooler-line retainers attached to the shroud.
Support the shroud while removing its last fastener. Move it slowly so it does not strike the fan blades, radiator fins, condenser, wiring, or hose fittings. If the shroud catches, stop and locate the interference rather than bending or twisting it.
Keep clips, bolts, cushions, and brackets organized by location. Photographing the original hose and clip routing before disassembly can prevent contact with the fan or belts during reassembly.
Remove the Radiator and Handle Automatic Trans Cooler Lines

Before unbolting the radiator, identify every remaining hose, fitting, bracket, seal, air deflector, and wiring retainer connected to it. Some automatic-transmission configurations use cooler hoses or fittings at the radiator. Manual-transmission replacement radiators may have unused factory-capped cooler ports, but the correct arrangement must be verified for the part and truck.
Clean around automatic-transmission cooler connections before opening them. Use the correct tool and fitting procedure for the truck. Do not grip or crush a hard line with locking pliers, and do not use dirty bolts, shop rags, or open hose ends as plugs.
Drain and Cap Lines
Cap each automatic-transmission cooler hose or line immediately after disconnection. Use clean, fluid-compatible caps that prevent contamination without damaging the hose or fitting. Label the inlet and outlet if their routing is not obvious.
Handle hard lines gently. Stop if a fitting rounds off, a line twists with the fitting, or corrosion causes the tube to flex. A damaged cooler line can create a transmission-fluid leak that is more serious than the original radiator repair.
Measure or estimate any fluid that escapes. If more than a trace is lost, verify the transmission-fluid level with the VIN-specific Toyota procedure before driving. Do not assume every Tacoma has a dipstick or that a transmission level can be checked accurately while cold.
Remove and Lift Radiator
Once all hoses and cooler connections are clear, remove the radiator mounting bolts or brackets in the sequence shown for the truck. Keep rubber cushions, lower bushings, air seals, and side deflectors in order so they return to the correct locations.
- Confirm every hose, line, clip, connector, and bracket is disconnected.
- Remove the radiator supports or mounting fasteners with the correct metric tools.
- Cap automatic-transmission cooler connections immediately, if equipped.
- Protect the condenser and surrounding components with clean cardboard if space is tight.
- Lift the radiator vertically without dragging its fins across brackets or fan blades.
- Inspect all cushions, seals, deflectors, fittings, and mounting points before installation.
Do not force the radiator past the fan, condenser, grille support, or cooler lines. If it catches, lower it slightly and find the point of contact.
Install the New Radiator and Reassemble the Fan/Shroud
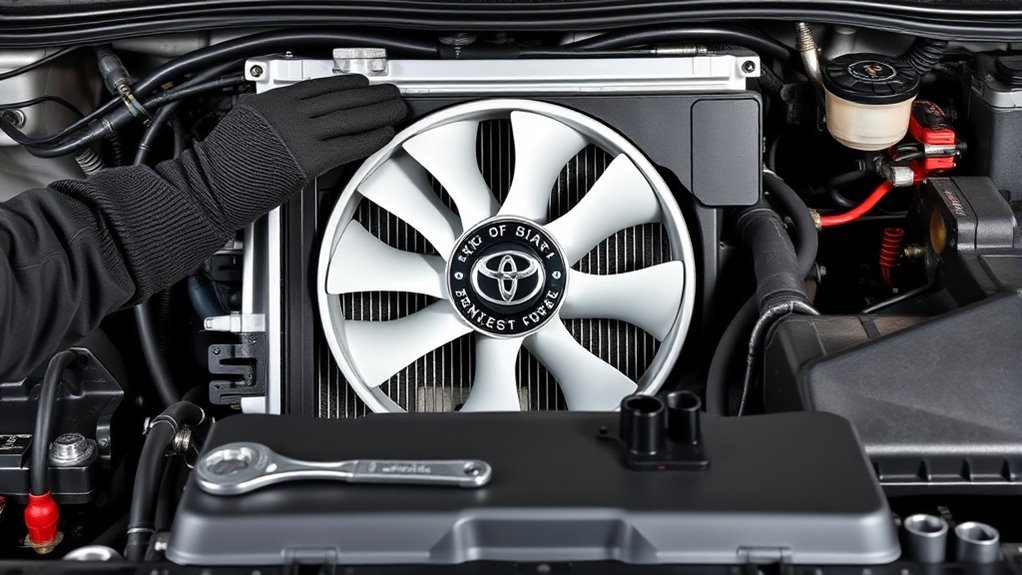
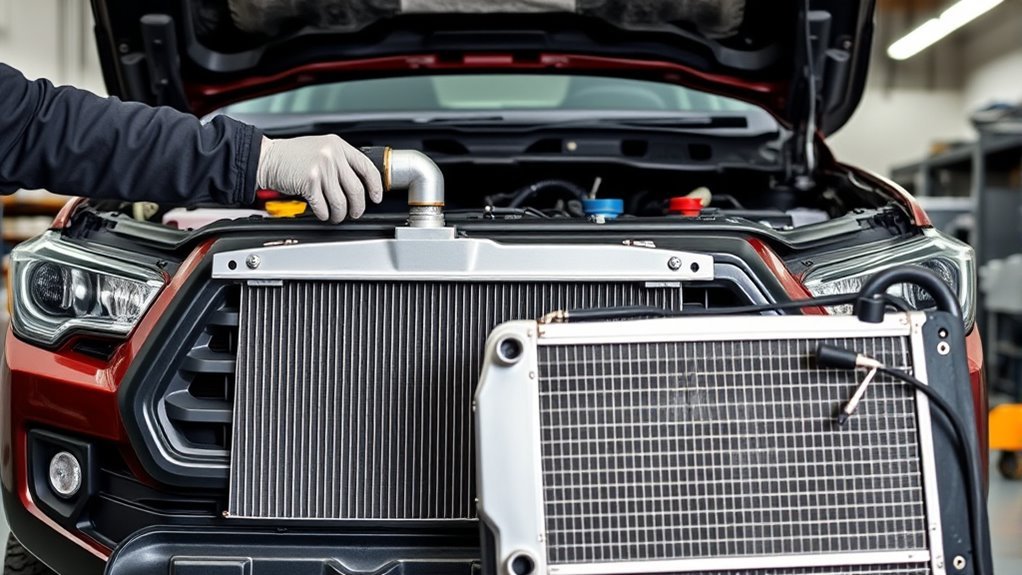
Compare the new radiator with the old one before installation. Check the upper and lower hose necks, drain petcock, cap neck, cooler ports, mounting points, overall dimensions, sensor or bracket locations, and any air-seal or deflector attachments.
Do not install the replacement if a port, bracket, neck angle, drain location, cooler fitting, or mounting tab differs from the original unless the radiator manufacturer and Toyota service information confirm the difference. Confirm whether unused transmission-cooler ports should remain factory-capped on a manual-transmission truck.
Transfer reusable bushings, cushions, brackets, seals, and deflectors only after inspecting them. Replace crushed, hardened, torn, or missing pieces. Lower the radiator slowly into its lower mounts and confirm it sits naturally without pinching wiring, hoses, or air seals.
Start mounting fasteners by hand to prevent cross-threading. Tighten them evenly to the torque listed in the Toyota repair information. Do not use the mounting bolts to pull a misaligned radiator into position, and do not crush rubber cushions or plastic tanks.
Reinstall the fan and shroud in the model-specific sequence. Confirm the fan is centered in the shroud opening and rotates without touching the shroud. Reattach all hose, wiring, cooler-line, and deflector retainers.
Pro tip: Position each hose clamp behind the raised bead on the fitting, matching the original clamp location whenever possible.
Reconnect the upper, lower, and overflow hoses. Reconnect automatic-transmission cooler lines if equipped and verify that every retaining clip or clamp is fully seated. Route all hoses and lines away from fan blades, belts, pulleys, exhaust parts, and sharp edges.
Before adding coolant, confirm that the drain petcock is closed, the radiator is secured, the fan clears the shroud, all hoses are connected, every cooler fitting is secure, and no tools remain in the engine bay.
Fill, Bleed, Test for Leaks, and Troubleshoot Common Issues
There is no single cooling-system bleeding procedure that should be applied to every Tacoma. Use the coolant and fill sequence specified for the exact engine and cooling-system configuration. Begin only when the engine is cold.
- Confirm the drain petcock, hoses, cooler lines, and mounting hardware are secure.
- Fill slowly with the manual-approved coolant. Do not add water to a premixed product unless the label and service information direct you to do so.
- Do not try to force the published total system capacity into a radiator-only refill. Coolant remains in other parts of the system.
- Fill the reservoir only to the specified cold mark rather than overfilling it.
- Follow the Toyota air-bleeding procedure for the VIN. Use a spill-free funnel or open-cap warm-up only when that procedure permits it.
- Set the heater controls as directed by the service procedure and confirm that cabin heat becomes consistent during warm-up.
- Watch the coolant level, temperature display or gauge, hose connections, radiator seams, petcock, cap neck, and cooler-line fittings.
- Shut the engine off immediately if coolant surges, steam appears, the temperature rises abnormally, cabin heat disappears, or a leak develops.
- After the prescribed warm-up, allow the engine to cool fully before opening the system or correcting the final level.
Before a road test, pressure-test the cold system with the correct cap adapter and remain below the pressure specified in the Toyota service information. Inspect the radiator tanks, seams, petcock, hose ends, cap neck, reservoir hose, and automatic-transmission cooler fittings.
Do not overtighten a hose clamp or petcock to stop a leak. A clamp may be in the wrong position, a hose may be damaged, a fitting may be cracked, or the radiator may not be seated correctly.
Check the automatic-transmission cooler fittings again during warm-up. If fluid was lost, verify the transmission-fluid level before driving. Stop if a fitting becomes wet or the transmission shifts abnormally.
After full cool-down, recheck the radiator or designated fill point and the reservoir. A small level change may occur as trapped air leaves, but repeated coolant loss requires further diagnosis. For weak cabin heat or suspected circulation problems, see the Tacoma heater-core coolant-flow guide.
Post-Repair Pass/Fail Check
Do not begin the first road test until every item below passes. A dry radiator by itself is not enough.
| Check | Pass Condition | Fail Action |
|---|---|---|
| Cold pressure test | The system holds the specified test pressure and every connection stays dry. | Find and repair the leak before warm-up or driving. |
| Warm-up | Temperature rises normally and remains stable. | Shut the engine off if the temperature rises abnormally. |
| Cabin heat | Heat remains steady after the engine reaches normal temperature. | Investigate low coolant, trapped air, or poor circulation. |
| Fan clearance | The fan rotates without touching the shroud, hoses, wiring, or retainers. | Correct the alignment or routing before starting or driving. |
| Coolant level | The specified cold level is correct after full cool-down. | Correct the level and investigate repeated loss. |
| Transmission fluid | Cooler fittings remain dry and any lost fluid has been checked with the correct procedure. | Do not drive until leakage and level are resolved. |
When every check passes, take a short drive close to home. Watch the temperature reading and confirm that cabin heat remains steady. Park on clean ground, allow the truck to cool fully, and inspect all fluid levels and connections again.
Common Mistakes That Cause Leaks or Overheating
Most post-repair problems come from incorrect fitment, damaged hoses or fittings, poor clamp placement, trapped air, fluid-level errors, or failure to diagnose the original overheating cause.
- Using one procedure for every Tacoma generation, engine, or transmission
- Applying the conventional workflow to a 2024–2026 truck without Toyota service information
- Ordering a radiator without checking the VIN and cooler-port configuration
- Draining the truck before comparing the old and new radiator
- Selecting coolant by color instead of the required specification
- Adding water to a product labeled pre-mixed or ready to use
- Trying to force the published total capacity into a partial refill
- Reusing cracked, swollen, brittle, or oil-soaked radiator hoses
- Placing hose clamps away from the raised hose bead
- Forgetting the overflow hose, air deflectors, seals, or shroud retainers
- Forcing a fan shroud past the fan or radiator
- Damaging corroded automatic-transmission cooler lines
- Failing to verify the transmission-fluid level after fluid loss
- Using a generic bleeding method that does not match the engine
- Opening a cap before the cooling system is fully cold
- Skipping the cold pressure test and full cool-down level check
- Replacing the radiator without checking the fan, thermostat, cap, pump, or engine condition
Note: Do not exceed the service-manual pressure during a cooling-system pressure test. Excess pressure can damage the radiator, reservoir, hoses, heater core, or seals.
After the first drive, park on clean ground and let the truck cool fully. Inspect for coolant or transmission-fluid drops, then recheck the specified cold fluid levels. Repeat the inspection the next day.
Frequently Asked Questions
How Much Does It Cost to Replace a Radiator in a Toyota Tacoma?
RepairPal’s national estimate updated June 18, 2026 lists average Toyota Tacoma radiator replacement at $825–$938 before taxes, location adjustments, and related repairs. Your actual cost depends on the VIN-specific radiator, labor rate, coolant, hoses, clamps, bushings, cap, disposal, transmission fluid, and any additional damage. Compare a written local quote with the complete DIY parts and tool cost.
How Long Does a Tacoma Radiator Replacement Take?
There is no universal time for every Tacoma. Reserve at least half a day for a first DIY attempt on a conventional 1995–2023 configuration. Corroded fittings, stuck hoses, fan or shroud access, refill, pressure testing, warm-up, and full cool-down can extend the job.
Does This Procedure Work for Every Tacoma Model Year?
No. The general workflow can help plan many conventional 1995–2023 repairs, but radiator mounts, fan and shroud removal, cooler lines, coolant requirements, additional cooling equipment, torque values, and bleeding procedures vary. For 2024–2026 trucks, use this article only as a planning overview and obtain VIN-specific Toyota service information.
Can You Drive After Replacing the Radiator?
Drive only after the cold system holds the specified pressure, the engine warms normally, the temperature remains stable, cabin heat is consistent, the fan clears the shroud, every hose and cooler-line connection stays dry, and the coolant and transmission-fluid levels are correct. Begin with a short drive near home and inspect the truck again after it cools.
Do You Need to Replace Radiator Hoses Too?
You do not always need new hoses. Replace any hose that is cracked, swollen, brittle, unusually soft, oil-contaminated, internally damaged, or unable to grip its fitting securely. Replace a weak or corroded clamp rather than overtightening it.
What Happens If Air Stays in the Cooling System?
Trapped air can cause coolant-level changes, weak cabin heat, hot spots, temperature fluctuation, or overheating. Follow the exact Toyota bleeding procedure for the engine, then recheck the cold level. If air repeatedly returns, inspect for leaks, cap problems, or an internal engine fault.
What Coolant Should You Use After Replacing a Tacoma Radiator?
Use the coolant specification listed in the vehicle-specific Toyota owner’s manual or service information. Do not choose coolant by color alone or mix formulas without confirming compatibility. Check whether the approved product is concentrated or already premixed before adding water.
Should You Pressure-Test a New Radiator Installation?
Yes. A cold pressure test can reveal a loose clamp, leaking petcock, damaged seam, cracked neck, cap problem, or cooler-port leak before a road test. Use the correct adapter and never exceed the pressure specified for the vehicle.
What If Transmission Fluid Leaks From the Cooler Lines?
Cap the lines immediately, clean the area, and repair any damaged hose, fitting, or hard line. If more than a trace of fluid was lost, verify the transmission-fluid level with the correct Toyota temperature and level-check procedure before driving.
Safety Disclaimer: This article provides a general planning and repair overview. It does not replace the Toyota service procedure, torque specifications, fluid-level procedure, or professional diagnosis for your exact vehicle. If you lack safe tools, are working on a 2024–2026 or i-FORCE MAX truck without the correct service information, lose substantial transmission fluid, find severe corrosion, or see overheating after repair, do not drive the truck until a qualified technician has inspected it.
Sources and Verification Notes
- Toyota Manuals and Warranties: model-year owner manuals and maintenance documents.
- 2024 Tacoma Maintenance Specifications: fourth-generation coolant and transmission-fluid reference data.
- Toyota 2024 Tacoma Technical Overview: fourth-generation and powertrain boundary.
- Toyota Technical Information System: VIN- and configuration-specific repair procedures and torque specifications.
- RepairPal Tacoma Radiator Replacement Estimate: dated national repair-cost benchmark.
- EPA Used-Antifreeze Disposal Fact Sheet: recycling, separation, and disposal guidance.
Conclusion
A successful Tacoma radiator replacement starts with confirming that the radiator is actually faulty and matching the replacement part to the truck’s exact configuration. Use the detailed workflow only as general planning guidance for conventional 1995–2023 trucks. Treat 2024–2026 models, turbo and intercooler arrangements, and i-FORCE MAX systems as VIN-specific repairs.
Work only on a cold engine, contain the coolant, protect automatic-transmission cooler connections, follow the correct fan or shroud sequence, and use the specified coolant and bleeding procedure. Before driving, require every post-repair check to pass: cold pressure, stable temperature, steady cabin heat, fan clearance, dry connections, and correct cold fluid levels.
If any check fails, stop and diagnose the system rather than continuing to drive. The next step is to confirm the VIN, obtain the matching Toyota repair procedure, and compare the replacement radiator with the original before draining the truck.