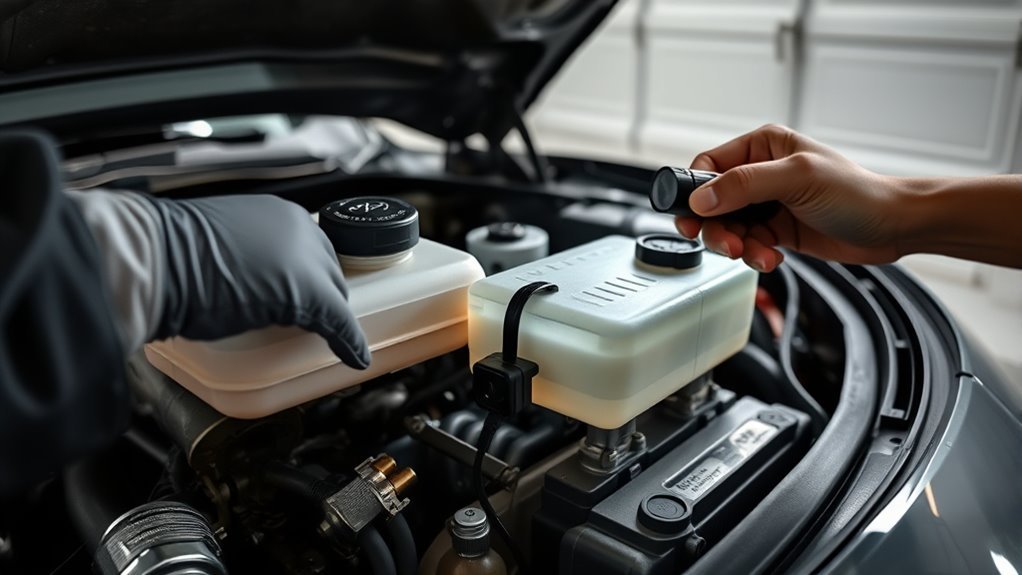
Check the coolant when the engine is cold: locate the translucent reservoir in the engine bay and confirm the level at the “full” mark; if unclear, loosen the cap only when cold and inspect the radiator neck until the fluid reaches the neck. Top off with a 50/50 Toyota‑approved coolant and deionized water, secure caps, inspect hoses and clamps for leaks, run to temperature to purge air, and recheck levels—keep going to learn step‑by‑step bleed and leak checks.
Quick Check: Inspect Your Toyota Supra Coolant Reservoir Level

Start by locating the coolant reservoir in the engine bay—it’s usually a translucent plastic tank with “full” and “low” marks. You’ll check when the engine’s cold to avoid burns. Visually confirm the fluid aligns with the “full” line; if unclear, remove the cap for a direct view of the internal fill mark. If level’s low, top off with the manufacturer-recommended coolant types and proper mixture to preserve seals and performance. After adding, inspect hoses and clamp joints for leaks that might cause recurrent loss. Make this a regular maintenance tips routine: scheduled visual checks prevent overheating and engine damage. You’re taking practical, autonomous steps to keep the Supra reliable and ready.
When and Why to Check the Radiator Neck (Safety Steps)
Don’t touch the radiator neck until the engine is fully cooled — wait several hours or overnight after driving to avoid burns from hot coolant or steam. When the engine is cold, loosen the cap slowly and carefully to bleed off any residual pressure; never open it while the system is hot. Only check that coolant reaches the neck when pressure is released, and if it’s low inspect hoses and fittings for leaks before adding coolant.
Wait Until Engine Cooled
Because the radiator and coolant are pressurized and can reach scalding temperatures, only check the radiator neck after the engine has fully cooled—waiting several hours or overnight if it was recently run. You’ll monitor engine temperature and follow safety precautions: park level, let heat dissipate, don’t touch the cap until cold. This prevents burns and violent coolant spray.
| Condition | Action | Goal |
|---|---|---|
| Engine hot | Do not open cap | Avoid scalding |
| Engine cooled | Open cap carefully | Verify coolant reaches neck |
| Not level | Reposition vehicle | Accurate reading |
Check when cold, confirm coolant reaches the neck for circulation, and proceed with repairs or top-up only after conditions meet safety criteria.
Safely Release Pressure
When the engine’s fully cool, slowly press down on the radiator cap and twist it a quarter turn to vent residual pressure before removing it completely, so you avoid a sudden burst of hot coolant or steam. You’ll perform a controlled pressure release as a core safety precaution: keep hands and face to the side, use a rag, and turn slowly until you hear a soft hiss. Once vented, remove the cap and inspect the coolant level at the radiator neck—fluid should reach the neck, not just the fins. Check hoses and the neck for leaks while the system is depressurized. If you see leaks, don’t drive; address the fault. Regular pressure release and inspection are disciplined safety precautions that empower you to prevent overheating and costly failure.
Top Off Coolant Safely: Mix, How Much, and Cap Procedure
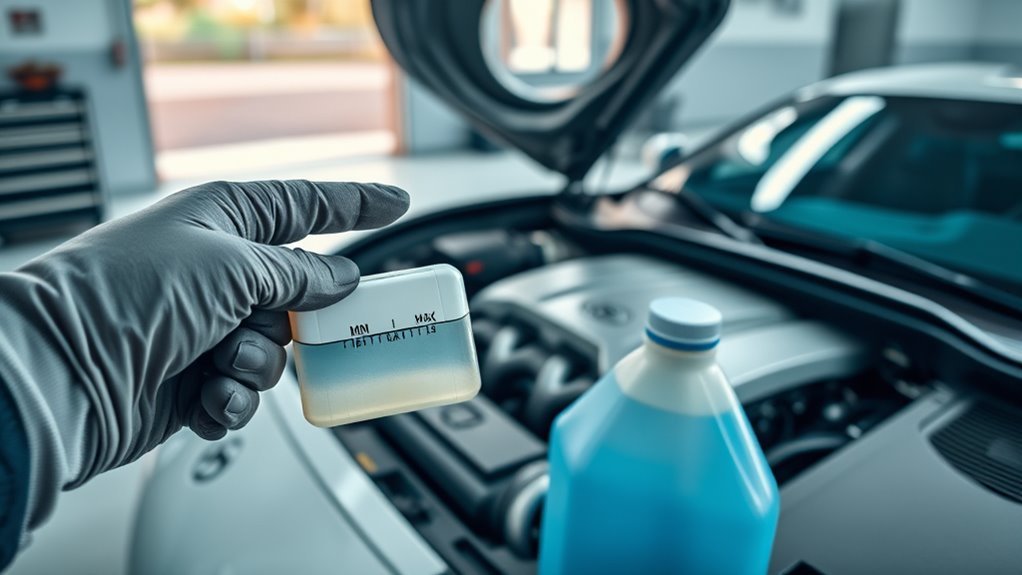
With the engine cold, mix Toyota‑approved coolant 50/50 with deionized or purified water before adding. Remove the reservoir cap, top to the “full” line without overfilling, then replace the cap and torque it snugly to maintain system pressure. Check both the main reservoir and overflow bottle after filling to confirm levels and prevent future overheating.
Proper Coolant Mix
Before you add coolant, make sure the engine is cold and you’ve got a 50/50 mix of the Toyota-recommended coolant and deionized or purified water ready. Use approved coolant types — OEM Toyota or equivalent long-life ethylene glycol formula — to protect aluminum internals and seals. Measure volumes precisely: half coolant, half DI water by volume. Employ proper mixing techniques: pre-mix in a clean container, then pour slowly into the reservoir to the MAX line; don’t overfill. Seal the system after filling to preserve pressure and prevent contamination. Check levels again after a short drive and monitor regularly for drops that indicate leaks. This method frees you from guesswork and keeps the Supra’s cooling system reliable.
Cap-Off Procedure
Having mixed the coolant to a 50/50 ratio and confirmed levels, let’s top off the Supra safely. Work only with a cold engine to avoid burns from steam or hot fluid. Remove the radiator or reservoir cap slowly—if pressure releases, stop and let it equalize. Add your distilled-mix until the reservoir reads “full” and, if accessing the radiator neck, until the fluid reaches the neck. Don’t overfill; excess can cause overflow and pressure issues. After filling, perform a secure cap replacement using the factory cap, seating it fully and turning until it locks. Start the engine briefly to circulate fluid and watch for air bubbles; if bubbles appear, bleed the system per procedure. Inspect hoses and overflow bottle regularly as part of coolant maintenance to prevent leaks and overheating.
Bleed Trapped Air From the Supra Cooling System After Topping
Once the Supra’s coolant is topped, start the engine and run it to operating temperature with the radiator cap off so trapped air can escape as bubbles. You’ll use this phase for disciplined coolant maintenance: set the heater to maximum heat and fan to force coolant circulation and drive air toward the open neck. Watch the reservoir and add coolant as needed to keep the level full and prevent localized boiling. When temperature stabilizes and bubbling diminishes, shut the engine and let it cool partially, then squeeze the upper radiator hose to dislodge remaining pockets. If air bubble activity continues, repeat the warm-run, heater-on sequence with the vehicle parked on a slight incline to encourage air migration and complete bleeding.
Find and Diagnose Coolant Leaks: 7 Checks to Pinpoint Loss
After you’ve bled the system and confirmed stable temperatures, check for leaks that could be bleeding off coolant. Start with a coolant hose inspection: visually examine all hoses for wear, cracks, bulges, or seepage at clamps. Inspect radiator and reservoir for residue or pooling; note any dried crust or fresh wetness. Verify the overflow bottle is filled to the “F” line and the cap seats securely. Run a pressure test on the cooling system to force out hard-to-see breaches—this is the core hidden leak detection step. Drive once, then monitor level: a significant drop after the first run that then stabilizes signals a leak needing targeted repair. Log findings so you can act decisively and reclaim control.
Routine Coolant Checks and When to Visit a Toyota Service Center
When the engine’s cool, check the Supra’s coolant reservoir and confirm the fluid sits between the “full” and “low” marks; if it’s below the low line or you see repeated drops, schedule a Toyota service center visit for a full inspection. You’ll perform routine coolant maintenance at regular service intervals, visually inspecting level and color, and noting odor or residue. If overheating, vapor, or frequent loss occurs, don’t delay—these symptoms suggest leaks or component failure.
| Action | Purpose |
|---|---|
| Visual check | Confirm level between marks |
| Smell/colour check | Detect contamination |
| Record level | Track drops over time |
| Follow service intervals | Prevent failures |
| Service center visit | Diagnose leaks, pressure test |
Follow procedures, keep records, and use authorized service for lasting freedom from breakdowns.
Frequently Asked Questions
Can I Use Tap Water Instead of Distilled Water in Coolant Mix?
You can, but you shouldn’t: tap water’s water quality varies and can harm coolant types by causing corrosion or deposits. Use distilled water with correct coolant concentrate; that preserves system integrity and gives you reliable, liberated control.
How Often Should Coolant Be Completely Replaced Rather Than Topped Off?
I changed my old radiator like swapping shackles for keys: replace coolant every 2–5 years or 30k–60k miles, using coolant maintenance tips to preserve coolant system longevity so you’re free from unexpected overheating.
Will Aftermarket Coolants Harm My Supra’s Aluminum Components?
Yes — if the aftermarket coolant lacks proper coolant compatibility with aluminum alloys, it can accelerate aluminum corrosion; you should verify specifications, flush and neutralize incompatible fluids, and choose approved formulas to protect your Supra’s components.
Can Low Coolant Trigger a Check Engine Light or Only Temperature Warnings?
Like a failing heartbeat, low coolant can trigger a check engine light and coolant warning signs; you’ll see temperature warnings and degraded engine performance effects, so inspect, top off, and diagnose promptly to reclaim control.
Is It Safe to Drive a Short Distance With a Low Coolant Level?
You can drive a very short distance if necessary, but you shouldn’t. Monitor coolant symptoms closely; stop if temperature rises. Avoid prolonged running to prevent engine overheating, and fix leaks or refill before further driving.
Conclusion
You’ve done quick, precise checks yet you’re still responsible—don’t assume the reservoir tells the whole story. While a visible level gives immediate reassurance, a cold radiator neck and trapped air can hide problems that only a bleed or pressure check will reveal. Top off the correct 50/50 mix, reinstall caps securely, then monitor for leaks and temperature shifts. If uncertainty remains, get Toyota diagnostic-level attention rather than guessing and risking engine damage.