Changing the cabin air filter on a Toyota Tundra is one of the easier DIY maintenance jobs because the filter is located behind the glove box on most models. The key is to use the correct replacement filter, note the markings on the old filter and case, and avoid forcing the plastic cover clips while you work.
Quick Answer
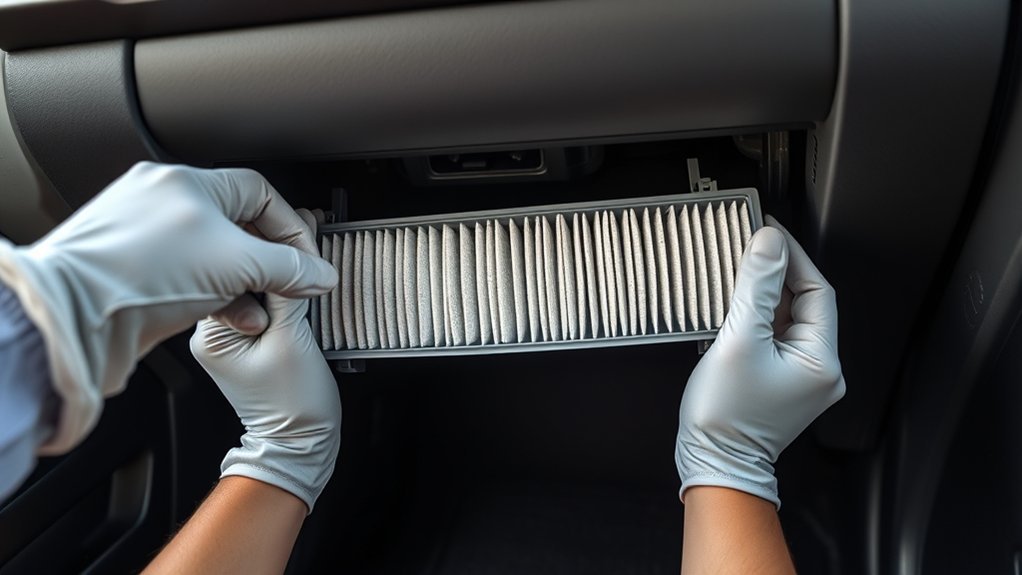
On newer Toyota Tundra trucks, the cabin air filter sits behind the glove box. Turn the truck off, open the glove box, remove the access panel and filter cover, pull out the filter case, swap in the new filter with Toyota “UP” marks facing up, then reinstall everything.
Key Takeaways
- Always buy a cabin air filter that matches your exact Tundra model year and trim.
- Toyota “UP” marks should face up; aftermarket “AIR FLOW” arrows should follow the filter manufacturer’s direction.
- Toyota’s 2024 Tundra maintenance guide lists cabin air filter inspection at 15,000 miles and replacement at 30,000 miles under the cited schedule.
- Replace the filter sooner if you drive in dust, heavy traffic, desert conditions, or notice weak airflow, odors, or easy window fogging.
At a Glance
| Time Required | 10–20 minutes for most DIYers; allow longer the first time |
| Difficulty | Beginner |
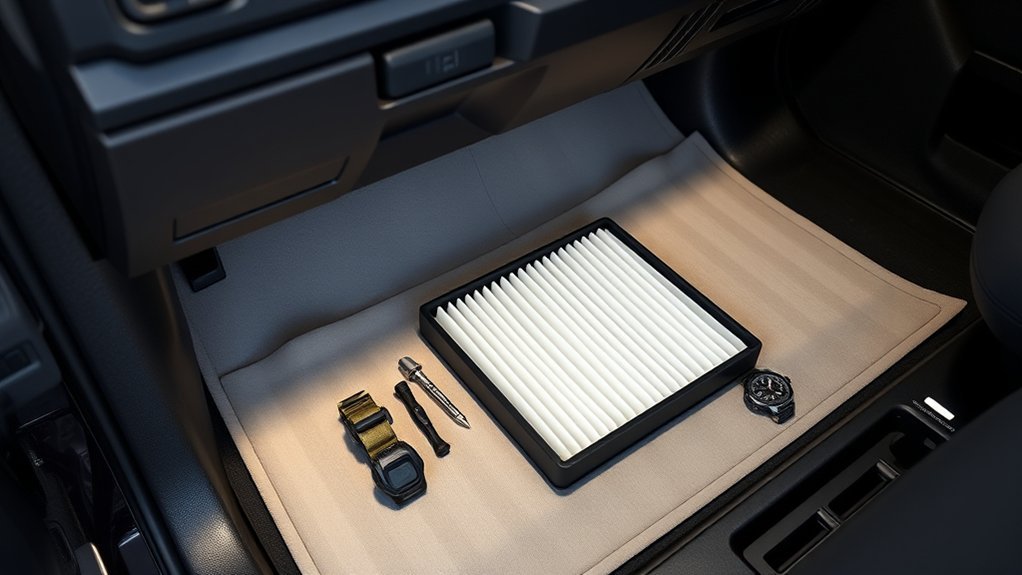
| Tools Needed | Replacement cabin air filter, flashlight, vacuum or soft brush; needle-nose pliers only if your older glove-box retainer needs help |
| Cost | Usually just the replacement filter; price varies by brand and filter type |
Before You Start: Check Fitment, Tools, and Safety
Before you open the glove box, confirm that the replacement filter matches your exact Toyota Tundra model year. Toyota changes small interior panels and filter-case details across generations, so do not rely on looks alone. Check the parts catalog, the filter box, your owner’s manual, or the old filter’s part number.
For current Toyota instructions, the air conditioning filter should be inspected and replaced according to the maintenance schedule, and early replacement may be needed in dusty areas or heavy traffic. You can verify your exact model year through Toyota Owners Manuals and Warranties.
Warning: Turn the engine switch off before removing the cabin air filter. Do not run the air conditioning system with the filter removed; Toyota warns that using the system without a filter may damage the system.
Where the Toyota Tundra Cabin Air Filter Is Located
On most Toyota Tundra models, the cabin air filter is behind the passenger-side glove box. The exact access method can vary. Some older Tundras use a glove-box damper, side tabs, or a small retainer. Newer Tundras may use a removable panel, a filter cover, and a separate filter case behind the glove box.
The important point is simple: work slowly and watch how the parts come apart. The glove box and filter cover use plastic tabs and claws, so forcing them can snap a clip. If the cover does not release, stop and look for the locking tab or direction arrow molded into the cover.
How Often Should You Replace a Tundra Cabin Air Filter?
For the 2024 Toyota Tundra maintenance schedule, Toyota lists cabin air filter inspection at 15,000 miles or 18 months and cabin air filter replacement at 30,000 miles or 36 months. Toyota also notes that heavy traffic, dirt roads, urban driving, dusty areas, and desert conditions can shorten filter life.
Replace the filter early if you notice weak airflow from the vents, musty odors, heavy dust on the old filter, or windows that fog easily while using Fresh mode. These symptoms often mean the filter is clogged or damp.
Note: The maintenance schedule can vary by model year and market. Use the schedule for your exact Tundra, especially if your truck is used for towing, off-road driving, construction sites, or dusty rural roads.
Step-by-Step: How to Remove the Old Cabin Air Filter
- Empty the glove box. Remove papers, tools, charging cables, and anything else that could fall behind the dash.
- Open the glove box fully. On newer Tundras, remove the small access panel behind the glove box area. On older models, you may need to release a damper or press the glove-box sides inward to drop the glove box farther.
- Find the filter cover. Look for the rectangular plastic cover behind the glove box. It may have tabs, claws, or a sliding lock.
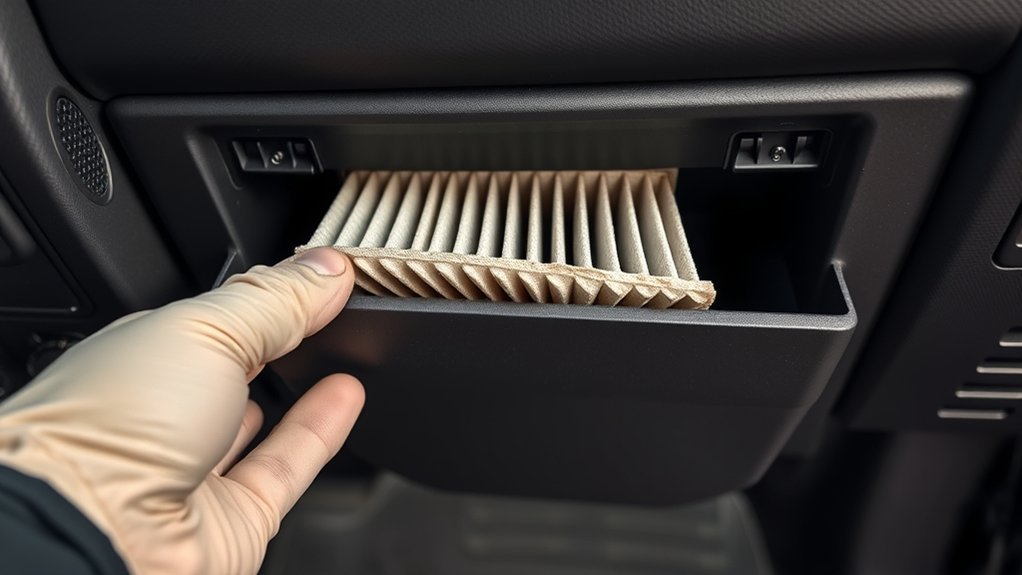
- Release the cover gently. Press or unlock the tabs as designed, then pull the cover straight out. Do not pry hard with a screwdriver unless the manual for your exact model calls for it.
- Remove the filter case or filter. Some newer Tundras use a removable filter case. Pull it out level so leaves and dust do not spill into the blower area.
- Note the markings. Before throwing the old filter away, look for “UP,” “AIR FLOW,” arrows, or case markings. These help you install the new filter correctly.
| What You See | What It Means |
|---|---|
| Gray dust or pollen | Normal use; replace if dirty or due by schedule |
| Leaves or pine needles | Vacuum the housing before installing the new filter |
| Damp filter or mildew smell | Dry and inspect the housing; check for water intrusion |
| Collapsed or bent pleats | Replace and confirm the new filter seats flat |
Clean and Inspect the Filter Compartment
With the old filter removed, vacuum loose debris from the housing, filter seat, and nearby seams. A narrow vacuum nozzle or soft brush works well. Avoid pushing leaves deeper into the HVAC box.
Inspect the cover, case, and seals for cracks, missing foam, or bent plastic. A loose cover can let unfiltered air bypass the new filter, and a bent filter can reduce airflow. If you see water, mud, or heavy mold-like residue, stop and investigate the source before installing the new filter.
Pro Tip: Hold the old filter over a trash bag before shaking or inspecting it. Cabin filters often trap dry leaves, sand, pollen, and road grit that can spill into the passenger footwell.
How to Install the New Tundra Cabin Air Filter the Right Way
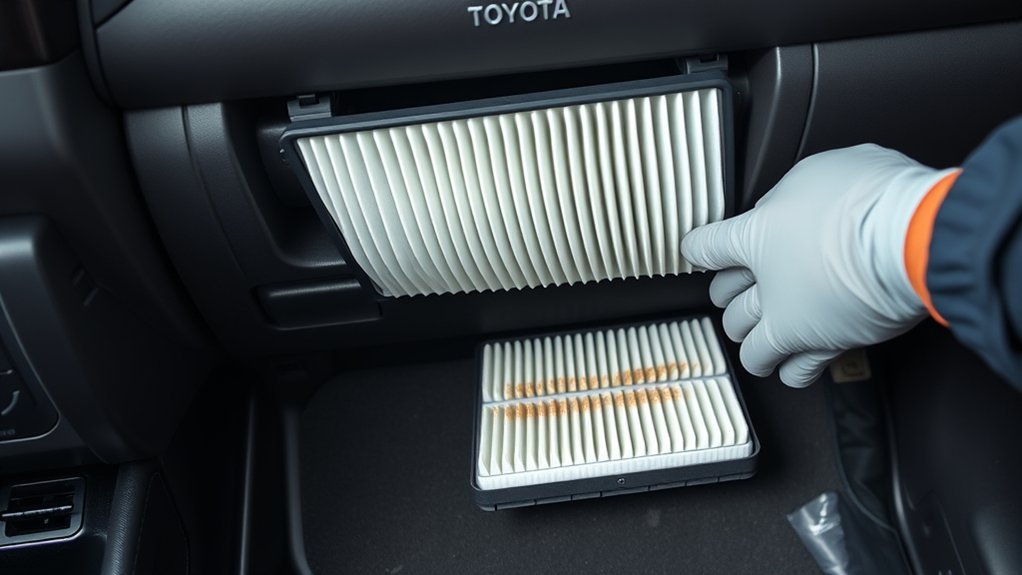
Install the new filter by following the markings on the filter and filter case. For Toyota filters marked “UP,” the “UP” mark should face up. If your aftermarket filter is marked “AIR FLOW,” follow the airflow direction printed on that filter’s instructions rather than assuming it means the same thing as Toyota’s “UP” mark.
Toyota “UP” markings describe filter orientation. Aftermarket “AIR FLOW” arrows describe the direction air passes through the filter. Treat those labels differently.
- Place the new filter in the case or housing. Keep it square and flat. Do not crush the pleats.
- Confirm the label direction. Toyota “UP” marks face up. If using an aftermarket airflow-marked filter, follow that filter’s instructions.
- Slide the case or filter in smoothly. If it catches, pull it out and realign it. Do not force it.
- Reinstall the filter cover. Push until the tabs or claws lock evenly.
- Check for gaps. The cover should sit flush with no edge sticking out.
Warning: Be gentle with the filter-cover claws. Toyota warns that applying excessive force while releasing the cover can damage the claws.
How to Reassemble the Glove Box
Reinstall the glove-box panel, damper, retainer, or side tabs in the reverse order of removal. Close and open the glove box once before putting your contents back inside. It should move smoothly and should not rattle, bind, or hang unevenly.
If the glove box does not close, check for trapped papers, a loose panel, or a filter cover that is not fully latched. Do not slam the glove box to force it shut.
Troubleshooting: How to Tell the Filter Is Installed Correctly
After reassembly, start the truck and run the fan at several speeds. Air should move normally through the vents, and the blower should not make scraping, fluttering, or whistling sounds.
- Weak airflow: Remove the filter and check for a crushed filter, blocked housing, or incorrect orientation.
- Rattling or fluttering: Confirm the filter case and cover are fully latched.
- Musty smell: Check for damp debris in the housing and replace the filter if it is wet.
- Windows fog easily in Fresh mode: Inspect the filter again; Toyota notes this can be a sign that replacement is needed.
- Cover will not sit flush: Pull the filter out and reinstall it squarely. A bent corner can keep the cover from closing.
Frequently Asked Questions
How often should I change the cabin air filter on my Toyota Tundra?
For the 2024 Toyota Tundra maintenance schedule, Toyota lists cabin air filter inspection at 15,000 miles or 18 months and replacement at 30,000 miles or 36 months. Replace it sooner if you drive in heavy traffic, dusty areas, desert conditions, or notice weak airflow or window fogging.
Which way does the Toyota Tundra cabin air filter go?
If the Toyota filter and case are marked “UP,” those marks should face up. If your aftermarket filter uses an “AIR FLOW” arrow, follow the direction printed by that filter manufacturer. Do not assume “UP” and “AIR FLOW” mean the same thing.
Do I need tools to replace a Toyota Tundra cabin air filter?
Many Tundra cabin air filter changes require no hand tools. A flashlight and vacuum are helpful. Some older glove-box retainers or dampers may be easier to handle with needle-nose pliers, but do not force plastic tabs.
Can I drive without the cabin air filter installed?
Do not use the air conditioning system without the cabin air filter installed. Toyota warns that running the system without a filter may damage the system and can allow debris into the HVAC housing.
Is the cabin air filter the same as the engine air filter?
No. The cabin air filter cleans air entering the passenger cabin through the HVAC system. The engine air filter cleans air going into the engine. They are different parts and are installed in different locations.
Conclusion
Replacing the Toyota Tundra cabin air filter is a simple glove-box job when you use the right filter and follow the markings carefully. Empty the glove box, remove the access panel and filter cover, pull out the old filter or case, clean the housing, install the new filter in the correct direction, and make sure the cover latches flush. If airflow still feels weak, recheck the filter orientation and look for debris in the housing.
Sources
- Toyota 2025 Tundra Owner’s Manual — Air conditioning filter — official filter removal, “UP” mark, and caution guidance.
- Toyota 2024 Tundra Warranty & Maintenance Guide — inspection and replacement intervals plus dusty-condition notes.
- Toyota Owners Manuals and Warranties — model-year-specific manual lookup.
- High-efficiency cabin air filter research — background on cabin filtration and roadway particle exposure reduction.