What’s in This Article
- Diagnose the Clunk: When It Happens & How to Replicate It
- Quick Fix: Grease the Slip Yoke First
- Inspect Driveshaft, Slip Joint, and U-Joints for Binding
- How to Test Transmission & Transfer Case
- Clean or Replace Slip Joint
- Fit a Breather & Grease Best Practices
- Parts, Cost, Time, and When to Call a Pro
- Frequently Asked Questions
A hard clunk when your 4Runner shifts into Drive can feel like something just slammed under the floor. Start by repeating the exact moment it happens: shift Park to Drive or Reverse, hold the brake, release it, and listen for a tap at low speed. Most checks begin with the driveshaft, slip yoke, universal joints, mounts, and transfer case fluid, because small play or binding can create a loud driveline knock.
Quick Answer
A 4Runner usually clunks into Drive because the driveline has binding, slack, or worn support parts. Grease the slip yoke lightly first, then inspect the universal joints, driveshaft splines, mounts, and transfer case fluid. If the noise stays after basic service, get the driveline checked before worn parts cause more damage.
Key Takeaways
- Repeat the shift from Park to Drive and Reverse so you can confirm when the clunk happens.
- Grease the slip yoke with a light, even coat instead of packing the joint full of grease.
- Inspect universal joints, splines, mounts, and fluid leaks before replacing major parts.
- Mark the driveshaft position before removal so it goes back in the same orientation.
- Call a qualified technician if the clunk stays, shifting feels harsh, or driveline play looks severe.
Diagnose the Clunk: When It Happens & How to Replicate It

When you’re trying to find a 4Runner clunk, repeat the same conditions every time. Shift from Park into Reverse or Drive, keep your foot on the brake, then release the brake and listen behind you. The noise often shows up right when the transmission loads the driveline.
Repeat the test at idle and during a light throttle input under 1500 RPM. Note the gear, engine speed, brake position, and vehicle temperature. A clunk that gets worse when warm can point to grease movement, loose parts, or expanding metal clearances.
Focus on the driveshaft, slip yoke, universal joints, and rear mounts first. These parts can bind, rotate with slack, or shift under load. Write down what you hear so you don’t replace parts by guesswork.
Quick Fix: Grease the Slip Yoke First (How to Test Immediately)
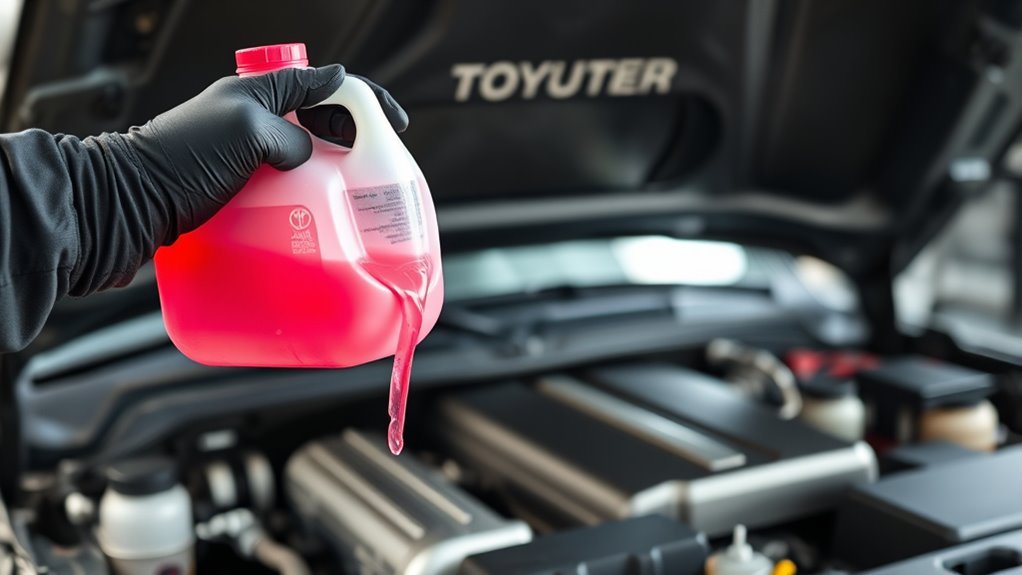
Start with the simplest test: grease the slip yoke with a modest amount of high-quality grease. Old or dry grease can make the slip joint stick, then release with a hard knock when you shift into Drive. Clean old buildup before you add fresh grease.
Use enough grease to coat the sliding surfaces, but don’t pack the joint full. Too much grease can restrict movement and make the clunk worse. After you service the joint, test the 4Runner right away under the same conditions.
- Park on level ground and secure the vehicle before you work under it.
- Remove excess grease from the slip joint and wipe away dirt or debris.
- Apply a light, even coat through the zerk fitting or by hand during disassembly.
- Reassemble parts and tighten fasteners to the correct service-manual torque.
- Start the engine, shift into Drive, and listen for the same clunk.
This quick step can reduce driveline stress and help you decide whether deeper service makes sense.
Warning: Never work under a 4Runner supported only by a jack, because a jack can slip or fail.
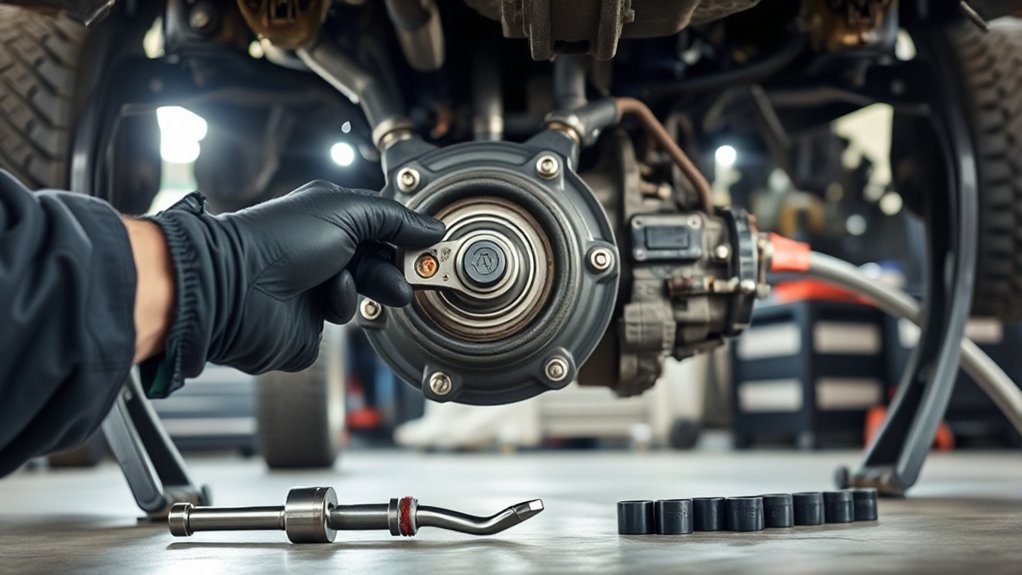
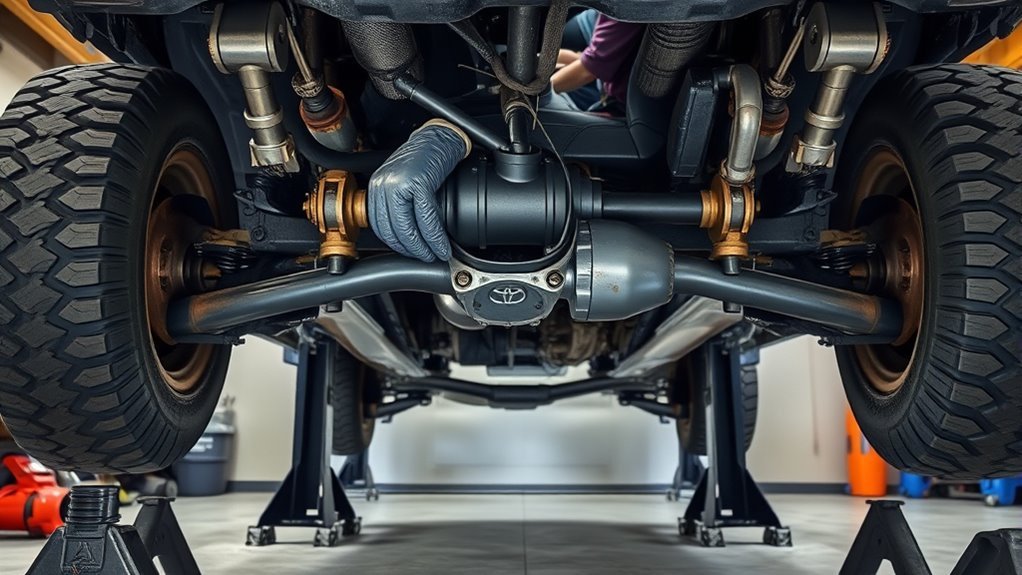
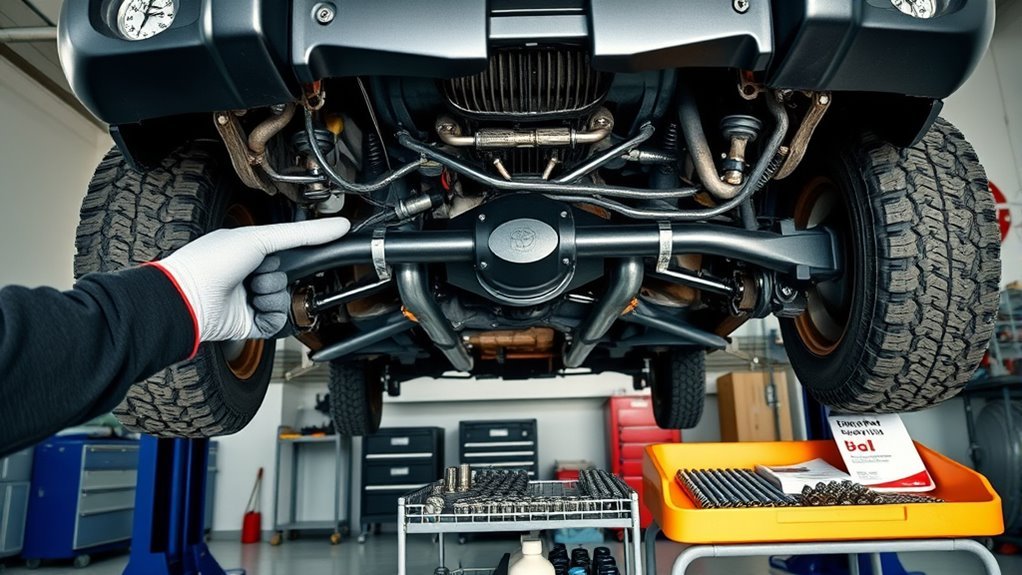
Inspect Driveshaft, Slip Joint, and U-Joints for Binding
After greasing the slip yoke, inspect the driveshaft, slip joint, and universal joints before you reassemble everything. Check for over-greasing at the zerk fitting, binding in the slip joint, and looseness in the universal joints. A small amount of play can feel much larger when the driveline takes load.
Disassemble the slip joint if needed, clean the splines, and apply a controlled coat of Teflon-based grease if it suits your parts. Check rear-end mounts for cracks, torn rubber, or movement under load. Good driveshaft service keeps a small clunk from turning into a larger repair.
| Item inspected | Symptom to watch for | Action |
|---|---|---|
| Slip joint zerk | Excess grease or binding | Clean and regrease lightly |
| U-joints | Play or rough rotation | Replace or relube as needed |
| Splines | Corrosion, sticking, or dry movement | Clean and apply suitable grease |
| Rear mounts | Cracks, separation, or movement | Replace worn mounts |
Rotate the driveshaft by hand and feel for rough spots. Push and pull near the joints to check for movement. If binding remains after cleaning and light greasing, you have narrowed the likely parts.
How to Test Transmission & Transfer Case (Drive and Stationary)
Before you take the 4Runner on the road, run a controlled stationary test. Set the parking brake, hold the service brake, shift into Drive, and listen for clunking or unusual noise from below. Repeat the same test in Reverse.
Use that sound as your baseline before road testing. On a short drive, accelerate gently, decelerate, and note any bang when the driveline loads or unloads. Check for fluid leaks around the transfer case and verify the fluid level with the correct service procedure.
During a short drive, note jerks or bangs when shifting, check for leaks and transfer case fluid, and inspect mounts and u-joints.
- Stationary test: Set the brake, shift gears, and listen for internal lash.
- Road test: Accelerate and decelerate gently to reproduce the clunk under load.
- Visual check: Look for transfer case leaks and low fluid signs.
- Mechanical check: Probe rear mounts and universal joints for play.
If the clunk stays after these checks, get a professional diagnosis. Transmission, transfer case, and driveshaft problems can sound similar from the cabin.
Clean or Replace Slip Joint (Disassembly & Teflon Grease Guide)
Next, expose the driveshaft slip joint so you can check for binding, wear, and old grease. Remove the driveshaft only after you mark its position. Clean the splines and housing, inspect nearby parts, then reassemble with a measured coat of suitable grease.
Too much grease can bind the joint, while too little may not stop the noise. Road-test the 4Runner after reassembly and compare the result with your first test.
Driveshaft Slip Joint Basics
The slip joint lets the transmission and rear axle move without forcing the driveshaft to bind. When splines dry out, corrode, or seize, the joint can stick and release with a clunk. Loose splines can also knock when the driveline takes load.
Disassembly and cleaning often work better than adding more grease through a fitting. Use a light coat of grease on the splines and avoid overfilling the cavity. If the clunk returns after proper service, the driveshaft may have worn beyond a simple grease fix.
- Inspect the splines for corrosion, dry movement, and visible wear.
- Clean dirt and old grease before adding fresh lubricant.
- Apply a modest coat of suitable grease to the splines.
- Replace the driveshaft if wear or looseness remains severe.
Disassembly Step-By-Step
You’ve checked the slip joint for corrosion, dry splines, and play. Now remove and service it so you can address the clunk at its source. Lift the 4Runner safely, support it on jack stands, and mark the driveshaft orientation before removal.
- Secure the vehicle on level ground with the wheels blocked.
- Mark the driveshaft and flange positions for correct reassembly.
- Unbolt the rear driveshaft from the differential and transfer case.
- Separate the slip joint and remove old grease and debris.
- Inspect the splines, seals, and housing for wear or damage.
- Reassemble the joint and confirm smooth sliding movement.
- Tighten fasteners to the factory service-manual torque.
Do not guess torque values or flange orientation. Wrong assembly can add vibration or make the clunk harder to diagnose.
Teflon Grease Application
When the slip joint sits apart and clean, apply a moderate, even coat of Teflon grease to the splines and mating surfaces. The goal is smooth movement without excess buildup. Rotate the joint by hand so the grease spreads across contact points.
Confirm that the grease suits the seal material and driveline parts before use. Replace damaged seals or worn parts before reassembly. Recheck the joint later if the clunk slowly returns.
- Lightly coat the splines after wiping away old grease.
- Rotate the joint and confirm smooth engagement.
- Check seal compatibility before reassembly.
- Inspect the joint again during routine service.
Pro tip: Take photos before disassembly so you can match the original driveshaft position during reassembly.
Fit a Breather & Grease Best Practices (Parts, Tools, and Steps)
Start by selecting the correct breather fitting and grease for your 4Runner’s driveline. Gather a grease gun, socket set, rags, wheel chocks, and basic safety gear. An improper breather or wrong grease can create more binding instead of solving the clunk.
Remove the old zerk only if that change suits your setup and service plan. Clean the joint before you add grease, then install the breather so pressure can vent during movement. Use steady strokes with the grease gun and stop before the joint feels packed.
Wipe excess grease from the outside of the joint. Reassemble all parts with proper torque, then test the same Park-to-Drive shift again. Regular cleaning before re-greasing helps keep the slip joint moving freely.
Parts, Cost, Time, and When to Call a Pro
You may only need basic grease, a fitting, and an hour of careful work. A worn universal joint, bad mount, or damaged driveshaft costs more and takes longer. Prices vary by shop, location, drivetrain layout, and part quality.
Plan a couple of hours for inspection and greasing. Set aside more time if you remove the driveshaft, clean splines, or replace joints. Call a pro if you find major play, harsh shifting, leaks, or a clunk that stays after basic service.
Parts Needed & Prices
Start with the least costly parts before you price a full driveshaft. Grease and small fittings cost less than major driveline parts, and they help confirm whether the slip yoke caused the noise. Universal joints and mounts cost more because they often need pressing, alignment, or careful installation.
- Breather fitting: Usually a low-cost part, often replaced in under an hour.
- Slip yoke grease: Usually a simple DIY service item when access is clear.
- Universal joints: Moderate part cost, with more labor if joints sit tight or rusty.
- Driveshaft assembly: Higher cost and often better left to a driveline shop.
Use the exact part for your 4Runner generation, drivetrain, and shaft type. A wrong fitting or joint can create vibration, leaks, or more noise.
Estimated Labor Time
A basic clunk check can take less than an hour if access is easy. Driveshaft removal, spline cleaning, and joint replacement can take several hours. Rust, seized bolts, and lack of lift access can add time.
Check fluid condition and driveshaft play yourself first if you can do so safely. That simple check can help you explain the symptom clearly to a shop. Better notes can reduce diagnostic time.
When To Call Professional
Call a professional if drivetrain noises stay after you grease the driveshaft and inspect the slip yoke. Persistent clunks, choppy shifts, or obvious driveline slack can point to deeper issues. A qualified technician can check the transmission mount, transfer case, driveshaft balance, and rear driveline parts together.
- You greased the slip yoke, but the clunk did not improve.
- You feel harsh shifting, strong vibration, or major slack at low speed.
- You see leaking fluid, torn mounts, or damaged universal joints.
- You lack the tools to remove, align, or torque driveline parts safely.
Do not keep driving hard if the noise grows louder. A failing universal joint or loose driveline part can create a safety risk.
Common Mistakes That Can Make the Clunk Worse
Over-greasing the slip joint ranks as one of the most common mistakes. Grease can fill the cavity and limit sliding movement, which may make the driveline bind. Clean first, then add only enough grease for smooth movement.
Skipping orientation marks can also cause trouble. The driveshaft should return to the same position unless a service manual or driveline shop tells you otherwise. Random reassembly can add vibration that feels like a new problem.
Ignoring mounts creates another false diagnosis. A worn mount can make a normal amount of driveline movement sound harsh. Inspect mounts before you order major parts.
Frequently Asked Questions
Why does my transmission clunk when I shift into Drive?
Your transmission may clunk when you shift into Drive because the driveline has binding, slack, or worn support parts. Start with the slip yoke, universal joints, mounts, and transfer case fluid before assuming the transmission itself has failed.
Do Toyota 4Runners have transmission problems?
Some 4Runners can develop transmission or driveline complaints as they age, but a shift clunk often comes from parts outside the transmission. Check the driveshaft, slip yoke, universal joints, mounts, and fluids before you pay for major transmission work.
What can cause a driveline clunk?
A driveline clunk can come from slip yoke binding, worn universal joints, loose mounts, damaged splines, or driveshaft misalignment. Low or leaking transfer case fluid can also make engagement feel harsher.
Is it safe to drive a 4Runner with a clunk?
A light clunk may only need service, but a loud or worsening clunk needs prompt inspection. Stop driving and get help if you feel vibration, see leaks, or hear metal knocking under load.
How much grease should I use on the slip yoke?
Use a light, even amount that coats the splines and sliding surfaces. Do not pack the joint, because excess grease can restrict movement and create more binding.
Conclusion
A 4Runner that clunks into Drive usually needs a careful driveline check, not instant transmission work. Start with the easiest service: repeat the symptom, grease the slip yoke lightly, and inspect the universal joints, mounts, splines, and transfer case fluid. If the clunk stays or the driveline has obvious play, book a professional diagnosis before the damage spreads. A clean, smooth driveline gives you quieter shifts and more confidence every time you pull away.