You’ll find the 5th‑gen 4Runner’s cabin air filter behind the glovebox; empty it, push the sides in to lower the box, remove the organizer and housing cover, then pull the filter straight out for inspection. If it’s gray, dusty, or restricting airflow, replace it with the arrow pointing down and reseal the cover. Use Toyota 87139‑50100 for dusty/off‑road use or a budget aftermarket for city driving. Keep going to get step‑by‑step removal, installation, and troubleshooting tips.
Quick Answer: Where the 4Runner Cabin Air Filter Is and How to Check It
One quick check: the 5th‑gen 4Runner’s cabin air filter sits behind the glovebox—you’ll release the glovebox stops by pushing in the sides, drop the box, remove the organizer, then take off the filter housing cover to inspect the cartridge for dirt and debris. You’ll want to examine pleats for clogs, dust, and trapped debris; a clogged filter reduces airflow and drags down air quality, so don’t ignore it. For liberation from stale, dusty cabin air, schedule filter maintenance every 15,000 miles, sooner if you drive off‑road or through heavy dust. When you replace the element, orient it with the airflow arrows pointing down and consider the Toyota charcoal part 87139‑50100 for improved odor and particle control. Regular checks and timely swaps restore fresh ventilation, improve HVAC performance, and free you from compromised air inside the vehicle. Keep records of checks so you’re not guessing when the next service is due.
Step‑by‑Step: Remove the Glovebox and Pull Out the Old Filter
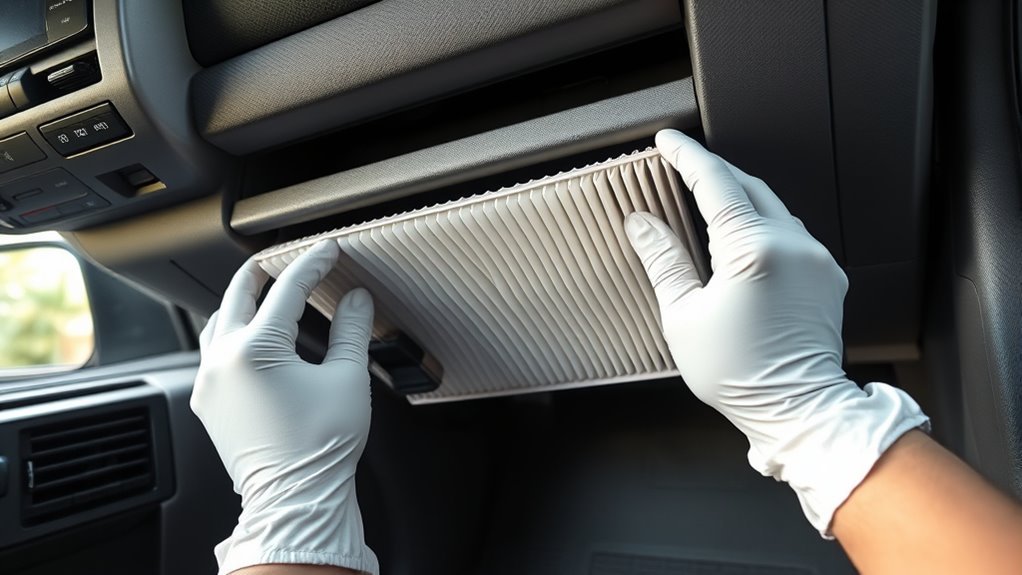
Now that you know where the cabin filter sits, start by emptying the glovebox so nothing falls out when you lower it. You’ll perform Glovebox removal by pushing the sides inward to release the stops, then let the box drop fully. That gives clear access to the cabin filter housing cover behind it.
Remove the housing cover carefully, watching clips and seals. Pull out the old filter straight toward you, inspect for debris or damage, and discard it—this is basic Filter maintenance. Don’t disturb ductwork or claim extra parts; be decisive and free.
| Step | Action |
|---|---|
| 1 | Empty glovebox |
| 2 | Push sides, drop glovebox |
| 3 | Locate housing cover |
| 4 | Remove cover carefully |
| 5 | Pull out and inspect old filter |
You’ve liberated the space and completed the removal stage. Next, you’ll prepare the replacement without reversing these steps prematurely.
Install the New Cabin Air Filter: Correct Orientation and Reassembly Tips
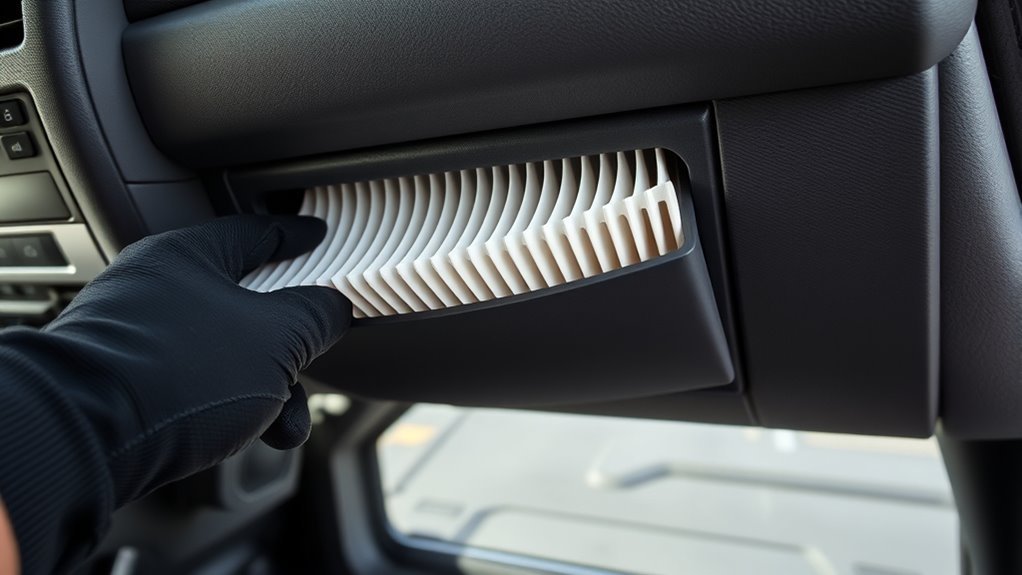
Start by seating the new filter so its AIR FLOW arrows point down, then slide it straight into the housing until it sits flush and you feel no gaps. Inspect the housing for debris before insertion — a clean cavity is essential for effective filter maintenance and true cabin liberation from dust and odors. Verify the airflow direction printed on the cartridge matches orientation inside the housing; wrong direction reduces efficiency.
Once seated, reattach the housing cover and fasten it securely to prevent air leaks that bypass the filter. Push the sides of the glovebox in gently to re‑engage the stops, then close and open it to confirm smooth operation. Do a final visual and tactile check: no gaps, cover aligned, and the filter stable.
You’ve finished a precise, low‑friction swap that restores breathing freedom in your 4Runner. Keep records of date and mileage for ongoing filter maintenance.
Which Cabin Filter to Buy: OEM Vs Aftermarket (Toyota 87139‑50100)
With the new filter installed, you’ll want to decide whether to stick with Toyota’s OEM part 87139‑50100 or save money with an aftermarket option. The OEM advantages are clear: the 87139‑50100 is reliable, engineered for the 5th Gen 4Runner, and often better at handling dusty or off‑road conditions. You’ll breathe easier knowing it meets Toyota’s specs.
Stick with Toyota’s 87139‑50100 for proven, off‑road durability — choose aftermarket only for budgeted, low‑dust driving.
- Cost vs. performance: aftermarket filters can cost as little as $8, but you’ll weigh immediate savings against longevity and filtration efficiency.
- User experience: some aftermarket brands (e.g., K&N) get mixed reviews — varying effectiveness and occasional odor issues highlight Aftermarket risks you should consider.
- Usage-driven choice: pick OEM if you run dusty trails frequently or want fewer variables; choose a trusted aftermarket option if budget and routine city driving dominate.
Decide based on how you drive and what freedom from maintenance hassle means to you.
When to Replace and Troubleshoot: Signs It’s Clogged (Dusty/Off‑Road)
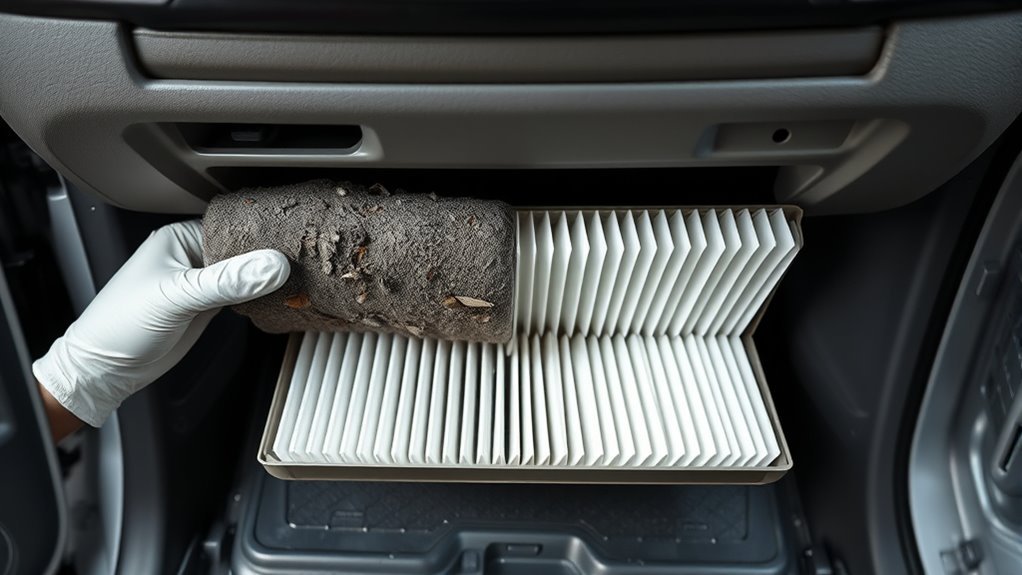
If you drive in dusty or off‑road conditions, check your cabin air filter every 15,000 miles or sooner, because those environments clog filters much faster and cut airflow, introduce odors, and leave dust inside the cabin. Watch for clear signs: reduced vent airflow, persistent musty or burning smells, and visible gray, debris‑laden filter media. You’ll also notice more dust settling on the dash and vents. These are not annoyances — they’re signals to act.
When you spot clogged filters or airflow issues, remove and inspect the element. If it’s gray, packed with leaves, sand, or grit, replace it. Replacing the filter restores ventilation, reduces odors, and improves in‑cabin air quality, especially after off‑road trips. Make inspection routine after heavy use, and swap the filter immediately when symptoms persist. That small maintenance step frees you from stale air and keeps your 4Runner performing cleanly.
Frequently Asked Questions
How Often Should I Change the Cabin Air Filter on My 4runner?
Change it about every 15,000 miles, or biannually if you drive dusty/off-road; monitor cabin filter lifespan and signs replacement needed like reduced airflow, odors, or visible dirt, and replace sooner to keep air clean and free.
Do I Actually Need to Replace My Cabin Air Filter?
Yes — your cabin air filter actually matters; like a breathable shield, it frees you from stale air. You’ll gain filter benefits: improved airflow, fewer allergens, and fresher cabin air, so replace it regularly.
Conclusion
You’ve done the sensible thing: found the filter, pulled the glovebox, and swapped in a fresh screen so your 4Runner breathes cleaner air. Think of the new filter as a polite doorman—keeping dust, pollen and trail grit on the outside where it belongs. Keep the part number (Toyota 87139‑50100) handy, check it after dusty trips, and replace when airflow or odor sag. A timely swap keeps your cabin calm and the HVAC happy.