Correct Supra wheel torque is not a “tight enough” job. The right value depends on the generation, hardware style, wheel type, and whether the threads are clean and dry. Use the specs below as a practical reference, then confirm the exact value for your model year in the Toyota owner’s manual or the wheel manufacturer’s instructions before final tightening.
Quick Answer
Most Toyota Supra wheel torque specs are generation-specific: MK3 is commonly listed at 76 ft-lb, MK4 at 101 ft-lb, and MK5/A90-A91 at 140 Nm, which is about 103 ft-lb. Use clean, dry threads, tighten in a star pattern, and recheck after the first short drive.
Key Takeaways
- MK3 Supra: use 76 ft-lb as the common stock-wheel reference.
- MK4 Supra: use 101 ft-lb as the common stock-wheel reference.
- MK5/A90-A91 GR Supra: Toyota’s manual lists 140 Nm for the wheel lock bolt; that converts to about 103 ft-lb.
- Install wheel hardware clean and dry unless Toyota or the wheel maker specifically says otherwise.
- Always hand-start the nuts or bolts, tighten in stages with a calibrated torque wrench, and recheck after about 30–60 miles or 50–100 km.
At a Glance
| Time Required | 10–15 minutes per wheel set |
| Difficulty | Beginner, if the car is safely supported and the threads are undamaged |
| Tools Needed | Torque wrench, correct socket, breaker bar or lug wrench, wheel lock adapter if equipped |
| Cost | Usually $0 if you already own the tools; a quality torque wrench is the main purchase |
Quick Reference: Supra Lug Nut and Wheel Bolt Torque by Generation
Use this table as a fast reference for stock-style wheel hardware. The owner’s manual and wheel maker’s instructions still come first, especially if your Supra has aftermarket wheels, spacers, extended studs, titanium hardware, different lug seats, or non-OEM wheel bolts.
| Generation | Common model years | Hardware style | Torque reference | Important note |
|---|---|---|---|---|
| MK3 / A70 | 1986–1992 in many markets | Studs and lug nuts | 76 ft-lb / 103 Nm | Confirm by exact year and wheel type. |
| MK4 / A80 | 1993–1998 in the U.S. | Studs and lug nuts | 101 ft-lb / about 137 Nm | Do not assume MK3 torque applies to MK4 wheels. |
| MK5 / A90-A91 GR Supra | 2020–2026 U.S. model years | Wheel bolts | 140 Nm / about 103 ft-lb | Toyota’s GR Supra manual uses wheel bolts, not traditional lug nuts. |
Note: Some Toyota GR Supra manual text shows 140 Nm with a nearby pound-foot value that may vary by printed market or conversion. If your wrench is in Nm, use the manual’s Nm value. If your wrench is in ft-lb, 140 Nm converts to about 103 ft-lb.
Exact Torque for MK3, MK4, and MK5 Supras
For a stock setup, the MK3 Supra commonly uses 76 ft-lb, the MK4 Supra commonly uses 101 ft-lb, and the MK5/A90-A91 GR Supra uses 140 Nm, which is about 103 ft-lb. These values assume the correct OEM-style hardware, clean and dry threads, and wheels that use the proper seat profile.
MK3 Torque Value
The MK3 Supra torque reference is 76 ft-lb. This applies to the typical A70 wheel-stud-and-lug-nut setup. Use a calibrated torque wrench, tighten in a star pattern, and do not use an impact gun for final torque. If the car has old studs, aftermarket wheels, or lightweight lug nuts, inspect the hardware first and verify the wheel maker’s torque guidance.
MK4 and MK5 Torque
The MK4 Supra torque reference is 101 ft-lb for stock-style wheel hardware. The MK5 GR Supra is different because it uses wheel bolts. Toyota’s GR Supra owner’s manual lists the wheel lock bolt tightening torque as 140 Nm, which is about 103 ft-lb. The MK5 also has BMW-derived wheel hardware, so do not treat it like an older Toyota stud-and-nut setup.
Warning: Never use a different car’s torque spec just because the wheels look similar. Bolt diameter, thread pitch, lug-seat shape, wheel material, and hub design all affect the correct clamping load.
Why Correct Lug Torque Prevents Rotor, Stud, and Wheel Damage
Wheel torque controls clamping force. Too little torque can let the wheel move against the hub, which can damage studs, bolts, bearings, and the wheel mounting face. Too much torque can stretch studs, damage threads, distort soft wheel seats, make the wheel difficult to remove, and contribute to brake vibration.
Even tightening matters as much as the final number. If one fastener is much tighter than the others, the wheel and rotor can be pulled unevenly against the hub. That is why every wheel should be tightened in stages and in a crisscross or star pattern, as recommended by wheel-installation guides such as Tire Rack’s lug nut and wheel bolt procedure.
The goal is not maximum tightness. The goal is even, measured clamping force at the manufacturer’s specified torque.
How Wheel Material and Lug Type Change Your Torque Choice
Wheel material and lug-seat type do not give you permission to guess a new torque number. They tell you what to verify before you torque the wheel. Stock wheels usually follow Toyota’s spec. Aftermarket wheels may need different hardware, different seat style, or the wheel manufacturer’s torque recommendation.
Steel vs. Alloy Wheels
Steel and alloy wheels behave differently under clamp load. Alloy wheels are more sensitive to damaged seats, dirt on the mounting face, and over-tightening. Instead of choosing a lower or higher number by material alone, check the wheel maker’s instructions. If no special instruction is supplied and the wheel uses the correct hardware, the vehicle manufacturer’s torque spec is normally the starting point.
Lug Seat Type
Match the fastener seat to the wheel. A conical lug nut does not belong on a wheel designed for a ball seat, and a ball-seat bolt does not belong on a wheel designed for a cone seat. A mismatch can create false torque readings, uneven clamping, wheel damage, or loosening after driving.
Common wheel-seat styles include:
- Conical/acorn seat: a tapered seat, common on many aftermarket wheels.
- Ball/spherical seat: a rounded seat used by some OEM and European-style applications.
- Flat/washer seat: a flat seat that depends on the correct washer and nut design.
Anti-Seize and Threads
For wheel nuts and bolts, install the hardware clean and dry unless Toyota, the wheel maker, or the hardware manufacturer specifically says otherwise. Lubricating the threads or seats changes friction, which changes the clamping force created at the same torque value. Tire Rack specifically warns that torque specifications are for dry threads and that lubricating threads or seats can cause inaccurate torque readings.
Pro Tip: If you are fighting corrosion, clean the hub face and wheel bore instead of coating the lug seats. A very light film of anti-seize on the hub pilot may help prevent wheel-to-hub sticking, but keep it off the threads, lug seats, rotor face, and brake surfaces unless a manufacturer instructs otherwise.
How to Tighten Lug Nuts: Star Pattern, Step-by-Step
Use a star pattern so the wheel seats evenly against the hub. For a five-lug wheel, move across the wheel rather than around it in a circle. Work in two or three passes instead of going straight to full torque on the first fastener.
| Step | Action | Why it matters |
|---|---|---|
| 1 | Clean the hub face, wheel mounting pad, and hardware seats. | Dirt or rust can create false torque and uneven seating. |
| 2 | Hand-start every lug nut or wheel bolt. | This helps prevent cross-threading. |
| 3 | Snug the hardware lightly in a star pattern. | The wheel centers and sits flat before final torque. |
| 4 | First torque pass: use about half the final torque. | Gradual tightening prevents one side from clamping first. |
| 5 | Second torque pass: tighten to the full spec in the same star pattern. | This creates even clamping force across the wheel. |
| 6 | Recheck after about 30–60 miles or 50–100 km. | The wheel can settle after the first drive. |
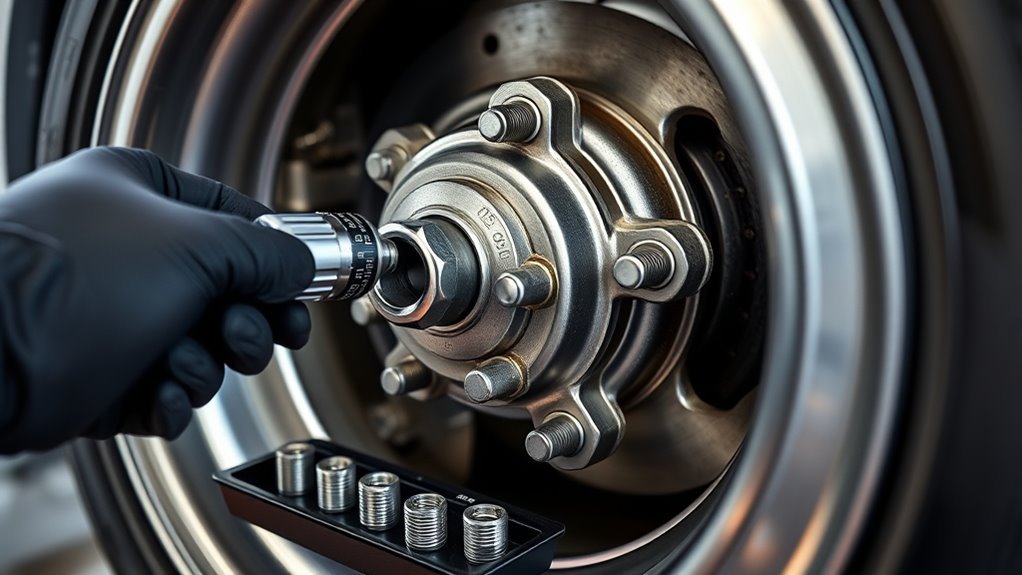
Using a Torque Wrench Correctly for Supra Wheels
A torque wrench is a measuring tool, not a breaker bar. Use it only for final tightening, not for loosening stuck nuts or bolts. Set the wrench to the correct value, apply slow steady pressure at the handle, and stop when it clicks or signals the set torque.
Setting and Calibrating Torque
Choose a torque wrench whose working range comfortably includes your Supra’s spec. A large wrench used near the bottom of its range may be less accurate. If the wrench has been dropped, stored while loaded, or used daily, have it checked or calibrated.
- Set the wrench to the correct unit: ft-lb or Nm.
- Use the correct socket and wheel lock adapter if equipped.
- Do not add long adapters unless you know how they affect torque.
- For click-type wrenches, stop at the first click.
- After use, return adjustable click-type wrenches to their lowest marked setting, not below the scale.
Proper Tightening Sequence
With the wheel mounted and the fasteners hand-started, snug the hardware in a star pattern. Lower the vehicle enough that the tire contacts the ground and the wheel cannot spin, but avoid putting the full vehicle weight on a loose wheel. Then complete the half-torque pass and final-torque pass.
Warning: Do not use an impact wrench for final torque. Toyota’s GR Supra manual warns that using an impact wrench on the wheel lock bolt can damage it. Use the proper hand tool and torque wrench for the final setting.
When to Retorque Supra Lug Nuts: Driving and Maintenance Intervals
Recheck wheel torque after the first short drive following wheel installation, tire rotation, brake service, suspension work, or any time the wheel has been removed. Continental recommends retorquing after about 50 km after a tire change; many U.S. shops use a 50–100 mile reminder. A practical Supra check window is about 30–60 miles or 50–100 km unless your tire shop or wheel maker gives a different instruction.
- After new wheels or tires: recheck after the first short drive.
- After tire rotation: recheck after the wheels have settled.
- After brake or suspension work: recheck because the wheels were removed.
- After vibration, clicking, or steering shake: stop driving when safe and inspect immediately.
- Before track use: check torque cold, then follow your track-day inspection routine.
Common Mistakes and How to Avoid Lug-Related Damage
Most wheel-torque problems come from shortcuts. Avoid these common mistakes:
- Over-tightening “for safety”: more torque is not safer. It can stretch studs, damage wheel bolts, and distort wheel seats.
- Using an impact gun for final torque: impact torque varies too much for final tightening.
- Skipping the star pattern: circular tightening can clamp one side before the wheel is fully seated.
- Lubricating threads without guidance: oil, grease, or anti-seize changes the torque-to-clamp relationship.
- Mixing seat types: the wrong nut or bolt seat can loosen or damage the wheel.
- Ignoring old hardware: rusty, stretched, or cross-threaded hardware should be replaced before torquing.
Aftermarket Wheels: Torque Best Practices for Supra, Velgen, Forged, and Alloy Setups
Aftermarket wheels need more care because the wheel design may not match the factory lug seat, bolt length, or hub-centric fit. Wheel brands such as Velgen Wheels publish Supra torque references, but the final answer for your car should come from the wheel maker, the hardware maker, and your Toyota manual.
For aftermarket Supra wheels, the correct torque is only safe when the wheel, fastener seat, thread engagement, hub fit, and torque value all match.
- Check seat type: conical, ball, and flat seats are not interchangeable.
- Check thread engagement: bolts or lug nuts must engage enough thread without bottoming out.
- Check spacers: spacers often require extended studs or longer bolts.
- Check hub fit: hub-centric rings must fit correctly if the wheel bore is larger than the hub.
- Recheck torque: new wheels can settle after the first drive.
Note: Lightweight aluminum, titanium, or colored aftermarket lug nuts may have special limits. If the hardware maker gives a lower torque range than the vehicle spec, do not guess. Contact the manufacturer or use stronger hardware rated for the vehicle’s required clamping load.
Quick Troubleshooting: Loose, Seized, or Damaged Lug Nuts
If a wheel fastener feels wrong, stop and inspect before driving. A loose, seized, stripped, or cross-threaded lug nut or wheel bolt can turn into wheel movement, damaged studs, damaged hubs, or wheel loss.
| Issue | What to do | When to stop |
|---|---|---|
| Loose hardware | Inspect the wheel seat, hub face, and threads; retorque to spec. | Stop driving if the wheel clicks, wobbles, or vibrates. |
| Seized nut or bolt | Use penetrating oil and steady hand pressure with the correct tool. | Stop if the stud twists, the bolt head rounds, or the lock key slips. |
| Cross-threading | Remove carefully and inspect both male and female threads. | Replace damaged studs, bolts, nuts, or hubs before driving. |
| Damaged seat | Inspect the wheel and fastener seat for galling, cracks, or deformation. | Do not torque a wheel with a damaged seating surface. |
Supra Wheel Torque Checklist
Before calling the job done, run through this quick checklist:
- The wheel mounting face is clean and flat.
- The lug nuts or wheel bolts match the wheel seat.
- The hardware is hand-started and turns freely.
- The torque wrench is set to the correct unit and value.
- The wheel was tightened in a star pattern.
- The final torque pass was done with a torque wrench, not an impact gun.
- The wheel lock key is removed and stored in the car.
- A retorque reminder is set for the first short drive.
Frequently Asked Questions
What is the torque on the A90 Supra lug nuts?
The A90/A91 GR Supra uses wheel bolts, not traditional lug nuts. Toyota’s GR Supra manual lists 140 Nm for the wheel lock bolt, which converts to about 103 ft-lb. If your printed manual gives a specific value in your preferred unit, follow that manual.
How many foot-pounds should I torque my Supra wheels?
For stock-style hardware, use 76 ft-lb for many MK3 Supras, 101 ft-lb for many MK4 Supras, and about 103 ft-lb for the MK5/A90-A91 GR Supra when converting from Toyota’s 140 Nm value. Always confirm by model year and wheel setup.
Are Supra lug nuts and wheel bolts the same thing?
No. Older MK3 and MK4 Supras use studs and lug nuts. The MK5 GR Supra uses wheel bolts that thread into the hub. The tightening method is similar, but the hardware, thread engagement checks, and replacement parts are different.
Should I use anti-seize on Supra lug nuts or wheel bolts?
Do not apply anti-seize to the threads or lug seats unless Toyota, the wheel maker, or the hardware maker tells you to. Most wheel torque specs assume clean, dry threads. Lubrication can create more clamping force than intended at the same torque setting.
Do aftermarket Supra wheels use the same torque spec?
Often they do, but not always. The safest answer depends on the wheel maker’s instructions, lug-seat style, bolt or stud length, spacer use, and hardware material. Verify those details before using the factory torque value.
Is the BMW F80 wheel bolt torque spec relevant to a Supra?
No. The BMW F80 is a different chassis, so its wheel-bolt torque should not be used as the default spec for a Toyota Supra. For an A90/A91 GR Supra, use the Toyota GR Supra manual and the wheel manufacturer’s instructions.
Conclusion
Correct Supra lug nut or wheel bolt torque keeps the wheel clamped evenly, protects the studs or bolts, and helps prevent rotor, hub, and wheel damage. Use 76 ft-lb as the MK3 reference, 101 ft-lb as the MK4 reference, and 140 Nm, or about 103 ft-lb, for the MK5/A90-A91 GR Supra. Tighten in a star pattern with clean, dry threads, use a calibrated torque wrench, and recheck after the first short drive.
Sources
- Toyota Owners Manuals and Warranties — official Toyota manual lookup for model-specific owner guidance.
- 2023 Toyota Supra Owner’s Manual — GR Supra wheel lock bolt torque and impact-wrench warning.
- Toyota USA Newsroom: 2026 GR Supra MkV Final Edition — current MK5 model-year context.
- Velgen Wheels Toyota Supra Wheel Torque Specs — aftermarket wheel maker’s Supra torque reference by generation.
- Tire Rack: How to Properly Torque Wheel Lug Nuts or Bolts — dry-thread guidance, torque wrench use, and tightening pattern.
- Continental Tires: Retorquing Wheels — retorque timing and loose-wheel safety context.