If your Tacoma won’t start, first confirm your foot’s on the brake and the smart key is recognized; replace the key battery or hold the fob to the START button if needed. Then check the 12V battery voltage, clean terminals, and test under load. If it still won’t crank, verify starter power and relay function. If it cranks but won’t run, inspect fuel pump, filter, and pressure. Continue for step‑by‑step diagnostics and documentation guidance.
Try These Quick Fixes First (Smart Key, Brake, Basics)

Start by confirming basic user actions and components before moving to complex diagnostics. You’ll first verify Smart Key Issues and Brake Pedal engagement: press the START button only while your foot’s firmly on the brake pedal, because an insufficient press can prevent engine start. If the dash shows “Key Not Detected,” replace or test the Smart Key battery and hold the key close to the START button to aid recognition. Inspect the Smart Key deactivation switch at the bottom of the instrument panel to guarantee it hasn’t been inadvertently pressed; if it’s engaged, the system will refuse to start. Work methodically: perform one action at a time, note results, and don’t mix steps. If the vehicle still won’t start after confirming brake input, key battery condition, proximity, and deactivation switch status, consult the Owner’s Manual for system-specific troubleshooting and next steps. This disciplined approach frees you from guesswork and gets you moving.
[Products Worth Considering]

Ensure accurate engine cooling with Toyota's genuine water temperature sensor, designed for precise coolant monitoring and reliable performance. This OEM part fits seamlessly into your vehicle, offering durability and consistent temperature readings for optimal engine health.

The Pigenius windshield sunshade protects your Tundra's interior from heat and UV damage while keeping the cabin cool. Its accordion design folds easily for storage and quick setup, and the triple‑laminate construction provides durable, reflective protection. Ideal for long trips and daily commutes, it guards dashboards, seats, and steering wheels from sun‑related wear.

Upgrade your vehicle's interior with this universal console cover that combines comfort and organization. The high‑quality microfiber leather resists spills and scratches while the thick memory foam core provides ergonomic support, reducing elbow fatigue on long drives. Dual side pockets keep essentials within reach, and elastic straps with non‑slip dots ensure a secure, tool‑free installation for any sedan.
How to Test the 12‑Volt Battery and Terminals
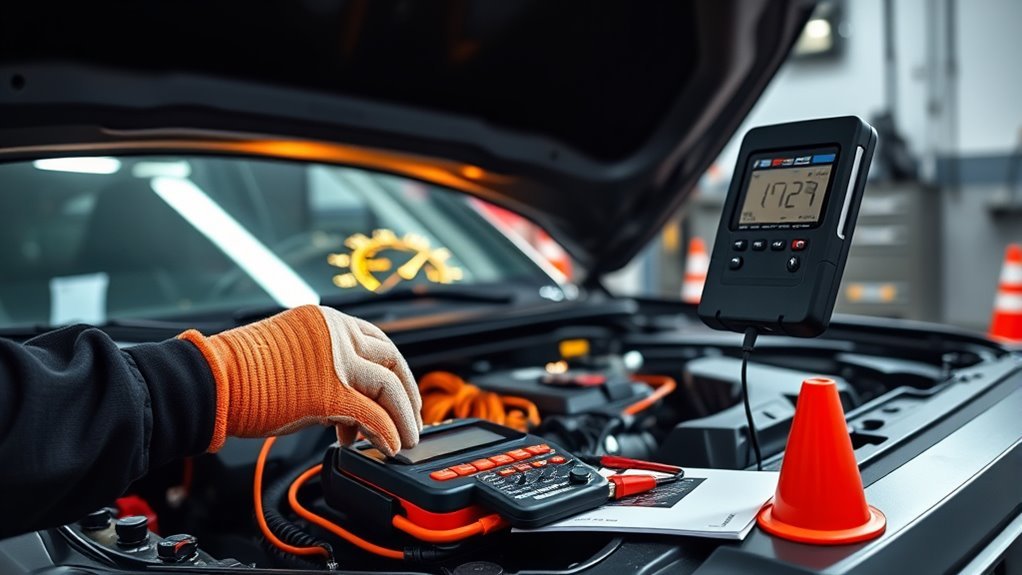
Start by measuring the battery voltage with a multimeter — a fully charged 12‑volt battery should read about 12.6 V. Inspect and clean any corrosion on the terminals (white/blue/green powder) and tighten the clamp nuts to spec to guarantee solid connections. Also confirm the ground cable is secure at the engine block and consider a load test if the battery is over three years old or shows weak voltage.
Battery Voltage Check
A multimeter is the quickest way to verify your Tacoma’s 12‑volt battery health: with the engine off, connect the meter’s red lead to the positive terminal and the black lead to the negative, and you should see about 12.6 volts on a fully charged battery. Use battery maintenance and voltage troubleshooting habits: record resting voltage, then measure with accessories on to detect voltage sag. Visually inspect the case for cracks or leakage; physical damage signals replacement. If resting voltage falls below ~12.2 volts, recharge and retest. Older batteries or units with repeated start issues need a professional load test to confirm capacity under load. These checks free you from guesswork—document readings, act decisively, and replace failing batteries to restore reliable starting.
Terminal Cleaning And Tightening
One quick check you can do yourself is to inspect and test the battery terminals for secure, corrosion-free connections before troubleshooting deeper electrical issues. Use a multimeter: a healthy 12-volt battery reads ~12.6V or higher. Visually inspect for terminal corrosion (white, blue, green powder). If present, mix baking soda and water, apply, and scrub with a wire brush until clean. Remove and clean one terminal at a time, preserving system memory if needed.
Reassemble with deliberate connection tightness: attach positive first, then negative, torque firmly but avoid over-tightening. Re-test voltage and retest starter operation. Properly cleaned, tight terminals free you from needless tow bills and give you control.
| Fear | Freedom |
|---|---|
| Corrosion | Cleaned |
| Loose | Secure |
| Dead | Restored |
| Frustration | Confidence |
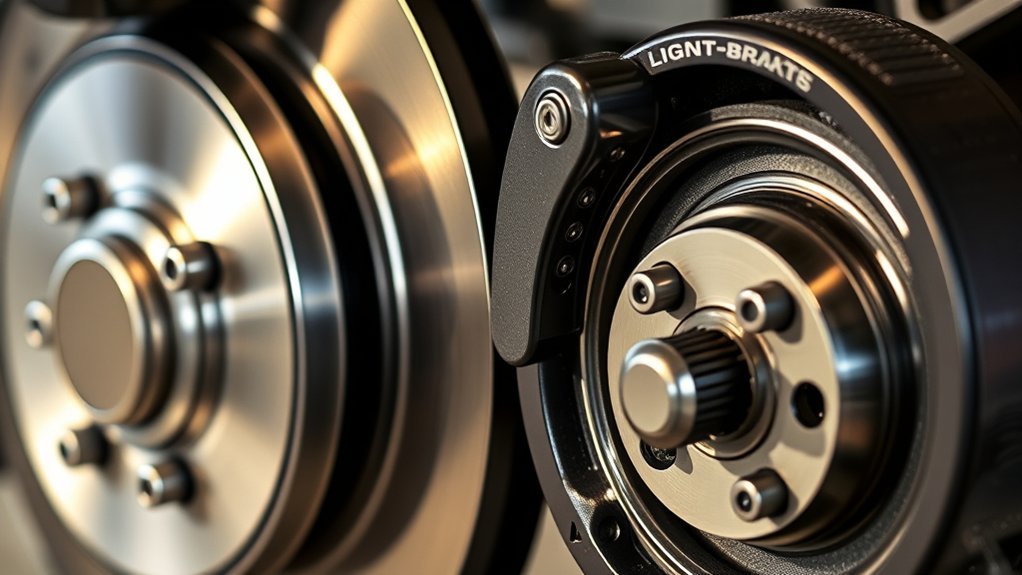
Starter and Starter‑Relay Checks for No‑Crank Problems
Next, you’ll confirm the starter is getting power by using a multimeter on the starter terminals while an assistant turns the key. If there’s no voltage, trace wiring and connectors for corrosion or loose crimps; if voltage is present but the motor doesn’t engage, test the starter relay for continuity and proper switching. A brief tap on the starter can indicate worn brushes or a failing solenoid if it temporarily restores operation.
[Products Worth Considering]

Upgrade your vehicle's interior with a stylish boho‑inspired center console cover that adds comfort and a striking visual appeal. Made from premium polyester fiber,...
Check Starter Power
When the engine won’t crank, start by verifying electrical supply to the starter: confirm the battery is fully charged and terminals are clean and tight, then use a multimeter at the starter to check for about 12 volts with the ignition in the “start” position; if voltage is present but the starter doesn’t engage, suspect a faulty starter motor or solenoid, and if no voltage is present inspect the starter relay (swap it with a similar relay in the fuse box) and all engine ground connections for cleanliness and tightness.
Apply methodical starter diagnostics and power testing: follow these steps to free yourself from guesswork.
- Measure battery voltage and starter input while cranking.
- Verify engine block and chassis grounds are clean and torqued.
- If voltage reaches the starter yet it won’t spin, plan starter/solenoid replacement.
Inspect Starter Relay
Why check the starter relay first? The relay routes battery power to the starter motor; if it fails, the engine won’t crank. You’ll often hear a click when the relay energizes but doesn’t pass current—an immediate sign to inspect it.
Locate the relay per your owner’s manual, then visually check terminals for corrosion and wires for looseness. Use a multimeter to perform continuity testing across the relay’s contact pins; lack of continuity under activation indicates relay failure and necessitates relay replacement. Also verify coil resistance to confirm proper operation. Re-seat or clean corroded connectors, then retest. If problems persist after connector service and testing, replace the relay to restore reliable starter engagement and reclaim control of your vehicle.
Fuel Delivery Tests When the Engine Cranks but Won’t Run
If the engine cranks but won’t run, start by confirming you actually have fuel and then methodically verify the delivery path from tank to rail. Check the fuel gauge to confirm level; don’t assume the sender is accurate, but rule out empty tank first. Visually inspect fuel lines for leaks or kinks that would cut flow. Listen for the fuel pump’s humming when you turn the key to ON—absence suggests pump or relay failure.
- Use a visual and audible check: confirm gauge, inspect lines, listen for pump operation.
- Replace the fuel filter if it’s due or shows restrictions; a clogged filter chokes the system.
- Attach a fuel pressure gauge to the rail and compare readings to spec; low or no pressure isolates pump, filter, or blockage.
Work deliberately, document readings, and free yourself from guesswork—let measured values guide repair or replacement decisions.
Smart Key, Immobilizer, and Key‑Fob Troubleshooting
Having trouble with a non‑starting Tacoma that otherwise cranks? Start Smart Key Troubleshooting by checking the key battery: a weak or dead cell commonly triggers “Key Not Detected.” Hold the Smart Key against the START button while pressing it to boost signal recognition and attempt a start. Inspect the Smart Key deactivation switch at the bottom of the instrument panel—if it’s been pressed, it can disable starting; set it to the enabled position. Replace the battery every 2–3 years as preventive maintenance to avoid unexpected lockouts. If you replace the battery and still face Key Fob Issues, the transponder may have lost sync; the key might need reprogramming. Reprogramming typically requires dealer equipment, so plan a service visit if on‑board remedies fail. Work methodically: check battery, verify switch position, attempt START‑button proximity trick, then escalate to reprogramming. These steps keep you mobile and in control.
Hybrid/EV Readiness: High‑Voltage and “Ready” Mode Checks
Because the high‑voltage battery is the primary power source for the electric drive, you’ll need to confirm its health before troubleshooting a Tacoma that won’t enter “Ready” mode. You’ll check for “Check Hybrid System” warnings, failure to engage “Ready,” and abnormal charge behavior. High voltage diagnostics identify cell imbalance, pack voltage, and internal resistance—tasks often requiring shop‑grade tools.
Confirm high‑voltage battery health first: scan for hybrid faults, inspect connections, and pursue professional pack diagnostics.
- Scan for hybrid fault codes with a scan tool that supports high voltage diagnostics; note persistent codes and freeze frame data.
- Visually inspect accessible components, secure connections, and coolant lines; document corrosion or damage for professional review.
- Schedule professional capacity and insulation tests if codes persist or symptoms continue; failing results typically require pack replacement.
Practice routine battery maintenance and monitoring to reduce sudden failures. You’ve got the right focus: verify symptoms, collect accurate data, then authorize professional testing or replacement to restore freedom of mobility.
2024 Tacoma Notes: Panasonic 12V Reports, TSBs, and Warranty Steps
When you encounter repeated no-starts on a 2024 Tacoma, first treat the Panasonic 12V as a likely culprit and document mileage and symptoms before visiting the dealer; reports show failures often appear between about 3,500–5,000 miles, so note low‑mileage occurrences. You should request a dealer-performed battery load test to verify state of charge, cold cranking capability, and internal resistance. Toyota has issued TSBs such as T-SB-0013-24 covering Smart Key immobilizer resets; reference applicable TSBs when you present symptoms to avoid misdiagnosis. There are no active recalls for starting systems; Toyota manages this defect pattern through warranty-supported battery replacement options rather than recalls. Before any work, confirm warranty coverage details for the 12V battery—basic warranty is 36 months/36,000 miles but coverage for the battery itself may differ. Keep concise records: mileage, timestamps, environmental conditions, and test results. That documentation empowers you to insist on appropriate warranty remedy and swift replacement.
When to Stop DIY: What to Document and Tell the Dealer
If the no-starts persist after basic checks, stop DIY efforts and gather a concise packet of evidence to hand the dealer: document what you saw, when it happened, and what you tried. You want clean symptom documentation and efficient dealer communication to free you from guessing and downtime.
- Record: date/time, ambient conditions, frequency, exact sounds, dashboard warnings, and any error messages (Smart Key/hybrid codes).
- List: battery voltage tests, terminal inspections, jumps, fuse checks, and any repairs or parts swapped; include service records and warranty papers.
- Capture: short video clips of the start attempt, screenshots of messages, and photos of warning lights and battery terminals.
Label everything clearly and keep originals accessible. Present the packet succinctly when you hand the truck over so the dealer can reproduce conditions, avoid redundant work, and act under warranty if applicable. Your organized evidence accelerates diagnosis and restores your autonomy.
Frequently Asked Questions
Why Do I Have Power but My Truck Won’t Start?
You’ve got power but it won’t start because battery issues can limit cranking, ignition problems or a faulty starter relay can block engagement, fuel supply failures stop combustion, or engine sensors prevent proper ECU operation.
How Do You Diagnose a No Start Problem?
You systematically check battery, starter, fuel system and ignition issues: measure voltage, listen for starter click, verify fuel pump and pressure, scan for codes, inspect fuses and relays, and replace faulty components to reclaim control.
Conclusion
You’ve walked through methodical checks—from smart‑key and brake interlocks to 12‑volt health, starter relay, and fuel delivery—so you’re not guessing in the dark. Keep tests repeatable, log voltages, error codes, and symptoms like a technician, and try simple fixes first. If HV systems or immobilizer issues persist, stop and contact the dealer with your documentation. Think of this as a checklist toolkit: systematic steps make diagnostics faster and outcomes clearer.