If your Tundra’s battery keeps dying, start by checking battery SOH/SOC and resting voltage (12.4–12.7V) and run a CCA or load test; if weak, replace. If battery’s fine, inspect the alternator for overvoltage, bad diodes, and unstable charging. Isolate parasitic drains with a multimeter and fuse‑pull method, and unplug aftermarket alarms, dash cams, backup/trailer wiring. Clean and secure grounds. Use a smart charger or disconnect switch short‑term, and continue on to learn step‑by‑step fixes.
Quick Fixes to Stop Your Tundra Battery Dying
If your Tundra’s battery is dying, start by testing its state of health (SOH) and state of charge (SOC) so you know whether you’re fighting a failing cell or just a low charge; a good battery should sit near 100% SOH and between about 45–98% SOC. Next, isolate parasitic draw: let the truck sleep, then measure amp draw — it should fall to about 0.05–0.25 A after wake cycles. Unplug aftermarket accessories (alarms, cameras) to see if they’re the culprit. Clean and tighten ground connections at the battery and chassis; poor grounds mask issues and steal your freedom on the road. Use a smart or trickle charger when you park for long stretches to avoid deep discharge and extend life. These battery maintenance tips and troubleshooting techniques get you back in control fast: test, isolate, secure, and maintain. You’ll stop surprise dead batteries and reclaim your independence without unnecessary parts swapping.
Test Tundra Battery Health and State‑of‑Charge in 5 Minutes
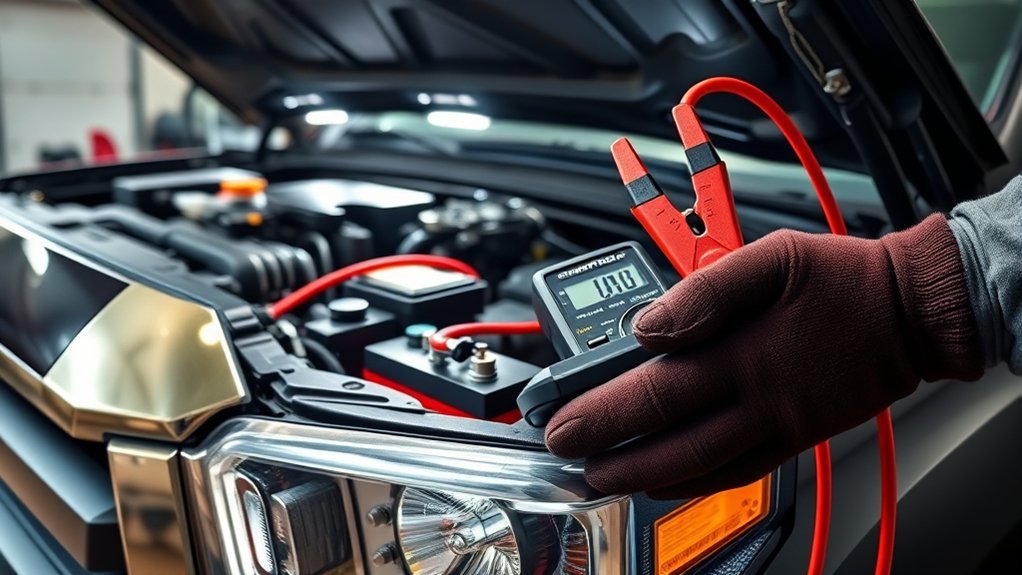
Grab a multimeter and do a quick voltage check—12.4–12.7V at rest means a healthy battery, while 12.2V is only about 50% SOC. If voltage is low or fluctuating, run a CCA or load test to confirm the battery’s ability to deliver current under load. Record the readings so you can spot trends and decide whether recharge, maintenance, or replacement is needed.
Quick Voltage Check
When you need a fast health check, use a multimeter to measure the Tundra’s battery voltage—around 12.6 V means fully charged, 12.4 V or lower signals a partial charge, and anything under 12.0 V suggests a discharged or failing battery. Put the multimeter on DC volts, touch red to positive and black to negative, and read at rest (no accessories). If reading under 12.4 V, charge it and retest; persistent low readings mean replacement. With engine running, expect 13.7–14.7 V—higher or unstable readings point to charging-system faults. Adopt simple battery maintenance tips: check after inactivity, keep terminals clean, and log readings. Use straightforward voltage monitoring techniques to stay free from surprise failures.
CCA And Load Test
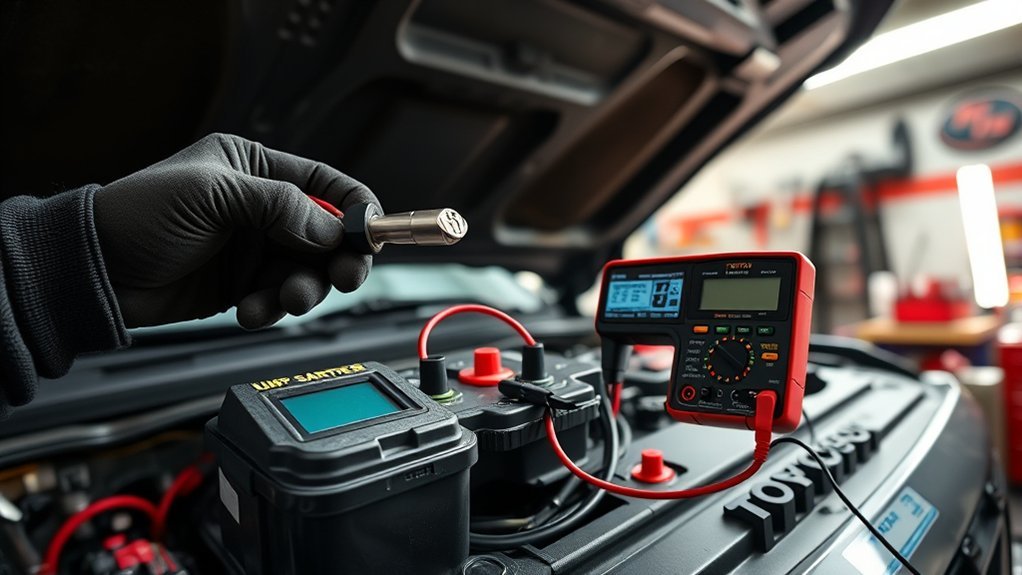
Voltage checks give you a quick snapshot, but CCA and load testing show whether the battery can actually crank your Tundra under stress. You’ll want to perform CCA testing to confirm the battery delivers rated cold cranking amps—critical in cold climates—so you’re not stranded when temperatures drop. Use a quality tester or take it to a shop that reports CCA results.
Next, run a Load analysis: apply a simulated starting load and watch voltage for 15 seconds. A healthy battery stays at or above 9.6 volts; anything lower signals internal weakness or near-failure. Also check State of Charge with a multimeter—12.6V is full, below 12.4V is partial. Test every six months to catch decline early and reclaim control.
Check Alternator: Overvoltage and Intermittent Charging Faults
Check the alternator for voltage spikes first, since readings between 15V and 18V while driving will quickly damage your battery. Test the diode and monitor amp draw — around 0.05A is normal, but higher or erratic values plus SOC swings from ~45% to 98% point to intermittent charging failures. Inspect grounding and wiring to pinpoint the fault and prevent further overvoltage events.
Alternator Voltage Spikes
If your Tundra’s alternator spikes between 15–18V while driving, you’re risking overcharging that can drain and prematurely ruin the battery; test the alternator for intermittent charging faults and diodes that meet specs to avoid inconsistent output. You should monitor alternator performance and voltage regulation with a multimeter and data logger to confirm spikes and steady-state behavior. Check diode integrity—spec’d diodes prevent rectifier leakage that causes erratic charging. Track battery SOC (45%–98%) during road tests; wide swings point to unstable output. Note amp draw patterns: stable 0.05A is normal, but 0.03–0.13A fluctuation implies regulator or rotor problems. Diagnose and replace faulty components promptly so you regain freedom from repeated battery failures.
Intermittent Charging Failures
When your Tundra shows intermittent charging—sporadic spikes up to 15–18V or erratic regulator behavior—you’ll want to isolate the alternator as the likely culprit and act quickly to prevent battery and electronics damage. Track charging patterns with a voltmeter while driving; sustained fluctuations signal faulty voltage regulation or bad diodes. Test alternator diodes and stator output to confirm they’re within spec; replace the unit if readings wander. Check for parasitic draw—anything above a steady 0.05A when off is suspect—and recheck after repairs. Clean and tighten ground and alternator connections to restore reliable current flow. You deserve freedom from unpredictability: fix the alternator or its connections, re-test charging patterns, and reclaim control over your Tundra’s electrical system.
Diagnose Parasitic Drain With Fuse‑Pull Isolation (Step‑by‑Step)
Before you start, make sure all doors are closed and the truck’s fully asleep so your readings aren’t skewed; then hook a multimeter in series to measure current and be ready to pull fuses one at a time while watching the amp draw. You’ll use systematic fuse identification and amp monitoring to free yourself from battery slavery. Pull one fuse, note the amp change, and reinsert if nothing shifts. If no single fuse points to the leak, split the box: remove half, check draw, then halve the suspects until you isolate the circuit.
- Keep a log: fuse ID, amp reading, time, and action — power equals knowledge.
- If a group shows a draw, test individual fuses from that group the next day to avoid false readings from systems waking.
- Once you find the offending circuit, disconnect or troubleshoot its components; you’ve identified the chain, now break it.
Stay methodical, document results, and reclaim control of your Tundra’s power.
Test Aftermarket Items: Alarms, Dash Cams, Backup Cams, Trailer Wiring
Curious whether that aftermarket gear is the leak? Start with alarm troubleshooting: disconnect the alarm module or its fuse overnight and monitor battery voltage. If drain stops, you’ve found a culprit—replace or rewire the unit. Next evaluate dash cam impact by unplugging the camera and any parking‑mode taps; use a multimeter to measure parasitic draw with and without the device. For backup camera inspection, remove its fuse or disconnect cameras tied into the trailer harness and watch for changes in current draw. Finally perform a trailer wiring check: inspect connectors for shorts, corrosion, or incorrect taps, and isolate the trailer harness from the truck to see if the draw disappears. Throughout, log voltage and milliamps so you can pin down excessive consumption. You deserve control over your truck’s power—methodically isolating each aftermarket item frees you from phantom drains and gets your Tundra back to reliable starts.
Inspect Grounds and Hidden Wiring That Cause Phantom Drains
If your Tundra keeps losing charge despite new batteries and tested aftermarket gear, start by checking every ground and hidden splice—loose, corroded, or amateur taps can create intermittent resistance that both masks and worsens parasitic drains. You’ll focus on ground integrity and a systematic wiring inspection: clean battery, firewall, engine block, and cabin grounds (kick panel area), and secure trailer-harness connections. Hunt for hidden mods or sloppy taps that tie into constant circuits.
- Inspect grounds at battery, engine block, and firewall; tighten, clean, and retest.
- Examine kick panel and cabin grounds plus trailer harness for hidden or amateur wiring.
- Log post-cleaning draw to spot patterns and confirm fixes.
Be methodical: isolate accessory circuits if needed, use a multimeter to measure parasitic draw after grounds are restored, and document changes. You’re reclaiming control—restore proper ground integrity, fix questionable splices, and free your Tundra from phantom drains.
Short‑Term Tools: Smart Chargers, Disconnect Switches, Tenders
One practical way to stop repeat dead batteries is to use short-term tools—smart chargers, battery disconnect switches, and trickle tenders—that keep your Tundra charged and isolated when it’s idle. You want control and freedom from surprise failures: smart chargers detect battery health and maintain proper charge, so you get smart charger benefits like automatic float charging and fault detection. Use a trickle tender in cold months or during long storage to supply a low, steady charge that counters self-discharge. For longer layups, install a battery disconnect switch to cut parasitic draw completely and reclaim autonomy over your truck’s power. These are battery maintenance tips you can act on today: connect the charger or tender to keep voltage stable, flip the disconnect to isolate the battery, and monitor charge status periodically. Taken together, these short-term tools reduce replacements, extend life, and let you rely on your Tundra without being tethered to roadside help.
When to Replace the Battery and When to Get Pro Diagnostics
When your Tundra’s battery starts showing age or recurring problems, replace it once it’s over four years old or when state-of-health tests show significant capacity loss—don’t wait for a no-start. You’ll want to track battery lifespan with periodic SOH and SOC tests; that keeps you in control and frees you from roadside dependence. If drains recur despite a fresh battery, get pro diagnostics to find parasitic draws, faulty modules, or alternator voltage spikes (15V–18V).
- If your battery is >4 years or SOH is low, replace it to restore reliable starts.
- If you’ve changed batteries annually or see sudden voltage spikes, have a technician perform electrical maintenance and parasitic-draw testing.
- If a relatively new battery keeps dying, insist on bench testing, charging-system checks, and wiring inspections.
Act early: replacement when warranted and timely professional diagnostics will liberate you from unpredictable failures and costly repeat replacements.
Frequently Asked Questions
Why Does My Toyota Battery Keep Dying?
Your battery’s dying because of common causes like parasitic draw from aftermarket accessories, poor grounds, or weak cells; use battery maintenance tips: test draw, clean connections, remove unused electronics, and replace or upgrade the battery to reclaim freedom.
How to Fix a Battery That Keeps Dying?
Test battery and charging system, follow troubleshooting steps to find parasitic draw, clean/tighten connections, remove aftermarket accessories, use smart charger, and adopt battery maintenance tips so you can reclaim control and stop repeat failures.
Conclusion
You’ve got the tools now: quick fixes, a five‑minute battery check, alternator and parasitic drain diagnostics, and what to test on aftermarket gear. Use smart chargers or disconnects short‑term, clean grounds, and replace the battery if tests fail. If problems persist, get pro diagnostics. Like a key turning a stuck lock, methodical checks will free your Tundra from unexpected deaths — systematic, practical steps get you back on the road fast.


[…] your model, grab the right update, and install it either OTA (2022+) or via USB (2018–2021). Keep battery and Wi‑Fi stable, follow file/format requirements, and let dealer handle critical ECU or firmware […]